AMT 1/48 Stinson Reliant SR9
| KIT #: | 905 |
| PRICE: | $15.00 'used' |
| DECALS: | One Option |
| REVIEWER: | John Summerford |
| NOTES: |
| HISTORY |
Edited from Wikipedia.
The Stinson Reliant is a popular single-engine four- to five-seat high-wing monoplane manufactured by the Stinson Aircraft Division of the Aviation Manufacturing Corporation of Wayne, Michigan.
 The
Reliant is a high-wing, fixed-tailwheel monoplane. 1,327 Reliants of all
types were made from 1933 to 1941, in different models, from SR-1 to SR-10.
The final commercial model, the Stinson Reliant SR-10, was introduced in
1938.
The
Reliant is a high-wing, fixed-tailwheel monoplane. 1,327 Reliants of all
types were made from 1933 to 1941, in different models, from SR-1 to SR-10.
The final commercial model, the Stinson Reliant SR-10, was introduced in
1938.
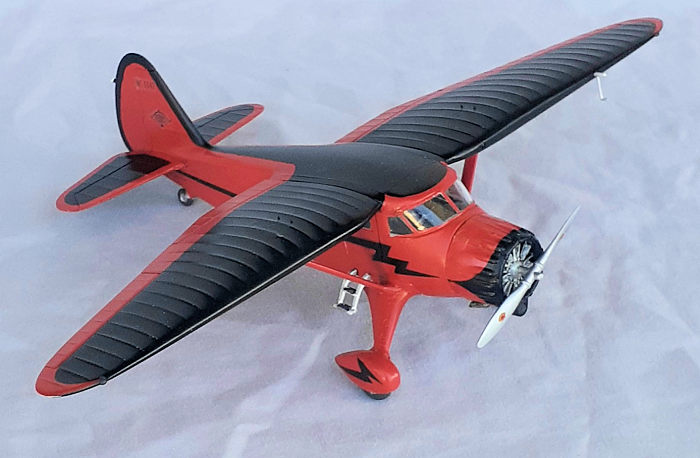
Reliant production can be broken into two distinct types – the straight-wing Reliants (all models up to SR-6) and the gull-wing Reliants (all models from SR-7 and after, including the militarized V-77/AT-19), with there being little in common between the two groups of types. The straight-wing Reliant has a wing of constant chord and thickness which is supported by two struts each side with additional bracing struts. In contrast the taper-wing Reliant has the broadest chord and thickness of the wing at mid-span, with the outer wing trailing edge heavily angled forward and a rounded cutout on the leading-edge root, all supported by a single strut. The taper wing has a significant step up between the fuselage and the wing, and the changes in wing thickness gave it a distinct gull appearance from the front
Engine options for the -9-variant ranged from a 245 horsepower (183 kW) Lycoming R-680-B6 engine to the 450 horsepower (340 kW) Pratt & Whitney Wasp Junior.
| THE KIT |
 Scalemates
suggests that the kit was originally produced sometime in 1970s. This boxing was
Re-issued in 2015 by Round 2 and looks like a kit from that era.
Scalemates
suggests that the kit was originally produced sometime in 1970s. This boxing was
Re-issued in 2015 by Round 2 and looks like a kit from that era.
Four sprues in two bags hold 27 cream color styrene parts and one clear sprue, in a separate bag, has eight for a total of 35 parts. Mold seams and some flash are present. Three of the parts are for a pilot figure. The engine looks like it is supposed to be a Wasp Junior. An after-market engine is a viable option.
Instructions are on a two-side 8-and-half by 11 sheet and include a parts map, four-step assembly sequence and a decal placement guide.
The paint scheme is gold over white with the decals featuring fuselage and wheel spats lightning stripes, but nothing for the cowl, which, given the bumps, would be a mess to try to apply. Painting a factory scheme is not for the faint of heart.
| CONSTRUCTION |
 A coat of
primer was applied to the interior parts. Some detail painting was done before
any parts were glued together; however, the doors were installed before the
painting was completed. After that, the cockpit assembly straight forward,
including scratch-built seat belts and without the pilot figure.
A coat of
primer was applied to the interior parts. Some detail painting was done before
any parts were glued together; however, the doors were installed before the
painting was completed. After that, the cockpit assembly straight forward,
including scratch-built seat belts and without the pilot figure.
Before closing the fuselage, the windows were installed. Once the seam was addressed, the windshield was installed and a touch of dyed filler went into the gaps and sanded. When that looked good, it was masked.
In the assembly diagram, the wings and stabilizers are shown assembled at the same time. In the following step, the wheel and wing struts are added. I prefer to use the wing struts as aids in achieving the correct dihedral (none, in this case) and they are attached to the wheel struts. The wheel struts went on first, then the wings, then the wing struts. The seams of the wings to fuselage were good, but both sets of struts needed several sessions of filing, filling, and sanding to get a good appearance. The tail pieces were not as difficult.
In preparation for painting, the wheels were assembled into the spats and the oil cooler added to the one-piece cowl
| COLORS & MARKINGS |
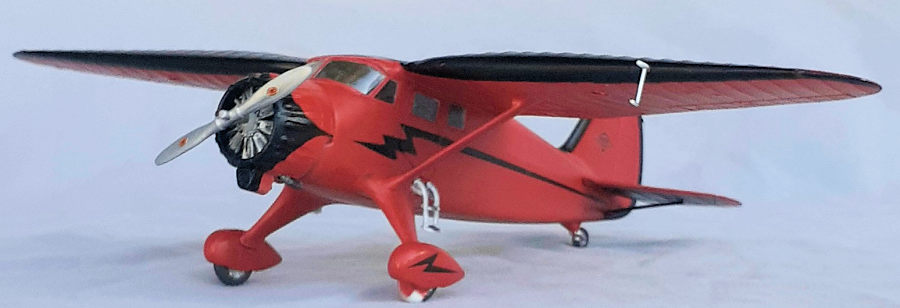
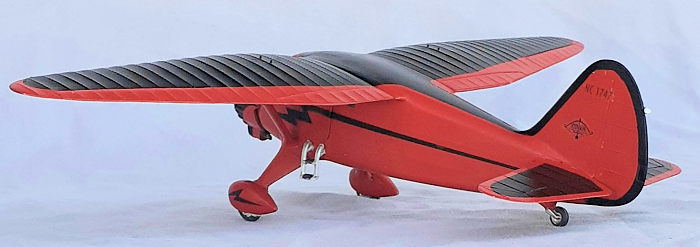
Since the clear parts were already masked, a coat of primer was laid down, followed by Tru-Color’s International Orange. (It looks like a shade of red to me.) Most of the time spent on this project was devoted to cutting curves for masking. The easiest part to mask was the cowl, which used an oval cut into quarter sections and the back of the cowl used as the reference edge to line up the scallop shape. No problem was encountered covering the bumps. The spats were also masked.
The lightning bolts on the fuselage were done with stencils made for a scan of the decals.
 A big
advantage of Tru-Color paints is that they cure quickly and it is nearly
impossible for the paint to bleed. Overspray can be an issue, as was the case
here, mostly with the stencils, and that was addressed by masking the black
paint and airbrushing more of the primary color. After that, a coat of gloss was
sprayed over the model.
A big
advantage of Tru-Color paints is that they cure quickly and it is nearly
impossible for the paint to bleed. Overspray can be an issue, as was the case
here, mostly with the stencils, and that was addressed by masking the black
paint and airbrushing more of the primary color. After that, a coat of gloss was
sprayed over the model.
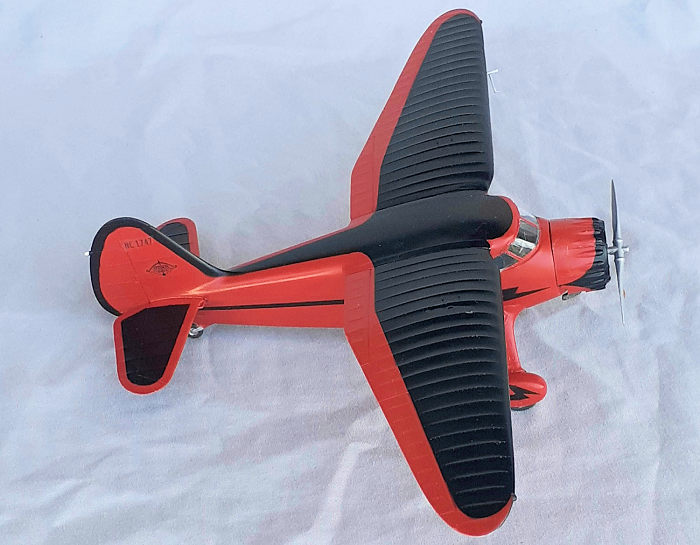
The only decals used are the logos on the fin, plus a set of registration numbers form the decal dudgeon, and a pair of propeller logos. After they dried another gloss coat went down
After unmasking the clear parts, the engine was assembled and glued into the cowl and that, in turn, glued to the fuselage. The overscale ladders came next followed by the wheels. The pitot was inserted into the leading edge of the wing, then, once again, the prop finished the build.
| CONCLUSIONS |
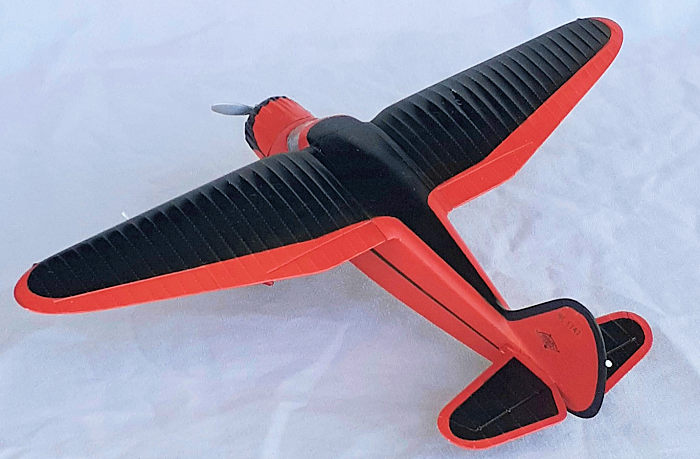
This kit is a product of its time. It will take a LOT effort to make a contest worthy model. However, the thinking behind the engineering was ahead of the technology and the kit has much potential. The fit of the parts is positive, easing assembly. Detail, especially the wing ribs, is overstated. Given today’s state of the art, a current manufacturer could produce a much better kit and include a good set of decals. This is a handsome subject and any modeler can produce a nice model.
2 July 2024 Copyright ModelingMadness.com. All rights reserved. No
reproduction in part or in whole without express permission from the editor.
If you would like your product reviewed fairly and fairly quickly, please
contact the editor or see other details in the
Note to
Contributors.