Minicraft 1/72 Stout Skycar
| KIT #: | BX72040 |
| PRICE: | $ |
| DECALS: | One option |
| REVIEWER: | George Oh |
| NOTES: |

| HISTORY |
 On Mon 13 Jan
25, Scott published John Summerford’s build review of the 72-scale Airfix/MPC
Ford Tri-motor. John revealed how William Stout founded the Stout Metal Airplane
Co in 1922, till he sold it to Henry Ford in 1925. New information is that Stout
was in-charge of the Stout Metal Airplane Division of the Ford Motor Company,
and that the Ford Tri-motor was one of his designs.
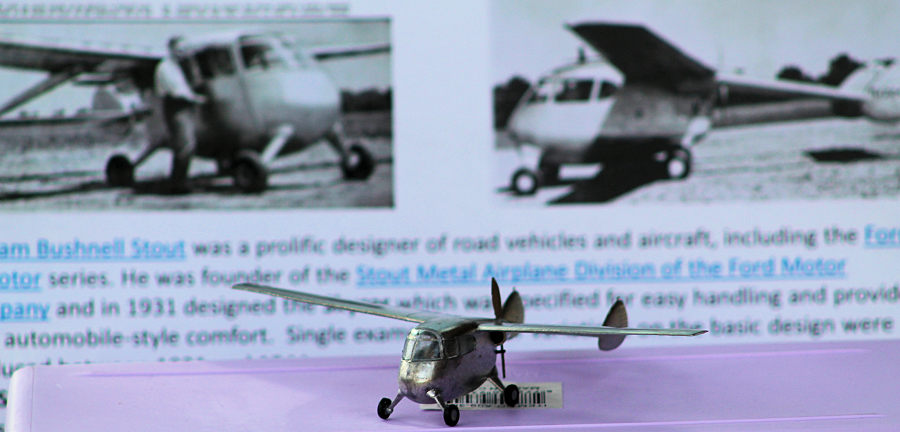
Stout also designed the Stout Skycar, and displayed it at the 1931 Detroit Motor Show. It featured easy handling and automobile-style comfort. His 1943 Skycar III had a rear-mounted higher-powered Lycoming engine and was constructed of stainless steel. The 4-wheel landing gear was intended to facilitate a later rebuild to roadability (which never occurred). But, it was destroyed in a hanger fire.
I bought this kit from a shop that I regularly frequent (on-line) in Ukraine (because they provide a great service, and can use the support). I stared building it because it was a novel quirky little thing.
| THE KIT |
The 34 parts come in two sprues inside a bag that is contained within a typical flimsy Avis end-opening box. Quite a few parts are tiny. An additional bag contains the decals and a clear sprue of 3 parts. Moulding is pretty good with a little bit of mould-slip evident. There are no locating pins, though there are a couple of locating indicators. Cockpit is rudimentary (with two seats and basic steering handles) and will be neigh invisible through the small windows.
| CONSTRUCTION |
 Construction
started when I glued the 2 x pairs of seat supports, and the rear bulkhead, to
the floor, then dry-fitted this subassembly into the fuselage/pod so that they
dried with a proper fit (against the provided ribs). All were painted with the
same light grey. Using the same technique, I painted the flight controls black,
glued them to the floor and again trapped the floor inside the pod. The seats
were detailed with lap-straps, attached on top of their supports, and then the
floor was glued into the right pod half.
The instructions don’t tell you to, but I glued the IP + coaming to the right pod half at the same time. And I shoehorned a couple of small ball bearings under the coaming as well. The rear half of the cabin (= the centre third of the pod) was empty, so I threw-in a couple of scratch-built suitcases and a suit carrier, then closed the pod.
One night, I glued the 3-piece wing tightly together, and next morning, I glued the centre/saddle section in place over the rear third of the pod. All of the seams of the wing/pod joins needed filling.
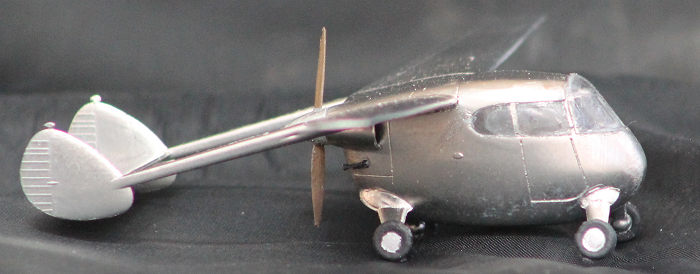 I thinned the
edges of the cheeks/side-ways extensions of the engine, painted the insides
black, then glued then tightly in place (being careful to ensure that the
trailing edged were level with the rear end of the pod). A make-or-break feature
of this sort of aircraft design is the alignment of the twin booms. I get around
this by clamping the horizontal stabiliser between the vertical fins-and-rudders
in the vertical jaws of a miniature sash-clamp, then while the glue is still
wet, aligning the forward ends of the booms. After drying overnight, I glued the
booms tightly in-place under the wings.
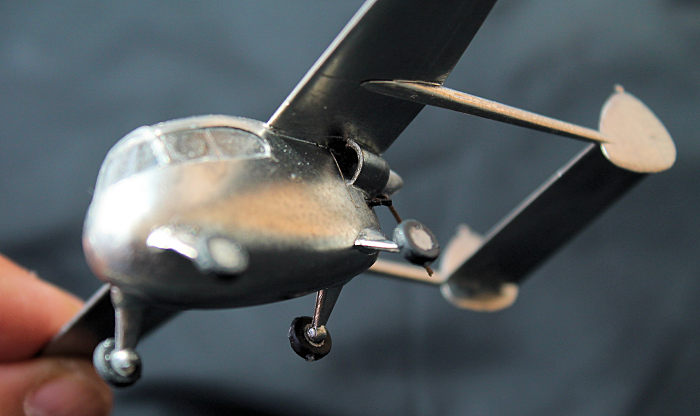
Now came the tricky bit. This little model has four short stubby legs to stand-on, and I really didn’t want one to sit higher (or lower) than the rest. My method was to fashion 2 x right-angles from ice-cream sticks. I glued all four legs in-position, then, while the glue was still wet, used the sticks to position the tips of the legs while the wings were held horizontally. It worked.
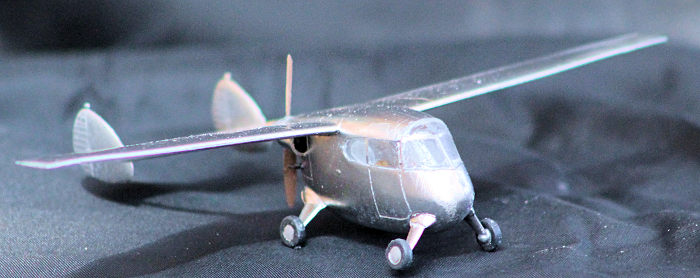
In a brilliant move, I placed masking tape over the unattached clear bits, then trimmed them to shape, before removing and preserving them. Next, I attached the two side bits (and despite my precautions, got a thumb print on one of them) and (after a little sanding) then the front piece. I replaced the masks, and rushed-off to the spray-gun.
| COLORS & MARKINGS |
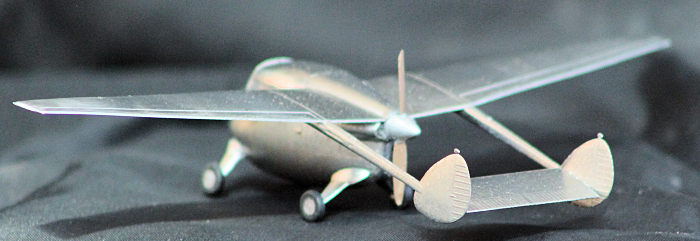 This was
easy. I spiked this wee beastie on a stick/handle shoved into its rear
as-yet-unused propeller attachment orifice, then the whole model got a coat of
SMS stainless steel (because it was made of the stuff). I even remembered to do
the spinner & propeller at the same time (Yay me!!). It dried for several
weekdays (‘cos I gotta work to support a Wife and chronic modelling habit).
When William Stout rolled-out this plane in Detroit, it was as yet, unregistered. By leaving-off the decals, I could replicate it in this form. Besides, I’m a devout coward and I didn’t want to tempt fate.
There were only a few last parts – all tiny. When attaching the wheels, wooden strips were pressed against them to keep them vertical. Attaching the propeller, spinner and their mounting base, and finally two exhaust pipes, completed then model. Internet photos reveal that a few parts are lacking – rudder control horns, a pitot tube, and I’d presume that she had aircraft navigation lights.
| CONCLUSIONS |
This build was hindered by the small size of some of the parts, and the thumb-print of the builder. It was enhanced by the good fit of the parts and the successful aligning of the twin-boom sub-assembly. While it is an unusual plane, it IS small, and will get lost amongst a display of 72-scale aircraft. But I know that it is there. It was fun to build, but I’d recommend it modellers with a few completed models on their shelves. If I was to do another, I’d be sorely tempted to open the pilot’s door and to further-detail inside the pod.
Since the invention of the aircraft, Man has dreamt of a flying car. Witness George Jetson’s flying car, the ‘Flying Car’ (that didn’t) in “Those Magnificent Men in their Flying Machines”, Harrison Ford’s ‘Spinner car’ in “Bladerunner”, Professor Emmett Brown’s final modification to his time-travelling Delorean, Ian Flemming’s ‘Chitty Chitty Bang Bang’ – just to name a few. But why a car with wings? Some fool will STILL not see them and damage one when he overtakes you.
| REFERENCES |
Just the instructions and some internet surfing.
20 March 2025 Copyright ModelingMadness.com. All rights reserved. No
reproduction in part or in whole without express permission. If you would like your product reviewed fairly and fairly quickly, please
contact
the editor or see other details in the
Note to
Contributors.