Heller 1/72 Caudron C-635 Simoun
| KIT #: | 80208 |
| PRICE: | $15.00 |
| DECALS: | Three options |
| REVIEWER: | Ryan Grosswiler |
| NOTES: | 2011 reissue |
| HISTORY |
Named after the Arabic word for a certain variety of desert
wind, the wooden Caudron C.635 Simoun was first flown in 1934. Blocky
and maybe a little dumpy-looking on the ground, the four-seater in reality 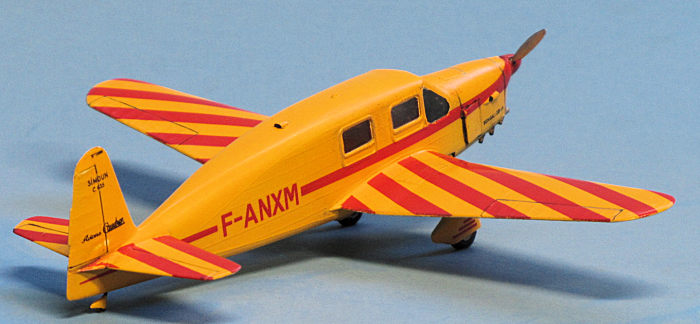 Races in Cleveland. The Simoun was
designed by the same man at about the same time and shared the racer's
basic aerodynamic formula.
Races in Cleveland. The Simoun was
designed by the same man at about the same time and shared the racer's
basic aerodynamic formula.
The design otherwise figured in the 1935 Paris-Saigon air race, notable mainly for participant Antoine de Saint-Exupéry's en-route crash in the Libyan desert. Marooned without a radio and few supplies, Saint-Exupéry and his navigator dehydrated and hallucinating, nearly succumbed to exposure and the elements before being rescued by (who else?) a passing band of Bedouins. The experience would inspire the author in works Wind, Sand and Stars and The Little Prince.
| THE KIT |
 The kit is
very conventional. A stout flip-top box easily big enough to hold the
finished model reveals three slightly bluish-gray sprues and one clear, hailing
from the era of crisply raised panel lines (I think the molds were cut in the
mid-seventies). This is the current issue of the kit as of this writing
and Heller's decals look absolutely fantastique in the box: glossy, opaque,
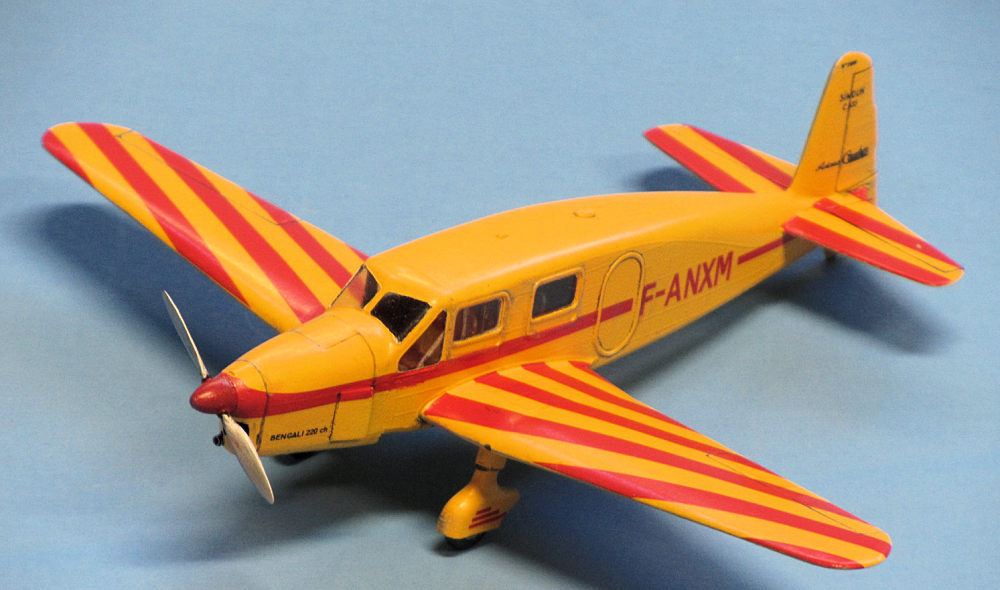
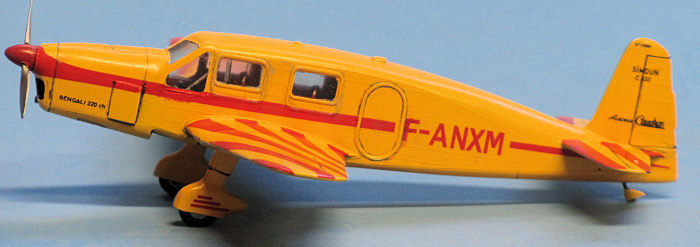
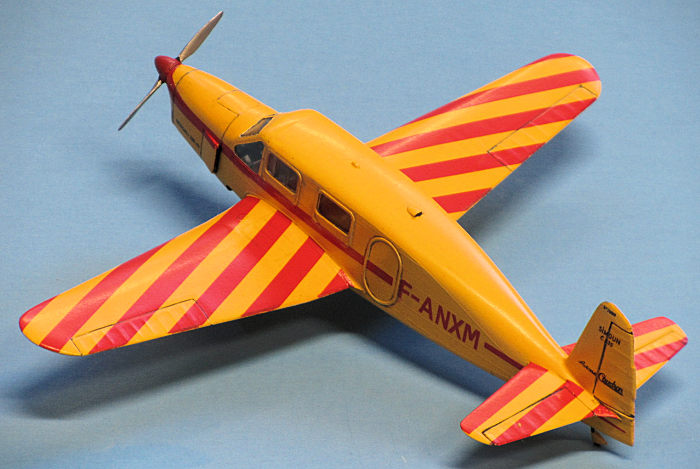
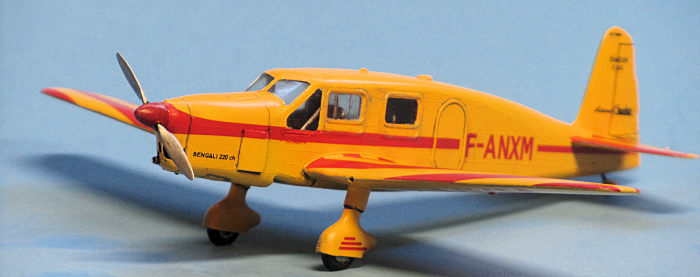
precise registration, and razor-sharp resolution. The garish yellow F-ANXM
option has been in every issue of this kit but this one's the only release which
also includes the prominent red stripes and trim, eliminating a tedious masking
and color match task. Two other options are offered, one civilian machine in
overall deep blue as currently exhibited in the Musée de l'Air et de l'Espace, and
an Armée de l'Air liaison
machine in overall light gray from 1938.
The kit is
very conventional. A stout flip-top box easily big enough to hold the
finished model reveals three slightly bluish-gray sprues and one clear, hailing
from the era of crisply raised panel lines (I think the molds were cut in the
mid-seventies). This is the current issue of the kit as of this writing
and Heller's decals look absolutely fantastique in the box: glossy, opaque,
precise registration, and razor-sharp resolution. The garish yellow F-ANXM
option has been in every issue of this kit but this one's the only release which
also includes the prominent red stripes and trim, eliminating a tedious masking
and color match task. Two other options are offered, one civilian machine in
overall deep blue as currently exhibited in the Musée de l'Air et de l'Espace, and
an Armée de l'Air liaison
machine in overall light gray from 1938.
| CONSTRUCTION |
Despite the simplicity of the kit, there's been some complaint in previous online builds about Heller's strange 2-piece split windscreen. I got around this problem--if you could call it that--because I had the Falcon vac-form replacement (from Set # 26) which is molded in a single piece. This may well be the only instance in my modeling life that a vacuform part saved time!
 [The supplied windscreen parts did well when I dry-fitted them for
this review, however. Assembly suggestion: Lay each fuselage half flat on your
work surface, set the corresponding windshield halves into them, and use
capillary action to flow just a little liquid cement into the joint. Let this
set up for a minute or two, then tape the fuselage halves together
accurately, perform any remaining adjustments to the windshield parts while the
cemented joint is still pliable, and leave it all to cure overnight. Separate
the halves and proceed with the rest of assembly normally.]
[The supplied windscreen parts did well when I dry-fitted them for
this review, however. Assembly suggestion: Lay each fuselage half flat on your
work surface, set the corresponding windshield halves into them, and use
capillary action to flow just a little liquid cement into the joint. Let this
set up for a minute or two, then tape the fuselage halves together
accurately, perform any remaining adjustments to the windshield parts while the
cemented joint is still pliable, and leave it all to cure overnight. Separate
the halves and proceed with the rest of assembly normally.]
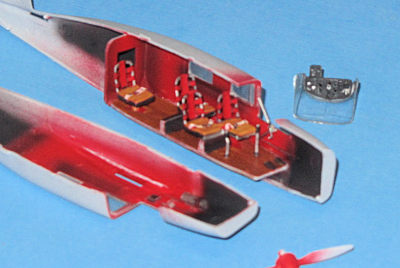
Sanding flat and polishing the kit side windows followed, to get rid of some annoying optical distortion. I next made up the interior, sprinkling in a little extra detail on the cockpit sidewalls, too, referencing photos on the internet, plus some lead-foil seatbelts: the front seating area is actually pretty visible on the completed model, particularly from the front. Since the basic interior color is red(!), I assembled the propeller as well, mixed up a red to match that on the decal sheet, and then sprayed the interior parts and prop spinner at once. Since all other rouge is accounted for in the decals, I therefore had one finish color down before even beginning general assembly. A little time was taken for the fairly complex cabin painting, mainly the seats.
 However, I hadn't bothered to dry-fit the fuselage halves properly,
and was rewarded with stubborn seam lines top and bottom when the fuselage
halves were joined. A few sessions were spent dealing with this, as I ended up
having to slice off the antenna and cabin vent details on the roof to achieve an
acceptable surface, replacing them with bits of shaped styrene when this was
done. I also replaced the fragile tailwheel leg with brass rod and added some
more detail around the engine cowling, including new exhaust stubs from Albion
Alloys aluminum tubing. I left off the propeller and then squashed the prop
shaft slightly with a pair of needle nose pliers to make it press-fit-removable
into the cowl part.
However, I hadn't bothered to dry-fit the fuselage halves properly,
and was rewarded with stubborn seam lines top and bottom when the fuselage
halves were joined. A few sessions were spent dealing with this, as I ended up
having to slice off the antenna and cabin vent details on the roof to achieve an
acceptable surface, replacing them with bits of shaped styrene when this was
done. I also replaced the fragile tailwheel leg with brass rod and added some
more detail around the engine cowling, including new exhaust stubs from Albion
Alloys aluminum tubing. I left off the propeller and then squashed the prop
shaft slightly with a pair of needle nose pliers to make it press-fit-removable
into the cowl part.
Half an hour of masking the windows followed, along with the otherwise trouble-free general assembly, and it was off to the paint shop.
| COLORS & MARKINGS |
A flat white enamel primer was applied, followed by Testor's Gloss
Yellow in two coats plus a little light sanding. Dog hair is an integral
atmospheric component in my home, gathering in corners, appearing in my food,
and showing up on the front of my pressed white suit-shirts when I'm conducting
formal 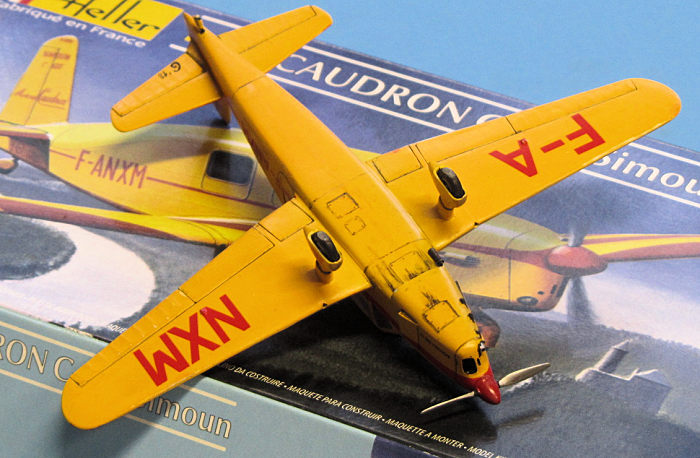 briefings to Fellow Humans of Significant Stripe at Very Important
Places. Oh, yes--and in absolutely anything I paint! So I'm getting into the
tardy habit of fine sanding between coats. On my models, not the
spoiled canines.
briefings to Fellow Humans of Significant Stripe at Very Important
Places. Oh, yes--and in absolutely anything I paint! So I'm getting into the
tardy habit of fine sanding between coats. On my models, not the
spoiled canines.
Two coats of Future were followed by the decals. These came through
on the promise brought by their appearance in the box by going on and curing
beautifully with Microscale decal Set and Sol. I did take the precaution of
spending about five minutes brushing on more Micro Sol on each wing panel top,
'working' the one-piece decal over the contours, as there's a dihedral break
under it and I was concerned it would wrinkle if not dealt with. Zero wrinkles
remained when I pulled the model out for inspection the following morning, and
the decals had really 'popped' the model to life. A flat coat was shot next to
capture a light weathering treatment (as befits a hard-flown cross-country racer
in the midst of contest) followed by a semi-gloss to lock it all in while giving
a bit of sheen and depth.
| CONCLUSIONS |
 A deceptively time-consuming project. While not exactly the
shake-'n'-bake I'd envisioned, the little Simoun was still a satisfying
diversion which throws a splash of color into my drab WWII lineup. Loads of
character in one of the first mass-produced true general aviation aircraft.
Highly recommended as a nice change of pace.
A deceptively time-consuming project. While not exactly the
shake-'n'-bake I'd envisioned, the little Simoun was still a satisfying
diversion which throws a splash of color into my drab WWII lineup. Loads of
character in one of the first mass-produced true general aviation aircraft.
Highly recommended as a nice change of pace.
For some reason the yellow in the images turned out with a distinct orange hue. The color on the model is more lemony.
| REFERENCES |
Kit instructions and the Internet, tied together with a smattering of my own knowledge! Plus watching the '70s film version of The Little Prince when I was a kid.
Ryan Grosswiler
20 April 2018
Copyright ModelingMadness.com
If you would like your product reviewed fairly and fairly quickly, please contact the editor or see other details in the Note to Contributors.
Back to the Main Page Back to the Review Index Page Back to the Previews Index Page