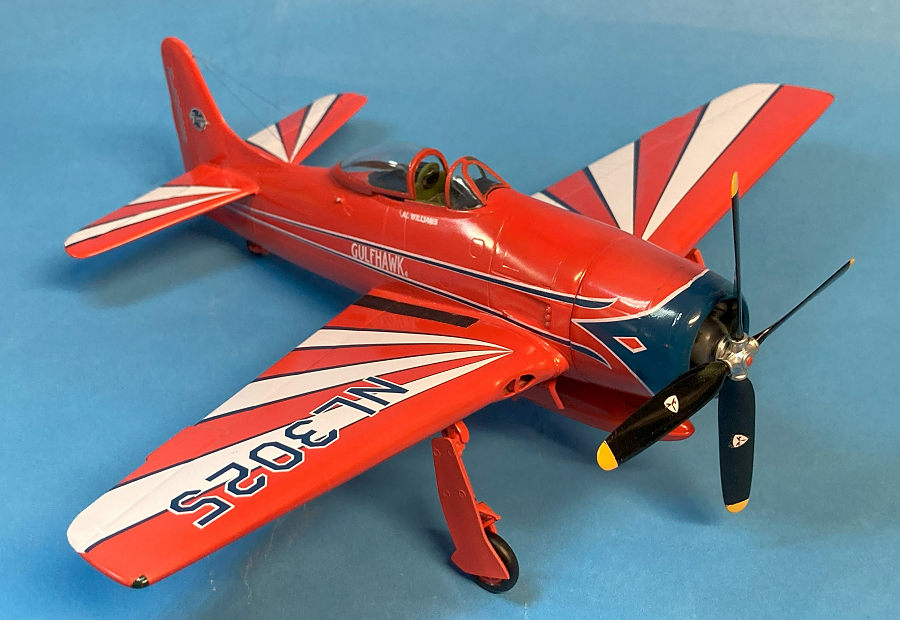
Testors 1/48 G-58A Gulfhawk IV
| KIT #: | 519 |
| PRICE: | $15.00 |
| DECALS: | Two options |
| REVIEWER: | H Davis Gandees |
| NOTES: |
I’ve built many Bearcats that I have loved since I watched four of them take off in formation from Miami NAS when I was a young boy. Arguably the best piston engine powered fighter in history. We’ll never know how it might have performed in WWII, but I have a good idea! |
| HISTORY |
 Grumman
built the civil G-58A, Gulfhawk 4th for Gulf Oil Company’s Al Williams who flew
it in airshows for only 3 months before a landing gear collapsed on landing in
New Bern, NC January 18, 1949. The centerline tank ruptured streaming gasoline
that was ignited by sparks. Williams was un-injured, but the Gulfhawk was
destroyed.
Grumman
built the civil G-58A, Gulfhawk 4th for Gulf Oil Company’s Al Williams who flew
it in airshows for only 3 months before a landing gear collapsed on landing in
New Bern, NC January 18, 1949. The centerline tank ruptured streaming gasoline
that was ignited by sparks. Williams was un-injured, but the Gulfhawk was
destroyed.
Williams claimed the lightened Bearcat with a 2,800 HP R-2800 “C” engine could exceed 500 mph. He also demonstrated its tremendous takeoff climb rate using 2 RATO bottles. Gulfhawk 4th was the most colorful Bearcat of all!
There was one other civilian Bearcat built by Grumman as a demo aircraft that was used by Grumman V.P. Sales, Roger Kahn to visit Navy customers. This G-58B “Factory Red Ship” now resides at the Palm Springs Air Museum.
| THE KIT |
The original Hawk kit was later released by Testors and others and is still available today. This F8F-2 kit was released incorrectly with decals for the G-58A Gulfhawk 4th that was based on the F8F-1 that had a 12-inch shorter tail along with other details that I would need to correct. The kit lacks detail in the cockpit and wheel wells, but the basic shape is generally accurate and parts from the later released Hobbycraft kit or other aftermarket parts can bring it up to an accurate representation of the Gulfhawk 4th.
| CONSTRUCTION |
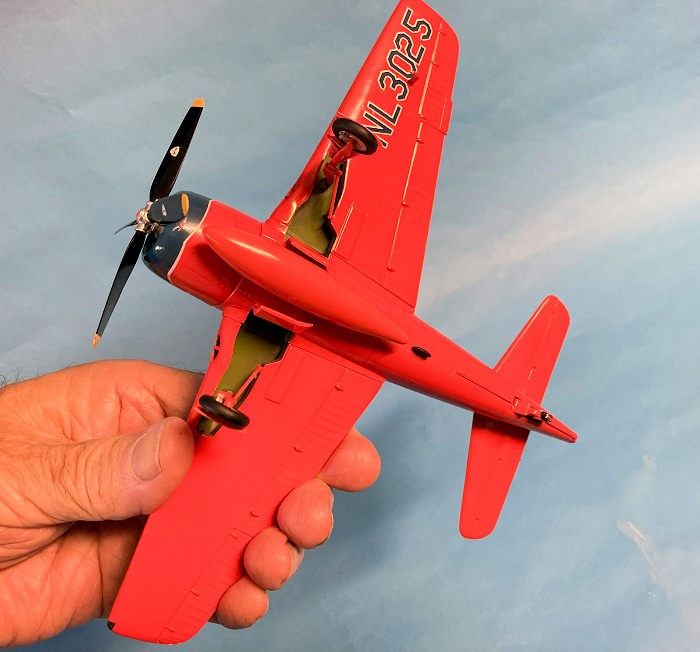
I started with the wings, by removing the gun barrels and gun breach blisters. The wing fold line was filled as the lightened Gulfhawk 4th had no wing folds.
The raised wing panel lines were sanded off, and the air intakes received splitters using styrene 3/32” stock sanded to shape. Several sink marks on the rear fuselage and wings were filled and sanded smooth.
The cockpit received the Hobbycraft cockpit tub, seat, stick, instrument panel, and rudder pedals from the scrap bin. The cockpit was painted the standard Bearcat Interior Green and Flat Black panels, and seat belt and harness decals were applied to the seat. After closing the fuselage halves, an ADF antenna made from sheet styrene was painted Testors Flat Black and pinned on the lower fuselage.
The kit F8F-2 upper cowling cooling exit vents were filled with sheet styrene and putty and blended into the fuselage as on F8F-1 that the Gulfhawk 4th airframe was based on.
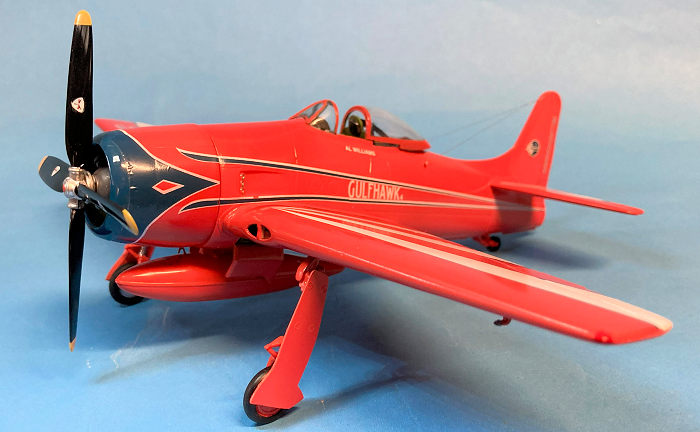
The molded in place engine was painted engine gray with aluminum cylinders with a black wash and the cowling lip was made less blunt by reshaping with a sanding stick. No manufacturer can seem to get the iconic Bearcat cowling shape right. A Hobbycraft cowling was reshaped at the lip and made more rounded and smoother. The vertical stabilizer was correctly shortened ¼ inch and the rudder trim tab sanded even with the training edge. The kit exhaust stacks were drilled out.
Landing gear strut braces from a Hobbycraft kit were attached to the landing gear struts that were painted orange and the oleos Revell Chrome.
Twin nylon thread wire antennas were installed from the tail to styrene rod insulators on the fuselage sides. The canopy and windscreen were painted and attached with white glue. The red and green nav lights were painted with a fine brush and the white tail nav light made with a drop of white glue.
| COLORS & MARKINGS |
 Once the
basic assembly was complete the model was thoroughly cleaned and given a light
coat of Tamiya White Primer. When dry, 2 coats of Tamiya TS-12 Bright Orange
rattle can paint were applied and left to dry overnight in a Tupperware to
protect from dust.
Once the
basic assembly was complete the model was thoroughly cleaned and given a light
coat of Tamiya White Primer. When dry, 2 coats of Tamiya TS-12 Bright Orange
rattle can paint were applied and left to dry overnight in a Tupperware to
protect from dust.
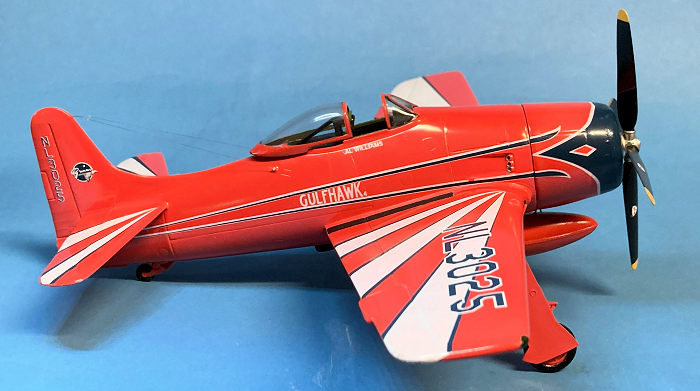
I used a newer set of Testors decals that were immersed for 1-2 minutes in warm water and performed well. It was suspected the blue nose scallop decals would not conform to the rounded cowling lip, so I mixed Testors Gloss Dark Blue with 6 drops of Testor Gloss Black to match the decal color.
The decals were trimmed and applied over the blue that was a near perfect color match! Not knowing how these old decals would react to a coat of clear gloss, I elected to leave them alone. They have a similar gloss to the orange paint and looked fine once dry. The decals were left to dry overnight, and the model was washed with warm water to remove any decal residue.
| CONCLUSIONS |
I think of the Grumman Bearcat as a huge propellor with an aircraft attached! With the big prop installed, the Gulfhawk 4th was finally completed in 40 hours. These vintage model kits can be built into a presentable subject with a bit of time and work. I am very happy the IPMS Nationals has added a Vintage model category for kits molded pre-1981. This will allow a category for new to the hobby modelers and us seniors who grew up with and still enjoy these vintage kits.
| REFERENCES |
Squadron F8F Bearcat in Action and online articles.
21 July 2025 Copyright ModelingMadness.com. All rights reserved. No
reproduction in part or in whole without express permission. If you would like your product reviewed fairly and fairly quickly, please
contact the editor or see other details in the
Note to
Contributors.