Airfix 1/72 DH.89 Dragon Rapide
|
KIT #: |
4047 |
|
PRICE: |
$18.00 or so |
|
DECALS: |
Three options |
|
REVIEWER: |
Peter Burstow |
|
NOTES: |
Kuivalainen photo etch used |
First flown in 1934, the DH 89 Dragon Rapide was a faster version of the DH 84
Dragon. It shared features of the larger four engined DH 86 Express. A small
eight passenger biplane, it was one of the most successful of the pre WW2
airliners, being able to operate profitably without subsidies. In 1936 small
 upgrades
were made, including the addition of flaps, producing the DH 89A
upgrades
were made, including the addition of flaps, producing the DH 89A
Around 500 of the military version, the DH 89B Dominie, were built for
the RAF, used as a ambulance, trainer and communications aircraft. Total
production was 731, the last few being assembled from spares. Post war many were
returned to civil use and there were a number of conversions with newer model
Gypsy engines. Many examples are preserved and some are still flying.
There is a huge list of both commercial and military operators, before,
during and after World War Two. It being operated by both sides during WW2. It
was also used by many private and company owners.
I have two
different boxings of this kit. Originally produced by Heller in the late 1970's,
it was reboxed both by Airfix and by Tasman from New Zealand. I'll describe the
kit in detail and outline the differences. The Heller boxing is in current
catalogues, and the Airfix boxing is still around. There are about 60 parts in
total. I downloaded a copy of the Heller instructions from the Heller site, for
comparison purposes.
Airfix:
Large top opening box. Three sprues of hard silver-grey plastic, cleanly moulded
with very slight flash and mould joint lines. Very fine raised line detail, with
no fabric effect, which this kit needs. There is a prominent Heller badge on the
inside of the port fuselage half. The sprues were loose in the sealed box, and a
lot of the parts had broken loose, it remains to be seen if there is any damage.
The clear parts were also loose in the box.
 Tasman:
Slightly smaller top opening box. The same parts, in soft white plastic, bagged
inside the box. Again very slight flash and mould joint lines. Clear parts in
the same bag, with the cockpit canopy part broken off. The Heller badge is on
the inside of the top wing top half, so a different mould. There are
additionally a vac-formed cockpit canopy, a piece of tinted clear card, a white
metal instrument panel and some stranded copper wire for rigging.
Tasman:
Slightly smaller top opening box. The same parts, in soft white plastic, bagged
inside the box. Again very slight flash and mould joint lines. Clear parts in
the same bag, with the cockpit canopy part broken off. The Heller badge is on
the inside of the top wing top half, so a different mould. There are
additionally a vac-formed cockpit canopy, a piece of tinted clear card, a white
metal instrument panel and some stranded copper wire for rigging.
Common to both
boxings:
The
cockpit has minor detailing of a seat, control column with separate yoke, and
rudder bar, all to be attached to the floor. An instrument panel attaches to the
fuselage half. A bulkhead divides the cabin space which has eight seats to be
installed. The engine nacelle assembly is made up of seven parts and includes
the wheel fairings and an exhaust pipe.
The clear parts
comprise a cockpit canopy, two strips of cabin windows, and landing lights. The
moulding is clear and thin, with well defined framing lines. Both canopies were
slightly scratched, and the cabin windows had distortions and sink marks. The
Tasman vac-formed canopy is very thin and clear, but the framing lines are not
as sharp as on the the injection moulded canopies.
The
remaining parts are the three part top wing, and the single piece lower wing,
the tail plane halves and a few stray aerials, tailwheel, lading lights etc.
Rigging is rather complex as it is a two bay biplane, but should be attempted to
enhance and strengthen the kit. Detail could be added to the cockpit and
engines.
The main
difference between the boxings is in the schemes and decals provided.
Airfix:
Three versions, a camouflaged Scottish Airways plane, a silver FAA example from
1960, and a Red and Blue civil registered plane from the King's Flight. The
large decal sheet has lots of stencilling and other small markings.
Tasman: Five
versions, two camouflaged USAAF planes, a camouflaged RAF ambulance aircraft,
and silver RAAF and RNZAF examples. The Scalemaster sheet has insignia and
serials, with one of the USAAF aircraft being named 'Wee Willie' and the RAF
ambulance 'Women of the Empire'. I photoshopped the decal scan to enhance the
white printing.
Heller:
Current catalogue kit has two schemes, camouflaged RAF and British civil. Older
boxings may differ.
Airfix
& Heller instructions:
An eight page A4 booklet with a short history, a page of warnings in about 12
languages, a 12 step assembly guide including detailed rigging information, and
detailed 4 view profiles for the supplied options. Only Humbrol paint numbers
are referenced, including several that need mixing. There is no reference to
what the colours really are.
Tasman
instructions: Eight
pages of A4, with a lengthy history, a long list of things to fix and detail on
the kit, rigging information, comprehensive reference list, and small exploded
diagram assembly instructions. It includes diagrams for detailing the cabin of
an ambulance version. There are two pages of profiles, with notes and named
colours. The main feature is four pages of pictures of a preserved aircraft with
42 internal and external detail photographs.
I used the Kuivalainen detail set, KPE 72032, made by Eduard, it has 20
odd etched brass parts, some pre-painted, mainly detailing the cockpit, and
includes external parts.
Started in the cockpit for once, adding the nine seats, bulkheads
and controls to the floor. A detail paint then added some of the etched details.
I managed to get all the etched bits into the cockpit, with a few dramas, not
sure of their value on such a small kit, but most are clearly visible. While
this was drying I sprayed the wings and inter-plane struts and some other bits
on the sprue. I wasn't sure which scheme I
 was going
to use, but silver wings was a good bet. Then closed up the fuselage halves,
didn't fit too well, needed to shave the rear bulkhead a bit. Used superglue for
strength and ended up with a small step along the bottom.
was going
to use, but silver wings was a good bet. Then closed up the fuselage halves,
didn't fit too well, needed to shave the rear bulkhead a bit. Used superglue for
strength and ended up with a small step along the bottom.
Added the top half of the top wing first, seemed odd, but that's what the
instructions said. Took the opportunity while I still had access to mask the
cabin windows. Added the rigging to the upper wing lower halves as instructed.
Then added the inter-plane struts and attached most of the rest of the rigging.
Then joined the upper wing lower halves to the upper wing. Several large ejector
pins on these parts had to be removed as they interfered with the fit. Offered
up the lower wing, had to adjust the rigging a bit but it all fitted fairly
well. Then rigged the fin and tailplane.
Before
painting, I added
the nacelles and their struts, then added etched brass aileron and rudder
control arms.
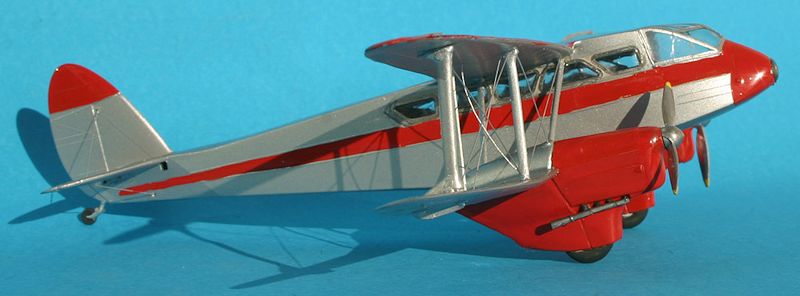
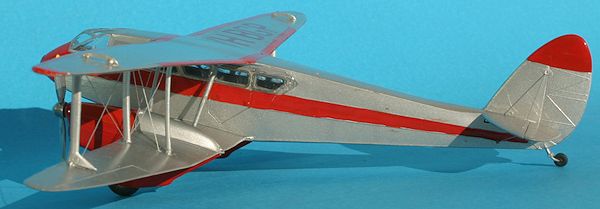
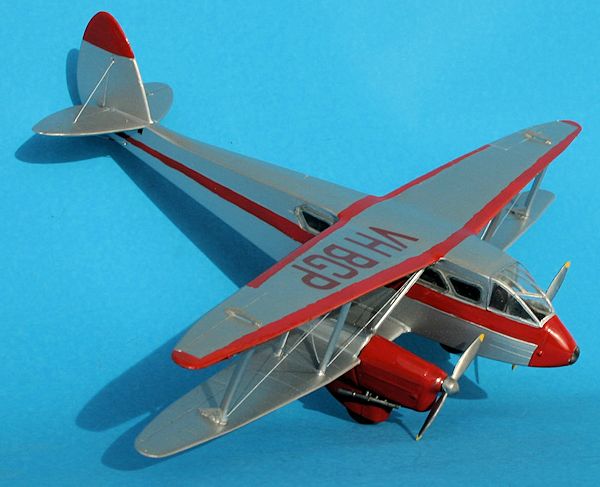
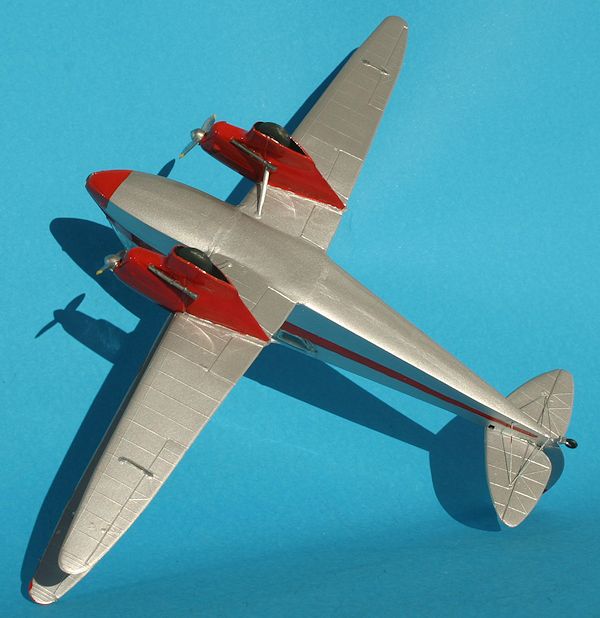
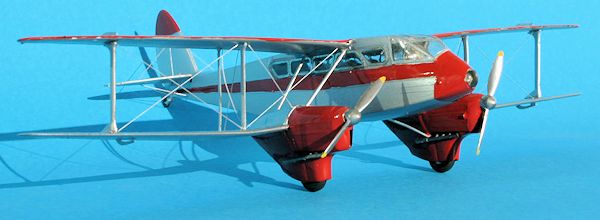
After a lot of dithering I found a scheme, VH-BGP, a silver and red
Dragon Rapide, that was based at the aircraft museum at Wangaratta. I have
several photos of this aircraft, from the museum and taken at
various
airshows. I'm not sure if it's still around.
Sprayed overall silver, then dealt with all the seams that came back at me.
Another wash then another spray of silver. Then hand brushed the red detailing.
Was planning a decal stripe for the cheat line but colours didn't match too
well. I used red 36” letters, from Altmark sheet A6, for the wing
registration.
The
last things I did were to
remove
the masking, added the nose light and the final etched brass pieces, the window
frames. Used Krystal Klear to glaze the cabin windows. A couple more paint touch
ups to finish.
A very difficult build of a elderly, but still available kit. Fit
was not great, flash was a problem on most parts and lots of gaps to deal with.
Many ejector pin marks interfered with construction or were visible and had to
be repaired.
The brass detail set added a lot of work, but the external fittings,
especially the window frames, made a big difference to the result.
Recommended for patient modellers who enjoy frustration.
http://en.wikipedia.org/wiki/De_Havilland_DH.89_Dragon_Rapide
A.J. Jackson, British Civil Aircraft 1919-1972: Volume II. Putnam, London, 1973.
A
Thanks to
for the preview kit. You can find this kit at your favorite hobby shop
or on-line retailer.
If you would like your product reviewed fairly and fairly quickly, please
contact
the editor or see other details in the
Note to
Contributors.
Back to the Main Page
Back to the Review
Index Page
Back to the Previews Index Page