Monogram 1/77 Ford Trimotor
| KIT #: | PA-15 |
| PRICE: | 75 cents when new |
| DECALS: | Two options |
| REVIEWER: | Brian Baker |
| NOTES: | Original 1956 issue |
| HISTORY |
The Ford Trimotor has to be considered one of the ten most significant and
influential transport aircraft in the history of aviation.
Its origins and history are well known, and the design stems from a
combination of metal working techniques developed by Dr. Hugo Junkers in Germany
during World War I, and the concept of the high wing tri-motor monoplanes
developed by Anthony Fokker in the nineteen-twenties.
The original American all-metal transports were developed by Bill Stout’s
Stout Metal Airplane Company, which was acquired by Henry Ford, who saw the
future of aviation in the all-metal airplane.
Stout developed several Liberty powered mailplanes, eventually evolving
into the Model 2-AT, which was a
 trimotor
design. This was unsuccessful, and
Ford fired Stout, replacing him with Harold Hicks.
Later, a Trimotor Model 3AT powered by three Wright J-4’s of 200 hp.
each, was built and flown, but this ungainly contraption was not what they were
looking for, so the next design, the Model 4-AT, was built.
This became the prototype for the classic Trimotor, although minor
changes were made, including the addition of an enclosed cockpit and different
window arrangements. Two basic
models were produced, the 11
passenger 4-AT with three Wright J-6 engines, and the 5-AT, which had three
Pratt and Whitney Wasp radials. The
slightly larger 5-AT carried 13 to 15 passengers, and a total of about 200
Trimotors of both models was completed between 1925 and 1932, when production
ended. Some accounts say that Ford
got out of aviation because several of his test pilots were killed in crashes,
but the development of the more modern Boeing 247 and later the Douglas DC-2
probably heavily influenced this decision.
trimotor
design. This was unsuccessful, and
Ford fired Stout, replacing him with Harold Hicks.
Later, a Trimotor Model 3AT powered by three Wright J-4’s of 200 hp.
each, was built and flown, but this ungainly contraption was not what they were
looking for, so the next design, the Model 4-AT, was built.
This became the prototype for the classic Trimotor, although minor
changes were made, including the addition of an enclosed cockpit and different
window arrangements. Two basic
models were produced, the 11
passenger 4-AT with three Wright J-6 engines, and the 5-AT, which had three
Pratt and Whitney Wasp radials. The
slightly larger 5-AT carried 13 to 15 passengers, and a total of about 200
Trimotors of both models was completed between 1925 and 1932, when production
ended. Some accounts say that Ford
got out of aviation because several of his test pilots were killed in crashes,
but the development of the more modern Boeing 247 and later the Douglas DC-2
probably heavily influenced this decision.
Ford did develop a Model 14 Trimotor prototype, but although the plane was
ground tested, it was never flown, and Ford’s single place “Flivver” monoplane
was never produced. There were also
several single engine prototypes, and a bomber version for the Army Air Corps
was also tested. The approximately 200 Trimotors produced by Ford were operated
by over 100 airlines throughout the world, and besides regular airline
operation, they were used by barnstormers, freight haulers, aerial refuellers,
forest fire tankers, sprayers, and parachute jump operations.
Today, approximately 11 Trimotors
survive, although there may be more on static display in museums.
Several are regularly flown, giving the public a chance to experience the
nostalgia of a bumpy ride in a noisy cabin.
| KIT |
 metal
prop on the nose, , and the kit engines
look somewhat different from those on the displayed aircraft.
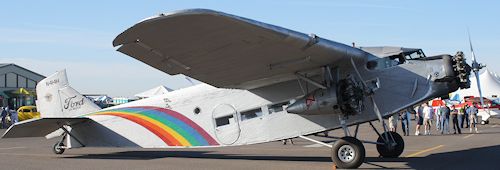
There is a photo of this same aircraft in the Ingells book on p. 44 which
shows the airplane on wheels with a tailskid, in the same configuration as the
kit, with three identical engines and propellers.
The colors are uncertain, although my black and white 616 photos of the
plane in the Dearborn Museum in 1975 are listed with the colors of silver, red,
black, and white, indicating that the NX numbers on the wings may have been red.
This is the color given in the kit decals, and since my decals were in
reasonably good shape considering their age , which could be fifty years or
more, were used to reproduce copies on my computer.
I opted for the black numbers, as this was the most common color for
registration numbers on Fords. The
plane in the museum is definitely not in the same configuration as the one
depicted in the kit.
metal
prop on the nose, , and the kit engines
look somewhat different from those on the displayed aircraft.
There is a photo of this same aircraft in the Ingells book on p. 44 which
shows the airplane on wheels with a tailskid, in the same configuration as the
kit, with three identical engines and propellers.
The colors are uncertain, although my black and white 616 photos of the
plane in the Dearborn Museum in 1975 are listed with the colors of silver, red,
black, and white, indicating that the NX numbers on the wings may have been red.
This is the color given in the kit decals, and since my decals were in
reasonably good shape considering their age , which could be fifty years or
more, were used to reproduce copies on my computer.
I opted for the black numbers, as this was the most common color for
registration numbers on Fords. The
plane in the museum is definitely not in the same configuration as the one
depicted in the kit.
The kit has been reissued numerous times, starting with P-15-98 and PA-15-98.
Yep, that’s 98 cents, folks. The kits had skis and wheels, but no real tailwheel.
Later, the reissues included wheels only, along with a revised rudder and
a new tailwheel unit. One issue had
decals and painting instructions for one of the Island Airlines Fords operated
from Port Clinton, Ohio, to the Put-In-Bay Island resort
in Lake Erie.
In 1983, Monogram reissued the kit as #6056-0200, apparently with a $2.00 price
tag. It gives the same plastic as
provided in the original, The tailwheel in the kit is no different, although the
drawings show a different f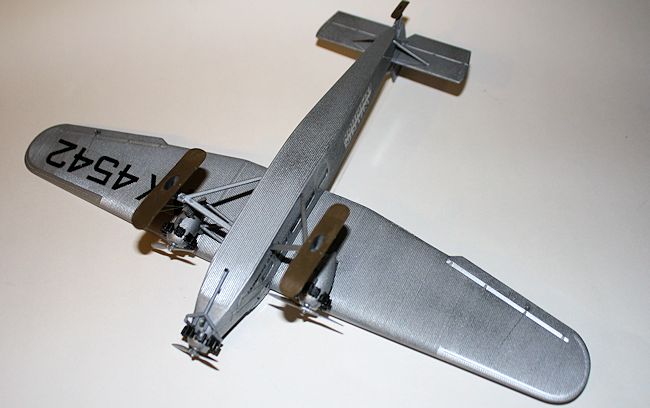 orm.
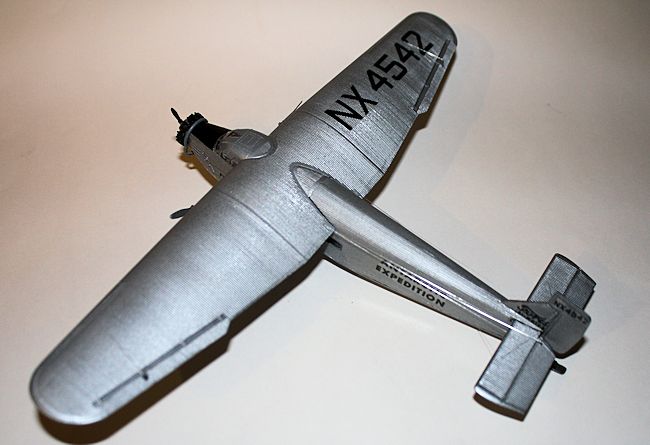
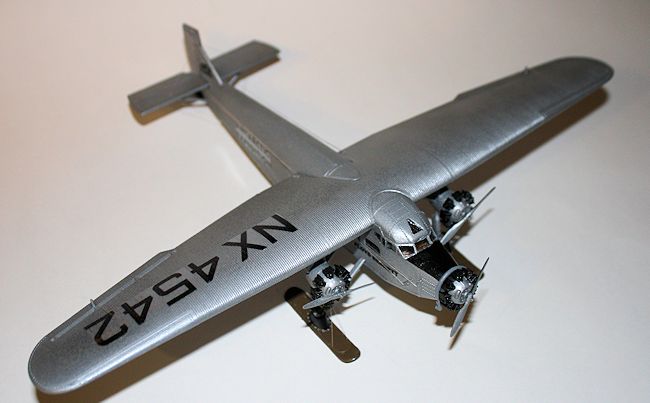
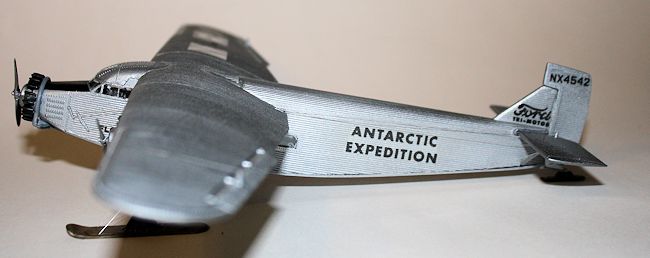
The decals provide markings for the Byrd airplane (NX4542) and for a TWA marked
aircraft, N414H, which was used for publicity purposes during the 1980’s. The
later issues are probably available at swap meets, and are worth getting.
However, I’ve seen and photographed
N414H. and it is a 5-AT, not a 4-AT, so you’d best use these decals with the
Airfix kit if you want to be accurate.
orm.
The decals provide markings for the Byrd airplane (NX4542) and for a TWA marked
aircraft, N414H, which was used for publicity purposes during the 1980’s. The
later issues are probably available at swap meets, and are worth getting.
However, I’ve seen and photographed
N414H. and it is a 5-AT, not a 4-AT, so you’d best use these decals with the
Airfix kit if you want to be accurate.
This is the only kit depicting the model 4-AT, and can be used for any of the
4-AT variants. I’ve done the original prototype, which requires new cabin
windows, an open cockpit, and other modifications.
A few 4-AT’s appear to have been fitted with flat windshields like the
5-AT, and these could be vacuformed if necessary.
The Airfix Ford depicts a model 5-AT, and is in true 1/72 scale.
It is a much later kit, and much superior in most respects, but it does
represent a different model, with different dimensions, so it probably makes
more sense to use the Airfix kit for the 5-AT and its variants, while using the
Monogram kit for the earlier models.
The kit is molded in silver plastic, and provides 33 parts plus 4 clear plastic window assemblies. There is no cabin or cockpit interior, although not much can be seen in the passenger cabin, and little can be seen in the cockpit. For a kit of this vintage, there isn’t much flash, although some trimming is required.
| CONSTRUCTION |
The windows should be glued in place before major assembly, and the little
triangular window should be inserted into the cabin top before the wing is
attached to the fuselage. Also, add the windshield, making sure that it fits in
place correctly. I used white glue to seal the gaps, and it worked fine.
I made a small floor, with seats and a
control column, with an instrument panel in front. They fit on a small ledge
inside the cockpit area. The
cockpit detail is not very visible through the windows, but I know it’s there.
Glue the fuselage halves together, making sure that all seams are in
contact. There is a small seam on
top of the fuselage that may require some trimming and filling, but this is
nothing se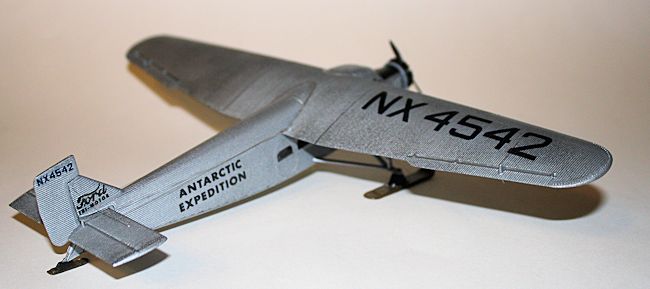 rious.
Add the landing gear struts and the rear stabilizer bracing struts before
attaching the fuselage bottom section. Clamp this in place. Be sure to mask all
of the windows before adding the wings.
Since the side cabin windows are identical, they are childishly easy to
mask.
rious.
Add the landing gear struts and the rear stabilizer bracing struts before
attaching the fuselage bottom section. Clamp this in place. Be sure to mask all
of the windows before adding the wings.
Since the side cabin windows are identical, they are childishly easy to
mask.
The wings are molded in three pieces, and they fit quite nicely, although
getting the seam removed from the leading edge corrugations
can be quite a chore.
It takes a lot of sanding and
filing, but can be done. The
fuselage almost snaps together, and the horizontal tail surfaces fit into place
easily, typical of Monogram kits of
a later generation. The rudder
mounting tab take a little trimming, but also fits into place with no problems.
The wing-fuselage fit requires a little trimming, but only a little
filling is required on the seams above the cabin.
The engine nacelles fit perfectly, although some trimming is needed, and
the struts align themselves properly. Once the struts are added, the nacelles
fit into place under the wings.
Since the airplane is silver, all of this can be done before painting.
The engines should be painted silver, and then the cylinders can be
painted black, as per instructions. I trimmed the pushrod housings off with a
knife to make them look silver, and the results were good.
The prop on the fuselage engine should probably have
black rear blade surfaces as an anti-glare measure, especially since the
cowling immediately ahead of the cockpit is painted black, or dark blue.
I just left the other props silver, as they needed no anti-glare paint.
Now the engines can be attached to their mounting positions.
| COLORS & MARKINGS |
 Once the
wings, tail surfaces, and engine nacelles are on, an overall coat of silver can
be applied. After that, I coated
the model with Glosscote, in preparation for the decals.
My newly made decals worked perfectly, although fit on the corrugated
surface could have been a little better.
With the decals in place, I attached the skis and made sure they lined up
properly. They just pop into place.
Just sitting the airplane on a flat surface forced the skis into the proper
position. Now the various wires and
control cables can be attached while the masking tape on the windows is removed.
Use a good three view for the wire locations, but all of the control
horns except for the rudder are molded into the control surfaces.
You’ll need to make this one. Keep in
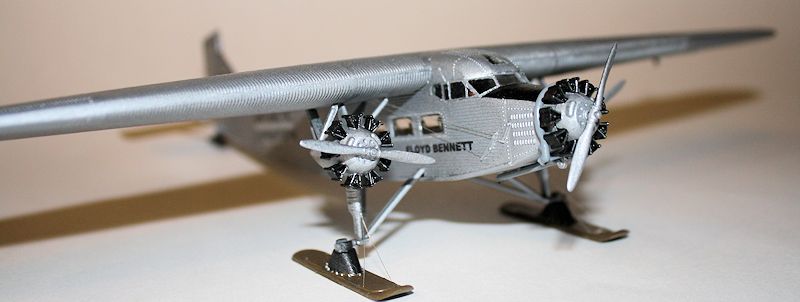
mind that if you build the wheeled version, the plane has a tailskid, not a
tailwheel, as shown in the photo below.
Once the
wings, tail surfaces, and engine nacelles are on, an overall coat of silver can
be applied. After that, I coated
the model with Glosscote, in preparation for the decals.
My newly made decals worked perfectly, although fit on the corrugated
surface could have been a little better.
With the decals in place, I attached the skis and made sure they lined up
properly. They just pop into place.
Just sitting the airplane on a flat surface forced the skis into the proper
position. Now the various wires and
control cables can be attached while the masking tape on the windows is removed.
Use a good three view for the wire locations, but all of the control
horns except for the rudder are molded into the control surfaces.
You’ll need to make this one. Keep in
mind that if you build the wheeled version, the plane has a tailskid, not a
tailwheel, as shown in the photo below.
| CONCLUSIONS |
 This
kit is an oldie and a classic, but with a minimum of experience,
the average modeler should be able to get this one together easily.
Remember that the modeling public at that point in time was mostly kids,
not adults, so the kit was designed with that in mind. Still, the kit can be
made into a very presentable model without a lot of effort, and it looks very
good on my shelf next to other models in the same general scale.
This kit is worth getting several of, especially if you want to model
some of the basic Ford variants. There are some after- market decals available,
but the basic kit decals are also useable.
Get several of these if you want to build this historic airplane. Unless
they reissue it, the price is bound to go up.
This
kit is an oldie and a classic, but with a minimum of experience,
the average modeler should be able to get this one together easily.
Remember that the modeling public at that point in time was mostly kids,
not adults, so the kit was designed with that in mind. Still, the kit can be
made into a very presentable model without a lot of effort, and it looks very
good on my shelf next to other models in the same general scale.
This kit is worth getting several of, especially if you want to model
some of the basic Ford variants. There are some after- market decals available,
but the basic kit decals are also useable.
Get several of these if you want to build this historic airplane. Unless
they reissue it, the price is bound to go up.
| REFERENCES |
There is certainly no shortage of materials and information relating to the Ford
Trimotor. Perhaps the most notable author on the subject is William T. Larkins,
a lifelong aircraft photographer (still active), founder of the American
Aviation Historical Society, and author of several works on the Ford, including
“The Ford Story” and Profile No.
156 on the Ford Trimotor. Douglas Ingells also produced a short paperback “Tin
Goose”, which gives a useful historical account of the Trimotor’s career and
lots of good photos. . There are
numerous sources on-line, so there is no reason to not have the information when
you start one of these models.
If you would like your product reviewed fairly and
fairly quickly, please
contact
the editor or see other details in the
Note to
Contributors.