X-scale 1/144 Lockheed L-188 Electra
| KIT #: | 144005 |
| PRICE: | $32.44 plus postage |
| DECALS: | Three options |
| REVIEWER: | Rob Leonard |
| NOTES: | Vintage Flyer Decals |

| HISTORY |
 The
Lockheed L-188 Electra is an American turboprop airliner built by Lockheed.
First flown in 1957, it was the first large turboprop airliner built in the
United States. Initial sales were good, but after two fatal crashes leading to
expensive modifications to fix an engine mount design defect, no more were
ordered with production ending at 170. Many Electras were modified as freighters
and some are still being used in various roles today. The Electra was the basis
for the P-3 Orion maritime patrol aircraft used throughout the world since 1962.
| THE KIT |
 In 1957,
Revell issued an Electra in the ever popular 1:115 scale. It is very rare and I
have never seen one with my own eyes. In 1965, with the models sales of the
Electra probably mirroring its success as an airliner, Revell altered the molds
for the Electra and produced a P-3A Orion, sort of mimicking what Lockheed did
in real life. This kit I did build, probably inspired by the stunning artwork of
an Orion, flying low at night, lightning flashing in the background as its
searchlight looked for a sub. In 1997, Minicraft issued their first L-188, in
the Eastern Airlines scheme. I bought one immediately, but did not get around to
building it. It has some reported shape issues and like the first Minicraft
airliners, was lacking detail. In 2024, X-Scale from Ukraine, issued the Electra
you see here with American Airline decals. It is a short run kit with all that
entails, but it is more detailed than the Minicraft effort. The entire kit is
gray and clear plastic, no resin or metal parts. It has engraved panel lines, in
scale and not too deep. A flight deck with crew stations is provided, but it
would nearly be impossible to see anything. Vinyl masks are provided for cockpit
windows and wheels.
| CONSTRUCTION |
Remember
always this is a short run kit, and you will do fine. Test fit ten times before
you use Tamiya Extra Thin. In common with other short run kits tooled in Ukraine
(my AMP KC-10, CRM 727 and X-Scale EC-24A come to mind) the seam line at the
bottom of the wings, stabilizer and tail runs across the control surfaces .
This is to avoid sink marks on the top of the wings, stabilizers and the
opposite side of the tail and provides a razor-sharp trailing edge. I always
tackle the wings, stabilizers and tail first on these short run Ukrainian tooled
kits, to get this out of the way. First, I test fit like mad. On the L-188, I
found I needed to remove some plastic in the recessed areas to allow the wing,
stabilizer or tail to sit flush. Once that is done, I glued the wings,
stabilizer or tail together. Before I add Mr. Surfacer 500 to the seams, I
re-scribe the control surfaces and then apply filler. I want to deepen them a
bit since the sanding of the Mr. Surfacer 500 will obliterate the control
surface scribing. Apply tape on both sides of the seam before you apply Mr.
Surfacer 500 to ensure it does not go everywhere. The fuselage fit well, and
since I was going to use decals for the cockpit, I had to fair in the clear
piece. The wing to fuselage join needed a small amount of Mr. Surfacer 1500
brushed on the seams before sanding. The other place needing extra work were the
engine nacelle and wing join. With aluminum and white wings, special attention
to those seams will pay off. The spinner hubs and props are multipart.
The good news is you can set the pitch of the blades to your liking. The bad news is getting the pitch correct on the props and the blades perpendicular is all up to you. I found the best trick was to get one blade at the pitch you wanted, ensuring it was perpendicular to the spinner and leave it alone overnight to set up. Then the next day add the remaining blades to that spinner to ensure consistent alignment. It took a couple of modeling sessions. The other fiddly step was the landing gear, which are well detailed and in scale. The instructions have you build the main gear and ancillary struts OUTSIDE the wheel well and then place it as one unit in the wheel well. I tried that on one side and thought it was needless hard. My solution was to add the main gear to the wheel well, let it set up overnight and then then next day attach the ancillary struts.
| COLORS & MARKINGS |
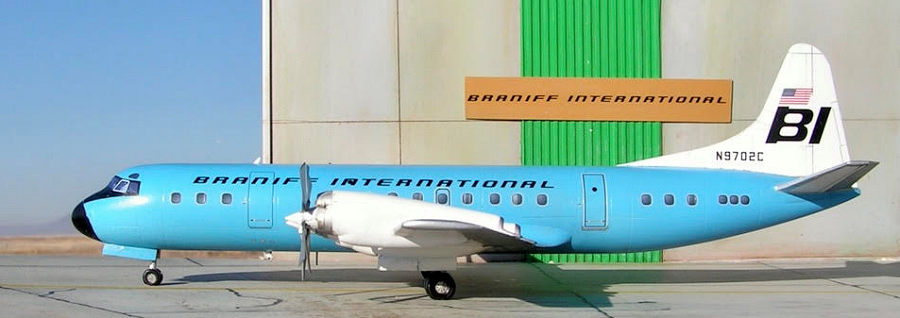
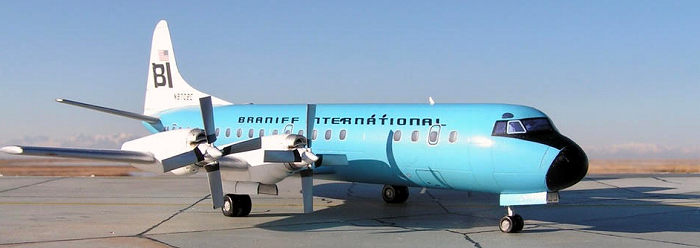
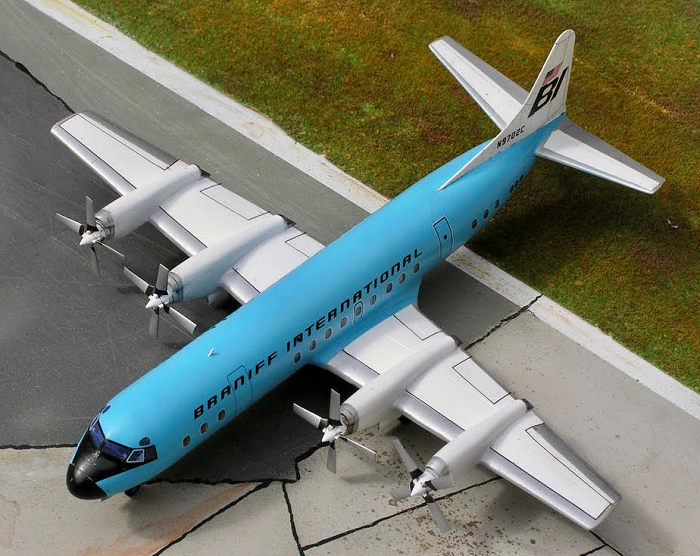
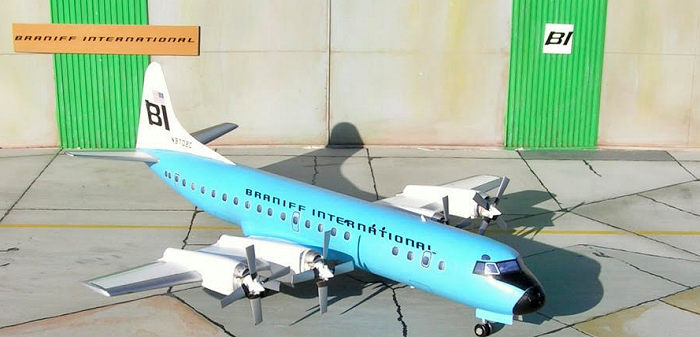
In the summer of 1967, as a ten-year-old, I flew with my family from Omaha to
Corpus Christi on a Braniff Electra, N9710C. I know it was that tail number,
because it was painted a light brown/tan color. I later came to know the color
was Ochre and only one of Braniff’s eleven Electras painted that shade. In the
mid-1960s, Braniff commissioned architect Alexander Girard who came up with this
new paint  scheme,
featuring a single color on each fuselage, while Braniff’s engineering and
advertising departments came up with the white tail with an enlarged black BI
and white wings. Compared to other airliners at the time with cheatlines it was
striking. Vintage Flyer Decals (VFD) makes a superb decal for Electras in the
scheme as well as the BAC 1-11 in 1/144. The decals are extremely well
documented and among the thinnest decals I have ever used. The paints used by
Braniff were a variety of greens, oranges, tan, yellow, blues, and red. For the
blue N9702C I built, I used Testors (small bottle) Blue 1108. The white was my
favorite, Tamiya Liquid Surface Primer while I used Tamiya LP-70 Gloss Aluminum
for the natural metal. The final step was an airbrushed coat of Vallejo
Polyurethane Satin cut 1:1 with Vallejo Airbrush thinner, since VFD recommends a
water based final coat.
| CONCLUSIONS |
If you want an injection molded 1/144 Electra this is the way currently and I highly recommend it.
| REFERENCES |
I found airliners.net a good source of photos for Girard Braniff Electras.
Rob Leonard
24 March 2025
Copyright ModelingMadness.com. All rights reserved. No reproduction in part or in whole without express permssion from the editor.
If you would like your product reviewed fairly and fairly quickly, please contact the editor or see other details in the Note to Contributors.