Revell 1/144 Concorde
|
KIT #: |
04257 |
|
PRICE: |
136 RMB |
|
DECALS: |
Several British Airways options |
|
REVIEWER: |
Richard F |
|
NOTES: |
|
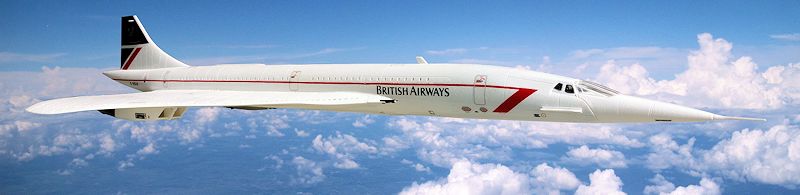
Concorde was the world's only commercially successful supersonic passenger
transport. Beaten into the air by the Soviet Union's Tu-144 which made its
maiden flight on New Year's Eve 1968, Concorde took to the sky for the first
time on 2 March 1969.
It's popular in some gloomy corners of the internet to compare the two
aircraft and claim that the Tu-144 was superior. Well, as Sir Sydney Camm
famously said of the ill-fated TSR-2, "All modern aircraft have four
dimensions: span, length, height and politics". In the case of the Tu-144
and Concorde, a fifth dimension might be added: commerce.
By the time Concorde retired in 2003, the Tu-144 was a distant memory.
Concorde had flown regular commercial service for more than 20 years from
1976 to 2003, with just 18 months grounded after the disaster of July 2000.
Throughout that two-and-a-half decades, British Airways and Air France had
daily services to New York from London and Paris respectively. At different
times, as demand for premium service on other routes waxed and waned with
the global economy, there was regular (more than once a week) service
 between
London and Miami, via DC, and Paris and Mexico via DC or New York. The
Tu-144, meanwhile, managed only 102 commercial flights (only 55 carrying
passengers), all on domestic routes, before being retired in 1979 not even
four years after its first in-service flight.
between
London and Miami, via DC, and Paris and Mexico via DC or New York. The
Tu-144, meanwhile, managed only 102 commercial flights (only 55 carrying
passengers), all on domestic routes, before being retired in 1979 not even
four years after its first in-service flight.
Concorde suffered one disastrous crash in Paris on 25 July 2000. The plane
was lost on take off with all 109 passengers and crew, and four more people
were killed when the flaming aircraft crashed into a hotel. Investigations
revealed that the plane had hit a piece of titanium that had fallen off a
Continental DC-10. The metal burst a tyre, and a piece of rubber was flung
into the Concorde's fuel tank. Another piece of rubber shredded some wiring
in the landing gear. The impact of the rubber into the fuel tank caused an
overpressure which burst a fuel valve, and fuel squirted onto the exposed
wiring hit by the other piece. The engine fire made the crew shut down the
engine, but then the plane didn't have enough power to continue taking off.
The pilots lost control and the plane crashed into the hotel. Years of
litigation followed and the Continental mechanic who had failed to prevent
the titanium falling off was convicted in a French court (along with
Continental) of involuntary manslaughter in 2010. This was overturned on
appeal in November 2012. As is so often the case (Space Shuttle, anyone?),
the early warning signs were there but ignored. Concorde had a long history
of explosive tyre bursts, happening up to 60 times more often than in
regular airliners, earning the plane a warning from the NTSB as far back as
1981. But as is also often the case, there were many complex factors that
led to this terrible crash. Some were human error, some were engineering
failures, and some were just plain bad luck. It was a fatal combination.
 Concorde
retired in 2003, as much a victim of the post-September
11 environment and
Airbus losing interest in ongoing support as any other reason. It's hard to
believe Concorde couldn't have continued a little longer, but the impact of
the Global Financial Crisis from about 2009 would certainly been the last
nail in the coffin. No matter how beautiful or capable a plane is, airlines
won't fly it if people aren't buying tickets. It's the unavoidable fifth
dimension of aeroplane design: commerce.
Concorde
retired in 2003, as much a victim of the post-September
11 environment and
Airbus losing interest in ongoing support as any other reason. It's hard to
believe Concorde couldn't have continued a little longer, but the impact of
the Global Financial Crisis from about 2009 would certainly been the last
nail in the coffin. No matter how beautiful or capable a plane is, airlines
won't fly it if people aren't buying tickets. It's the unavoidable fifth
dimension of aeroplane design: commerce.
This glorious aircraft still holds the world record for the transatlantic
crossing by a commercial aircraft: 2 hours, 52 minutes and 59 seconds from
takeoff to touchdown. British Airways G-BOAD did this in 1996. (The SR-71
holds the absolute record: 1 hour, 54 minutes 56 seconds). Hard to see
either of those records falling any time in the near future given there is
now nothing remotely as fast, especially at long range.
I previewed this kit
right here on MM. In a nutshell it has nicely engraved panel lines, but
is otherwise fairly basic (limited detail on undercarriage and inside the
engines, for example). My boxing has only BA liveries - the decals are
marked (c) 2005. I know there are other recent boxings which include Air
France decals.

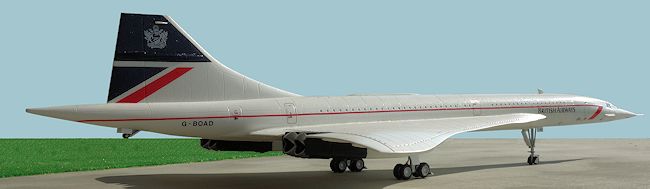
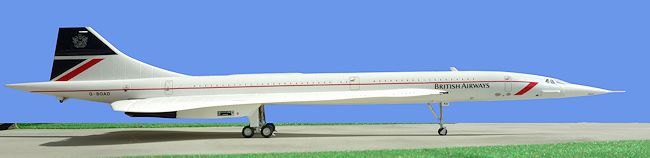
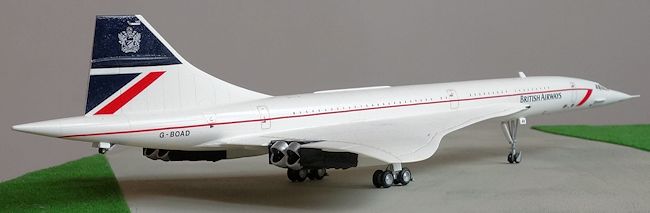
The
options are the earlier "Landor" scheme with the geometric patterns on the
tail and the silver coat of arms or a few variations of the "Chatham" scheme
which Concorde wore in the last years before it retired. See the section on
decals below for more on that. The sheet, by Cartograph, comes with a mass
of data stencils, most of them legible and very clearly printed. It also
enables you to make every British Airways Concorde by means of a selection
of letters. It comes with a ready-made G-BOAD decal for the aircraft that
holds the transatlantic speed record for a civilian aircraft (although I am
not sure whether G-BOAD flew that record-setting flight in the earlier or
later scheme. Best check your references if that's important for your
build).
Simple start on this one: paint the inside of the cockpit area black, add a
bit of noseweight, and glue the fuselage together. (Of course, I needed to
trim off a bunch of flash first - this is an old mould).
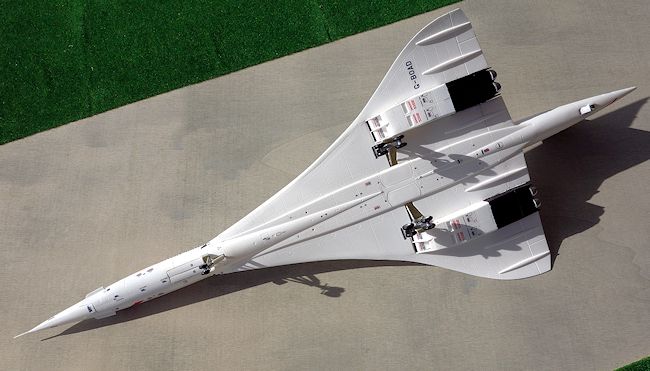
Getting the wings on wasn't as easy, and I got a lot of superglue on my
hands by the time I was done. After test fitting and trying a few different
approaches, I decided to install the bottom piece first, and then put the
top wings on one by one. A bit of swearing and cussing and rubbing superglue
off my fingers later, the plane actually looked like a Concorde. You do need
to take your time underneath and do some practice fits, including of the
engine pods. Don't rush it, because it's easy to mess up.
The join at the trailing edge of the wing, directly underneath the fuselage,
is an area for particular attention. It needs some sanding to get rid of a
small but noticeable step.
Inside
the engine pods there is basically nothing other than a simple piece with a
simplistic turbine facing. Nothing in the rear end where the exhausts are,
and also no real effort to depict the intake interiors. You can do some
improvements here if you want. I elected not to because I just wasn't in the
headspace for major modifications. This one is a shelf-sitter for me not a
show stopper.
You need to take care at the leading edge too, up front where it joins the
fuselage. The fit is not perfect (especially on the underside too) but you
don't want to be too heavy handed with the sanding or putty because it's one
of the most noticeable parts of the plane and you'll lose the nice surface
detail.
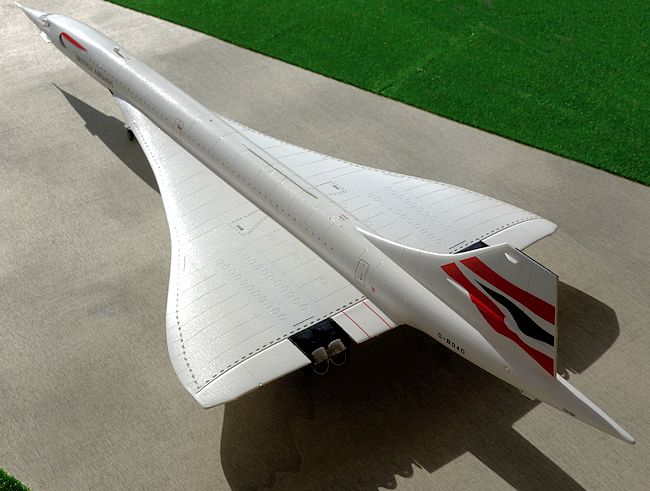
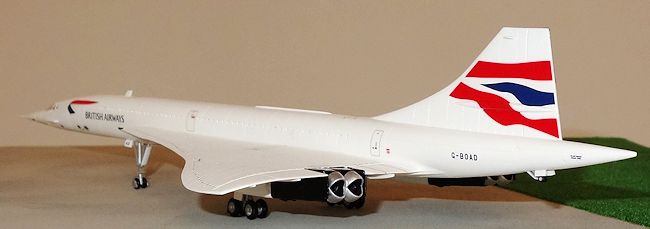
I had already decided to do my Concorde nose up, partly because I read
somewhere that the Revell kit looks wrong in nose down position, but mainly
because Concorde looks way cooler nose up. Relax - Concordes were regularly
seen nose up while on the ground. They taxied nose down, of course, but to
avoid damage they kept the nose up wherever practical. And on closer
inspection of photos, the error is easy to see. The Revell kit has the
cockpit windscreen (not the supersonic one) as totally flat. In fact it is
two windows and they are at an angle with its apex in the centerline.
That
said I didn't apply the nose until right at the very end because I'd wanted
to at least take a photo of it nose down (which I didn't do because I
couldn't get it to stay in place). So the join isn't as clean as it might
have been. I had to scratch up some card to blank off the interior of the
nose cone so it wasn't so visibly hollow when seen through the visor. In
reality the nose seems pretty empty anyway - it's just a fairing after all.
There's no detail in the main wheel wells and no well up front, but the
wheel bay doors seem to be closed except when cycling, so that's no
problem.
The undercarriage is pretty basic but there is something you can do to make
it look better. Concorde's undercarriage has two fairly prominent features
that are easy to scratchbuild and make your model look a little more
realistic. First, on the main bogey, there is a wheel protector of some
description. It's very prominent on the real thing (but possibly wasn't
always there - I did some cursory research and I think it was added in the
mid-late 1970s). I've seen it variously described as a spray deflector or
also as a kind of FOD protector, to stop the wheels kicking debris up into
the engines. Either way, you can build it fairly easily with a piece of
scrap plastic to connect to the front of the main gear bogey, and then a
thinner piece perpendicular to that and as close to the main wheel as you
can. The real one appears to actually have a circular indentation so the
tyre can get very close, but in 1/144 you aren't going to see that. Be
careful to set it low to the ground rather than at the same height as the
axles.
The
other little upgrade you can do, also pretty easily, is build the similar
spray deflector on the nose gear. This is also fairly prominent on the real
thing, although I'll confess I didn't know of it until I started looking
closely (unlike the main gear one, which I'd heard of, possibly from reading
news about the crash at the time). I used sheet styrene and basically just
cut two matching triangle shapes and glued them to the wheels. Then I added
a cross-piece on top. The whole thing took about 15 minutes and I think it
does make a worthwhile modification.
Last of all, I stuck a square sheet of plastic card inside the nose cone, so
that when you look through the windscreen, you don't see all the way to the
bottom of the cone. In reality the nose cone is basically empty apart from
the mechanism that raises and lowers it, at least as far as I can tell.
Apart from those three scratch-ups I didn't make any modifications to the
kit at all. I just decided to try to build, paint and decal it as cleanly as
I could.
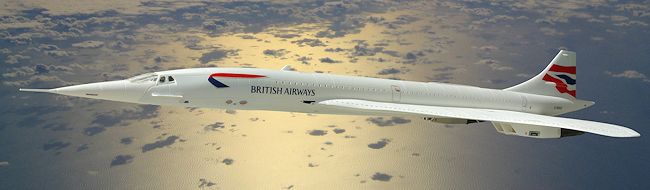
Concorde was generally white all over, apart from its airline
decorations. The famous Pepsi marketing livery was only temporary,
and the plane needs the white paint to be able to manage body heat
at sustained flights at Mach 2. White spray paint on white plastic.
How hard can it be, right?
Well,
it took three coats from a spray can before it looked acceptable. I'd
painted the inside of the cockpit area black, and that showed through
the white. Same around the engine area. But it didn't take too long and
I got a pretty nice finish. Maybe not as glossy as it could have been,
and I won't use that brand of spray again, but I was happy enough.
The decals are by Cartograph and very satisfying to use. They are neatly
printed, go on well, settle onto the surface even without a solution,
and once a bit of Mr Mark Softer hits them, they look very nice indeed.
Take it easy with that stuff though, these decals only need a small
amount. I tested it on an underside data stencil and one of them blobbed
out and bled colour everywhere. I really liked the attention that's gone
into the decals, with a separate decal to cover the prominent lumps on
the tail and special instructions about the best order of decal
application. It comes with two door outlines for the front door - one
that matches the engraved panel lines, which are incorrect, and another
decal which is the proper scale size of the door (ie bigger than the
kit's lines). The instructions refer you to
www.airliners.net for
photos of the different markings options. I've yet to put one of these
on - I'll do it as soon as I find it!
The only downside to the decals is that the later version of the
"Chatham" scheme - the red and blue swishes on the tail - looks "pixellated"
to me. That is, the decal that tries to capture the shaded red and blue
doesn't do so very well because the shading isn't subtle enough in its
colour transition. No big deal though because there is a very similar
but unshaded scheme.
I
started with the idea of doing one side of the plane in Landor and one
side in Chatham. I realised early on that I liked both schemes, but had
no intention of building two Concordes. Because the only top-and-bottom
markings on this plane are data stencils, common to both versions (at
least according to the instructions) you can easily take this approach.
I have yet to find a single viewing angle where you can see both sides
of the plane at once.
This isn't as weird as it seems. This very plane - G-BOAD - once carried
the BA livery on one side and the Singapore Airlines one on the other.
The two had a codeshare agreement (as we'd know it today) in the late
1970s.
As noted above, these decals were wonderful to use. Beautifully designed
and printed, and very well behaved. If only all decals were of this
quality.
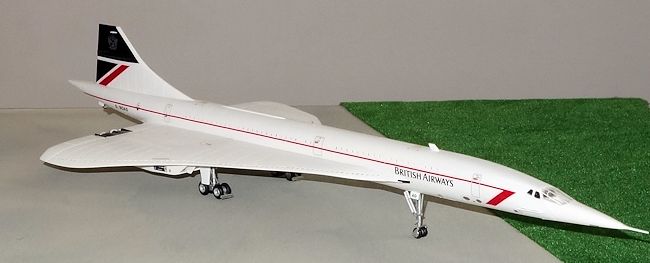
I
don't want to sound boastful but I am very pleased with this model. It's one
of the nicest ones I have been able to produce in recent times. I took my
time on the building but apart from a couple of simple and minor mods on the
landing gear it is straight from the box.
If you like Concorde (and let's face it, unless you're a gloomy conspiracist
who blames the Tu-144's failings on that mystery Mirage at the Paris airshow,
how can you not?) then I can thoroughly recommend this kit. Build it as a "kerbside"
to showcase its lovely lines and beautiful scheme, and I think you'll be
very happy.
If you would like your product reviewed fairly and fairly quickly, please
contact
the editor or see other details in the
Note to
Contributors.
Back to the Main Page
Back to the Review
Index Page