| KIT #: | ? |
| PRICE: | $5 or so when new |
| DECALS: | One option |
| REVIEWER: | Richard F |
| NOTES: |
| HISTORY |
Nikita Kruschev, the irascible Soviet leader,
visited France in 1960 and flew in a Sud-Aviation Caravelle. He was so impressed
by its quiet cabin that he ordered the Tupolev design team to build a similar
plane. The Tu-134 was born.
Known as "Crusty" by NATO, the Tu-134 adopted the same quiet-cabin rear engine
layout of the Caravelle and numerous other aircraft that had been inspired by
the French design. The Russian airliner's wings were s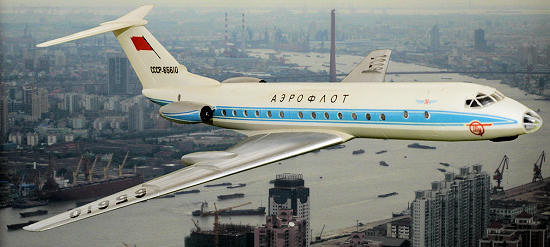 wept
further back than the other aircraft, and it kept the glass nose of its own
family, the earlier Tu-104 airliner and the Tu-16 Badger bomber. But it was as
elegant as the Caravelle, and with its distinctive Tupolev wing, perhaps a
little more aggressive looking.
wept
further back than the other aircraft, and it kept the glass nose of its own
family, the earlier Tu-104 airliner and the Tu-16 Badger bomber. But it was as
elegant as the Caravelle, and with its distinctive Tupolev wing, perhaps a
little more aggressive looking.
It entered service in 1967, nearly a decade after the Caravelle, and flew for
many years with Aeroflot, LOT, Malev, Interflug and CSA, the main East Bloc
airlines during the Cold War. These days, it's banned in the EU due to its
ancient, noisy engines. You can still fly on one in Russia or Central Asia, if
you trust those second and third tier airlines!
If you're really game, you can try your luck with Air Koryo, the North Korean
carrier, which uses Tu-134s on some of its few international legs.
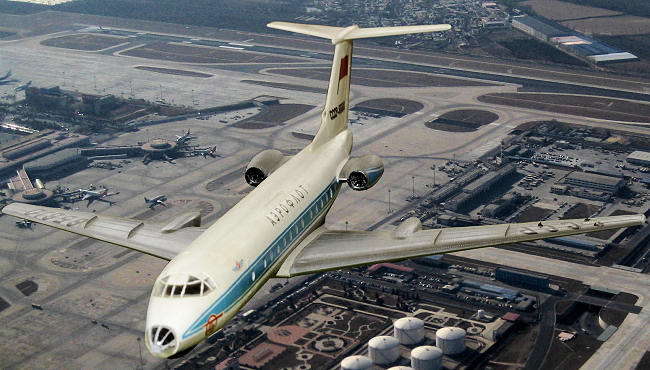
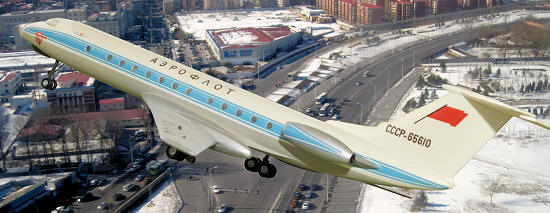
My research reveals that the subject of this kit, CCCP-65610, might have been
built before 1972. I found a photograph of it at Stockholm in that year. Later,
it, or at least another Tu-134 with the same registration number, was
photographed in Interflug colours in 1991. That aircraft no longer had a glazed
nose. Apparently it then moved to Atyrau Airways in Kazakhstan, where it was in
service at least as recently as 2002 under the number UN-65610. Who knows if
it's the same plane as depicted in my old VEB kit?
| THE KIT |
Ah, VEB! What a love affair I have with your model
kits. This is classic VEB - chunky plastic, no real detail, so-so fit, but
fantastic subject and easy to build.
There is no interior detail at all - a bit of a shame because in 1/100, with a
big cockpit window and a glazed nose, there is surely scope for something to
appear inside. If you want that, build it yourself.
| CONSTRUCTION |
This was a straightforward build. The most
important thing is to put plenty of noseweight. The wings are way back, and the
T-tail gives it a strong tendency to tailsit. There is tonnes of room, so I put
a few spare screws inside, far enough back that you couldn't see them through
the nose transparency.
 I put the
fuselage windows in, then glued the fuselage together. Some tape was needed to
keep it aligned while the glue dried. I masked each window individually.
I put the
fuselage windows in, then glued the fuselage together. Some tape was needed to
keep it aligned while the glue dried. I masked each window individually.
Make sure you don't put the engines on until after it's painted and the decals
have been applied. This makes things a lot easier.
The wheels are very simple and fairly basic looking.
You can build this entire kit in about fifteen minutes - there really isn't much
to say. (Your editor has built this kit back around 1982
and I can assure you that it took me more than 15 minutes to build!)
I spent quite a while sanding, though, to get a decent smooth join on top of the
fuselage. That is one time-consuming area that will make an obvious difference
to the finished result.
I lost the ill-fitting nose glazing after a few years. Recently, I discovered
that the short nose on my Revell 1/144 Super Constellation, which is moulded in
clear plastic, is just about a perfect fit. In profile it's the wrong shape, but
in any other angle it looks fine. I painted on some window frames, attached it,
and having repaired the plane, I decided to write a review.
| COLORS & MARKINGS |
I made this kit in the early 1990s, before great
websites like www.airliners.net existed. I only had the box art and one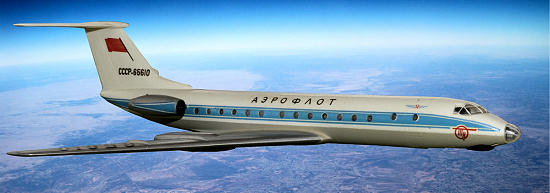 picture from a book to go on. But it turns out I was fairly close - a photo of
this exact plane on www.airliners.net shows CCCP-65610 parked at Stockholm in
1972 wearing almost this paint scheme.
picture from a book to go on. But it turns out I was fairly close - a photo of
this exact plane on www.airliners.net shows CCCP-65610 parked at Stockholm in
1972 wearing almost this paint scheme.
The only mistake I made was painting the lower fuselage in a light grey. It
should have been an aluminium colour. That was hard to tell from the picture I
had. I used Testors spray cans for this model: gloss white, gull grey and
aluminium for the wings.
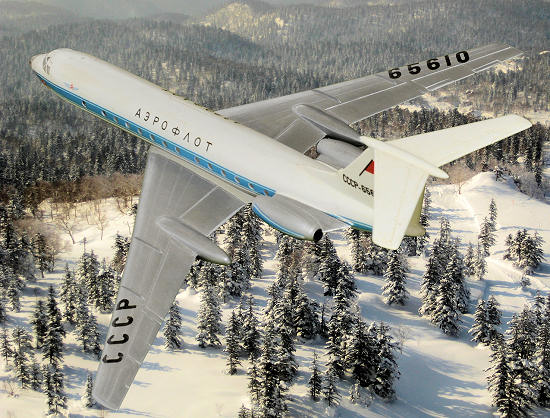
The decals were - amazingly - quite effective. Apart from the overwing serial
numbers, they have stayed in place very well in the nearly 20 years since this
was made.
| CONCLUSIONS |
 I love VEB
kits and always recommend them to adventurous modelers. If you only like the
Hasegawa and Tamiya building experience, then don't go for this kit. If you have
put a few older Airfix kits together in your time, then you won't have any
trouble with this one.
I love VEB
kits and always recommend them to adventurous modelers. If you only like the
Hasegawa and Tamiya building experience, then don't go for this kit. If you have
put a few older Airfix kits together in your time, then you won't have any
trouble with this one.
It's a rare bird, and a good looking one. If you can find it at a reasonable
price, snap it up and put it together.
September 2011
If you would like your product reviewed fairly and fairly quickly, please contact the editor or see other details in the Note to Contributors.