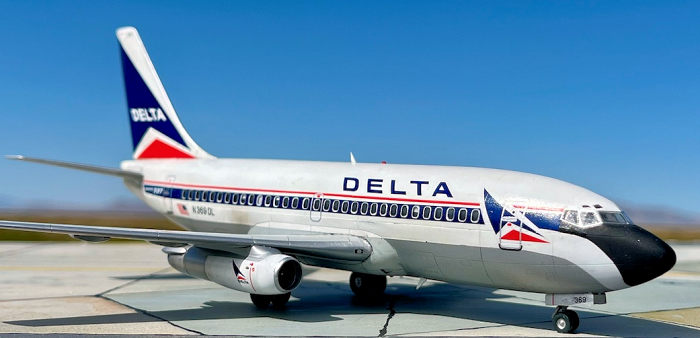
X-Scale 1/144 B.737-200
| KIT #: | X144012 |
| PRICE: | $30.00 |
| DECALS: | One Delta livery |
| REVIEWER: | Bob Leonard |
| NOTES: |
| HISTORY |
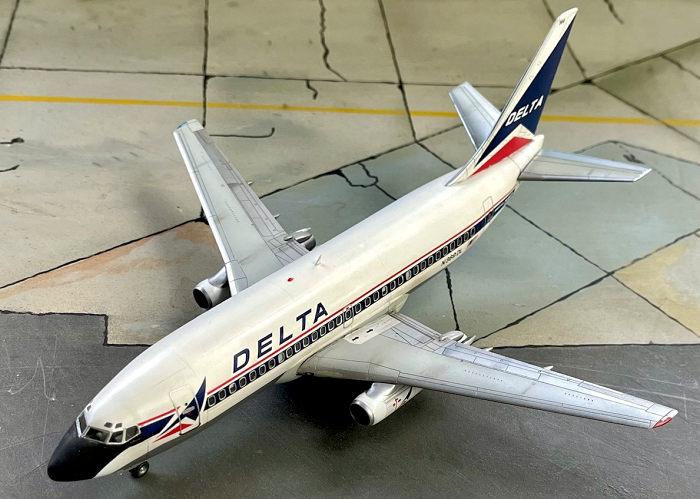 The Boeing 737-200 (732 for
short) is an American narrow-body jetliner developed to supplement the 727 on
short and thin routes. The 732 retained the 707 fuselage width, but with two
underwing P&W JT8D turbofans. Envisioned in 1964, the initial 737-100 made its
first flight in April 1967 and entered service in February 1968 with Lufthansa,
which was the first non-US airline to launch a major US jetliner program. Not a
popular model, only 30 737-100s were made and 22 went to the German airline. The
lengthened 732, depicted here, entered service in April 1968. Boeing lagged
behind its competitors; the SE 210 Caravelle had been in service since 1959 with
SAS, and the BAC-111, Douglas DC-9, and Fokker F28 were already into flight
certification. To expedite development, Boeing used 60% of the structure and
systems of the existing 727, particularly the fuselage, which differs in length
only. The 148-inch wide fuselage cross-section permitted six-abreast seating
compared to the rivals' five-abreast. The 727's fuselage in turn was derived
from the 707.
The Boeing 737-200 (732 for
short) is an American narrow-body jetliner developed to supplement the 727 on
short and thin routes. The 732 retained the 707 fuselage width, but with two
underwing P&W JT8D turbofans. Envisioned in 1964, the initial 737-100 made its
first flight in April 1967 and entered service in February 1968 with Lufthansa,
which was the first non-US airline to launch a major US jetliner program. Not a
popular model, only 30 737-100s were made and 22 went to the German airline. The
lengthened 732, depicted here, entered service in April 1968. Boeing lagged
behind its competitors; the SE 210 Caravelle had been in service since 1959 with
SAS, and the BAC-111, Douglas DC-9, and Fokker F28 were already into flight
certification. To expedite development, Boeing used 60% of the structure and
systems of the existing 727, particularly the fuselage, which differs in length
only. The 148-inch wide fuselage cross-section permitted six-abreast seating
compared to the rivals' five-abreast. The 727's fuselage in turn was derived
from the 707.
My exposure to the 737-200 started in January, 1971 when as a 13 year old, I flew on a United 732 from Sacramento to Salt Lake City. The day previous, I had flown on a Military Airlift Command charter from Andersen AFB, Guam to Travis AFB, California via Braniff. The 707-327C used by Braniff dwarfed the 732 I boarded in Sacramento, but the family resemblance was apparent.
| THE KIT |
 Scalemates says
Airfix first issued a 732 in 1/144 in 1969 in Lufthansa livery. It remained a
stalwart of their jetliner range ever since with re-boxings including CP Air,
Air France, Air New Zealand, Ansett, Southwest and Britannia Airways among
others. It has been a very popular subject with many aftermarket decal
manufacturers. In the 1980s, I built an Airfix 732 in Frontier Airlines markings
from Microscale for my father-in-law, since the Denver-based airline was his
employer.
Scalemates says
Airfix first issued a 732 in 1/144 in 1969 in Lufthansa livery. It remained a
stalwart of their jetliner range ever since with re-boxings including CP Air,
Air France, Air New Zealand, Ansett, Southwest and Britannia Airways among
others. It has been a very popular subject with many aftermarket decal
manufacturers. In the 1980s, I built an Airfix 732 in Frontier Airlines markings
from Microscale for my father-in-law, since the Denver-based airline was his
employer.
However, the Airfix kit can now be consigned to the “Nostalgia Build” category with the arrival of this superb new kit from the Ukrainian model firm, X-Scale. The kit’s hallmarks are color instructions, longer engines featured on the 732 Advance, 3D printed fan blades for the engines, vinyl masks for the cabin windows, flight deck and black nose demarcation, engraved panel lines, wheel well detail, in-scale landing gear, clear parts for the cabin window, flight deck, wing tip lights and landing gear lights. A flight deck with instrument panels, decals and pilot seats completes the front office. The Decograph decals are for one Delta machine.
| CONSTRUCTION |
I first
wanted to get two chores out of the way common to these Ukrainian kits: those
seam lines on the bottom of the wings and the installation of the clear cabin
windows. Before applying thick black cyano-acrylate glue to the seam lines, I
deepened all the affected engraved control surfaces with my scriber. I knew
sanding to obliterate the seams would render the engraved control surfaces hard
to see, so deepening those lines beforehand was essential. I understand why they
tool the wings this way. It leaves the trailing edge of the wings and horizontal
stabilizers commendably thin. I also used a micro-chisel for plastic to ensure
the recessed areas of wings were as smooth as possible so the wing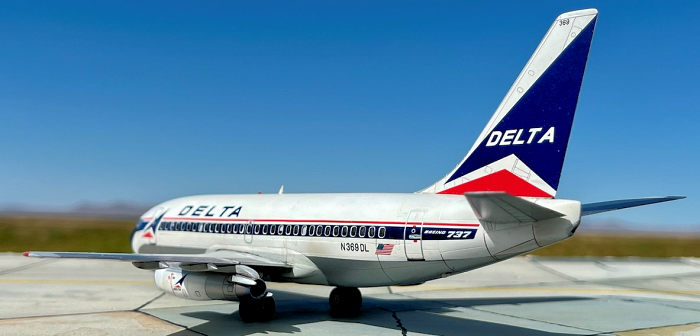 inserts would
fit flush. Every minute you spend ensuring the wing inserts fit flush saves 10
minutes of sanding and re-scribing later. For the clear cabin windows, I drilled
out the recessed areas with a cheap variable speed hand drill and razor-sawed
out the areas I wanted to expose in the interior of the fuselage. I readily
admit, this might be an unneeded step. Unlike CRM, X-Scale does not instruct you
to cut out the recessed window portion of the fuselage. They inform you to
simply glue the insert in place, relying on the dark gray plastic of the kit to
give the illusion of depth. On my next X-Scale 732, I will give that a try. I
was left with some careful filling around the clear window strips, but my
technique had improved from when I had the same construction with the CRM
727-200. Any seam work around the windows was rectified with Deluxe Materials
Perfect Plastic Putty, a white water-soluble filler perfect for this type of
job. Excess putty is removed with a moistened cotton bud/swab. Behind the clear
glass cabin windows, I placed a few pieces of white decal to depict sun shades.
The anti-collision lights, top and bottom of the fuselage, are aftermarket red
resin from CRM. The in-scale landing gear is both highly detailed and fiddley to
assemble, but once done are sturdy. The tiny clear parts for the wing landing
lights is a great idea, but in 1/144 I could not get a satisfactory look. I
sanded them smooth and resorted to black and silver decals to represent the
landing lights.
inserts would
fit flush. Every minute you spend ensuring the wing inserts fit flush saves 10
minutes of sanding and re-scribing later. For the clear cabin windows, I drilled
out the recessed areas with a cheap variable speed hand drill and razor-sawed
out the areas I wanted to expose in the interior of the fuselage. I readily
admit, this might be an unneeded step. Unlike CRM, X-Scale does not instruct you
to cut out the recessed window portion of the fuselage. They inform you to
simply glue the insert in place, relying on the dark gray plastic of the kit to
give the illusion of depth. On my next X-Scale 732, I will give that a try. I
was left with some careful filling around the clear window strips, but my
technique had improved from when I had the same construction with the CRM
727-200. Any seam work around the windows was rectified with Deluxe Materials
Perfect Plastic Putty, a white water-soluble filler perfect for this type of
job. Excess putty is removed with a moistened cotton bud/swab. Behind the clear
glass cabin windows, I placed a few pieces of white decal to depict sun shades.
The anti-collision lights, top and bottom of the fuselage, are aftermarket red
resin from CRM. The in-scale landing gear is both highly detailed and fiddley to
assemble, but once done are sturdy. The tiny clear parts for the wing landing
lights is a great idea, but in 1/144 I could not get a satisfactory look. I
sanded them smooth and resorted to black and silver decals to represent the
landing lights.
| COLORS & MARKINGS |
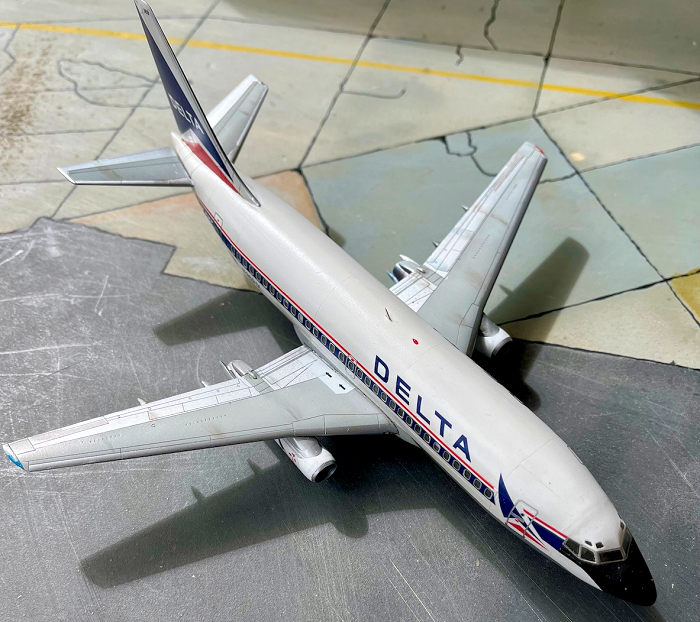
After using the superb vinyl masks on the cabin and flight deck windows, I painted the kit in natural metal with White and Dark aluminum by MRP, the white solar crown in Tamiya Liquid Surfacer Primer-White and Xtracolor Boeing Gay FS16515 for the wings, horizontal stabilizers and bottom of the fuselage and Testors flat black for the nose. For weathering I used artist oils sparingly, mostly on the bottom of the fuselage, the wings, horizontal stabilizers and the rear tail cone where 732 photos revealed grime. Weathering on airliners is a personal preference, and less is more, but to me a pristine model airliner looks more like a diecast.
Before I decaled, I used Mr. Color GX100 Super Clear III, 75% Mr. Color Leveling Thinner, and 25% clear gloss. The kit decals are exceptional. They are fractionally more thick and matt than the aftermarket decals I am accustomed to, but under Microscale Set and Sol they bed down well. Another modeler on AirlinerCafe who was building the exact same kit, recommended the cheat line be segmented in to four window sections to aid in the cheat line alignment to the cabin windows. It was an excellent suggestion. I sealed everything with GX100 sprayed through my H&S airbrush.
| CONCLUSIONS |
Put down that Aifix kit, this is the one you’ve waiting for. The Usual Suspects have already issued decal sheets scaled to fit this kit. My next 732 will feature British Airways livery.
| REFERENCES |
Walkarounds and in action photos of 737s are plentiful on the internet.
Bob Leonard
21 September 2026 Copyright ModelingMadness.com. All rights reserved. No
reproduction in part or in whole without express permssion from the editor.
If you would like your product reviewed fairly and fairly quickly, please
contact
the editor or see other details in the
Note to
Contributors.