Monogram 1/72 B.737-100
| KIT #: | 4515 |
| PRICE: | $40.00 'used' |
| DECALS: | One option |
| REVIEWER: | Joe Essid |
| NOTES: | Kit can be quite expensive |
| HISTORY |
Nearly everyone who reads this review will have at some point been crammed into seat 22B on an airliner. You recall that "snack" and plastic cup of soda? The seatback in front of you jammed into your knees? The two plus-size passengers on each side of you, squeezing you in the middle seat like peanut butter in a tube?
We can partly thank, or blame, Boeing's 737 series for the dire reality of modern air travel. The DC-9 did its part, as did the 727 and other large jets on longer routes. For intermediate hauls at the end of a "spoke" like my city, however, I often boarded a 737.
Boeing's jet debuted long before our current era of in-flight discomfort, with the first series of just 30 airframes rolling out in 1967, when flying was still glamourous and the term "Jet Setting" meant something. Lufthansa was the only airline to operate the 100 series when new, though the 737 would go on to a storied career right to the present (and troubled) fourth-generation Max aircraft. I've learned while building this kit that the 737s are called "narrow body" airframes because they feature a single aisle. The planes look wide enough to me, at least if I spring for Business Class.
 Early
737s, and for all I know, later ones, got nicknamed "The Guppy." It is
roundish and in its shorter versions, actually cute, like an airliner a
child would draw, unprompted. The first 737s were the smallest, carrying
between 85 and 130 passengers up to 1700 miles. After the -100 came ever
longer models with different engines, and while Airbus has made real inroads
on domestic carriers' transcontinental fleets, recently surpassing the 737
as highest-selling commercial aircraft, the Boeing jet still holds a record
for most planes delivered. With more 11,000 produced, the Guppy looks likely
to carry many of us in varying degrees of comfort for many decades to come.
Early
737s, and for all I know, later ones, got nicknamed "The Guppy." It is
roundish and in its shorter versions, actually cute, like an airliner a
child would draw, unprompted. The first 737s were the smallest, carrying
between 85 and 130 passengers up to 1700 miles. After the -100 came ever
longer models with different engines, and while Airbus has made real inroads
on domestic carriers' transcontinental fleets, recently surpassing the 737
as highest-selling commercial aircraft, the Boeing jet still holds a record
for most planes delivered. With more 11,000 produced, the Guppy looks likely
to carry many of us in varying degrees of comfort for many decades to come.
On a happy note, in my early 20s I took my first flight on a Piedmont Airlines 737, likely a 200 series plane. I loved Piedmont, later acquired and ruined by USAir. My mom and I flew to meet my brother in Kentucky. There was little security at Richmond VA's Byrd Field; my father walked with us all the way to the departure gate, in a terminal that had not changed much since a 1950 post card image I found in the online image collection at Virginia Commonwealth University. When I was a child, the family would go to the airport "on a Sunday ride," if you recall those pleasant outings when traffic was not so nasty, just to watch planes take off and land.
After a short hop over the mountains, mom and I landed for a leisurely layover in Roanoke. We strolled off the plane, holding paper tickets, while the flight boarded more passengers. There was no jetway, just a set of stairs down to the tarmac. We had to traverse no more than a screen door to enter a locally run airport restaurant for an outstanding country-style breakfast. We then continued on to Louisville. No hurry, no indignities, no crowds. I thought flying would always be that way!
I miss that sort of air travel mightily, as much as I miss Monogram. I love their 1/72 kits, so when I realized they once boxed a 737, I snagged it.
| THE KIT |
 Scalemates
shows Aurora's kit with openings for the passenger windows, whereas Monogram
offered a solid fuselage with decals for windows. Aurora produced a DC-9 in this
scale, as well as a 747, 707, and 727 in smaller scales, if you are curious and
stumble across one. A few of these were reissued by Monogram.
Scalemates
shows Aurora's kit with openings for the passenger windows, whereas Monogram
offered a solid fuselage with decals for windows. Aurora produced a DC-9 in this
scale, as well as a 747, 707, and 727 in smaller scales, if you are curious and
stumble across one. A few of these were reissued by Monogram.
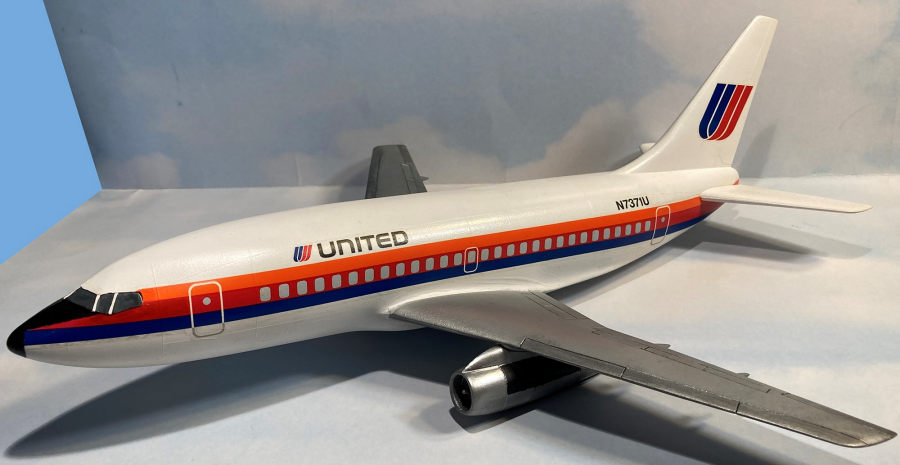
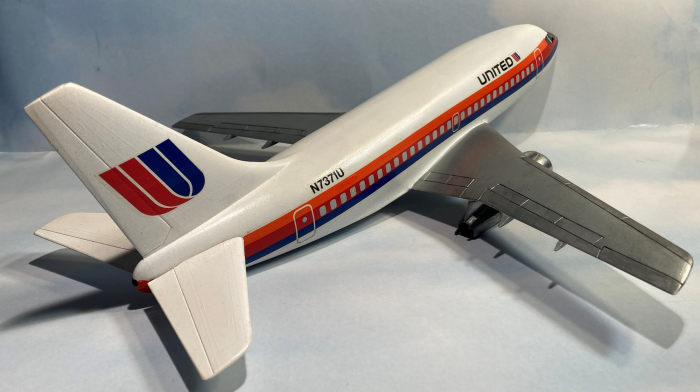
The Monogram / Aurora Guppy is not cheap on auction sites, running over $100 US, but I found a started example, with shipping, for around $40. I have seen others partly built like mine for reasonable money. My kit came in United Airlines livery, apparently based on an early agreement by the airline to buy 40 examples, until the contract was changed to the longer 200-series planes.
Molded in white plastic with 30 parts and only 12 steps in the instructions, the pieces are large ones, with a single clear part for cockpit glass. I did not measure the wings with calipers, but a back-of-the-envelope estimate showed me that they are far too short in this scale.
Monogram's kit would make a nice souvenir for a young builder after a first flight. One wonders if airport stores and in-flight, duty-free shops once sold models that children never finished, kits now begin pulled out of attics and put up for sale by downsizing Boomers.
| CONSTRUCTION |
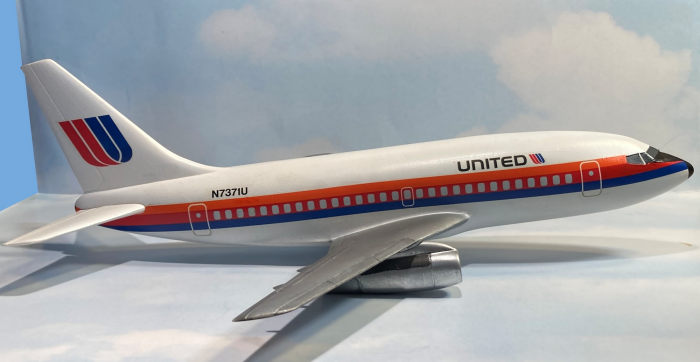
There was no sense in trying to fix the wings, and given the simple nature of the kit, I decided I'd opt for a flying model hung from my study's ceiling.
I began assembling the wings and fuselage, mating them the first day of building, then putting together the engines. Seams were not bad, except for the joint between the upper surface of the wings and fuselage. Both sides needed CA and much sanding to set things right. Once the engines were in place, I got out rattle cans of paint.
| COLORS & MARKINGS |
Most of my time on this kit went to painting and detailing. United's plane had silver wings and a white body. Thus I saw no need for my airbrush. I cleaned the kit with rubbing alcohol and didn't bother priming, spraying the entire jet with Krylon "Short Cut" gloss white enamel from my local hardware store. The can looks exactly like a Testor's can, but Krylon is not part of the Rustoleum empire that gobbled up and mostly shut down Testors.
Like Testors of old, Krylon's paint went down perfectly, making a hard surface that I let cure several days before masking the fuselage and painting wings and engines with Dupli-color Chrome. At the forums for Modeling Madness, we have been talking about reducing the viscosity of paint in spray cans by heating them in water that's below the boiling point. That technique works well. Some wag I won't name dubbed my project The Krylon Express.
 Duplicolor's
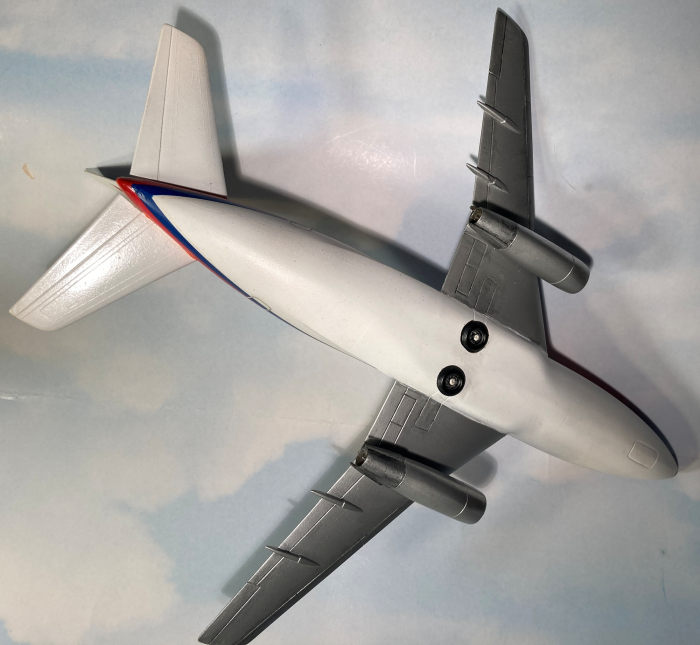
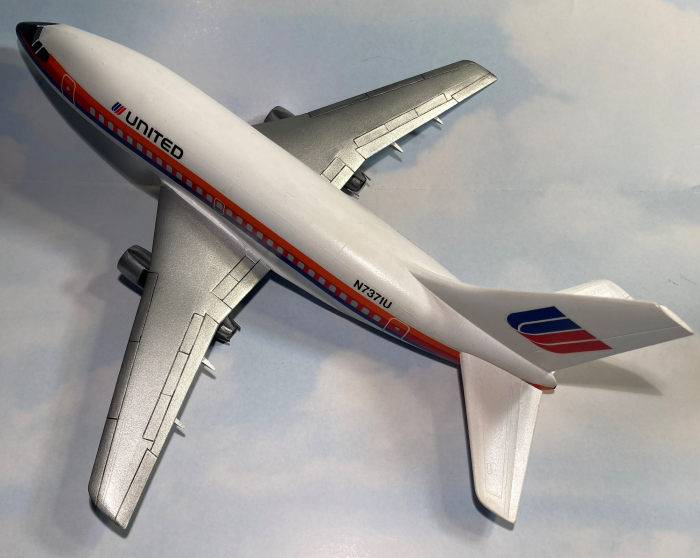
Chrome is shiny stuff, so shiny that it did not look good in scale for wings.
But it looked great on the engines, so I masked them and hit the wings with
Tamiya Bare Metal Silver. Once all this cured, I felt the Kyrlon was so glossy
that I needed no Future or other gloss coating before putting on the decals.
Duplicolor's
Chrome is shiny stuff, so shiny that it did not look good in scale for wings.
But it looked great on the engines, so I masked them and hit the wings with
Tamiya Bare Metal Silver. Once all this cured, I felt the Kyrlon was so glossy
that I needed no Future or other gloss coating before putting on the decals.
Monogram's decals are known for their durability but to be safe, I scanned the sheet and I brushed the original with Microscale's Decal Film. The thickness of the decals proved a real boon. I got the tail insignia on first, to check their integrity. After they went on fine and reacted well to Microset, I took the big decals for fuselage stripes, passenger windows, and exit doors to the bathroom sink, ran the tap until the water was warm, then added liquid soap to the basin. The decals went on superbly, with only one small tear. Only later did I realize that the door outlines did not match the raised lines for them on the fuselage.
One caveat for those doing an OOB build: the decals are too short. Align them with the cockpit opening, not the tail as I did. You'll have to paint the stripes anyway; I ended up retouching both ends and luckily that went well, including mixing an orange-red to match the decal's red hue (Tamiya red is very close). I gave the decals two days to dry, popping a bubble or two with a quilting needle, then top-coating the lot with Tamiya Semi-gloss.
I washed the turbofan blades and the aft part of the engine nacelles with thinned Tamiya Gunmetal to add contrast, then brushed the interior of the nacelle with Armory silver for even more. I liked how the gunmetal set off a control surface, so I washed them as well. Finally the turbofan exhausts got brushed with Model Master Jet Exhaust.
On the outside, the engines got a black rectangle brushed on outboard of the pylon, as shown on Lufthansa's 737-100s. This provides more needed contrast for such a simple kit.
| FINAL CONSTRUCTION |
Leaving the nose-gear doors closed, I bored out holes in the bottom of the plane for the main wheels to show, as they do when retracted on 737s. I should have done this before closing the fuselage.
That mistake led to the only tedium of the build: hand-sanding the wheels, molded in one piece. Otherwise too thick to fit, they needed to be slimmed down by half. I had used sprue to span the opening I'd created, and I dreaded dropping a wheel into the abyss! The wheels sit proud of the outer skin now; they'd be flush on the real aircraft. That said, I was done by this point and unless my friend Jim visits, no one will notice. He flew 737s for years with American Airlines before transitioning to the Airbus A320.
 Research
showed how simplified the Monogram and Aurora engines were, compared to those on
actual JT8D turbofan engines. Without going wild with scratch-building, I
couldn't add the 100's unique "suck in doors" to the front of the engines. They
are suggested by raised details. I did work on the rear, relying on some nice
photos of Lufthansa's jets to get a sense of the engines' thrust-reversers size
and position.
Research
showed how simplified the Monogram and Aurora engines were, compared to those on
actual JT8D turbofan engines. Without going wild with scratch-building, I
couldn't add the 100's unique "suck in doors" to the front of the engines. They
are suggested by raised details. I did work on the rear, relying on some nice
photos of Lufthansa's jets to get a sense of the engines' thrust-reversers size
and position.
Adding reversers ended up ruining the paint on the engines, as the parts slipped when being fitted and glue-blobs resulted, worthy of my 10-year-old self. Muttering choice words, I ripped the engines and pylons off, stripped the paint, and started again. When all was ready I attached them a final time.
I painted the cockpit windows in dark blue/gray to hide an empty flight deck, then added framing with painted strips of Frog tape. With a good quality brush I freehanded anti-glare black to the nose. Finally, I shot the kit once more with semigloss. Ready for takeoff! Please put your seatbacks in the upright position. . . thank you for flying on NoFrills Airlines' Krylon Express Service. Hey, ground crew! Paint the wing lights! That task was done after photos were shot.
| CONCLUSIONS |
 I really
enjoyed building the kit, short wings, short decals, botched engines (my fault)
and all. Even a child new to the hobby could make a fun toy out of this kit. I
wasn't after much more, so the result pleasantly surprised me, like a smooth
flight that arrives on time.
I really
enjoyed building the kit, short wings, short decals, botched engines (my fault)
and all. Even a child new to the hobby could make a fun toy out of this kit. I
wasn't after much more, so the result pleasantly surprised me, like a smooth
flight that arrives on time.
The famous engineer Harrison Storms, after being involved with the XB-70 and other warplanes at North American, told his wife why working on Project Apollo delighted him; he got to build something without guns on it. After all my military builds I felt the same, especially for an aircraft that I've spent many hours aboard, most of them pleasant.
I'm ready for more civil-aircraft in the collection now! I only need some Piedmont decals and a BPK 737-200 to relive my first airliner trip.
| REFERENCES |
Reder, Robert. A Brief History of Monogram Models Inc: The First 40 Years. Robert Reder, 2000.
Wikipedia, "Boeing 737," https://en.wikipedia.org/wiki/Boeing_737
Wikipedia, "Pratt & Whitney JT8D," https://en.wikipedia.org/wiki/Pratt_%26_Whitney_JT8D
May 2024
Back to the Previews Index Page
Back to the Previews Index Page