Hasegawa 1/144 Embraer E170
| KIT #: | 11101 |
| PRICE: | $30.00 |
| DECALS: | Ten serial options |
| REVIEWER: | Ben Brown |
| NOTES: |
Draw Decals United Express decals |
| HISTORY |
 The
Embraer E170 is the smallest of the company’s E-Jet family. The jet entered
service in 2004, competing with the Bombardier CRJ-700. I can seat up to 78
passengers in a high-density, pack-‘em-in-like-sardines configuration, but
usually seats 72. It is powered by a pair of GE CF34-8E engines that produce
14,200 lb thrust. As of 2017, the E170 was out of production, replaced by a
stretched version, the E175. The E175 competes with the CRJ-900, and seats
between 78 and 88 passengers, depending on the seating configuration.
The
Embraer E170 is the smallest of the company’s E-Jet family. The jet entered
service in 2004, competing with the Bombardier CRJ-700. I can seat up to 78
passengers in a high-density, pack-‘em-in-like-sardines configuration, but
usually seats 72. It is powered by a pair of GE CF34-8E engines that produce
14,200 lb thrust. As of 2017, the E170 was out of production, replaced by a
stretched version, the E175. The E175 competes with the CRJ-900, and seats
between 78 and 88 passengers, depending on the seating configuration.
The E170 is currently operated by Republic Airlines, J-Air, HOP!, Saudia, and EgyptAir Express.
| THE KIT |
The kit is molded in light gray plastic, with a separate sprue in smoked
clear plastic for the stand. Optional parts are included to build the model with
the landing gear up or down. A large nut and bolt are inc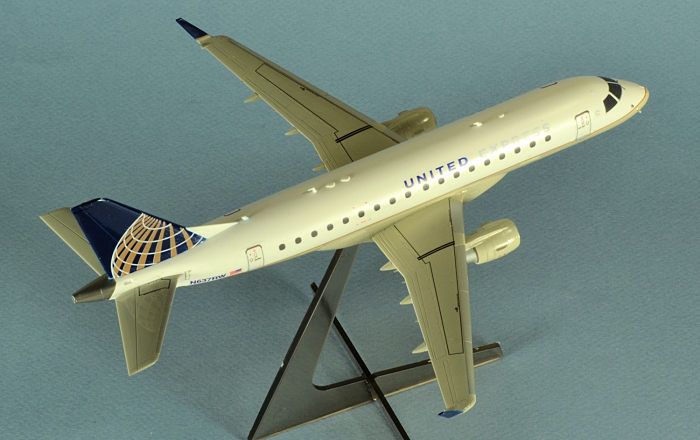 luded
for nose weight. No clear parts are provided for cabin or cockpit windows, which
might be irritating to some modelers.
luded
for nose weight. No clear parts are provided for cabin or cockpit windows, which
might be irritating to some modelers.
The model includes many delicate antennae molded into the fuselage parts, but Hasegawa was kind enough to provide additional antennae on the sprue, for people like me who end up knocking most of them off during construction.
The decal sheet provides makings for any of the 10 E170s operated by J-Air, as well as wing walkway outlines, stencils, and windows. Hasegawa has also released this kit with J-Air’s new livery and a third version with the E170 demonstrator markings.
Note that Braz sells a longer fuselage to convert this kit to a 175. I haven’t personally seen it, so I cannot comment on its quality.
| CONSTRUCTION |
 Construction
is relatively simple, so the model can be built in an afternoon. There isn’t
really much to say about construction, and there are no “gotchas” to watch out
for.
Construction
is relatively simple, so the model can be built in an afternoon. There isn’t
really much to say about construction, and there are no “gotchas” to watch out
for.
If the model is to be built gear-up, one must drill a hole just aft of the main gear wells to accept the socket for the stand. A nut and bolt mount to a bulkhead in the fuselage to prevent the model from being a tail-sitter if it is built with the gear down.
The engines might be a little complicated for a beginner, but go together without any fuss. The way they are constructed requires one to paint some of the natural metal areas prior to assembly. The small size makes it a little challenging to mask these areas when the model is painted. Overall fit was very good, and I only had to use a little Mr Surfacer in a few spots.
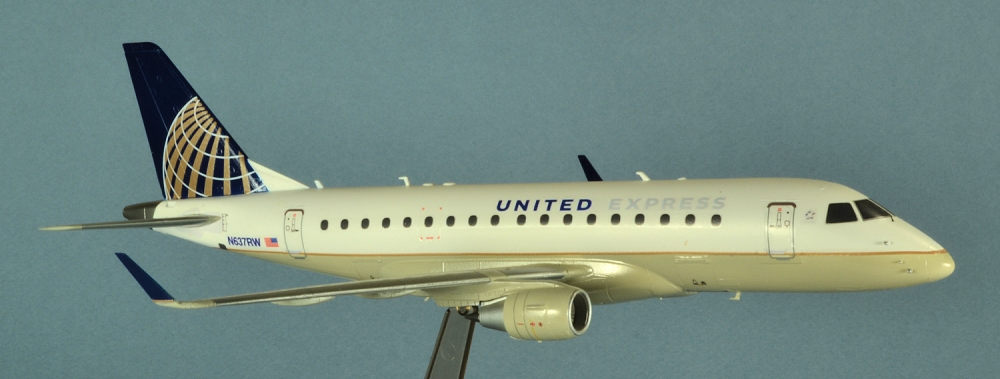
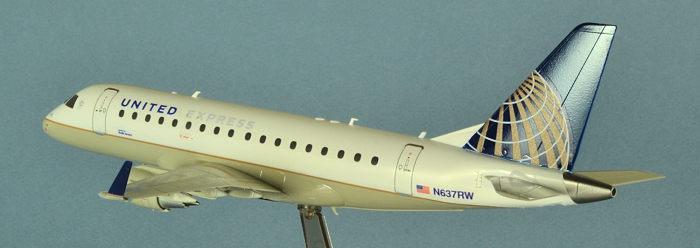
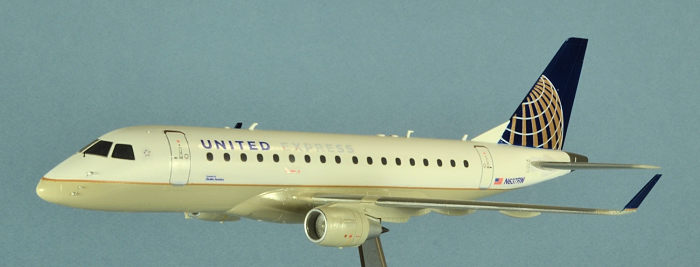
| COLORS & MARKINGS |
I chose the current United Express livery, because I like the old Continental tail markings and these jets are constantly flying over my house. I first painted the model using Mr Base White, which airbrushes beautifully when thinned with Mr Leveling Thinner. The lower surfaces are Model Master Light Gull Gray, which might be a little dark for the gray United uses, but looks okay. The tail is Tamiya X-4 Blue.
Draw
Decals is a print-on-demand aftermarket decal maker with a huge variety of
subjects. Draw uses what they call “Digital Silk” printing, which I believe is a
toner-based process that can print white. On-demand printing is probably how
airliner modelers will eventually buy most of their aftermarket decals, since
the vast number of airline liveries and aircraft make it almost impossible to
sell enough of a run of silkscree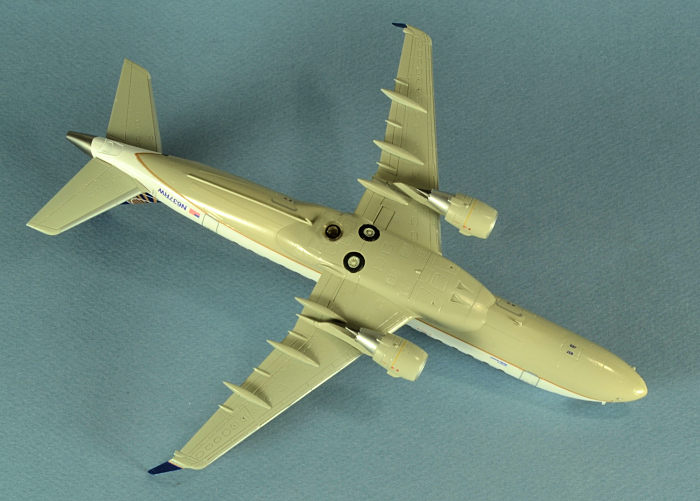 ned
decals to be profitable. The Digital Silk decals are much tougher than
ALPS-printed decals, and they don’t have the striped effect you often see with
the older process. The downside is the ink on these decals is stiff and
completely impervious to decal setting solutions. They can be a little difficult
to conform to compound curves, like over the nose of a model. The trick is to
place them on the model, and then press them down with a rag or cotton swab
dipped in near-boiling water, melting them into place. They still don’t like to
conform to panel lines, but they generally end up looking very good.
ned
decals to be profitable. The Digital Silk decals are much tougher than
ALPS-printed decals, and they don’t have the striped effect you often see with
the older process. The downside is the ink on these decals is stiff and
completely impervious to decal setting solutions. They can be a little difficult
to conform to compound curves, like over the nose of a model. The trick is to
place them on the model, and then press them down with a rag or cotton swab
dipped in near-boiling water, melting them into place. They still don’t like to
conform to panel lines, but they generally end up looking very good.
The decals fit the model perfectly. I used the kit window decals and stencils. Once the decals were dry, I sprayed the model with Microscale Clear Satin finish. I’ve found that using clear gloss makes my airliners just a little too shiny and toy-like.
I actually managed to build and paint this model without knocking off a single antenna, so I didn’t need to use any of the spares included in the kit. The only other tasks were to add the horizontal stabilizers and the socket for the stand.
| CONCLUSIONS |
This was a very enjoyable build. Hasegawa has designed this kit so that beginners can build a nice replica, but advanced modelers will find this kit to be a lot of fun, too.
Draw Decals are highly recommended. Once you get past learning the ever-so-slightly different method of applying them, they can be just as easy to use as any other water slide decals.
| REFERENCES |
Wikipedia
Airliners.net
If you would like your product reviewed fairly and fairly quickly, please contact the editor or see other details in the Note to Contributors.
Back to the Main Page Back to the Review Index Page Back to the Previews Index Page