KVZ 1/75 An-2 'Colt'
| KIT #: | 5557 |
| PRICE: | $18-24.00 |
| DECALS: | |
| REVIEWER: | Brian Baker |
| NOTES: | Ancient kit from the 60s |
| HISTORY |
The Antonov AN-2 single engine biplane is one of the unique aircraft to have entered commercial and military service after World War II. It was designed as a multi-purpose airplane, capable of being used as a transport and agricultural aircraft. It first flew in 1947, and there were at least 17 or 18 versions of the type produced in the Soviet Union, and the type was also produced in East Germany, Poland, and China. It was operated by all of the state airlines for back country service, and although a biplane, served well for many years. Specific versions included the AN-2P general purpose transport, AN-2S agricultural type, AN-2V floatplane, ZAN-2L water bomber, AN-2ZA high altitude meteorological research aircraft, and the highly modified AN-2M agricultural type.
 The type
was used by Aeroflot, and was exported to many other countries, mainly but not
entirely within the Soviet Bloc. Countries receiving the aircraft included
Guinea, Mali, China, East Germany, Mongolia, Nepal, Egypt, Cuba, Hungary, Czech
Republic, Poland, Bulgaria, Rumania, North korea, Vietnam, and Yugoslavia. The
type was extensively used in the Soviet Union for agricultural duties, and
sprayed millions of acres of farmland over the years.
The type
was used by Aeroflot, and was exported to many other countries, mainly but not
entirely within the Soviet Bloc. Countries receiving the aircraft included
Guinea, Mali, China, East Germany, Mongolia, Nepal, Egypt, Cuba, Hungary, Czech
Republic, Poland, Bulgaria, Rumania, North korea, Vietnam, and Yugoslavia. The
type was extensively used in the Soviet Union for agricultural duties, and
sprayed millions of acres of farmland over the years.
The AN-2 became the Soviet “Jack of all Trades” during its service career, being used also for air ambulance duties, parachute training, glider towing, and specialized exploration operations.
There is a lot of information on the AN-2 on line, so I’ll refer you to that, otherwise this review would have to be published in book format. Needless to say, the AN-2 was produced over a span of 45 years, from 1946 to 2001, a world record, and existed in numerous variants ranging from radial powered variants to ones powered by turbine engines. Probably a total of at least 20,000 was built over the years, and many are still flying, although quite a few are displayed in various aviation museums throughout the world.
| THE KIT |
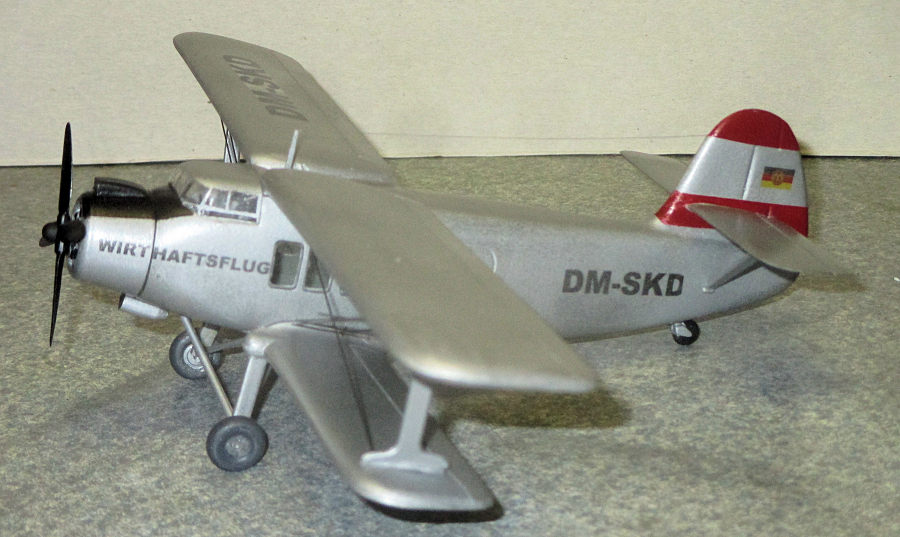
Although a number of 1/72 scale kits of the basic AN-2 have been produced in recent years, notably those of Airmodel, O’Neill, Trumpeter, and Zvezda, the KVZ kit was the earliest to appear, and it is in 1/75 scale, which I my mind is close enough to 1/72 for display purposes. Also, probably since KVZ was an East German producer, the version they produced differs from the more common types in that their plane had large rectangular windows along the sides rather than the circular windows seen on most AN-2’s.
I have had this kit in my stash for at least 40 years, and have no idea where it came from. It had been reboxed, and the decals, side window transparencies, and wheels were missing. There was a set of instructions with very minimal information, including a drawing of the assembled model with parts numbered, and a text in what appears to be Czech, as it is certainly not German. There is no date information on the instructions, and I couldn’t read a word of it. So starting in complete ignorance, I began.
 My reason
for starting this kit was that I had obtained a set of aftermarket details for
what I thought was the AN-2, but was actually the AN-12 transport. Once out on
the desk, I had to start it, as it was a challenge I refused to pass up.
My reason
for starting this kit was that I had obtained a set of aftermarket details for
what I thought was the AN-2, but was actually the AN-12 transport. Once out on
the desk, I had to start it, as it was a challenge I refused to pass up.
The kit is cast in somewhat brittle black styrene plastic, mostly overpainted in silver. It consists of two fuselage halves, 3 piece upper wing assembly, four piece lower wing assemblies, wing and tail bracing struts, a cowling with no engine detail, a four bladed curved style propeller, several scoops and exhaust stacks, a one piece horizontal stabilizer, a four piece landing gear assembly, and a clear cockpit canopy. Parts are crude, and surfaces have “rivets” imbedded in them in no apparent pattern. I removed these immediately. There was some flash, and some of the parts, notably the wing sections, required some putty to fill in the gaps. The propeller was trash when I got it, and after trying to glue it together, I eventually replaced it with a four blader from one of the Hasegawa Japanese fighter kits.
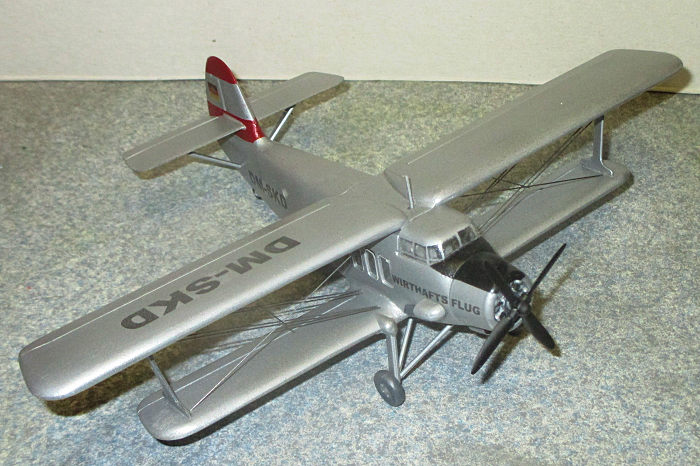
One rather interesting part provided was a set of single piece rigging wire units in “X” form, intended to be installed between the wings to simulate rigging wires. They were much heavier than the wires I could see on photos of the actual airplanes, so I passed on these, opting for very stiff thin steel piano wire.
One of my references was a series of photos I took of the AN-2 preserved at the “Yankee Air Museum” in Belleville, MI, just across from the old Ford Willow Run B-24 production plant. I grew up in this area, although the museum wasn’t established until long after I was gone. By the way, maybe with all of the to-do about renaming the Confederate Air Force Museums, this museum should maybe be renamed the “Damn-Yankee Air Museum”. But I digress.
I also went on line and found some information on this kit, including what the decals should have looked like. I found an East German registration, DM-SKD, on the box art, which I reconstructed on the computer. I could not find an actual photo of the aircraft.
| CONSTRUCTION |
After examining all of the components, and removing
the flash and irregularities, I painted the interior of the fuselage silver. I
also constructed a floor and an instrument panel for the cockpit. I also added a
pair of seats from the spares box, and a control wheel from somewhere. I decided
that I would make up the side windows from clear plastic sheet that I had,
trimming it to size and gluing it in later with white glue. I joined the
fuselage halves and the wing assemblies, and
 after
adding enough putty to fill all the cracks, assembled them to the fuselage.
Strangely, they seemed to line up pretty well. There was a lot of putty work
remaining, it that was just time consuming. I then added masking tape seat belts
and a paper instrument panel, and then placed the cockpit canopy in position. At
this time, I masked off the cockpit windows for painting.
after
adding enough putty to fill all the cracks, assembled them to the fuselage.
Strangely, they seemed to line up pretty well. There was a lot of putty work
remaining, it that was just time consuming. I then added masking tape seat belts
and a paper instrument panel, and then placed the cockpit canopy in position. At
this time, I masked off the cockpit windows for painting.
At this point, I attached the wing struts and tail struts. The tail units fit perfectly, but the wing struts did not fit on the lower wings, so I had to use some filler to get them into acceptable condition. The main struts of the landing gear looked nothing like the ones in the photos I had, so I scratch built them, using the bracing struts from the kit. There was a tailwheel provided, but it looked way too large, so I found one in the spares box and used it. No main wheels came with the kit, so I used a pair from the spares box.
The engine cowling had a cylindrical recess, but no engine detail. I found an engine in the spares box and filed it down to where it fit inside the cowling. It worked perfectly, and it actually looks like there is an engine in there.
| COLORS & MARKINGS |
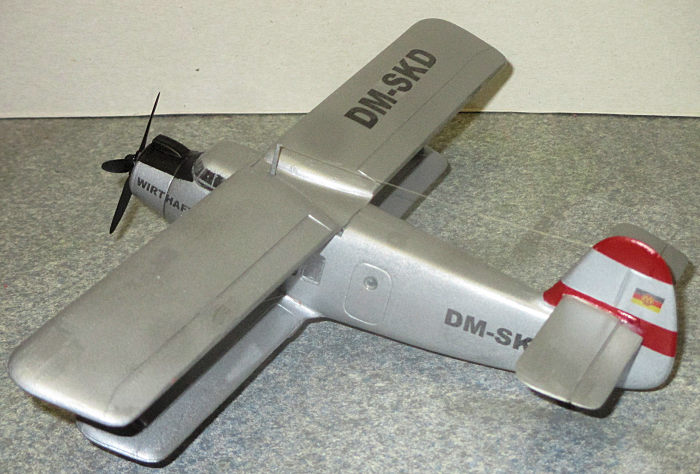
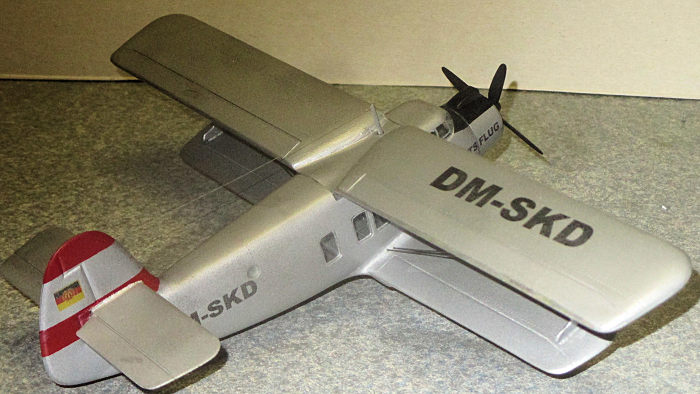
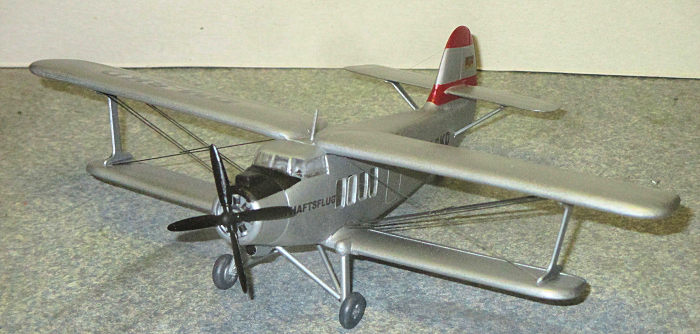
On line, I discovered the markings they intended to provide on the decals. The aircraft was overall silver, with two red stripes on the rudder, a black anti-glare on top of the cowling, and East German civil registration, DM-SKD. Along the side of the fuselage starting at the engine cowling was the phrase “WIRTSHAFTFLUG” (whatever that means) in block letters. I made decals of these in the proper sizes, and also made a couple of copies of the East German flag from an internet site, and these worked fine as decals on the rudder.
 I did the
decals on the printer and gave them a coat of clear gloss spray. I painted the
rudder red and masked off the stripes, and painted the top of the cowling flat
black and masked it off. I then painted the entire airplane silver. After
installing the wheels and tailwheel, I applied the decals in their proper
positions.
I did the
decals on the printer and gave them a coat of clear gloss spray. I painted the
rudder red and masked off the stripes, and painted the top of the cowling flat
black and masked it off. I then painted the entire airplane silver. After
installing the wheels and tailwheel, I applied the decals in their proper
positions.
Before installing the rigging, I installed the side windows. I used fairly thick clear plastic, and cut the pieces to size, gluing them in with white glue. I thought they looked pretty good. I used Chrystal Clear for the two small circular windows.
Since I was not using the plastic rigging, I cut some pieces of stiff piano wire and started installing the landing and flying wires. According to the photos I had, there was only one set of landing wires, and I opted for only one wire going from the top fuselage to the lower wings. I did parallel wires for the other set, and installed a wire brace about halfway, where the wires intersected. There were no tail bracing wires, although the plane did have a wire low frequency antenna running from a mast above the fuselage to a position on the leading edge of the vertical stabilizer.
| CONCLUSIONS |
Honestly, this kit is a really crude one, and given its age, should be considered a true antique model kit. That said, it wasn’t hopeless, and although the result was not spectacular, it was, in my mind at least, somewhat acceptable. I don’t have any other kits of this aircraft at the moment, so this one will have to do. If you are planning to buy one of these, be aware of its limitations. If you border on the masochistic, you might just enjoy the challenge. If you have one in your stash, don’t throw it away. Hope springs eternal……..
19 March 2019
Copyright ModelingMadness.com
If you would like your product reviewed fairly and fairly quickly, please contact the editor or see other details in the Note to Contributors.
Back to the Main Page Back to the Review Index Page Back to the Previews Index Page