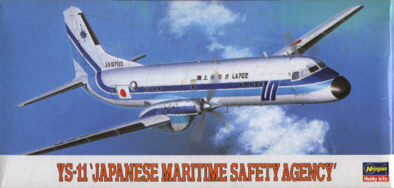
| KIT: | Hasegawa 1/144th NAMC YS-11 |
| KIT # | LK1 |
| PRICE: | Y1800, about $22.00 |
| DECALS: | Japan Maritime Safety Agency |
| REVIEW & PHOTOS BY: | Andrew Abshier |
| NOTES: | One of eleven different boxings of this aircraft currently available |
| KIT: | Hasegawa 1/144th NAMC YS-11 |
| KIT # | LK1 |
| PRICE: | Y1800, about $22.00 |
| DECALS: | Japan Maritime Safety Agency |
| REVIEW & PHOTOS BY: | Andrew Abshier |
| NOTES: | One of eleven different boxings of this aircraft currently available |
|
HISTORY |
In 1956 the Japanese Ministry of Trade and Industry began feasibility studies for the design and production of a new airliner. The Ministry directed the major Japanese aircraft producers to join forces in producing the aircraft; the amalgamation was known as the Nippon Air Manufacturing Corporation (NAMC). What resulted was a 60 passenger pressurized airliner of conventional design, powered by two Rolls-Royce Dart turboprop engines. The aircraft was first flown in 1962; after a protracted test program, the YS-11 finally entered airline service in April 1965.
In marketing airliners, timing is as crucial to a type's success as is the relative merits of the aircraft. Unfortunately for NAMC, the YS-11 was ready to enter service at a time when the Fokker/ Fairchild F-27s were already well-established. Even the Japanese carriers showed little interest in the YS-11, which was considerably more expensive than the F-27. After appeals by the Ministry to the patriotism of the airlines--and a more negotiable price--All Nippon Airways and Toa Domestic Airlines finally signed on. Around that time overseas sales finally started to come in, including an order from Piedmont Airlines in the United States.
Eventually only 168 aircraft were produced, the majority sold to Japanese
operators, both government and civil. Most of the currently active YS-11s
are in the home islands, with an additional mini-stronghold in the Philippines.
The Japanese carriers that were so reluctant to sign on to the YS-11 order book
have turned out to be the most loyal users of the YS-11, and 35 years after its
initial revenue service, it is still possible to fly on a YS-11 in Japan.
|
THE KIT |
The YS-11 is Hasegawa's first 1/144th scale kit, and it is a nice one. Molded in white plastic, the basic YS-11 aircraft is made up from 49 parts. Depending on which boxing is chosen, there are additional parts of the "add-on" variety for the military or maritime patrol versions. Thus, an airliner can be made from any boxing of the kit with no modifications needed.
Surface detail is entirely engraved and very nicely done. The complex NACA vents, scoops, and outlets on the RR Dart nacelles are especially nice. The propellers are molded to practically scale thickness, which is both a blessing and a curse; they look great, but they are fragile and need special care to be worked on (one of my YS-11 kits came with a broken-off propeller blade). Propeller spinners are separate parts, and are easy to lose when cut from the sprue, as I found out!
Landing gear and wheels are nicely done, but there is no detail in any of the wheel wells.
Trailing edges on all flying surfaces are agreeably sharp. There is a slight engineering fault on how the wing halves are done, which I'll describe in the Construction section.
The fuselage is molded solid with no window openings, but a clear windshield
is provided. With many variations in window and door configurations (and
that's just counting the airliners), it makes sense that Hasegawa chose decals
for cabin windows. There is even a tiny amount of flight deck
detail--two seats molded integrally with the forward bulkhead and cockpit floor!
If you build the model with a clear windshield, once the frames are painted
those two seats are about all you'll see.
|
CONSTRUCTION |
Assembly of this kit is mostly very straightforward. Virtually everything fits together as well as any modern Hasegawa kit out there. Most of what I have to write about are in addressing the few tricky areas in construction.
The fuselage has all of the antennas and the rotating beacon (located halfway down the upper fuselage) molded to one half. These should all be cut off; the lower fuselage antennas were not used on YS-11 airliners in the United States, so I discarded those. I did carefully section off the rotating beacon for use later.
The wings are the only areas where the engineering is less than perfect. The wing halves are molded so that the trailing edge is in one piece. The join line on the underside coincides with the aileron line, but runs through the single-panel flaps rather than following their join line! With the engineering care lavished on the rest of the kit, I was a bit disappointed with Hasegawa for doing the join line in this manner. Careful assembly helped minimize the filling and sanding I had to do, but it still took some help with CA glue to get everything smoothed out.
Though not 100% accurate, I boxed in the main gear wheel wells with 5 thousandths plastic. It was very easy to do, and gave the wheel wells a more finished look.
The forward part of the nacelles are in three parts: the nacelle halves, and
the engine front. The halves are molded with part of the leading edge
included, and the join lines match the panel lines on the actual aircraft.
There are many surfaces to align when fitting the forward nacelles, so fitting
them is tricky. After building a couple of YS-11 kits, I've come up with a
procedure that helps get everything in place:
1. Tack glue the forward most 2-3mm of the nacelle halves.
2. Trial fit the nacelles to the wings.
3. Shim the backs of the nacelles using thick paper or 5 thousandths
plastic where they join the wing to spread the wing root sections tight against
the wings themselves. This will leave a gap along the top of the nacelle,
but this gap is easy to fill and sand, much more so than the other seams.
4. Remove the nacelles, apply slow-setting CA glue, and reset. The
slow setting glue will give time for adjustments. Once all is right, hold
in place until the glue sets.
Once over those hurdles, no worries! The fit of the stabilizers to the fuselage was perfect, and the wing to fuselage fit was nearly so; I had to smooth off a slight contour fault on the underside of one wing/fuselage joint, but the joints themselves were very tight and no filling was required.
Painting and decaling came next (see next section). Once that was
complete, I installed the landing gear, landing gear doors, and propellers.
I then tried to add the rotating beacon, but it shot out of my tweezers for
parts unknown! The blade antenna was made from 5 thousandths sheet
plastic; I lost my first one the same way, but made another.
| PAINT & DECALS |
All areas of the model that would be finished in natural metal were polished
with Blue Magic silver polish.
Once I got everything polished out to my satisfaction, I masked off the lower
fuselage and wings for painting of the white on the upper fuselage and
stabilizers. I first airbrushed on Floquil Reefer White as a primer.
After filling and sanding some small faults, I resprayed the primer and allowed
it to dry 24 hours. I then followed with my favorite gloss paint mix: 60%
Testors Insignia White with 40% Aero Gloss dope thinner. The dope thinner
acts as a fast-evaporating carrier for the enamel paint, and with good
airbrushing technique eliminates any chance of paint running. I airbrushed
on 3 light coats of white, then allowed it to dry 24 hours once more. Once
dry, I pulled the masking tape, and gently wet-sanded the paint with used 1200
grit sandpaper to eliminate the slight "orange peel". The paint
was then polished back out using Flitz non-abrasive polish.
After masking off the white areas, all other areas were finished in SnJ Spray
Metal according to the manufacturer's instructions. After polishing out
the SnJ, dissimilar panels were finished using various tones of
Testor's Metalizer. I used a combination of Tamiya tape and refrigerated
(yes, refrigerated--the tape then leaves no residue) Scotch tape to mask off the
panels, and no SnJ was pulled up after I removed the tape except for one small
area which was easily refinished.
The propellers were finished in Testor's Modelmaster Light Ghost Gray FS 36375, with spinners finished in Testor's non-buffing Aluminum. In preparation for decaling I applied Future floor wax to the blades using a cotton swab.
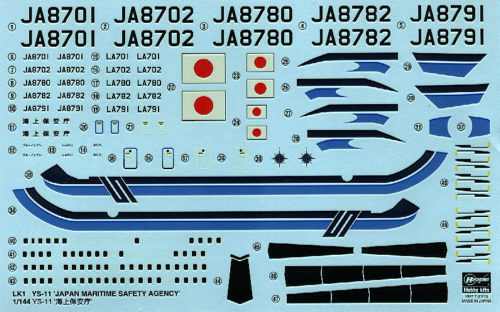
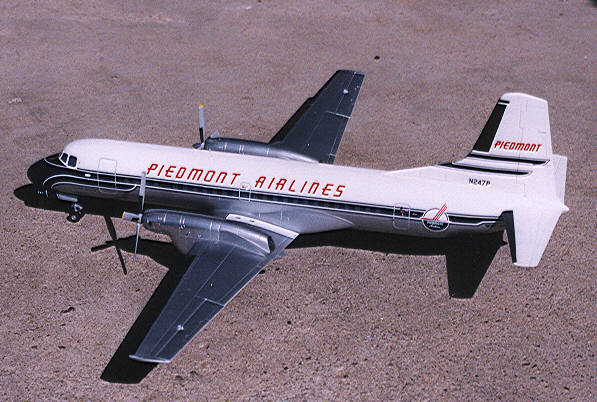
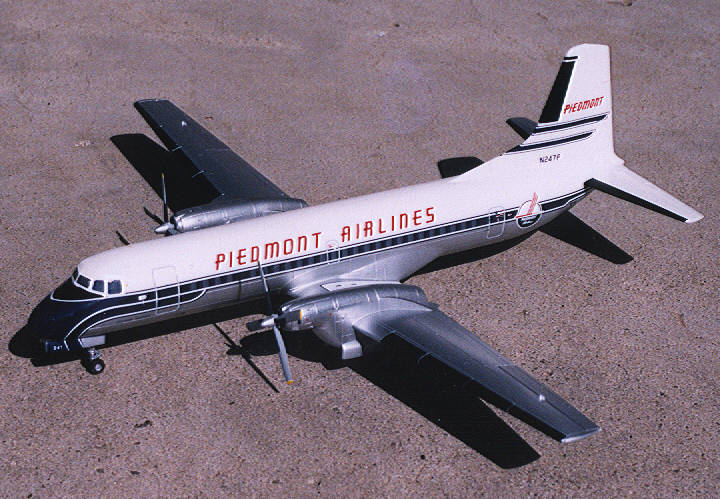
The decals in this boxing are for the Japan Maritime Safety Agency. The sheet is printed on standard Hasegawa decal film (read: thickish) but includes some useful bits for airline schemes, such as propeller markings and de-icer boots. I chose to do a Piedmont YS-11 in delivery colors from Liveries Unlimited sheet 44-123; decaling this complex livery is a story in itself, and I have written a separate review of the sheet that can be found in the Decals section.
Once the decals were on, I was left with a dilemma: how to clearcoat the
decals without compromising the character of the natural metal finish. I
learned from members of the Airline Modeler's Digest that Future floor wax could
be applied in specific areas using a cotton swab! Following their
procedure, I dipped a swab into the Future, rolled off the excess around the
neck of the bottle, and applied it in long strokes down the upper fuselage and
stabilizers. Future's unique self-leveling properties came to the fore
here, and the finish dried perfectly smooth! Best of all, I didn't have an
airbrush to clean.
|
CONCLUSIONS |
This is a great little airliner kit, and aside from the few small challenges mentioned, it is a very easy build! With no less than 11 different boxings available form Hasegawa at this writing (May 2000) and 11 different aftermarket airliner decals, it should be no problem finding the right YS-11 scheme for you!
I would recommend that anyone wanting to build a YS-11 airliner should buy one of the three boxings with Liveries Unlimited decals: kits HSG10114 (Southwest Air Lines-Okinawa), HSGLK3 (Japan TransOcean Air), or HSGLK2 (ANK/Air Nippon). These sheets are printed on Microscale decal film, and include all of the accessory bits (propeller markings, de-icer boots, overwing exit walkways) missing from most of the aftermarket airliner sheets out there. The liveries given are nice, so if you don't want to spend money on aftermarket decals you would still come up with an attractive YS-11.
There is another 1/144th YS-11 kit, by Doyusha. Costing about half as
much as the Hasegawa kit, it is less than half as good! Small details,
when present at all, are clunky looking, surface scribing is vintage Matchbox
Trench Works, and it has shape problems, especially near the aft fuselage.
It really isn't worth saving with the Hasegawa kit around.
|
REFERENCES |
Personal photo archives
Airliners Magazine no. 38, March/April 1996
Back to Main Page