|
KIT: |
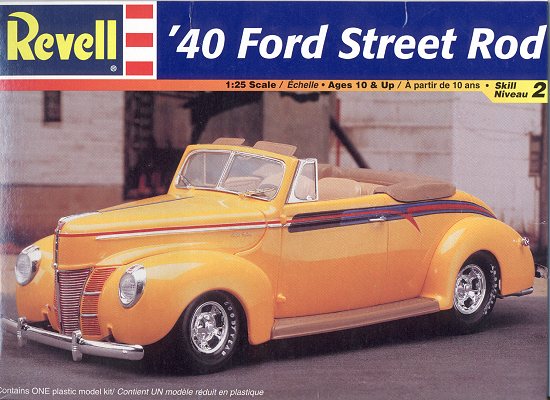
Revell 1/25 scale 1940 Ford Street Rod Convertible |
|
KIT # |
2344 |
|
PRICE: |
$15.00 |
|
DECALS: |
See review |
|
REVIEW & PHOTOS: |
|
|
NOTES: |
Modern Street Rod of a Classic Car |
|
HISTORY |
The 1940 Ford is often considered to be the best looking Ford ever built. With sealed beam headlights, longer front spring, a new front torsion bar ride stabilizer, and other improvements, the car represented a big jump in Ford automotive design. The Deluxe convertible coupe was the only convertible built by Ford in 1940. It featured a new power soft top and cost $849!
Like the1932 Ford, the 1940 Ford is one of the most popular vehicles for customizing or “hot rodding”. With great styling lines that can be altered in numerous ways, and plenty of room under the hood for virtually any type of motor, the vehicle naturally lends itself to a variety of street rodding options. Along with its sister the coupe, the 1940 Ford convertible is a prized possession for those that own them.
|
THE KIT |
 Revell’s 1940 Ford Convertible Street Rod (Kit No. 2344) is
essentially a reboxing of the Monogram Pro Modeler 1940 Ford Convertible (Kit
No. 5961). In fact, the parts that make the kit into a street rod are included
in the Pro Modeler box, along with the exact same instructions, which are the
last half of the extensive instruction booklet included in the kit. The street
rod version includes a lowered
suspension, HiPro flat head V-8 engine with dual 2-barrel carburetors, chromed
engine parts, and a custom dual exhaust system. A custom ragtop is included
along with a folded down boot for displaying the car with its top down. The
decals include some wild flames that can make for a really interesting paint
scheme. Two different sizes of Goodyear tires are included to be mounted on
chrome custom rims.
Revell’s 1940 Ford Convertible Street Rod (Kit No. 2344) is
essentially a reboxing of the Monogram Pro Modeler 1940 Ford Convertible (Kit
No. 5961). In fact, the parts that make the kit into a street rod are included
in the Pro Modeler box, along with the exact same instructions, which are the
last half of the extensive instruction booklet included in the kit. The street
rod version includes a lowered
suspension, HiPro flat head V-8 engine with dual 2-barrel carburetors, chromed
engine parts, and a custom dual exhaust system. A custom ragtop is included
along with a folded down boot for displaying the car with its top down. The
decals include some wild flames that can make for a really interesting paint
scheme. Two different sizes of Goodyear tires are included to be mounted on
chrome custom rims.
The majority of the kit is molded on 7 white sprues. The body is molded separately and packaged in the plastic bag with these seven sprues. Taillights are molded in clear red plastic. There is one sprue of chrome-plated parts and a clear sprue for windows and headlights. Finally, the box contains a decal sheet with flame decals, instrument panel decals, and several sets of license plates.
This is a welcome addition to the street rod kit line, as the other two 1940 Ford kits, Lindberg’s and AMT’s, either have been around for a long time or are not quite up to the standards of this kit. Once again, Revell has demonstrated its “stuff” in the plastic car model world!
|
CONSTRUCTION |
 As with most of my car models, I assembled the body first,
because it needed to be painted and set aside for a few days to dry. I elected
to install the fender aprons (parts 109 and 110) and the firewall (part 33) into
the engine compartment, and also attached the rear fenders (parts 10 and 11) to
the body. At this point, the completed body went to the paint shop and received
several coats of Testors Gloss Guards Red. The body was then set aside to dry on
its coat hangar stand. At this time, I also painted the underside of the
interior floor (part 37) Guards Red, as this would be showing above the frame
when viewed from underneath the model.
As with most of my car models, I assembled the body first,
because it needed to be painted and set aside for a few days to dry. I elected
to install the fender aprons (parts 109 and 110) and the firewall (part 33) into
the engine compartment, and also attached the rear fenders (parts 10 and 11) to
the body. At this point, the completed body went to the paint shop and received
several coats of Testors Gloss Guards Red. The body was then set aside to dry on
its coat hangar stand. At this time, I also painted the underside of the
interior floor (part 37) Guards Red, as this would be showing above the frame
when viewed from underneath the model.
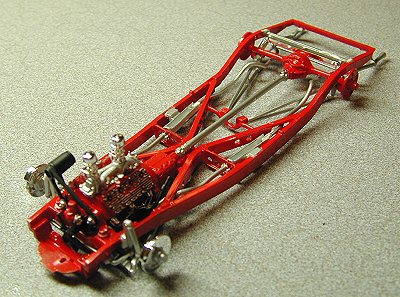
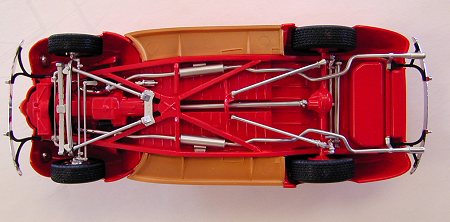
The next thing assembled was the frame. In keeping with the
unicolor approach that is in vogue today among street rodders, I opted to
continue my Guards Red theme on the frame. Various parts that would be attached
to the frame (i.e., rear differential, ladder bars, and exhaust system) were
spray painted with Testors non-buffing aluminum. Once the frame was dry, all of
these parts along with the dropped front axle, front
 stabilizer bar, shocks and
front spring/radius rods were attached per the instructions. The front and rear
disc brakes were left chromed and the calipers were brush painted with Testors
flat black. These were then glued to the front and rear axles.
stabilizer bar, shocks and
front spring/radius rods were attached per the instructions. The front and rear
disc brakes were left chromed and the calipers were brush painted with Testors
flat black. These were then glued to the front and rear axles.
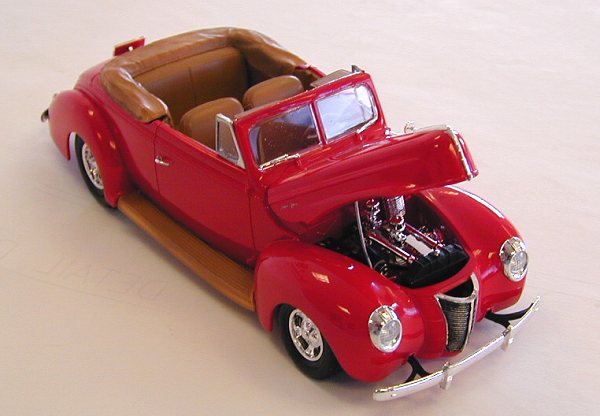
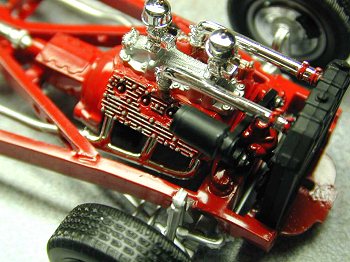
The next subassembly I tackled was the engine. The engine block halves were assembled and given a good gloss coat of Guards Red. After drying, the various chromed parts such as the cylinder heads, headers and fuel pump block off plate were attached. The intake manifold was painted with Testor’s Metallizer Aluminum and attached to the engine. The kit carburetors, which are chromed, were then mounted to the aluminum painted intake manifold. Finally, the distributor and air cleaners were glued to the engine assembly. Since this model was being built as a Christmas present for a relative of mine (hope he isn’t reading this now), and had to travel with me over the Thanksgiving holidays, I elected not to wire the engine. Nothing like feeling pressure while constructing a model!
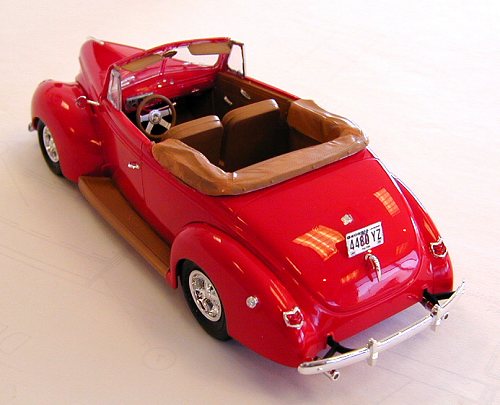
The next subassembly addressed was the interior. This was assembled per the kit instructions and given a coat of Model Master Wood paint to simulate a tan leather color. The convertible boot was also sprayed this color. The dashboard was sprayed Guards Red, and the instrument panel decal was placed in the panel cutout on the dashboard. The dashboard instrument housing, which is molded in clear plastic, was painted black around the gauge faces and installed over the decal so the instruments show through the clear faces. After installation of the dashboard and steering column/wheel, I set this subassembly aside to dry. The wheels and tires were assembled last.
|
PAINTING AND FINISHING |
 As stated above, the model was spray painted with Testors Model
Master Guards Red, cut with lacquer thinner, and allowed to dry for several
days. I then broke out my
MICRO-MESH surface restoration kit and wet sanded the body finish. As usual, I
got a little too carried away and managed to sand through on a door edge to bare
plastic, so some careful masking and a quick reshoot of the body color, and I
was back in business. Once all the rough places were sanded out, I used “The
Treatment” Model Wax to put a high shine on the finish (I generally do this with
a nice cloth rag, wrapped around my finger and moistened with “spit” – must be a
throwback to my old military days!).
As stated above, the model was spray painted with Testors Model
Master Guards Red, cut with lacquer thinner, and allowed to dry for several
days. I then broke out my
MICRO-MESH surface restoration kit and wet sanded the body finish. As usual, I
got a little too carried away and managed to sand through on a door edge to bare
plastic, so some careful masking and a quick reshoot of the body color, and I
was back in business. Once all the rough places were sanded out, I used “The
Treatment” Model Wax to put a high shine on the finish (I generally do this with
a nice cloth rag, wrapped around my finger and moistened with “spit” – must be a
throwback to my old military days!).
Before installation, the running boards were sprayed with Model Master Wood to match the convertible top boot. The kit glass was then glued into the body using white glue, and the interior glued to the body. The remaining exterior chrome pieces (e.g., bumpers, door handles, gas tank gap), clear headlight lenses, and clear red taillights were then mounted to the kit.
Since my relative lives in Georgia, I crafted a 1/25th scale Georgia-Fulton County license plate using Adobe Illustrator and my color inkjet printer to attach to the rear bumper. I did this by going on the internet, downloading some images of Georgia plates from plate collector websites, clipping them into Illustrator, and then carefully tracing them (very time consuming, but worth the effort). Matching the colors is no sweat using Illustrator.
CONCLUSIONS |
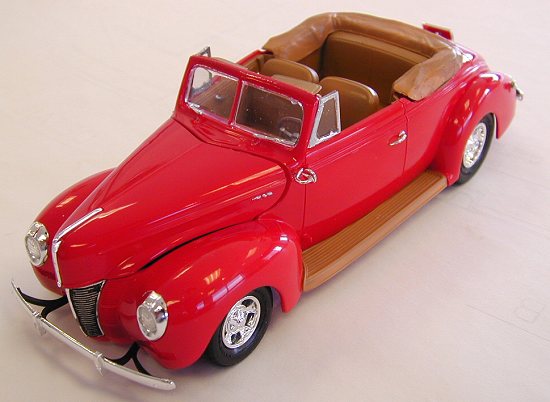 The Revell 1940 Ford convertible is a beautiful kit. The kit goes
together well with minimal fit problems or assembly hassles, and is way more
detailed than previous kits of this classic vehicle. I will probably build
another, this time as a stock version. I highly recommend this kit as an
enjoyable car modeling project.
The Revell 1940 Ford convertible is a beautiful kit. The kit goes
together well with minimal fit problems or assembly hassles, and is way more
detailed than previous kits of this classic vehicle. I will probably build
another, this time as a stock version. I highly recommend this kit as an
enjoyable car modeling project.
If you would like your product reviewed fairly and quickly by a site that has thousands of visits a day, please contact me or see other details in the Note to Contributors.