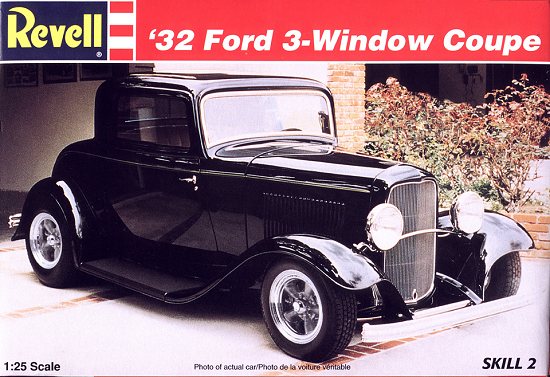
Revell 1/25 '32 Ford 3-Window Coupe
|
KIT # |
7605 |
|
PRICE: |
$11.98 |
|
DECALS: |
See Review |
|
REVIEW & |
Blair Stewart |
|
NOTES: |
` |
|
HISTORY |

In 1931 the Ford Motor Company was still producing the Model A, even though its sales were sagging. The staff at Ford finally convinced Henry Ford that car shoppers were now looking for more luxury in vehicles, and the Model A was history. Ford began development of a new model, with the idea of including more luxury as well as more power and more elegant lines. The result was the 1932 Ford or "Deuce", which was faster, more comfortable, and more refined than other available cars, yet still affordable. Among the innovations in the new vehicle was Ford’s first production flathead V-8 motor.
 The 1932 Ford 3-Window coupe is
probably the most popular vehicle for customizing or "hot rodding"
that has ever come along in the entire history of American automobile
production. The basic simplicity of the Deuce made it easy to strip it down and
modify it. The vehicle has been sought after since customizing vehicles came
into vogue, and modern day, new full-size versions of the vehicle are produced
in kit form for the customizer who can’t find an original vehicle to modify.
The 1932 Ford 3-Window coupe is
probably the most popular vehicle for customizing or "hot rodding"
that has ever come along in the entire history of American automobile
production. The basic simplicity of the Deuce made it easy to strip it down and
modify it. The vehicle has been sought after since customizing vehicles came
into vogue, and modern day, new full-size versions of the vehicle are produced
in kit form for the customizer who can’t find an original vehicle to modify.
These new kits contain everything from replica fiberglass bodies to completely new and specially designed chasses and suspension systems. The rod builder can pick and choose from a variety of custom parts, all the way from completely customized modern V-8 engines, air conditioning, automatic or manual transmissions, stereo systems, and trick rear ends. Add a set of modern day alloy or chrome wheels and a nice set of tires, and you’ve got that great rod look so unique to the American automotive scene.
|
THE KIT |
 Since AMT released its 1/25th
scale 3-n-1 version of the ’32 Ford Coupe in 1959 (Kit No. 132), a variety of
’32 Ford kits have appeared on the modeling scene. However, Revell’s
3-window coupe, first produced in 1996, raised the bar significantly. Packaged
as a fully customized street rod, the kit comes with modern customizing features
such as a Ford 302 CID engine, a modern suspension system, a custom leather
interior, dual exhaust system, and a set of American mag wheels and Goodyear
tires. The modeler is also given the option of constructing either a full fender
or "highboy" (fenderless) version of the vehicle (in 1997,
Revell-Monogram released its ’32 Highboy roadster version of this kit, No.
7625).
Since AMT released its 1/25th
scale 3-n-1 version of the ’32 Ford Coupe in 1959 (Kit No. 132), a variety of
’32 Ford kits have appeared on the modeling scene. However, Revell’s
3-window coupe, first produced in 1996, raised the bar significantly. Packaged
as a fully customized street rod, the kit comes with modern customizing features
such as a Ford 302 CID engine, a modern suspension system, a custom leather
interior, dual exhaust system, and a set of American mag wheels and Goodyear
tires. The modeler is also given the option of constructing either a full fender
or "highboy" (fenderless) version of the vehicle (in 1997,
Revell-Monogram released its ’32 Highboy roadster version of this kit, No.
7625).
On opening the box, one is greeted by four sprues molded in white plastic containing the majority of kit parts. The body is molded separately and packaged in the plastic bag with these four sprues. Taillights are molded in clear red plastic. There are two sprues of chrome-plated parts and a clear sprue for windows and headlights. Finally, the box contains a decal sheet with flame decals and two sets of license plates.
In its August 2000 issue, Scale Auto Enthusiast magazine announced that its readers had named the Revell ‘32 Ford 3-window coupe as "kit of the millennium." This is a fitting tribute to a great looking, well engineered model car kit.
|
CONSTRUCTION |
Although my primary modeling
realm is aircraft, I have enjoyed building model cars periodically since my
first AMT kit in 1960: the 1940 Ford Coupe. When I first started building these
cars, one just left them in the bare, black plastic they were produced in, as
none of us had a clue about how to apply a decent paint job to a plastic car
kit. Then came a revolutionary
 development in the modeling business: spray cans!
I remember winning the one and only model contest I ever entered because I was
the only one who had successfully applied a sprayed-on coat of lacquer paint,
and it was Pactra’s candy apple green to boot, which required a base coat of
gold paint. I learned fairly early that getting a good, smooth gloss coat on a
plastic model kit was a little bit trickier than applying matt finishes, but an
absolute key technique for a presentable model (more about this later).
development in the modeling business: spray cans!
I remember winning the one and only model contest I ever entered because I was
the only one who had successfully applied a sprayed-on coat of lacquer paint,
and it was Pactra’s candy apple green to boot, which required a base coat of
gold paint. I learned fairly early that getting a good, smooth gloss coat on a
plastic model kit was a little bit trickier than applying matt finishes, but an
absolute key technique for a presentable model (more about this later).
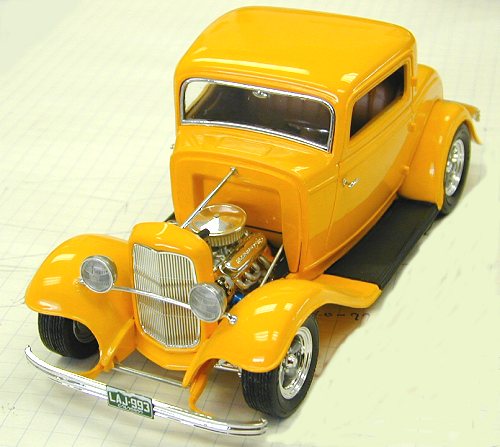
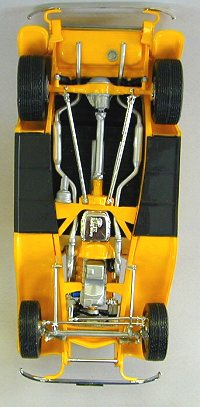
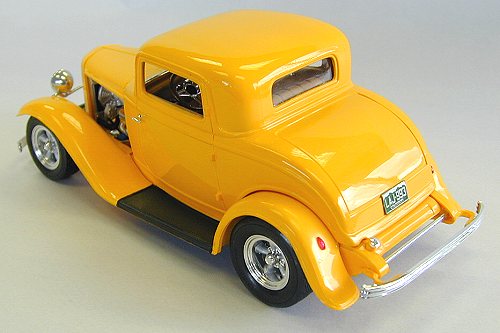
My first major decision was whether to detail the kit or build it box stock. Even though there are literally thousands of aftermarket kits and parts for scale model cars, I opted for the later approach. I decided to paint my model in the "unicolor" theme that is so popular among hot rodders today, and chose Testor’s Model Master Chrome Yellow as my paint theme.
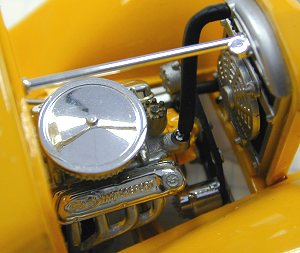
With the engine set aside to dry,
I began working on the chassis and suspension system. In keeping with my
unicolor theme, the chassis, rear axle and frame cross
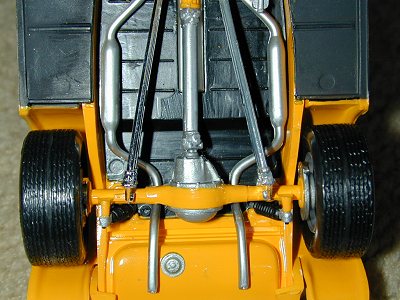 member were spray painted
chrome yellow and then the various chrome pieces from the kit were attached. I
decided to shave about 3/16" off the tab that mounts the front axle (part
28) to the frame to give the car that "in the weeds look prior to mounting
the axle to the frame.
member were spray painted
chrome yellow and then the various chrome pieces from the kit were attached. I
decided to shave about 3/16" off the tab that mounts the front axle (part
28) to the frame to give the car that "in the weeds look prior to mounting
the axle to the frame.
I then painted the bottom of the model’s interior flat black to provide a contrast when the kit was assembled. At this stage, the exhaust system was given a coat of aluminum paint and glued to the chassis. The engine was then mounted to the chassis and the drive shaft, painted MM steel, was connected between the transmission and the rear differential housing.
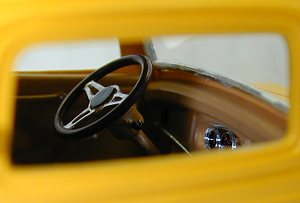
The next subassembly tackled was
the interior. This was assembled per the kit instructions and given a coat of
Model Master Wood paint to simulate the tan leather color that is an option in
so many luxury 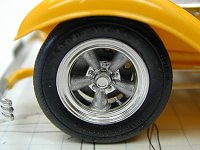 automobiles today. The dashboard instruments were painted black
and highlighted in silver, white and red. After installation of the dashboard
and steering column/wheel, I set this subassembly aside to dry. The wheels and
tires were assembled next, and the center wheel spokes were brush painted with
MM aluminum.
automobiles today. The dashboard instruments were painted black
and highlighted in silver, white and red. After installation of the dashboard
and steering column/wheel, I set this subassembly aside to dry. The wheels and
tires were assembled next, and the center wheel spokes were brush painted with
MM aluminum.
|
PAINTING AND FINISHING |
 For some modelers (especially
those who concentrate on aircraft and armor), achieving a realistic gloss finish
on a model car seems to be a roadblock to their construction. I, too, have found
this an obstacle, until I threw my ears back and charged ahead about 12 years
ago and decided to get back into car modeling. Two developments make this task
easier than it used to be: modern airbrushes and gloss paint finishing kits.
Another key I have found is simple: I use enamel-based paints thinned with
lacquer thinner.
For some modelers (especially
those who concentrate on aircraft and armor), achieving a realistic gloss finish
on a model car seems to be a roadblock to their construction. I, too, have found
this an obstacle, until I threw my ears back and charged ahead about 12 years
ago and decided to get back into car modeling. Two developments make this task
easier than it used to be: modern airbrushes and gloss paint finishing kits.
Another key I have found is simple: I use enamel-based paints thinned with
lacquer thinner. 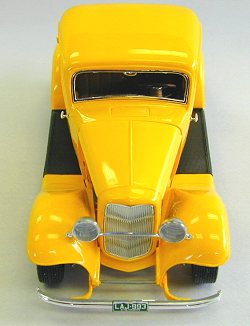 I’m not sure of all the chemistry here, but I do know that
using lacquer thinner does two things: it cuts down the drying time for the
enamel paint; and it seems to reduce the tendency of enamel paints for an
"orange peel" finish. A final key technique for achieving high gloss
finishes is that, unlike spraying flat colors, you must spray gloss coats on
"wet" (i.e., you have to flow the paint on the model and let it build
up much faster than when using flat finishes). This can be a little tricky
because if you spray your paint on too wet, you risk a run (paint pooling and
then dripping off your model or puddling up where you don’t want it to). Like
any endeavor requiring skill and technique, practice is the key, and any old
piece of styrene plastic can be used for this purpose.
I’m not sure of all the chemistry here, but I do know that
using lacquer thinner does two things: it cuts down the drying time for the
enamel paint; and it seems to reduce the tendency of enamel paints for an
"orange peel" finish. A final key technique for achieving high gloss
finishes is that, unlike spraying flat colors, you must spray gloss coats on
"wet" (i.e., you have to flow the paint on the model and let it build
up much faster than when using flat finishes). This can be a little tricky
because if you spray your paint on too wet, you risk a run (paint pooling and
then dripping off your model or puddling up where you don’t want it to). Like
any endeavor requiring skill and technique, practice is the key, and any old
piece of styrene plastic can be used for this purpose.
A final gloss coat painting tip: I generally fashion a support bracket for my model car bodies out of an old coat hanger: you just bend it to shape so that it can be wedged up under the car body and still sit on a flat surface. This allows you to rotate the body as you paint it and keeps your slimy fingers off the finish until it is dry!
With that background, I sprayed the body, radiator shell, rear gas tank, and fenders MM chrome yellow. And now comes the real step to achieving a high gloss finish. After letting the parts dry a few days (I live in Colorado, so gloss enamel paint jobs tend to dry out fairly quickly, but if you live in a more humid area, you might want to wait a week or more), I broke out my MICRO-MESH surface restoration kit. This kit comes with fine abrasive paper, ranging in grit from 2400 to 8000, a sanding block, a polishing cloth, and a bottle of Micro-Gloss liquid abrasive. Depending on how good the initial gloss coat is, one starts out with the lower grits and moves on up to the higher grits. I generally wet sand my car finishes using running water in a sink, as this prevents the abrasive from getting clogged by the loosened paint. (Be careful not to sand through the paint; however, if this does happen, reshoot the gloss paint over the bare spots, let it dry, and then resand).
 As a final finishing step, rather
than the Micro-Gloss, I like to use "The Treatment" Model Wax, which
is a pre-softened Carnauba wax available at most well-stocked hobby shops (I
suppose one could use Johnson’s furniture wax as well, but I have not
personally tried this). The wax is mildly abrasive and allows you to rub out the
remaining pits and scratches in the finish. I generally use the MICRO-MESH
polishing cloth as a final finishing tool, although I think that a good piece of
felt will achieve the same results.
As a final finishing step, rather
than the Micro-Gloss, I like to use "The Treatment" Model Wax, which
is a pre-softened Carnauba wax available at most well-stocked hobby shops (I
suppose one could use Johnson’s furniture wax as well, but I have not
personally tried this). The wax is mildly abrasive and allows you to rub out the
remaining pits and scratches in the finish. I generally use the MICRO-MESH
polishing cloth as a final finishing tool, although I think that a good piece of
felt will achieve the same results.
After these subassemblies dried, I masked off the running boards and sprayed them satin black for that rubber look. The kit glass was then glued into the body using white glue, and the interior glued to the body. After gluing the fenders to the chassis, I glued the body to the fenders and chassis. The remaining exterior chrome pieces (e.g., bumpers, door handles, gas tank gap), clear headlight lenses, and clear red taillights were then mounted to the kit.
As a final touch, I crafted a 1/25th scale Colorado license plate using Adobe Illustrator and my color inkjet printer to attach to the front and rear bumpers. I did this by going on the internet, downloading some images of Colorado plates from plate collector websites, clipping them into Illustrator, and then carefully tracing them (very time consuming, but worth the effort). Matching the colors is no sweat using Illustrator. One can even craft custom plates using this technique (for these, the trick is finding a font that matches the font used on most license plates; since I haven’t yet discovered what the real font is, I default to Arial or, for us Mac types, Helvetica, which, in 1/25th scale, looks pretty close).
|
CONCLUSIONS |
As Kevin Arnold’s voice-over on "The Wonder Years" would say, "and there you have it." This was a most enjoyable car kit to build and paint, and produces a great replica of the premier American hot rod of choice. Pick up a couple of them and give them a try. You won’t regret it!

|
REFERENCES |
If you would like your product reviewed fairly and fairly quickly, please contact the editor or see other details in the Note to Contributors.