| KIT #: | 126135 |
| PRICE: | $30.00 |
| DECALS: | One option |
| REVIEWER: | Ben Brown |
| NOTES: |
| HISTORY |
Based on the Porsche 908, the 917 was designed to take advantage of a Commission Sportive Internationale (CSI) rules change for 1968 through 1971 that was intended to slow down cars like the 7-litre V8 Ford GT40s and 4-litre V12 Ferraris at fast tracks, such as Le Mans. Engine capacity was reduced to 3 litres, in hopes of enticing manufacturers who were already building 3-litre engines to move into endurance racing. Since most manufacturers couldn’t switch production immediately, 5-litre Group 4 cars were allowed, as long as at least 50 cars were manufactured. This was reduced to 25 cars, when it was realized there would be few entrants. Ferrari did not participate in the 1968 season, so most races went to Porsche’s 907 and John Wyler’s GT40. In July 1968, Porsche began designing a completely new car, powered by a 4.5 litre flat 12. Their goal was to win an overall victory at Le Mans, which would be a first for the company. By April 20, 1969, Porsche had parked 25 917s in front of the factory, ready for the CSI inspectors to certify them.
 The car had a
spaceframe chassis, permanently pressurized with inert gas to detect cracks. The
Type 912 air cooled, flat-12 engine was nestled behind the cockpit and powered
the rear wheels. A large, gear-driven fan kept the engine cool. In order to keep
the car as light as possible, Porsche made use of lightweight metals, such as
titanium and magnesium, and used the tubular chassis to carry oil to and from
the front-mounted oil cooler. Even the gear shift knob was lightweight, being
made of balsa wood. The engine originally produced 520 hp, but by the time the
turbocharged 917/30 was introduced, horsepower was up to 1100.
The car had a
spaceframe chassis, permanently pressurized with inert gas to detect cracks. The
Type 912 air cooled, flat-12 engine was nestled behind the cockpit and powered
the rear wheels. A large, gear-driven fan kept the engine cool. In order to keep
the car as light as possible, Porsche made use of lightweight metals, such as
titanium and magnesium, and used the tubular chassis to carry oil to and from
the front-mounted oil cooler. Even the gear shift knob was lightweight, being
made of balsa wood. The engine originally produced 520 hp, but by the time the
turbocharged 917/30 was introduced, horsepower was up to 1100.
During the late 1960s, as speeds increased on the fast courses like Le Mans, race car designers started having to pay greater attention to aerodynamics. No more of Enzo Ferrari’s “Aerodynamics are for people who can't build engines.” The 917 originally had a long tail with active aerodynamic aids, but serious handling problems made the car almost undrivable at high speed. After a disappointing 1969 season, Porsche contracted John Wyler’s JWA Gulf Team to become the official works team and to act as a development partner. During tests at the Österreichring race track, one engineer noticed that gnats had been splattered all over the car, which gave an indication of the air flow. The tail was clean, which indicated there was no air flow across it, a problem since you need air flow to generate downforce. A new, shorter tail was built in the pits, using tape and sheets of aluminum. The new tail changed the air flow to provide more downforce and the test drivers were finally satisfied with the new design, which became known as the 917K (for Kurzheck, German for short tail). Porsche later developed a new long tail version of the car for high speed tracks. This 917LH (Langheck) generated more downforce than the previous year’s car, but with less drag, as well.
In addition to Wyler’s team, Porsche quietly supported the Porsche Salzburg racing team as a second works team (which surprised Wyler when he learned of it). Porsche also provided support to Martini Racing team’s own 917 effort.
For the 1970 Le Mans race, Wyler entered 3 light blue and orange 917Ks, two with 4.9 L engines and one with a 4.5 L engine. Three 917LHs were entered in the race, two by Salzburg and one by Martini Racing. The Martini car had a wild blue and green paint scheme, which led the press to label it as the “Hippie Car” or the “Psychedelic Car.” Early in the race, most of the works Ferrari 512s took themselves out of the race in a crash. The Wyler and Salzburg cars continued to battle for the lead, but by 12 hours, all of the Wyler cars were out of the race. The race was won by the #23 917K of Porsche Salzburg, followed by the Martini car. Porsche had finally won a Le Mans. In addition to the 1-2 win by 917s, a 908 won third place and a 914-6 came in 6th overall and first in its class. In between all of these Porsches were two Ferrari 512s.
By the end of 1970, Wyler and Salzburg Porsche 917s and 908s had won 9 of the 10 races, with Ferrari winning Sebring. The 908s were entered in place of the 917s at Targa Florio and the Nürburgring. Such was the dominance of the 917, Porsche sold all 25 of the initial batch of cars and went on to build more than 50, while Ferrari had to sell the remainder of its 25 512s at a discount to move them.
 Wyler and
Martini 917s continued to dominate in 1971. The only real non-Porsche
competition was from Roger Penske’s Sunoco team, running a privateer 512 that
had been upgraded to 512M standards. In spite of winning a couple of poles and
having Mark Donohue as the primary driver, the Ferrari couldn’t end the
Porsche’s dominance. Penske’s 512M gave Porsche enough competition that the
917/20 was built as a test bed for Can Am parts and low drag aerodynamics, so
Porsche could continue to dominate. When the 917 returned to Le Mans in 1971,
the Martini Racing team won the race and set a distance record (5,335.313 km)
and an average speed record (220.2 km/h) that stood until 2010. This car still
holds the fastest lap record, but the track has changed since 1971.
Wyler and
Martini 917s continued to dominate in 1971. The only real non-Porsche
competition was from Roger Penske’s Sunoco team, running a privateer 512 that
had been upgraded to 512M standards. In spite of winning a couple of poles and
having Mark Donohue as the primary driver, the Ferrari couldn’t end the
Porsche’s dominance. Penske’s 512M gave Porsche enough competition that the
917/20 was built as a test bed for Can Am parts and low drag aerodynamics, so
Porsche could continue to dominate. When the 917 returned to Le Mans in 1971,
the Martini Racing team won the race and set a distance record (5,335.313 km)
and an average speed record (220.2 km/h) that stood until 2010. This car still
holds the fastest lap record, but the track has changed since 1971.
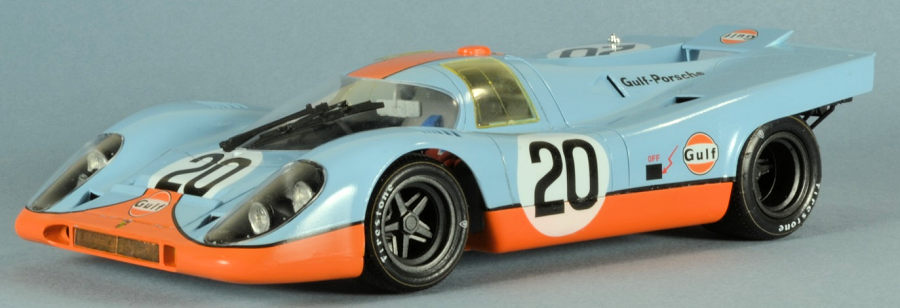
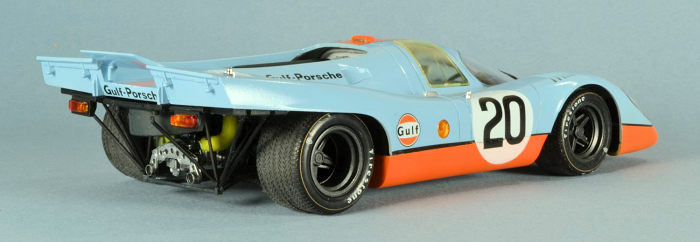
Chassis number 24, depicted in this kit, was initially used as a Le Mans test car, but was put to work as Steve McQueen’s car in his movie Le Mans, which was filmed during the 1970 race. It was later sold, and sat in a barn for over 20 years. It was eventually discovered in 2001 and restored, and recently sold for $14 million; the most expensive Porsche ever sold.
In the past, I had never paid much attention to the 917, since my race car interests generally ran more towards 1960s CAN-AM cars and more modern GT cars. Some friends and I were discussing cars one day, and one mentioned his favorite was the 917. I started browsing the Internet for 917 photos and was very quickly hooked. Then I found this video of a 917K howling around the track: https://www.youtube.com/watch?v=FkP5Svl16Qg (Be sure to turn the volume to 11!). Oh, that flat 12 sounds good! I immediately ordered the Fujimi kit, a bottle of Gulf Blue paint from Gravity Colors, and cleared my work bench.
| THE KIT |
The kit is molded in light blue and black, with a clear sprue and chrome-plated sprue. Rubber tires are provided, with some dry Firestone transfers for the sidewalls. Since this is a curbside model, no engine compartment detail is provided, but the interior is fairly well-detailed. The instructions have color callouts for Gunze and Mr. Hobby paints. Decals are provided for the #20 movie star car.
 I’ve seen
comments online that say that the front half of the car is about 4mm too wide.
This causes the windscreen to also be too wide. Renaissance Models sells a resin
engine cover that is a couple of millimeters wider than the kit part, but this
just gives you a model that’s even wider. I bought this piece, but decided not
to use it, since it would have taken a lot more work to clean up and install
than I wanted to put into this build. If you want the most accurate 1/24 917K,
Model Factory Hiro makes several, very expensive, resin and white metal kits.
Heller’s old 917Ks are mostly more accurate in shape than Fujimi’s and have
engine details, but are difficult to build and usually have a lot of warped body
parts. These were also sold under the Union and Testors labels. I was going more
for fun and ease of construction, so I went with the Fujimi kit.
I’ve seen
comments online that say that the front half of the car is about 4mm too wide.
This causes the windscreen to also be too wide. Renaissance Models sells a resin
engine cover that is a couple of millimeters wider than the kit part, but this
just gives you a model that’s even wider. I bought this piece, but decided not
to use it, since it would have taken a lot more work to clean up and install
than I wanted to put into this build. If you want the most accurate 1/24 917K,
Model Factory Hiro makes several, very expensive, resin and white metal kits.
Heller’s old 917Ks are mostly more accurate in shape than Fujimi’s and have
engine details, but are difficult to build and usually have a lot of warped body
parts. These were also sold under the Union and Testors labels. I was going more
for fun and ease of construction, so I went with the Fujimi kit.
| CONSTRUCTION |
I
started construction by gluing the engine cover, rear valence panel, and the
under-nose piece to the front part of the body. Cars run in the 1971 Daytona 24
hour race had an additional clear panel above the windshield, and Fujimi
provides both colored and clear parts for this area. I used the colored panel
and  filled the gaps with Apoxie Sculpt. There are two different bonnets for the
front, with different-sizes of openings for the radiator air flow, and this car
used the one with the larger opening. This was the only part of the kit that
gave me any trouble. It didn’t’ fit very well, and the Dzus fasteners molded
into it are oversized. I was able to remove them and sand the part flush with
the body without damaging the Gurney flap just forward of the opening, but I was
never completely satisfied with the panel line at the front of the bonnet.
filled the gaps with Apoxie Sculpt. There are two different bonnets for the
front, with different-sizes of openings for the radiator air flow, and this car
used the one with the larger opening. This was the only part of the kit that
gave me any trouble. It didn’t’ fit very well, and the Dzus fasteners molded
into it are oversized. I was able to remove them and sand the part flush with
the body without damaging the Gurney flap just forward of the opening, but I was
never completely satisfied with the panel line at the front of the bonnet.
I built up and painted the chassis per the kit instructions. Everything went together pretty quickly, once the preliminary painting was finished. No seat belt buckles or decals are provided, so I made set of belts using a very old set of photo etched buckles from Model Technologies, some blue tape, and some logo decals from Indycals.
| COLORS & MARKINGS |
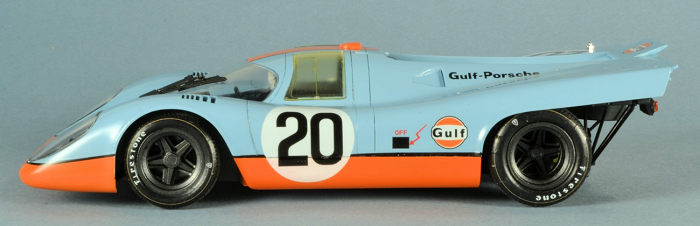
After filling and sanding all of the seams and mold lines, I primed the body with Mr. Base White primer, thinned with Mr. Leveling Thinner. After lightly wet sanding the primer with 1500 and 3000 grit sandpaper, I sprayed the body with a couple of coats of Gulf Blue, from Gravity Colors. This paint comes premixed for airbrushing, sprays well, and covers well. Gravity’s color coats are flat, so they dry quickly, but they need a gloss clear coat. I painted the underside of the nose and sides of the chassis per the kit instructions with Mr. Hobby C59 Orange, hoping Fujimi had matched their decals to that paint. It came out a little dark where I sprayed it over the Gulf Blue paint on the nose, so I had to go back and reapply it over a white base coat. Unfortunately, the tape pulled up the paint and primer in a couple of small spots, so I had to go back and repair those areas. I then sprayed the model with a coat of Tamiya clear gloss. I applied the clear a little too heavily, causing the underlying paint to bubble in some spots, but I was able to salvage things by sanding and repainting.
 I didn’t feel
like fussing with photo etched Dzus fasteners for the radiator cover, so I tried
some silver rivet decals from Mike Grant. Unfortunately, they were too small and
disappeared when I applied them to the model. I should have left the bulged air
vent over the cockpit off, painted it, and installed it after the decals. I had
to paint this area orange and then cut away part of the stripe so it would fit
over the bulge.
I didn’t feel
like fussing with photo etched Dzus fasteners for the radiator cover, so I tried
some silver rivet decals from Mike Grant. Unfortunately, they were too small and
disappeared when I applied them to the model. I should have left the bulged air
vent over the cockpit off, painted it, and installed it after the decals. I had
to paint this area orange and then cut away part of the stripe so it would fit
over the bulge.
While the decals looked like a perfect match for Mr. Color Orange while they were on the decal sheet, they lightened considerably once they dried. I had to mix some orange paint to match and repaint the lower part of the nose and lower sides of the body. The decals for the sides of the car presented an assembly problem. The numbers went across the break between the body and chassis, so I had to decide whether to apply the decals after gluing these assemblies together, and then clear coat the model, or apply the decals, cut them, clear coat the body, and then glue it to the chassis later. I finally chose the easier option and clamped the body to the chassis, applied the decals, and then cut them. Fortunately, the number decal had a seam through it caused by the bottom of the door. I left a small strip of orange decal hanging over the bottom edge of the body, hoping that it would overlap the seam between the body and chassis, helping to hide it. Unfortunately, that plan didn’t work very well, and I had to paint the lower edge of the body black. I would have been better off cutting all of the orange away from the black stripe and having the black pinstripe camouflage the seam.
Once the decals were dry, I wiped the model down and then sprayed a couple more coats of Tamiya clear gloss. After letting everything dry for a week, I polished the body with various automotive polishes from my garage, followed by a final coat of wax.
| FINAL CONSTRUCTION |
The windshield and headlight covers fit perfectly, but the two side windows needed some tweaking, and I was never able to get them to fit completely flush with the body. I painted the insides of the side windows with Tamiya Clear Yellow to replicate the tinting on the real car. At some point during the rainy 1970 Le Mans race, black tape was applied to the edges of the headlight covers to keep water out. Fujimi supplies decals for this, but I left them off, because I thought they looked ugly.
It was at this point that I realized I hadn’t opened the holes on the right side of the body for the yellow side marker light and fuel filler cap. The fuel filler presented a dilemma, because it was too large to leave off of the model, and drilling out the hole might damage the paint and stress the joint between the front and rear sections of the body. Fortunately, I was able to avoid disaster by drilling a small pilot hole and then gently enlarging it by hand with a cone-shaped Dremel bit.
 The 917’s
wheels appear to have been a dark metallic gray, so I painted them with Model
Master Gunmetal, and then sealed them with semi-gloss clear. I sanded the tire
treads down a little, to put a few laps on them, and then tried to apply the
Firestone logo decals to the sidewalls. Fujimi provided a spare logo, in case
one is damaged. Of course, I managed to destroy two of them. I did what I should
have done in the first place and ordered some tire logos from Indycals. Indycals
provides decals that completely cover the tire sidewall, so you get the
Firestone logos, as well as the gold ring around the tire. The black in the
decal is the same color as the tire, so they blend in well, but for future
builds, I’ll probably live without the gold rings and just cut out and apply the
Firestone logos. The decals required many applications of Solvaset to get them
to conform to the tires, and there are still a few spots that never would lie
down. I managed to damage the gold ring on one tire as I moved it. Indycals has
an “Oops Protection” service, where they’ll replace a decal you mess up, at no
charge. I had already used this service on the last car I built, so I passed on
this one, so as not to be “that guy” and abuse this excellent service.
The 917’s
wheels appear to have been a dark metallic gray, so I painted them with Model
Master Gunmetal, and then sealed them with semi-gloss clear. I sanded the tire
treads down a little, to put a few laps on them, and then tried to apply the
Firestone logo decals to the sidewalls. Fujimi provided a spare logo, in case
one is damaged. Of course, I managed to destroy two of them. I did what I should
have done in the first place and ordered some tire logos from Indycals. Indycals
provides decals that completely cover the tire sidewall, so you get the
Firestone logos, as well as the gold ring around the tire. The black in the
decal is the same color as the tire, so they blend in well, but for future
builds, I’ll probably live without the gold rings and just cut out and apply the
Firestone logos. The decals required many applications of Solvaset to get them
to conform to the tires, and there are still a few spots that never would lie
down. I managed to damage the gold ring on one tire as I moved it. Indycals has
an “Oops Protection” service, where they’ll replace a decal you mess up, at no
charge. I had already used this service on the last car I built, so I passed on
this one, so as not to be “that guy” and abuse this excellent service.
The fit of the body to the chassis isn’t very good, requiring some clamping to hold everything in place. The tube frame around the engine and rear suspension required a little bending and flexing to get it to fit under the body. Amazingly, considering how my builds usually turn out, the model rests solidly on all four tires.
| CONCLUSIONS |
This is a nice, relatively easy kit to build, without any major problems, other than my own self-inflicted ones, and would be a good kit for someone who is relatively new to car models. It’s not too expensive, and one can learn some of the basic skills, such as prepping and painting the car body, without getting bogged down in tiny engine and suspension details, or worrying about botching an expensive kit. I’ll stick with airbrushing the clear coats on my future car builds. I’m just too ham-fisted to use rattle cans!
| REFERENCES |
Wikipedia - https://en.wikipedia.org/wiki/Porsche_917;
https://en.wikipedia.org/wiki/1970_24_Hours_of_Le_Mans
Road & Track - https://www.roadandtrack.com/motorsports/a10209689/porsche-917-steve-mcqueen-le-mans-movie-car-for-sale/
Sources:
Spotmodel - http://www.spotmodel.com/
Indycals - http://www.indycals.net/
Gravity Colors - https://www.gravity-colors.com/
7
December 2018 Copyright ModelingMadness.com
If you would like your product reviewed fairly and fairly quickly, please
contact
the editor or see other details in the
Note to
Contributors. Back to the Main Page
Back to the Review
Index Page
Back to the Previews Index Page