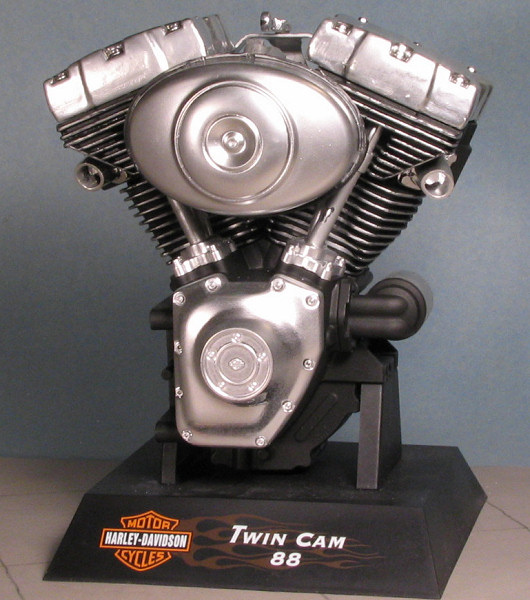
Testors 1/4 Harley Davidson Twin Cam 88
|
KIT #: |
7205 |
|
PRICE: |
$39.95 MSRP |
|
DECALS: |
One option |
|
REVIEWER: |
Kevin Powers |
|
NOTES: |
Cast metal and plastic parts |
 Can't tell you much about
Harley-Davidson except that they were one of the earliest motorcycle maker,
beginning operations in Milwaukee in 1903. The name of the bikes come from
the last name of the two originators of the company. They are not the first
motorcycle, the Indian being the first in 1901. All this was possible
because of the development of a single cylinder gasoline powered engine
that became available in 1901. This small engine was light enough to put
into a strong bicycle frame and the motorcycle was born.
Can't tell you much about
Harley-Davidson except that they were one of the earliest motorcycle maker,
beginning operations in Milwaukee in 1903. The name of the bikes come from
the last name of the two originators of the company. They are not the first
motorcycle, the Indian being the first in 1901. All this was possible
because of the development of a single cylinder gasoline powered engine
that became available in 1901. This small engine was light enough to put
into a strong bicycle frame and the motorcycle was born.
The Harley was used not only by
enthusiasts, but also by the military, which found them good for courier
duty. Unfortunately, the accident rate on these motorcycles was rather high
so when the jeep became available, it was used to replace the motorcycle.
The jeep was not only less prone to accidents, but also didn't break down
quite as often. This last trait was very common with motorcycles and when
the 'bad-ass' biker came into being in the 1950s, it was quite common for
these motorcycle gangs to have several pick-up trucks with which to haul
off broken-down motorcycles.
Customizing motorcycles became very
much the craze in the 1960s and into the 70's. During this time, the Harley
was still a popular motorcycle, despite its poor reliability and the
onslaught of less expensive and more powerful motorcycles from Japan.
Nearing bankruptcy, Harley improved its quality control, modernized its
production facilities and is the darling of the aging baby boomer who has
to prove to himself that he can spend his way to youth. These bikes are
less than inexpensive with most of them costing more than the standard car.
Just to give you an idea, the local Harley dealer pays over $80,000 in
local (not state) sales taxes each year. The average age of a Harley
rider in around 50 years old, and these folks are also the ones who have
the greatest number of accidents as slowing reflexes can no longer keep
them out of the trouble these large and powerful bikes get them into.
However, more and more younger riders
are finding the Harley to be what they want to spend their excess money on
and Harley-Davidson, which now produces high quality, trouble-free
motorcycles, is selling every one they can build.
History section courtesy of your editor
 Upon close inspection of the parts, I saw no flash on
the plastic or chrome pieces, however, there were very visible mold parting
lines. The chrome pieces were very well chromed, but, unfortunately, the mold
parting lines were stuck out like a sore thumb.
Upon close inspection of the parts, I saw no flash on
the plastic or chrome pieces, however, there were very visible mold parting
lines. The chrome pieces were very well chromed, but, unfortunately, the mold
parting lines were stuck out like a sore thumb.
The metal parts that made up the cylinder halves, were pre-painted, with
silver drybrushing. They were nicely done, albeit, a little on the heavy side
for the dry brushing.
The instructions were quite simple, if a bit on the mis-leading side.
For more on the kit, please
visit the preview.
The chrome pieces had to be sanded and I repainted them with a chrome paint for
car bumpers.
The tint was a little dull compared to the pieces that were chromed by the
factory.
The majority of the chrome pieces when cut off the
sprue, the underlying plastic showed in not to noticeable areas. The screws
that come with the kit, are several different sizes, which the instructions, in
its not so clear way, tells which size goes where. I had to use a magnetic
jewelers screw driver, given that most of the screws go into tight areas, which
pretty well eliminates ham-fisted people, such as myself, from installing the
screws any other way.
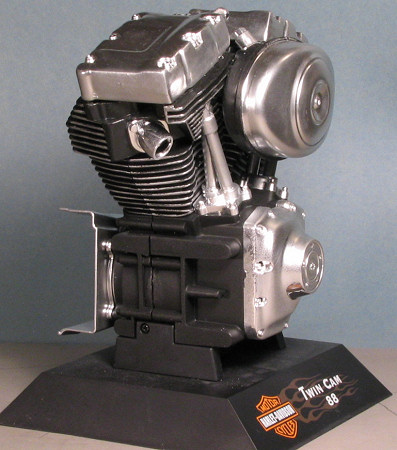
 When I got to the part where the metal pieces,
(cylinder halves), went together, the screws didn't pull the halves tight enough
together to disguise a visible seam line running from top to bottom. No painting
was done to the kit as, for the most part, it wasn't required. Serious modelers
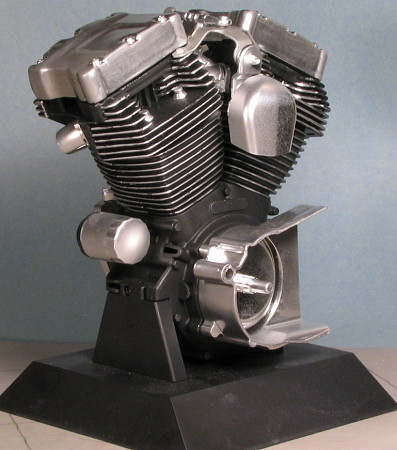
will probably want to strip the chrome parts and either have them rechromed or
repainted as that is about the only way you'll be able to deal with the mold
seams and sprue attachment points.
When I got to the part where the metal pieces,
(cylinder halves), went together, the screws didn't pull the halves tight enough
together to disguise a visible seam line running from top to bottom. No painting
was done to the kit as, for the most part, it wasn't required. Serious modelers
will probably want to strip the chrome parts and either have them rechromed or
repainted as that is about the only way you'll be able to deal with the mold
seams and sprue attachment points.
After the final assembly was complete, I sprayed a
dull coat over the whole assembly, which took off some of the shininess of the
factory chrome, to match the painted pieces.
When I first opened the kit, I believed that this kit would be one of those
'shake n bake' kits. Given the not so clear instructions, the different sized
screws, and the chrome pieces having to be refinished, Wouldn't recommend the
kit to people with limited modeling experience. Having said that, however,
It would be a neat piece to be just built as is and put on a shelf. The kit has
a lot of potential for those who want to add fuel lines, spark plug wires,
etc...
For serious modelers, I think the kit would be much
better if the flaws of the chrome pieces were corrected, and the instructions be
done in the traditional numbered cartoon drawings rather than dark, fuzzy
photographs. I would also recommend that longer screws be used where the
plastic parts were concerned, because most of the plastic holes ended up
stripping out, and I had to get out the ol' Testors reliable glue and 'weld' the
plastic together.
February 2006
Copyright ModelingMadness.com. All rights reserved.
If you would like your product reviewed fairly and fairly quickly, please
contact
the editor or see other details in the
Note to
Contributors.
Back to the Main Page
Back to the Review
Index Page 2019