| KIT #: | 14010 |
| PRICE: | €15 'special offer' |
| DECALS: | One option |
| REVIEWER: | Spiros Pendedekas |
| NOTES: | 1983 release |
| HISTORY |
Back in the late 70’s, concerned that the public was growing tired of generic
Japanese designs, Suzuki’s Germany branch delegated Target Designs Company to
come up with an innovative design that would reflect those times futuristic
trends. Jan Fellstrom, Hans-Georg Kasten and Hans Muth (a trio previously
working for BMW designs) were the main creative forces behind the Katana design.
The rest is history.
 The emerging GSX1100S was first presented in prototype form at the Cologne show
in 1979 and, despite the fact that the frame and engine remained unchanged from
the standard GSX1100, the edgy design made quite a splash. Quickly attaining a
“love or hate” reputation (mostly towards “love”), Suzuki dared to put the bike
into production with minimal changes!
The emerging GSX1100S was first presented in prototype form at the Cologne show
in 1979 and, despite the fact that the frame and engine remained unchanged from
the standard GSX1100, the edgy design made quite a splash. Quickly attaining a
“love or hate” reputation (mostly towards “love”), Suzuki dared to put the bike
into production with minimal changes!
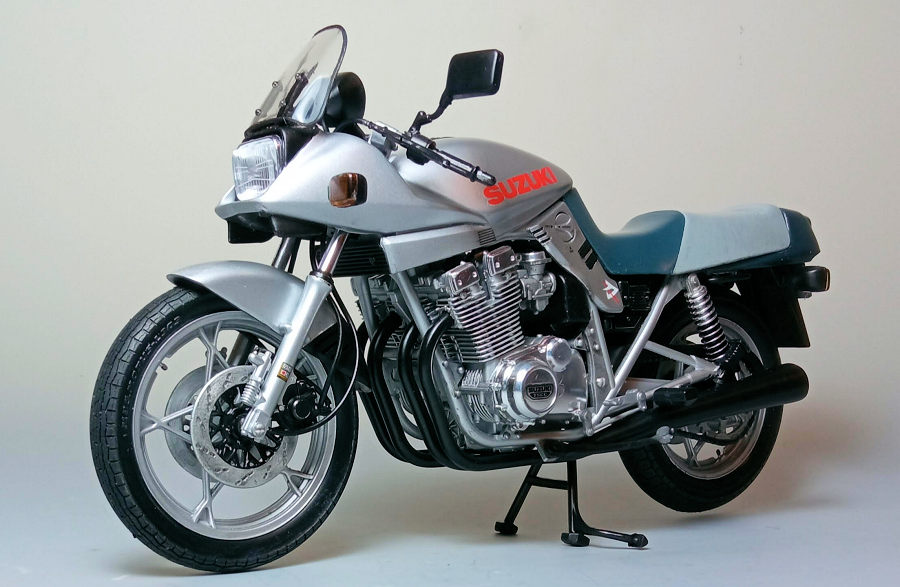
Designating it as the "World's Fastest Motorcycle", it was the first Japanese
model with a frame-mounted fairing, as well as the first with proper racing
clip-on bars. With its bold transverse four cylinder, DOHC, 16 valve 1100cc
unit, easily pumping out more than 100hp, the aerodynamic Katana could solidly
flirt with the 140mph region.
Not selling as well as Suzuki had hoped, with its styling becoming something of
a marmite situation, it remained in production for the majority of markets only
until the end of 1981, with a few Mark II 1100 Katanas being produced primarily
for the European market the following years. The original model was revived in
1990, in order to commemorate Suzuki's 70th anniversary, with later versions
also remanufactured, primarily for the Japanese market, a practice that was
maintained until 2001.
Despite the fact that its sales never fulfilled expectations, the Katana is a
prime example of an advanced stylistic design that a colossal manufacturer dared
to put into production. In fact, Suzuki was the first Japanese manufacturer to
design something different, without being constrained by preconceived notions.
That’s why the Katana, apart from becoming a legend, made a huge impact on
modern motorcycle designs and it is because of this that Suzuki has to be
praised for producing such a wonderful machine.
| THE KIT |
It was the year 1983 when Tamiya decided to treat us with this detailed 1/12 kit of the Katana (together with a superlative 1/6 “big sister”). Definitely state of the art back then, this kit can still hold its own today: it is well molded, offers great detail and looks to be an uncomplex build. The fact that Tamiya decided to recently reissue and offer it at very interesting prices (along with many of their now classic kits), can only be warmly welcomed. For an in-depth view of the kit’s contents you may refer to its preview here.
| CONSTRUCTION |
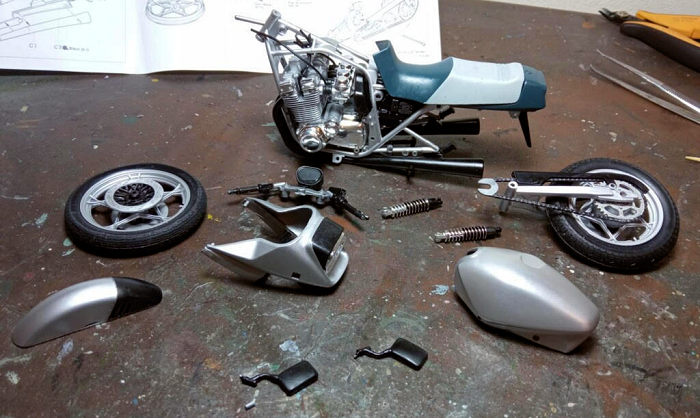
Since this was my first motorcycle kit, I performed the radical act of having a
look at the instructions, from where it became pretty obvious that the build
would mostly include doing a number of subassemblies and putting them together,
mosto of them at final stages: a very pleasant act for a number of us who like
doing subassemblies.
The engine was first: I assembled the 3-piece crankcase, onto which the 5-piece
cylinder block was attached. The 8 chrome plated parts catering for various
covers were left off, to be attached after the main block painting.
 The 11-piece exhaust was next assembled. With the glue still uncured, I affixed
the complete exhaust to the assembled basic engine, essentially using the latter
as a jig, in order to align all of the exhaust parts. Affixing the exhaust was
easy, since the engine block has big intrusions where the exhaust pipes are to
be inserted. After glue curing, I removed the assembled exhaust and filled the
emerging gaps first with liquefied styrene and secondly with normal filler, then
sanded everything smooth. The rear mufflers’ ends had their circumferential
holes drilled out for extra realism.
The 11-piece exhaust was next assembled. With the glue still uncured, I affixed
the complete exhaust to the assembled basic engine, essentially using the latter
as a jig, in order to align all of the exhaust parts. Affixing the exhaust was
easy, since the engine block has big intrusions where the exhaust pipes are to
be inserted. After glue curing, I removed the assembled exhaust and filled the
emerging gaps first with liquefied styrene and secondly with normal filler, then
sanded everything smooth. The rear mufflers’ ends had their circumferential
holes drilled out for extra realism.
Other sub assemblies included the swing arm, the air cleaner, the fuel tank,
front fender, the handlebars, front fairing and the rear chain with its
sprockets and guard. Most of the aforementioned sub assemblies were 2-piece
affairs and fit was generally very good, with only a few seams appearing at more
or less expected places. After a filling and sanding session, I took all
subassemblies and even many individual parts to the paint shop!
| COLORS & MARKINGS |
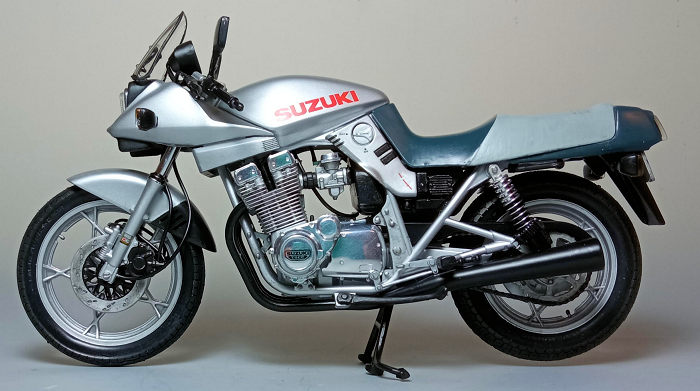
I first sprayed a coat of Hu11 silver to all items that are supposed to be
“silver” or “aluminum” color in reality. Those mainly included the fuel tank,
front fairing and fender (its front section only), side panels, handlebars,
frame halves, the complete engine, the quadruple carburettors, the two wheels,
the rear swing arm, the brake disks, the rear sprocket and the front forks lower
section.
 Next black paint was brush painted where applicable, namely at the complete
exhausts, the air cleaner, the complete rear fender as well as the aft section
of the front fender (the latter after masking off the fore silver section), the
top section of the front fairing, the mirror and turn lights bodies , the oil
cooler inlet, the handlebars grips, levers and instrument base, the carburettor
intake pipes, the fuel tank filler cap, the center and side stands, the foot
pegs, the shock absorbers lower section, the brake disks non-friction areas, all
brake calipers, the rear brake supporting rod and so on.
Next black paint was brush painted where applicable, namely at the complete
exhausts, the air cleaner, the complete rear fender as well as the aft section
of the front fender (the latter after masking off the fore silver section), the
top section of the front fairing, the mirror and turn lights bodies , the oil
cooler inlet, the handlebars grips, levers and instrument base, the carburettor
intake pipes, the fuel tank filler cap, the center and side stands, the foot
pegs, the shock absorbers lower section, the brake disks non-friction areas, all
brake calipers, the rear brake supporting rod and so on.
As a note, some areas where paint was applied had already been chrome plated by
Tamiya (like at the front fork bottoms or shock absorbers lower areas). Whereas
“normally” you do not paint directly onto chrome plated parts, I did apply paint
onto them after a good friend and fellow modeler told me he does so. The result
was good, the only particularity being that the paint is not adhering as
strongly as on normal plastic, so a heads-up here!
A coat of Future prepared the painted parts for decaling. I used the kit decals
which behaved excellently, no remarks whatsoever, with a second coat of Future
sealing them.
| FINAL WORK |
After attaching all chrome plated covers at the engine and the carburettor tops,
the engine, carburettors, air cleaner and rear fender were trapped between the
frame halves. The rectifier was attached at this time, as well. Upon glue
curing, I attached the exhausts and center stand with fit being great.
The rear wheel was next: after mounting the nice looking tire to the rim, I
affixed the sprocket / chain / guard sub assembly and the brake disk to the left
and right wheel hub respectively, then secured them to the swing arm by using
one of the mini screws provided, with the complete rear sub assembly secured to
the frame by two more screws, followed by attachment of the shock absorbers.
Though instructions call for gunmetal, the chain was painted black, then heavily
dry brushed with silver, as it yields to a closer resemblance to my perception
of real looks.
 The spark plug harnesses, clutch and throttle cables are provided as vinyl
tubing parts: they were cut to the lengths indicated by the instructions and
patiently affixed in position. Their “grab” was not too strong, meaning that
they might easily come off any time during construction and will have to be
reaffixed.
The spark plug harnesses, clutch and throttle cables are provided as vinyl
tubing parts: they were cut to the lengths indicated by the instructions and
patiently affixed in position. Their “grab” was not too strong, meaning that
they might easily come off any time during construction and will have to be
reaffixed.
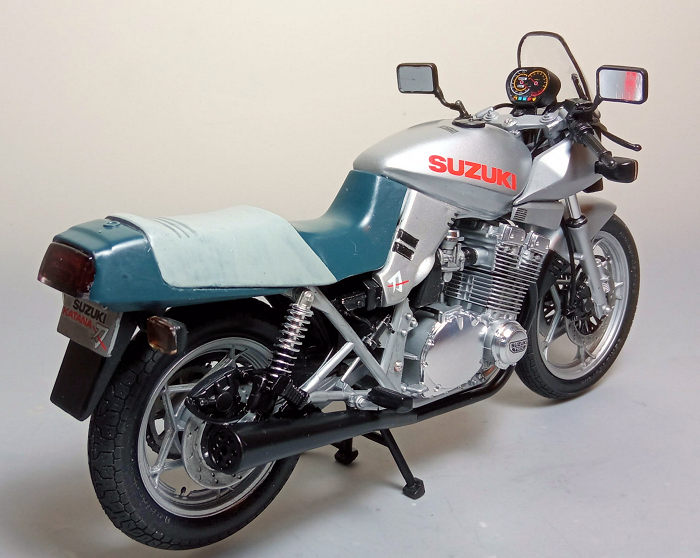
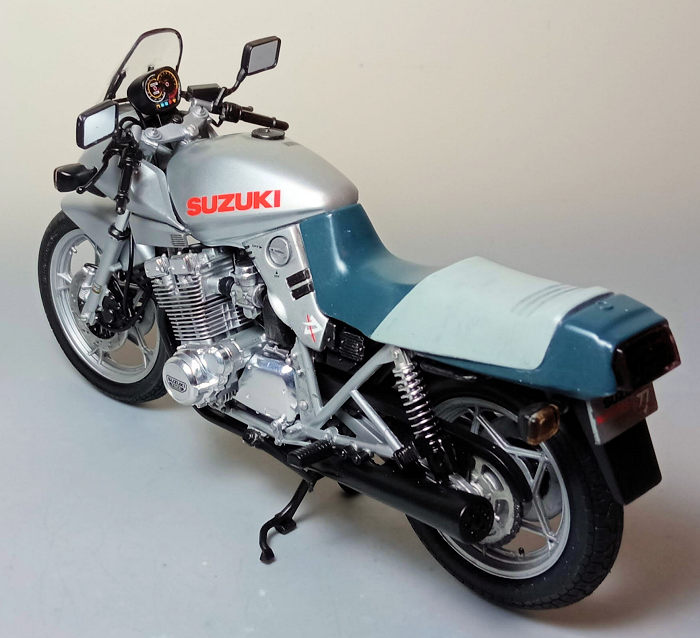
The fuel tank, side panels, side stand, saddle and rear cowl were next attached
in position. The fuel filler cap was attached at this time as well. Though the
saddle did not seem to precisely fit at the rear, it is more or less supposed to
fit like this, since, in reality, its end stands a tad higher than the rear cowl
top. Half of the saddle was painted Hu127 Light Ghost Gray, whereas the other
half, together with the rear cowl, were painted Hu77 Navy Blue that dried close
to the dark teal shade that was observed in reality.
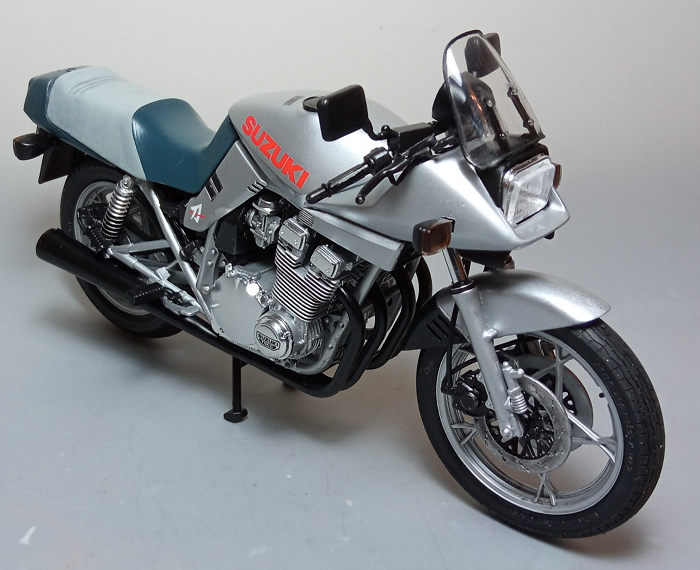
With the model now able to stay upright on its center stand, I moved to the
front: after assembling the headlight, I carefully inserted it from the inside
of the front fairing where it clicked into place. The fairing was then attached
in position.
I mounted the nice looking tire to the front wheel, followed by attaching the
brake disks and trapping the assembled wheel and front fender between the front
forks, using a mini screw. The lower triple clamp was then attached and the
complete sub assembly was placed to the bottom of the central column, with the
one piece handlebars to the top. They were secured by a mini screw. The various
tubing and cabling was replicated by suitable pieces of vinyl hoses that were
cut per instructions and carefully affixed.
I decided to give a black wash at areas that would benefit by accentuating their
details, mainly the main engine and carburetors. Minimal silver dry brushing was
applied at the brake calipers and rectifier area. I did not like the exposed
view of the mini screw heads, so I affixed a tiny blob of liquefied styrene over
each and painted them silver afterwards. A satin coat gave the model its final
hue.
The turn signals and rear light were attached, their lenses painted with Humbrol
amber and red clear paint respectively. The number plate, for which no
registration number is provided but a nice looking “Suzuki Katana” decal, was to
be painted black, but I could not resist the temptation and painted it chrome
with my silver pen. The nice looking rear view mirrors were also assembled and
attached, before calling Hans Muth’s brain child done!
| CONCLUSIONS |
 Tamiya has developed a reputation for its 1/12 Motorcycles
(among, of course, its other kits) and I can easily see why. Despite being
already 40 years old, this kit is very well molded, offers plenty of details
and, despite being not exactly low in parts count, it builds systematically and
effortlessly. Transparencies are nice and clear and instructions are superb, as
are the decals.
Tamiya has developed a reputation for its 1/12 Motorcycles
(among, of course, its other kits) and I can easily see why. Despite being
already 40 years old, this kit is very well molded, offers plenty of details
and, despite being not exactly low in parts count, it builds systematically and
effortlessly. Transparencies are nice and clear and instructions are superb, as
are the decals.
If you want a 1/12 Katana, this is the only game in town (Aoshima makes a 1/12
die-cast), but, frankly, you don't really need anything more, as this 40-year
old classic kit can easily hold its own today (as of 2022). Add to that the
recent reissue Tamiya has greeted us which contains fresh decals and is offered
at low prices and you can easily figure out why we have a winner here.
This was my first motorcycle model ever and, judging by the fun I had and the
relative easiness of building, I can easily recommend it to anyone. Having
always wanted to build a motorcycle model, I had been many times warmly advised
by dependable modelers to build a 1/12 Tamiya bike and I can only state that
they were spot-on in their advice. If you are mostly into planes (like Yours
Truly), building such a kit does not differ too much from what you are used for,
merely doing less “main construction” but more subassemblies that you finally
put together, something very entertaining for most of us.
If you fancy building the iconic Katana, or, so to speak, a motorcycle kit in
general that will not drive you nuts with its complexity of construction and
will not blow your bank account, treat yourself to this Tamiya beauty. A
gorgeous bike will emerge, prettying up your showcase.
Happy modeling!
23 February 2023 Copyright
ModelingMadness.com. All rights reserved. No reproduction in part or in whole
without express permission. If you would like your product reviewed fairly and fairly quickly, please
contact
the editor or see other details in the
Note to
Contributors.