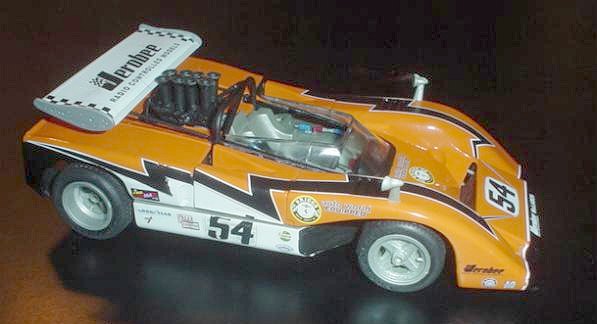
Accurate Miniatures 1/24 McLaren M8B
|
KIT # |
5004 |
|
PRICE: |
$32.50MSRP when new |
|
DECALS: |
one option |
|
REVIEWER: |
Mark Hiott |
|
NOTES: |
|
HISTORY |
Accurate Miniatures is well known for their aircraft model kits, but they also make VERY nice automotive kits. In addition to the M8B, they also make two versions of the Grand Sport Corvette. (a review on that kit coming soon) The Corvette is still on the AM product list, the M8B is not. (shame)
 Originated in 1966 the Can-Am Challenge, Group 7
cars gave the builders free reign to design “no limits” cars.
Originated in 1966 the Can-Am Challenge, Group 7
cars gave the builders free reign to design “no limits” cars.
McLaren’s 1968 car, the M8A, was wedge shaped, powered by Chevy 427ci aluminum block ZL-1 engines. The new engines produced 620-640hp…. almost 100 more then the previous years engine.
The Can-Am Series expanded to 11 races in 1969 and Team McLaren won EVERY race, Denny Hulme winning 5 and Bruce McLaren winning 6 and the 1969 Championship. Their car in 1969 was the M8B, an evolution of the M8A. The major difference was the placement of the rear wing.
Team McLaren won 5 consecutive championships during the Can-Am Series with Team McLaren involvement ending in 1972, Bruce McLaren having been killed at the start of the 1970 season while testing one of the M8D cars.
Privateers continued to run McLaren cars until the end of the series in 1974, the final race being won by a McLaren M20.
The Accurate Miniatures kit represents one of these privateer cars: the #45 M8B driven by Tony Adamowicz in 1971
|
THE KIT |
 Upon opening the M8B box, you will find a nicely
molded kit in white. There are also 2 vinyl sprues, one in silver and one
in black. These contain a large number of hoses, wires and fuel
lines. The instruction book - and I do mean BOOK- is very well written and
has very good diagrams on the construction steps. Also interspaced
throughout the instructions are tidbits of info on the real car.
Upon opening the M8B box, you will find a nicely
molded kit in white. There are also 2 vinyl sprues, one in silver and one
in black. These contain a large number of hoses, wires and fuel
lines. The instruction book - and I do mean BOOK- is very well written and
has very good diagrams on the construction steps. Also interspaced
throughout the instructions are tidbits of info on the real car.
While we all have seen these kits at various swap meets and such, I personally, have never seen one completed. Now I know why! If ever there was a kit over-engineered, this is it! It builds into a beautiful model, but is NOT for the faint of heart. It is as tough a build as I have ever done. It took me a span of 5 months to build, working three or four hours a week. That was the most I could stand! Fear not dear reader....with patience and care, you too can build this kit.
|
CONSTRUCTION |
 The build begins with the engine and rear
suspension. I didn't bother to count, but I imagine that they make up about 40 or
50 parts! Care must be taken when assembling the suspension to make sure of
alignment...later steps will be MUCH easier if you take care here.
The build begins with the engine and rear
suspension. I didn't bother to count, but I imagine that they make up about 40 or
50 parts! Care must be taken when assembling the suspension to make sure of
alignment...later steps will be MUCH easier if you take care here.
I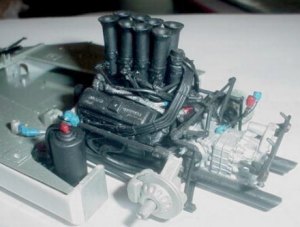 will mention that if you decide to paint the vinyl
hoses as I did use acrylic paint. Enamel paints will remain tacky on
vinyl parts. Super Glue must be used on the vinyl hoses as well. Pay
close attention to the routing of the hoses, some BARELY fit in later
steps. I found that a hair dryer makes the hoses fit better. Just be
careful not to MELT them.
will mention that if you decide to paint the vinyl
hoses as I did use acrylic paint. Enamel paints will remain tacky on
vinyl parts. Super Glue must be used on the vinyl hoses as well. Pay
close attention to the routing of the hoses, some BARELY fit in later
steps. I found that a hair dryer makes the hoses fit better. Just be
careful not to MELT them.
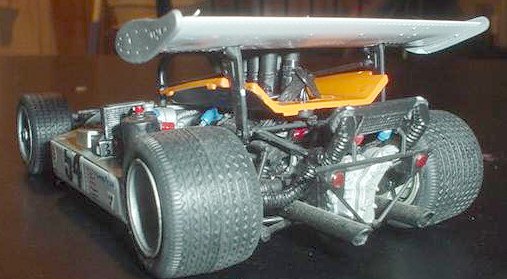
Next up is the chassis. I found that most of the
chassis parts do not fit very well. Some filing will be required to get a
good fit. The position of the radiator is not real clear and will require
test fitting so that the coolant hoses will reach. If you look real close
at the left cor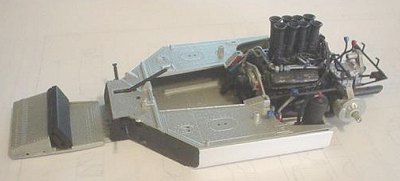 ner of the chassis by the engine, you will notice some
of the fit problems. I guess I should have taken just a little more off
that one.
ner of the chassis by the engine, you will notice some
of the fit problems. I guess I should have taken just a little more off
that one.
Installing the engine in the chassis is very easy as it just drops into place. After allowing it to dry overnight, I attached all the vinyl hoses. There are a few hoses that the instructions say can be left out....so I left them out! A lot of the detail is very hard to see once the build is done. So use your own judgment.
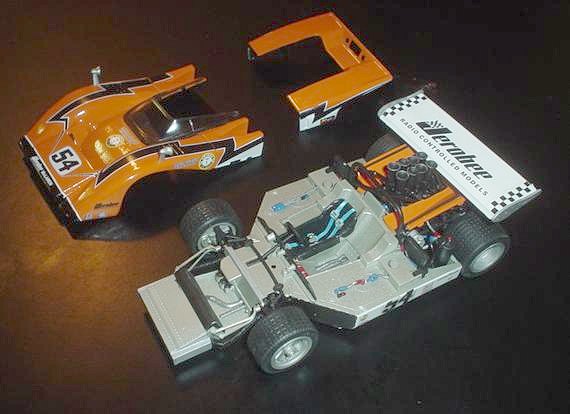
Once the chassis is done, you can move on to the
body. I could write a whole article on the body alone....because the fit
is CRAPY! It doesn't fit together well, it doesn't fit the chassis right
and the door hinges are a joke. I finally ended up ignoring the
instructions and doing it my own way.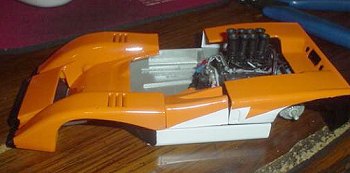
I assembled the nose and engine cover as per the instructions. But after test fitting it to the chassis I discovered that the body is too SHORT! As the engine cover position is dictated by the location of the engine, I focused my attention on the nose. I ended up shaving the rear edge of the nose until the doors would fit in place as they should. I then glued the doors to the nose. The fit is still not as good as I had hoped, but it's decent. When I build my next M8B, I will have to do it a different way.
|
COLORS AND MARKINGS |
I thought the one saving grace of this kit was the
very cool paint scheme. BOY, was I wrong! While it is VERY cool, its a bear
to do correctly. The lower sides of the chassis being very hard to paint
without getting over spray on the chassis.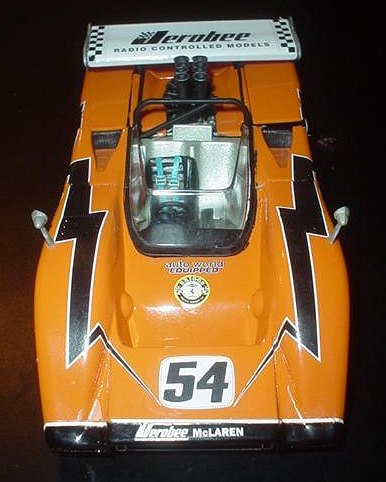
The engine was painted flat black with an aluminum transmission. As with and auto kit, the engine was painted as an assembly. The various hoses have red or blue fittings on each end. These were painted all at once before being removed from the trees. Three coats of acrylic paint was needed to cover the black hoses.
Various parts were painted before removal from the trees. The chassis parts were painted overall aluminum and then the sides were taped off and painted bright white. Take care here....I had to repaint several areas of the chassis that got white over spray on them.
The instructions call for "McLaren Orange" for the body, but I couldn't find any. I ended up using a 94 Volkswagen Gulf color - "Tangerine". I think that it comes very close to McLaren Orange. To do the sides of the body, I photocopied the decal sheet and used the decals as masks to paint the white areas.
On the subject of decals: If you can find aftermarket decals, USE THEM! The decals in my kit were either defective or perhaps something happened to them before I got the kit. Whichever, my decals splintered in the water. I was able to recover most of them but some of the black "flash" decals were beyond use. I plan in the future to strip this kit and use a/m decals to get a better quality. Decals for this kit are made by a company called INDYCALS (http://www.indycals.com). They are the decals for the 1969 McLaren M8B driven by Bruce McLaren and Denny Hulme. I'm not sure if the kit would require modifications to use them, but I'd be willing to find out!
|
CONCLUSIONS |
As I stated in the beginning: This kit is over-engineered. While it builds into a beautiful kit, it is VERY unforgiving of mistakes. Be VERY careful and make sure everything fits just the way it suppose to. Would I build another one? Yes...it just takes a lot of patience and test fitting. I think this is a kit that you should consider "kits" within a kit. Build each sub-assembly as a kit and take your time.
I was disappointed with the decals in my kit, but I don't know if this a problem common to it or not. If I had a/m decals when I started I would have used them.
I give this model a 7 out of 10, it is a nice kit when completed. Its just a pain in the butt to get it that far.
February 2004
Copyright ModelingMadness.com. If you would like your product reviewed fairly and
fairly quickly, please contact
the editor or see other details in the Note to
Contributors.