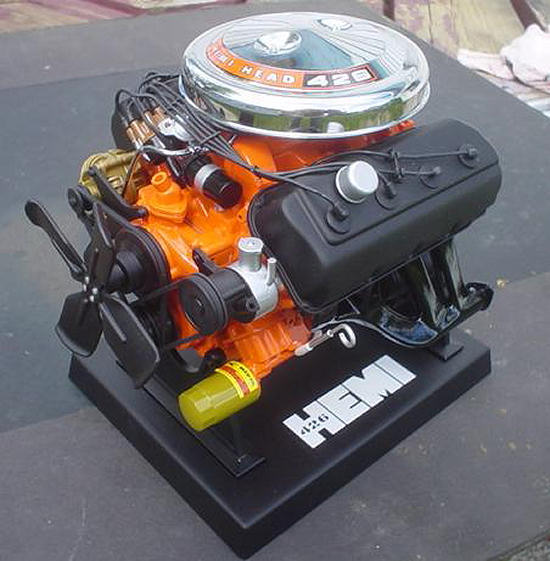
Testors 1/6 Dodge 'Hemi' engine
| KIT #: | ? |
| PRICE: | $45.00 MSRP |
| DECALS: | No options |
| REVIEWER: | Mark Hiott |
| NOTES: | Die-Cast and pre-painted |
| HISTORY |

Hemispherical
cylinder heads have been used since at least 1903; they were used by the Belgian
car maker Pipe in 1905, the Peugeot Grand prix Car of 1912, the Alfa Romeo GP
car of 1914, Daimler and Riley. Stutz built four valve engines, conceptually
anticipating modern car engines. The BMW double push rod design, taken over by
Bristol Cars, the Peugeot 403 and the Toyota T engine are other well known hemi
engines. Harry Miller racing engines were also a notable example.
Perhaps the most widely known proponent of the hemispherical chamber design is the Chrysler Corporation. Chrysler became identified primarily by trademarking the "Hemi" name and then using it extensively in their advertising campaigns beginning in the 1960s. Chrysler has produced three generations of such engines: the first (the Chrysler FirePower engine) in the 1950s, the second (the 426 Hemi), developed for NASCAR in 1964 and produced through the early 1970s, and finally the "new Hemi" in the early 2000s. The "Hemi" engine introduced in 2002 by DaimlerChrysler had a combustion chamber featuring valve and spark plug locations markedly different from the 426ci Hemi engine of muscle car fame. The current-production "Hemi" V8 with its pinched chamber, does not have true hemispherical combustion chambers despite the name. Rather, it bears a closer resemblance to the mid-1950s Polyspherical chamber, which Chrysler engineers developed as a lower cost alternative head for their V8 engines.
| THE KIT |
I'm not one to normally build die-cast models, but when I saw the 1/6 Hemi, I HAD to have it!
 This kit
is of the STREET version of the Hemi. There are NASCAR versions out there
offered built up, so be careful if you choose to go that route. The way to tell
the difference is that the STREET version has the black wrinkle finish valve
covers and dual carbs. The NASCAR version has chrome valve covers with a single
4-barrel carb.
This kit
is of the STREET version of the Hemi. There are NASCAR versions out there
offered built up, so be careful if you choose to go that route. The way to tell
the difference is that the STREET version has the black wrinkle finish valve
covers and dual carbs. The NASCAR version has chrome valve covers with a single
4-barrel carb.
Upon opening the box, I was surprised at what I found. As with any die-cast, all the parts are molded in color. What surprised me was that each parts was bagged SEPERATLY. A couple of the bags had several small parts in each bag, but those were mostly the plastic parts for the kit. None of the parts are attached to trees. A generous supply of screws in 3 sizes is included. I sorry I don't have pics of the kit before assembly, but I was in a big hurry to build this one!
The instructions are black and white photo steps with no written assembly instructions. However, there are numbered steps. Although good, they have several mistakes in them. I will try to point them out as I go through the build process.
** One note to add; I’m not sure if this kit is made by Testors. The box says "Lincoln Mint" and I know that it is EXACTLY the same as the ones you see offered built up under the "Lincoln Mint" badge.*
| CONSTRUCTION |
It die-cast people, how hard can it be? Get a GOOD Phillips screwdriver of the proper size and you're all set. You will also need some CA glue as there are several parts made out of plastic that will need to be attached to a metal part.
 Following
the instructions for the most part. I varied from the instructions at step 11.
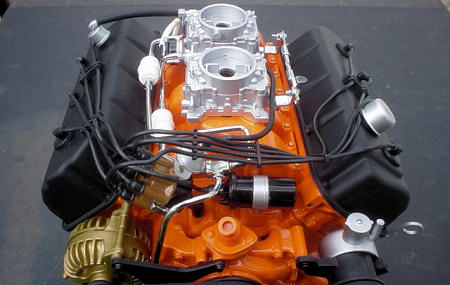
They would have you glue the carb halves together and then glue them to the
intake manifold. There are more then enough screws to place the carbs on the
manifold and then screw them down from underneath. This is what I did.
Following
the instructions for the most part. I varied from the instructions at step 11.
They would have you glue the carb halves together and then glue them to the
intake manifold. There are more then enough screws to place the carbs on the
manifold and then screw them down from underneath. This is what I did.
The next problem comes in step 16; they say to use screw "A" to attach the heads, however, screw "A" is too long. Again, there are plenty of screws, so I used the shorter screw "B" to attach the heads.
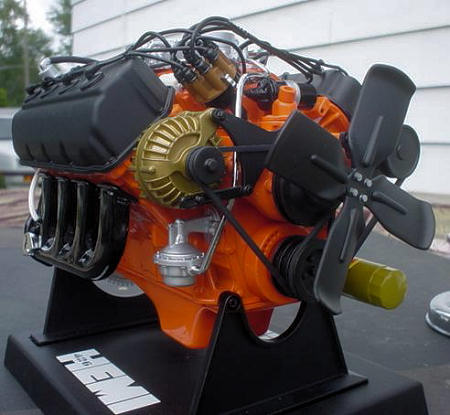
The fuel lines are installed in step 31. They show you how to route them down to the fuel pump. Fuel pump? I don't remember installing the fuel pump.... that’s because you DIDN'T, it just appears in step 21! Nowhere in the instructions does it tell you how to install the fuel pump. Not that it's that hard, but it would have been nice to at least tell me.
The fuel lines are the most troublesome parts of this kit. They look great, but don't fit worth a darn. I had to remove the distributor installed in step 20 to get them to fit even close to where they are suppose to go. After much fiddling, I ended up breaking the lines apart and routing them the proper way. I think in the future I will replace the fuel lines with wire.
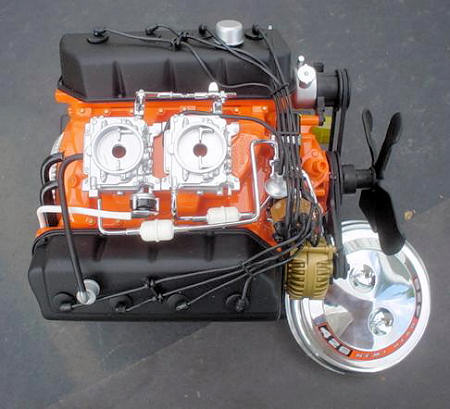
The rest of the assembly went ok and the model builds into a very impressive engine. I am quite pleased with it.
| CONCLUSIONS |
I think Testors has a winner on its hands. If you are a Mopar
nut like me, this is a must have!
| REFERENCES |
Wikipedia for the history
If you would like your product reviewed fairly and fairly quickly, please contact the editor or see other details in the Note to Contributors.