Fujimi 1/24 Porsche 911 GT3R (997)
| KIT #: | ? |
| PRICE: | $30.00 |
| DECALS: | Multiple options |
| REVIEWER: | Ben Brown |
| NOTES: | Racing Decals 43 RDE24/001 2012 Spa 24 Hours Prospeed Competition #74 |
| HISTORY |
Entire books have been written about the Porsche 911, so I’ll just hit the high spots of the car’s long history with a quick summary. The 911 series dates back to 1963. It was originally to be called the 901, which was its internal model designation, but Peugot claimed to have exclusive rights to naming cars with three numbers with a “0” as the middle number. Rather than try to sell the car in France under a different name, Porsche just called the car the 911.
 One of the 911’s defining features is the
rear-mounted, horizontally-opposed 6-cylinder engine. The 911 used an
air-cooled engine until the Type 996 was introduced in 1998. The first cars
produced 130 hp, while the 2019 version produces 444 hp. Engines have been
available in both naturally aspirated form and turbocharged. The rear engine
layout gives the car a 38/62% front/rear weight bias, giving the early cars
a reputation for leaving the pavement backwards if pushed beyond their
limits. As the car evolved, these nasty habits have been mostly tamed. Top
Gear’s Jeremy Clarkson once said the 911 is proof that Porsche engineers are
all men. According to Clarkson, men spent 50 years trying to make a rear
engine layout handle well, while women would have just moved the engine to a
better location. In 2006, the 997 911 GT3 was named by Motor Trend as “the
best handling car in America.”
One of the 911’s defining features is the
rear-mounted, horizontally-opposed 6-cylinder engine. The 911 used an
air-cooled engine until the Type 996 was introduced in 1998. The first cars
produced 130 hp, while the 2019 version produces 444 hp. Engines have been
available in both naturally aspirated form and turbocharged. The rear engine
layout gives the car a 38/62% front/rear weight bias, giving the early cars
a reputation for leaving the pavement backwards if pushed beyond their
limits. As the car evolved, these nasty habits have been mostly tamed. Top
Gear’s Jeremy Clarkson once said the 911 is proof that Porsche engineers are
all men. According to Clarkson, men spent 50 years trying to make a rear
engine layout handle well, while women would have just moved the engine to a
better location. In 2006, the 997 911 GT3 was named by Motor Trend as “the
best handling car in America.”
Almost since the first car was produced, 911s have been a regular fixture at the race track, offroad, and in just about any other form of motorsports, routinely making the podium. Porsche has produced factory race cars for its own teams, as well as privateer teams.
T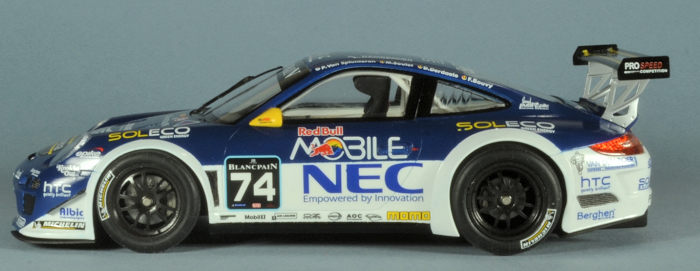 he 997 GT3R was produced from 2006 to 2011. It
was built using the stiffer floor pan of the all-wheel drive Carrera 4,
without the front differential. In addition to a more solid structure, the
missing front differential allowed Porsche to mount the fuel tank lower. The
GT3 R has a 4.0 liter 493 hp boxer engine, a six-speed sequential
transmission, ABS and traction control. A hybrid version was also offered.
It was developed by the Williams Formula 1 team and featured their kinetic
energy recovery system (KERS). The hybrid has two electric motors driving
the front wheels. They produce a total of 218 hp for the front wheels.
he 997 GT3R was produced from 2006 to 2011. It
was built using the stiffer floor pan of the all-wheel drive Carrera 4,
without the front differential. In addition to a more solid structure, the
missing front differential allowed Porsche to mount the fuel tank lower. The
GT3 R has a 4.0 liter 493 hp boxer engine, a six-speed sequential
transmission, ABS and traction control. A hybrid version was also offered.
It was developed by the Williams Formula 1 team and featured their kinetic
energy recovery system (KERS). The hybrid has two electric motors driving
the front wheels. They produce a total of 218 hp for the front wheels.
Prospeed Competition is a Belgium-based racing team that was founded in 2006. They started out competing in the now-defunct GT2 class and are currently competing in Le Mans GT3 events. They finished 13th overall in the 2012 Spa 24 Hours race.
| THE KIT |
| CONSTRUCTION |
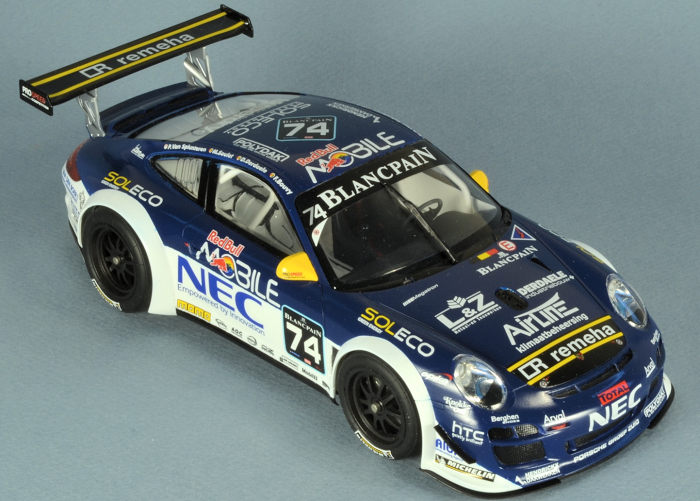 This is a fairly simple kit, so assembly goes
pretty quickly. Most of the parts needed to be painted either white or
semi-gloss black. There are some molded-in wires and boxes in the cockpit
that I painted black.
This is a fairly simple kit, so assembly goes
pretty quickly. Most of the parts needed to be painted either white or
semi-gloss black. There are some molded-in wires and boxes in the cockpit
that I painted black.
Once the initial painting was done, it was just a few minutes to assemble the cockpit. I made seat belts from strips of painted medical tape, and then added homemade hardware cut from styrene sheet and bits of metal staples. I found that it was easier to add the roll cage piece by piece to the cockpit, rather than build it and then install it, as the instructions recommend. Start with the two side pieces and then flex them to install the other parts.
The chassis is simplified, because the car’s undertray covers everything. The suspension includes brakes and coilover shocks, and steerable front wheels. This is all hidden, once assembled. The only engine detail is molded into the underside of the chassis, with a separate exhaust system. I painted the engine various shades of aluminum, and the exhaust was painted Alclad Pale Burnt Metal. All of this is covered by the rear diffuser, so I didn’t spend much effort detailing.
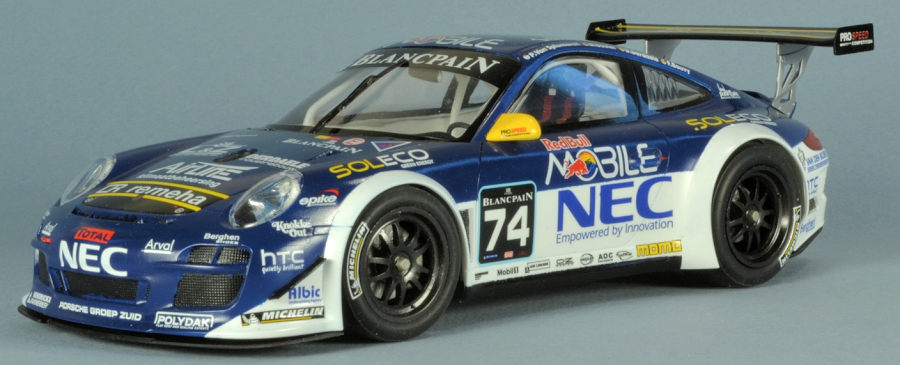
| COLORS & MARKINGS |
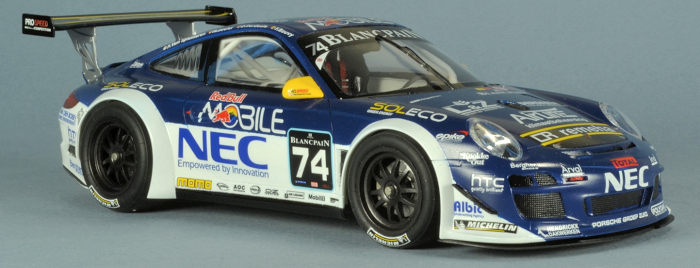
I first primed the body with Tamiya White Primer, decanted from the rattle can. I then painted the lower parts of the body with Tamiya TS-26 Pure White, which dried in a smooth, glossy finish. I had a heck of a time finding a blue that looked close to photos of the real car, mainly because I was trying to avoid having to mix the color. In some photos, the car seemed to have a purplish hue and in others, it was more of a true blue. I finally settled on a $4 can of Krylon Regal Blue, even though it was a little darker than the blue on the decals. I decanted the Krylon paint and applied it with an airbrush. It dried quickly, but with a pebbly finish, requiring wet sanding with 3000- and 5000-grit sandpaper and polishing with multiple grains of automotive polish. Once I finally got a smooth finish, I applied a coat of Tamiya clear gloss to try to protect the somewhat fragile Krylon paint. I painted the mirrors Testors Gloss Yellow.
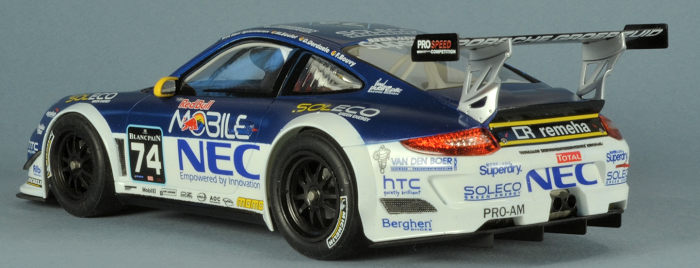 The decals are from Racing Decals 43, depicting the
#74 Prospeed car from the 2012 Spa 24 Hours. This was the first time I had used
this company’s decals, and they performed beautifully. I had no problems with
silvering and the whites and yellows were completely opaque. They forgot to add
a white background to the “TOTAL” sponsor decals, so the lettering is blue on
the one on the front of the car. The only problem I had with the decals was they
take a long time to break free of the backing paper, but soaking them in hot
water for a couple of minutes sped up the process. Once the decals were dry, I
applied two more coats of Tamiya clear gloss and gently polished it with fine
automotive polish. I masked and painted the clear window insert using Tamiya
tape and semi-gloss black.
The decals are from Racing Decals 43, depicting the
#74 Prospeed car from the 2012 Spa 24 Hours. This was the first time I had used
this company’s decals, and they performed beautifully. I had no problems with
silvering and the whites and yellows were completely opaque. They forgot to add
a white background to the “TOTAL” sponsor decals, so the lettering is blue on
the one on the front of the car. The only problem I had with the decals was they
take a long time to break free of the backing paper, but soaking them in hot
water for a couple of minutes sped up the process. Once the decals were dry, I
applied two more coats of Tamiya clear gloss and gently polished it with fine
automotive polish. I masked and painted the clear window insert using Tamiya
tape and semi-gloss black.
Fujimi provides decals for the tire logos that are applied like Clear-Fix decals from the 1990s. They are intended to be cut out and then placed decal-side down on the tire. The backing paper is then wetted, and theoretically, after a couple of minutes the decal releases from the paper and attaches itself to the tire. Then, you just peel away the backing paper, leaving a perfectly-placed logo on the tire. So far, I’ve had around a 50% success rate with this type of decal, but fortunately, Racing Decals 43 was kind enough to provide the logos on their sheet.
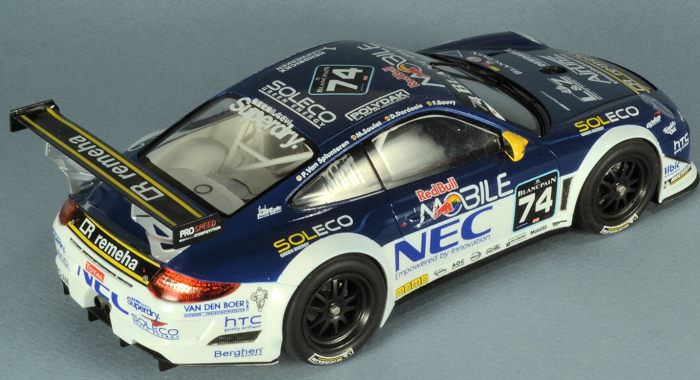
| FINAL CONSTRUCTION |
 The wheels were plated in a satin-finish chrome,
but the car I was building had black wheels, so I soaked them in Purple
Cleaner engine degreaser to remove the plating. It was a shame, because they
looked pretty good in the satin finish. I painted the wheels with Mr Color
Metallic Black and then gave them a clear gloss coat. I also removed the
chrome from the brake rotors and wing mounts, and then repainted them with
various shades of Alclad. The instructions would have you install the wheels
prior to adding the body to the chassis, but it’s best to leave the rear
wheels off, because they interfere with the undercuts in the wheel well
openings as the body drops over them.
The wheels were plated in a satin-finish chrome,
but the car I was building had black wheels, so I soaked them in Purple
Cleaner engine degreaser to remove the plating. It was a shame, because they
looked pretty good in the satin finish. I painted the wheels with Mr Color
Metallic Black and then gave them a clear gloss coat. I also removed the
chrome from the brake rotors and wing mounts, and then repainted them with
various shades of Alclad. The instructions would have you install the wheels
prior to adding the body to the chassis, but it’s best to leave the rear
wheels off, because they interfere with the undercuts in the wheel well
openings as the body drops over them.
Unfortunately, the kit didn’t include the “dive planes” that are mounted in front of the front wheel wells, so I made my own from 0.005 brass and painted them gloss black to simulate carbon fiber.
| CONCLUSIONS |
This Fujimi curbside kit was a lot of fun. The parts fit well, didn’t require much cleanup, and I didn’t have to get bogged down detailing an engine (it’s just not my thing).
I wasn’t very happy with the results I got with Krylon paint. Because you get several times the amount of paint you get in a Tamiya can for half the cost, one could say you get what you pay for. Krylon and Rust-O-Leum paints were intended to paint furniture and lawn mowers and such, instead of models, so we can’t really expect Tamiya quality from them. After getting even worse results from a different can of Krylon on another model, I did some experimenting and found that adding about 25% Mr Leveling Thinner helped the paint flow much better and left a satin finish that could be polished to a decent shine in preparation for a coat of Tamiya clear. I think I’ll still stick with paints intended for models after this experiment.
| REFERENCES |
https://en.wikipedia.org/wiki/Prospeed_Competition
https://www.evo.co.uk/porsche/911/6503/porsche-911-gt3-997
https://www.speedsport-magazine.com/motorsport/grand-touring/endurance-series/2012/results.html
Ben Brown
28 June 2019
Back to the Main Page Back to the Previews Index Page
Back to the Previews Index Page