AMT 1/25 Lola T-8800
| KIT #: | 6753 |
| PRICE: | $ |
| DECALS: | One option |
| REVIEWER: | Ben Brown |
| NOTES: |
Indycals decals |
| HISTORY |
Lola Cars International Ltd. Huntingdon, England was founded by
Eric Broadley in 1958, eventually growing into one of the oldest and largest
race car manufacturers in the world. Lola started out building front engine
sports cars before moving on to building race cars. During the 1960s, Broadley
designed the Lola Mk.6 coupe powered by a Ford engine. This design attracted
Ford’s interest, and they paid Broadly to put his company on hold for 2 years
while he worked with Roy Lunn on what became the Ford GT40. Broadley managed to
get out of the contract after a year and went on to build his own car, the Lola
T70 and its successors. These cars were raced successfully all over the world.
Lola continued to compete in sports car racing throughout the ‘70s and into the
‘80s. Lola cars were first raced in Formula 1 from 1962
 to 1964, without a lot
of success. In 1967, Lola teamed with Honda to build the Honda RA300/Lola T130,
which went on the win the 1967 Italian Grand Prix. Lola went on to develop cars
for many race series, including Formula Two/Formula 3000 and Formula 5000.
to 1964, without a lot
of success. In 1967, Lola teamed with Honda to build the Honda RA300/Lola T130,
which went on the win the 1967 Italian Grand Prix. Lola went on to develop cars
for many race series, including Formula Two/Formula 3000 and Formula 5000.
Lola started building chassis for the Indy 500 in the 1960s, with Graham Hill winning the 1966 race in a Lola. A Lola driven by Al Unser Sr won the 1978 Indy 500. During the 1980s, with the collapse of the revived CanAm race series, Lola started concentrating on the Championship Auto Racing Teams (CART) series. In 1983, Mario Andretti drove a Lola in the Indy 500 for the new Newman Haas team. Lola cars began to dominate the series, eventually pushing March out by 1991. Arie Luyendyk scored another win for Lola in the 1990 Indy 500. Lola’s main competition in the late ‘80s was Reynard. They entered CART in 1994, and by 1998, only the Davis Racing team was still running a Lola chassis. Penske Racing ran a Lola for 1999, after they abandoned their own chassis, but switched to Reynards for 2000 and 2001. The Newman Haas and Chip Ganassi teams switched back to Lolas during this time, so in 2001, the field was fairly evenly matched between Reynards and Lolas. Reynard soon ran into financial trouble and most teams running Reynards switched to the Indy Racing League, so by 2003, Lola was the only chassis manufacturer in the Champ Car (ex-CART) series. In 2007, Champ Cars switched to the Panoz spec chassis, thus ending Lola’s involvement in Indycar racing. Lola finally shut down in 2012.
 The
Lola T8800 chassis was the 1988 season’s Indy car. It weight about 1300 lbs and
was fitted with a turbocharged Judd, Cosworth, or Chevy V8, or a Buick V6 engine
that produced 900 horsepower. It featured a carbon fiber and aluminum monocoque
chassis, with a carbon fiber and fiberglass body. Top speed depended on the
track and the car’s gearing, but top speeds at Indianapolis approached 220 mph.
The
Lola T8800 chassis was the 1988 season’s Indy car. It weight about 1300 lbs and
was fitted with a turbocharged Judd, Cosworth, or Chevy V8, or a Buick V6 engine
that produced 900 horsepower. It featured a carbon fiber and aluminum monocoque
chassis, with a carbon fiber and fiberglass body. Top speed depended on the
track and the car’s gearing, but top speeds at Indianapolis approached 220 mph.
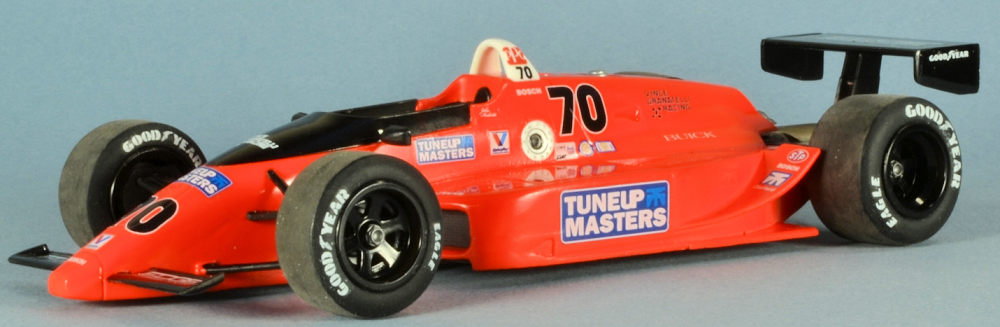
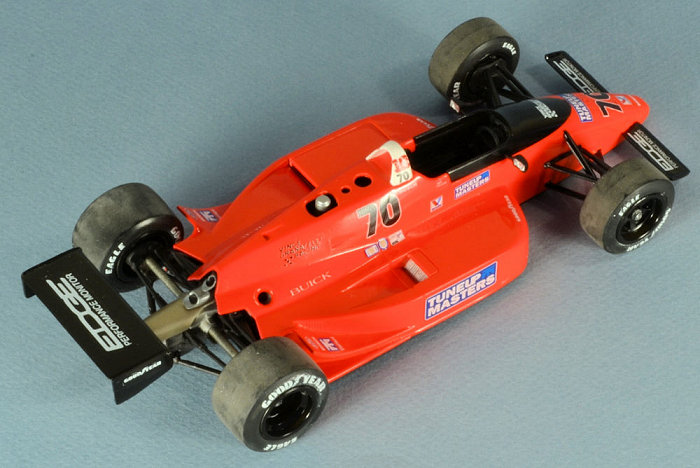
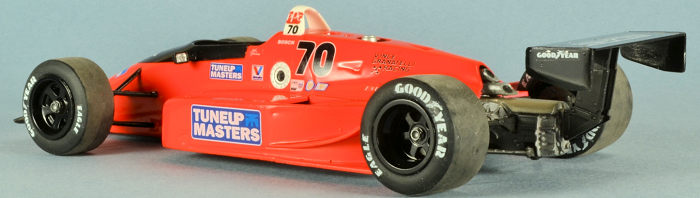
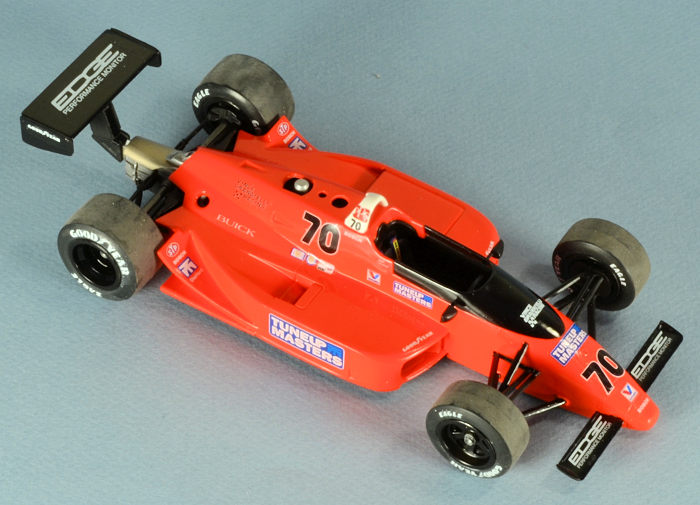
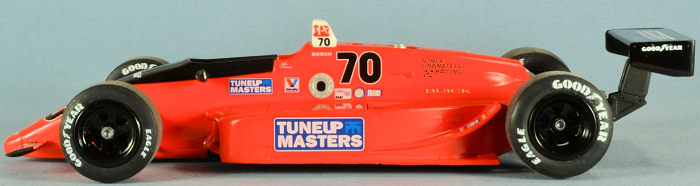
Vince Granatelli Racing ran Indy cars from 1987 to 1991. Roberto Guerrero won two races in 1987 and Arie Luyendyk won two races in 1991. All Granatelli cars were painted fluorescent red, in honor of Granatelli’s sponsorship by STP. For the 1989 Indy 500, John Andretti drove a Buick V6-powered T8800 for Vince Granatelli’s Tuneup Masters team. He finished 25th after an engine failure put him out of the race at Lap 61.
| THE KIT |
The kit is molded in white plastic, with a chrome-plated sprue containing the wheels and various engine parts, and a clear windscreen. Four vinyl tires are also provided. Decals allow the modeler to build Mario Andretti’s Chevy-powered car.
| CONSTRUCTION |
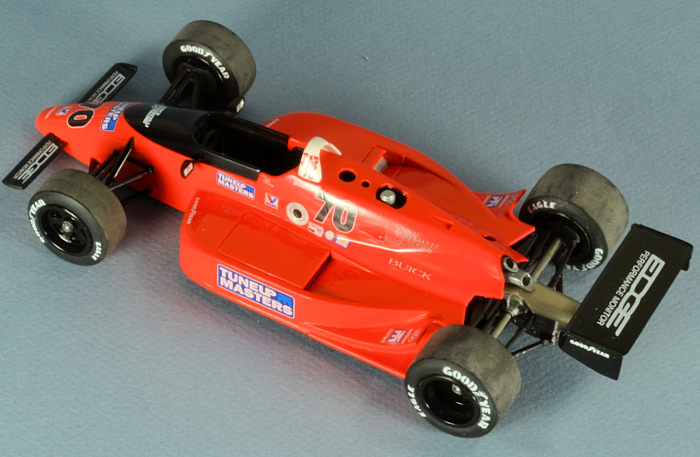
These AMT Indy cars are relatively simple kits, with a modest parts count, but typical of many kits of the 1980s, they do have a few fit issues. I started with the cockpit, and just followed the painting instructions. There should be a lot of exposed carbon fiber and aluminum, but I just went with various shades of dark gray and black. The cockpit is sparse, with only the seat, steering wheel and instrument panel, shifter, and pedals. I added some seat belt decals from Indycals, since I planned to leave out the driver.
 The
engine, transmission, and rear suspension are built up as one unit, which
attaches to the firewall in the body. The kit engine has pretty good basic
detail, and would look great with some detail painting and a few aftermarket
parts. I stripped the chrome off of the chromed sprue, so I could paint the
various parts. I only did a little basic painting on the engine/gearbox
assembly, since I planned to build this kit as a curbside model. The kit has a
Chevrolet V8 engine, while the Granatelli car had a Buick V6. Indycals sells a
3-D-printed V6 through their web site, should the modeler want to display this
engine. The engine/gearbox assembly must be installed prior to installing the
engine cover, so I had to do a little masking prior to painting.
The
engine, transmission, and rear suspension are built up as one unit, which
attaches to the firewall in the body. The kit engine has pretty good basic
detail, and would look great with some detail painting and a few aftermarket
parts. I stripped the chrome off of the chromed sprue, so I could paint the
various parts. I only did a little basic painting on the engine/gearbox
assembly, since I planned to build this kit as a curbside model. The kit has a
Chevrolet V8 engine, while the Granatelli car had a Buick V6. Indycals sells a
3-D-printed V6 through their web site, should the modeler want to display this
engine. The engine/gearbox assembly must be installed prior to installing the
engine cover, so I had to do a little masking prior to painting.
The engine cover didn’t fit very well and required some clamping and Apoxie Sculpt along the seam where it met the forward part of the car. I also had to use filler along the seams on the sides of the nose and around the side pod intakes. I removed the upper suspension arms to make cleanup in these areas a little easier.
| COLORS & MARKINGS |
I primed the model by airbrushing Mr Base White primer, to cover the filler and
to give the Tamiya lacquer paint a consistent base color. It airbrushes
beautifully when thinned with Mr Leveling Thinner and covers as well as Tamiya’s
rattle can white primer. I started with Tamiya TS-36 Fluorescent Red for the
main color. This almost led to disaster, through a combination of my
inexperience with rattle cans and the semi-clear quality of the paint. I managed
to get some runs in the paint and was never able to get good coverage. I let
everything dry for a few days, sanded out the runs, and then airbrushed the
model with Model Master Fluorescent Red. This semi-gloss paint is a perfect
match for the Tamiya paint and it covers
much better, so I was able
to hide most of the problem areas on the bright paint. I airbrushed the
underside of the model and the wheels Tamiya semi-gloss black and the wings with
Tamiya Gloss Black. After the mess I made with the rattle can paint, I decided
to skip using a rattle can for the clear gloss coat and fell back on
 airbrushing
my old tried and true Future. Unfortunately, I didn’t give the underlying
lacquer and enamel coats enough time to gas out, so I got some minor dry lake
bed effect on top of the side pods. Next time, I’ll just take the time to decant
and airbrush Tamiya clear.
airbrushing
my old tried and true Future. Unfortunately, I didn’t give the underlying
lacquer and enamel coats enough time to gas out, so I got some minor dry lake
bed effect on top of the side pods. Next time, I’ll just take the time to decant
and airbrush Tamiya clear.
The decals I used were purchased almost 10 years ago, and were printed using an ALPS printer. Indycals has since moved to a newer type of printer that can still print white, but doesn’t have the striped effect one often sees with ALPS. The old ALPS decals performed well with Microscale’s Micro Set and Micro Sol. Unfortunately, the sheet was missing the rear wing logo and a couple of Valvoline logos, but included some of the markings for a Dyanetics-sponsored STP car, so I ordered an updated set from Indycals. The new set performed flawlessly, but the white wasn’t quite opaque, letting some of the underlying color bleed through. Once the decals were dry, I sprayed the model with a final coat of Future.
| FINAL CONSTRUCTION |
I had split the forward wings, so I could install them after the seams on the
nose were cleaned up. The rear wing attached without any problems; I just had to
sand the top of the wing mount to reduce its angle of attack. The kit only
includes speedway wings, but Indycals sells a set of 3-D-printed road course
wings, if 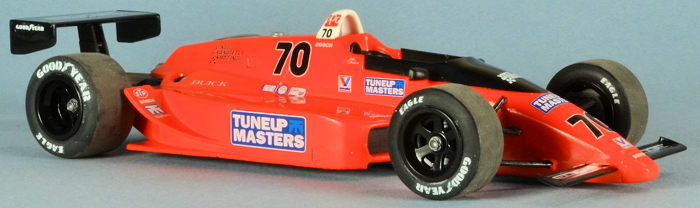 you want to build something different. I also added the upper
suspension parts and brakes at this time. The tires had “Goodyear Eagle” molded
into the sidewalls, so I sanded the logos off and added some Indycals tire
logos. Unfortunately, I didn’t notice that there were two different sizes of
logos until after I had applied the wrong logos to the wrong tires, so I had to
take advantage of Indycals’ excellent “Oops Protection” service. Once the
replacement decals were applied to the correct tires, I protected the decals
with some Microscale clear flat. I stripped the chrome off of the wheels and
painted them semi-gloss black. Brake rotors are supplied for the front and rear,
but there rears are not mentioned in the kit instructions and no calipers are
provided. Fortunately, they are well-hidden inside the wheels. The windscreen
was painted using a mixture of Future and Tamiya Gloss black, to give it a
heavily-tinted look. I tried to use Bare Metal foil on the mirrors. For years, I
have had a less-than-friendly relationship with the stuff, and I was once again
reminded why. I ended up just painting the surfaces with Metalizer aluminum. One
of these days I’ll fix them with some Mylar or something.
you want to build something different. I also added the upper
suspension parts and brakes at this time. The tires had “Goodyear Eagle” molded
into the sidewalls, so I sanded the logos off and added some Indycals tire
logos. Unfortunately, I didn’t notice that there were two different sizes of
logos until after I had applied the wrong logos to the wrong tires, so I had to
take advantage of Indycals’ excellent “Oops Protection” service. Once the
replacement decals were applied to the correct tires, I protected the decals
with some Microscale clear flat. I stripped the chrome off of the wheels and
painted them semi-gloss black. Brake rotors are supplied for the front and rear,
but there rears are not mentioned in the kit instructions and no calipers are
provided. Fortunately, they are well-hidden inside the wheels. The windscreen
was painted using a mixture of Future and Tamiya Gloss black, to give it a
heavily-tinted look. I tried to use Bare Metal foil on the mirrors. For years, I
have had a less-than-friendly relationship with the stuff, and I was once again
reminded why. I ended up just painting the surfaces with Metalizer aluminum. One
of these days I’ll fix them with some Mylar or something.
| CONCLUSIONS |
 These old AMT Indy kits build into nice models of late-‘80s Indy cars. They’re
fairly simple and there are not too many parts, so someone with a few models
under their belt can turn out a good-looking model. They’re not very expensive
on the used kit market, and with Indycals producing lots of reasonably-priced
decals and some nice accessories, you can build a wide variety of cars. It’s
like airliner modeling, where there are almost too many great liveries to choose
from. If you want to have some fun and put a splash of bright color among your
drab military models, give one of these Indy cars a try.
These old AMT Indy kits build into nice models of late-‘80s Indy cars. They’re
fairly simple and there are not too many parts, so someone with a few models
under their belt can turn out a good-looking model. They’re not very expensive
on the used kit market, and with Indycals producing lots of reasonably-priced
decals and some nice accessories, you can build a wide variety of cars. It’s
like airliner modeling, where there are almost too many great liveries to choose
from. If you want to have some fun and put a splash of bright color among your
drab military models, give one of these Indy cars a try.
| REFERENCES |
Wikipedia
Open Wheel Racing Modeling Forum http://mb2501.proboards.com/
Indycals http://www.indycals.net/
3 September 2018
Kit
and decals courtesy of my wallet. I have no financial connection with Indycals
or its owner. I just like his products.
If you would like your product reviewed fairly and fairly quickly, please contact the editor or see other details in the Note to Contributors.
Back to the Main Page Back to the Review Index Page Back to the Previews Index Page