| KIT: | Fujimi 1/24 Enzo Ferrari |
| KIT #: | 123141 |
| PRICE: | $35.99 MSRP |
| DECALS: | One car |
| REVIEWER: | Greg Ewald |
| NOTES: | Fantastic intermediate kit, lacking some detail, almost perfect fit. |
| HISTORY |
Carbon Fiber Body. 12 Cylinder Engine. Wow is the word for this little speedster, hit the ground running at 0-60 at under four seconds? Sure.
If you like life in the fast lane, this is possibly the epitome of a sport’s car, let’s go over 200 without a sneeze, shall we? Of course, at the blistering gas-guzzle of around 12 mpg, you may want to make sure you have a healthy bank account.
The car has an adjustable air flow system that is computer controlled, once the little sucker gets going fast enough, the body of the whole thing adjusts to make it more efficient. Hey, you might get 13 mpg !
| THE KIT |
 Unfortunately,
the kit boxing doesn’t do the model justice, with the bright red of the box
graphics, it overwhelms the base red colour of the car in the clear plastic
viewing area. Yeah, I know, not a big deal, and to ignore this kit because of
mediocre boxing would be a huge mistake, as it is a fantastic “middle of the
road” kit. It falls short of some of the details of the high-end car models, but
outshines the basic MPC deals you see so often.
Unfortunately,
the kit boxing doesn’t do the model justice, with the bright red of the box
graphics, it overwhelms the base red colour of the car in the clear plastic
viewing area. Yeah, I know, not a big deal, and to ignore this kit because of
mediocre boxing would be a huge mistake, as it is a fantastic “middle of the
road” kit. It falls short of some of the details of the high-end car models, but
outshines the basic MPC deals you see so often.
The kit sprues are somewhat thick, but the plastic is just fantastic, easy to cut, sand, and manipulate. On top of that, Fujimi has gone overboard on their engineering in regards to the precise fit, this is almost a “snap-tite” kit. (see Daboss’s preview here: http://modelingmadness.com/scotts/cars/previews/fujimi/123141.htm)
Clear parts are a little thick, and as Scott noted, the different sprues are molded in separate colours, not always making sense, as many of the red sprues have to be painted black. Hmmm.
Instructions are a little vague, but decipherable, and with a few mistakes. Test fit everything prior to using a fast setting glue.
| CONSTRUCTION |
The first step involves the calipers and axles, for some odd reason, these are meant to rotate like a toy. Don’t. Glue them in place or down the road, you will be sorry, as the attachment points are structurally very weak. Trust me on this one. Snap ! “Damn it!”.
 When you
start to assemble the different components, you really get an appreciation for
just how far Fujimi has gone to make this a good kit: bing, bang, boom,
everything just clicks together.
Less impressive are the dashboard and console, wait
to paint it until you have it assembled or you run the risk of snapping of a
fiddly bit.
Definitely apply the decals in stages, as I didn’t, as to
avoid disaster.
When you
start to assemble the different components, you really get an appreciation for
just how far Fujimi has gone to make this a good kit: bing, bang, boom,
everything just clicks together.
Less impressive are the dashboard and console, wait
to paint it until you have it assembled or you run the risk of snapping of a
fiddly bit.
Definitely apply the decals in stages, as I didn’t, as to
avoid disaster.
The car’s interior is rather drab, all in different shades of black, with a few flecks of chrome bits to cheer one up. The massive engine resides just behind the seats, I can not imagine the noise and vibration level while driving this speedy thing.
 Unfortunately,
the engine is not a separate item, and is molded into the main frame of the
upper chassis, which makes the painting something of a B. (I mean ‘bear’), but
the upper construct goes into the lower like a glove. And it fits.
Unfortunately,
the engine is not a separate item, and is molded into the main frame of the
upper chassis, which makes the painting something of a B. (I mean ‘bear’), but
the upper construct goes into the lower like a glove. And it fits.
There are no belts for the seats, and the attachment points for the seat base’s are vague, so be careful, if you misalign them, the low roof won’t fit on.
The interior of the upper body is a total surprise, it almost falls together easily, the preformed black screens going into their slots without a hitch at all. On my instruction sheet, parts F18 and F 17 are marked backwards, hence the reason for test fitting constantly.
The side panels D3 and D4 are going to really require CA glue to get into place, perhaps with an accelerator, and some serious finger-work. I did one at a time, and set them aside to dry for 30 minutes before attaching the larger outer panels D1 and D2.
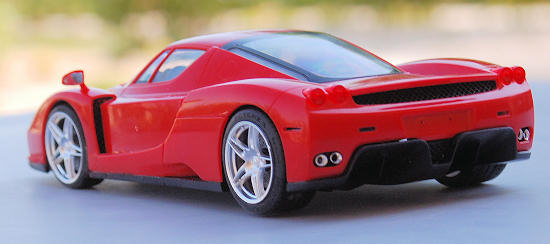
The clear parts that go on for the headlights, sidelights, and taillights fit perfectly with no sanding, a true miracle. Those of you who have had to deal with warped or out of size clear bits will really love this aspect.
Front bumper part D9 does take a bit of doing, but just glue the mid section in, let it dry, and then do each end to make sure the little wing ends align with the main body.
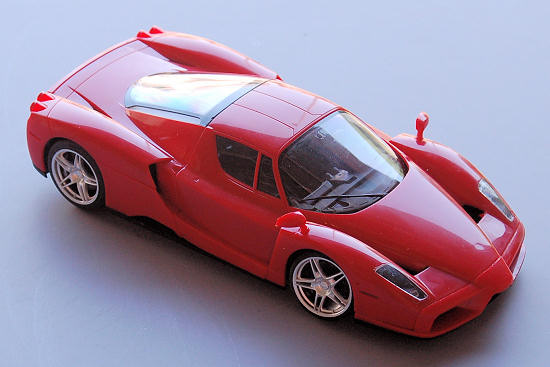
Fujimi supplies a mask for the clear glass windows, use these, then mask the upper surface with Blue Tape, and spray. I applied a thin wash of Krystal Kleer, to tack it down, then CA glue on areas where it would not fog at all. For all of the looks of complexity, it went smoothly, both window parts were done in under twenty minutes. This is a true hallmark of a company that wants to step outside the box, and really make things easy for a modeler!
| COLORS & MARKINGS |
I
rarely, if ever, build models OOB, but this one required very little attention
in the paint department, aside from the odd requirements of the instructions to
mix paint colours of black, flat black, and semi-satin black.
O.K., I know a fair number of car nazi’s, but this
amount of paint detail is kind of ridiculous for this level of car model, where
most of the detail is lost inside and invisible.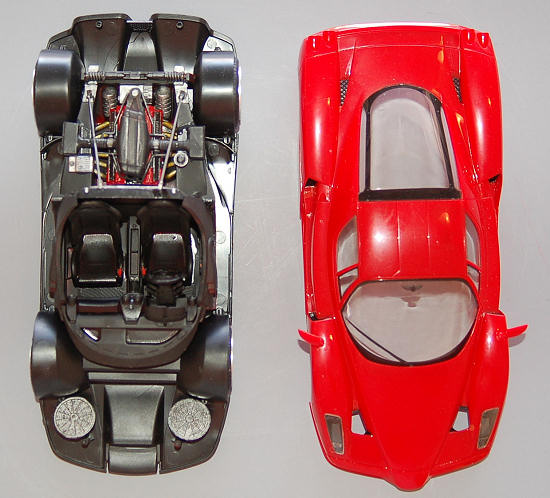
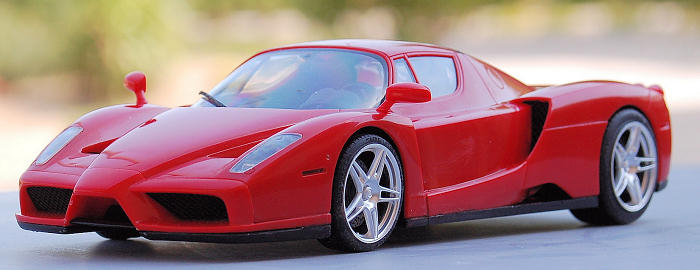
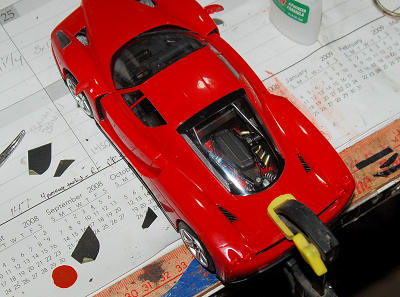
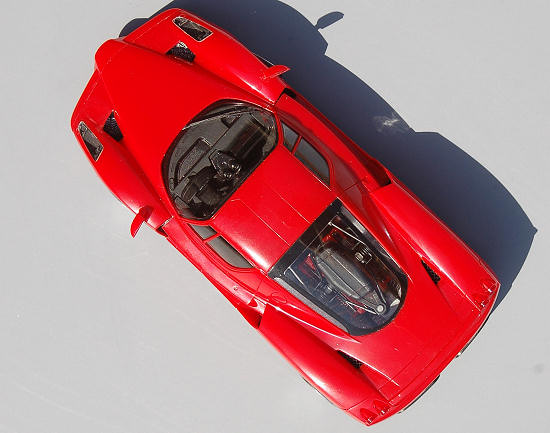
Many of the purist’s are going to want to flail me, but I did not paint the main body at all, as it is a drop in carbon fiber body in 1/1 scale, and they captured the semi-gloss red perfectly when they molded it. Hey, why “make-work”? (*keep reading for a follow up)
Like all car models, you have to paint as you go, so have all of your colours assembled and handy. I painted the brake calipers, axles, and underneath with a flat black, then gave it a wash of chrome silver, then another wash of flat black. It at least sets it off a little.
The interior is a veritable
smorgasbord
of different black tones, be ready to
get a little irritated. I would love to see someone drive this beast with it’s
pitch dark interior around my home city of
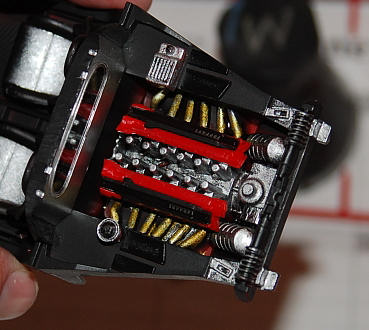
The Engine: Ah, the heart of every vehicle. Too bad this one is so simplified. A purist will want to rip out the guts of the mainframe, and scratchbuild a new one, as many of the connection points between the many bits don’t even meet up (not that you can see much anyway). I painted the whole interior compartment flat black, then started picking out the hoses and valves with brushed on silver. The main exhaust stack was painted in gold, (since I do have a friend with a Ferrari, and he has gold headers) and then the whole mess was given a good dark black wash. Personally, I would have liked to attacked the engine compartment with a dremel and a bunch of wire, but I know that static from some of the readers here tends to favour the complete OOB thing. To be fair to the Fujimi Company, once the engine is under the cowling, it does look pretty fantastic, and even my nit-picking wife couldn’t find any flaws in their design. O.K. enough humble pie, let’s get on with it.
| FINAL BITS |
 The most
frustrating part of this build was actually on one of the tiniest parts.
Attaching the review mirror to the main window is a real p.i.t.a.
You must use clear glass adhesive, or Krystal Kleer
as I did, or you run the risk of fogging your
massive, curved windscreen. Thank heavens, a good movie was on, and I held it in
place while a Spinosaurus ripped apart would-be-mercenaries, blowing gently. (me
blowing on the plastic, not the dinosaur)
The most
frustrating part of this build was actually on one of the tiniest parts.
Attaching the review mirror to the main window is a real p.i.t.a.
You must use clear glass adhesive, or Krystal Kleer
as I did, or you run the risk of fogging your
massive, curved windscreen. Thank heavens, a good movie was on, and I held it in
place while a Spinosaurus ripped apart would-be-mercenaries, blowing gently. (me
blowing on the plastic, not the dinosaur)
| CONCLUSIONS |
 If you
have assembled a few MPC/AMT models or the like, you will dig this kit. It goes
together well, and in about 24 hours of work, including drying time, you have a
total “sex-machine”, as they would say.
I don’t like the engine at all, and the final
assembly is tough, but the rest of the model is flawless, and so well engineered
that it makes you shake your head in wonder. Fujimi has produced another winner,
for sure.References:
If you
have assembled a few MPC/AMT models or the like, you will dig this kit. It goes
together well, and in about 24 hours of work, including drying time, you have a
total “sex-machine”, as they would say.
I don’t like the engine at all, and the final
assembly is tough, but the rest of the model is flawless, and so well engineered
that it makes you shake your head in wonder. Fujimi has produced another winner,
for sure.References:
| REFERENCES |
http://en.wikipedia.org/wiki/Enzo_Ferrari_(car)
July 2008
Thanks to www.dragonmodelsusa.com for the review kit. Get this at your local hobby shop or from the hyperlink to Dragon USA.
If you would like your product reviewed fairly and quickly, please contact me or see other details in the Note to Contributors.