AMT 1/25 1963 Corvette
| KIT #: | 6520 |
| PRICE: | $25.00 |
| DECALS: | License plates |
| REVIEWER: | Blair Stewart |
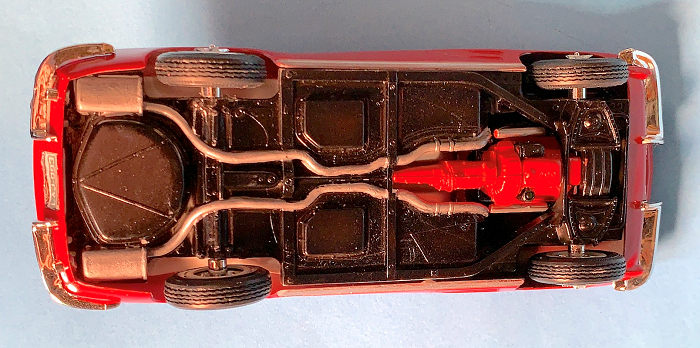
| NOTES: | One-piece chassis; minimal engine bay detail |
| HISTORY |
The 1963 Chevy Corvette was the final result of more than 50 years’ worth of research both on and off the racetrack. Conceived by Bill Mitchell and Zora Arkus-Duntov, the second-generation (C2) Corvette essentially evolved from a racecar – the Stingray racer that Mitchell created (and privately funded out of his own pocket.)
Even its title, which was an axiom deliberately given to the race car because of its resemblance to an actual stingray, stuck and further defined the C2 for all time as the “Corvette Sting Ray.”
The car was an instant marketing success. Given its improved and re-imagined styling from the C1, and the impressive advancements made to the car’s performance and handling, there was no doubt the second-generation Corvette would be a triumph. Even so, nobody could have guessed that Mitchell’s ingenious design and Duntov’s engineering wizardry would produce a sports car that would become as popular or as successful as the 1963 Corvette.
 When the
1963 Corvette finally made it to market, its sales numbers jumped off the
charts, literally skyrocketing Corvette sales to levels never before seen – even
in 1953 when the C1 had originally been marketed to enthusiastic soldiers
returning home from overseas.
When the
1963 Corvette finally made it to market, its sales numbers jumped off the
charts, literally skyrocketing Corvette sales to levels never before seen – even
in 1953 when the C1 had originally been marketed to enthusiastic soldiers
returning home from overseas.
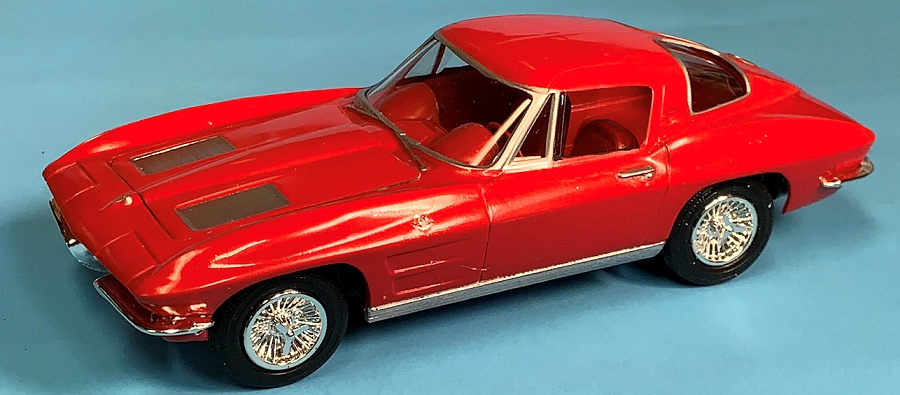
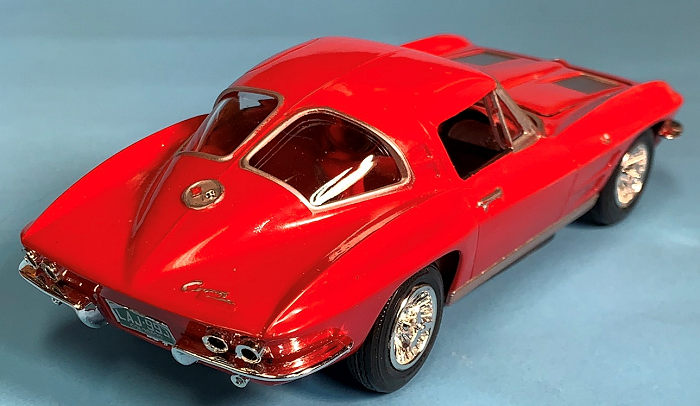
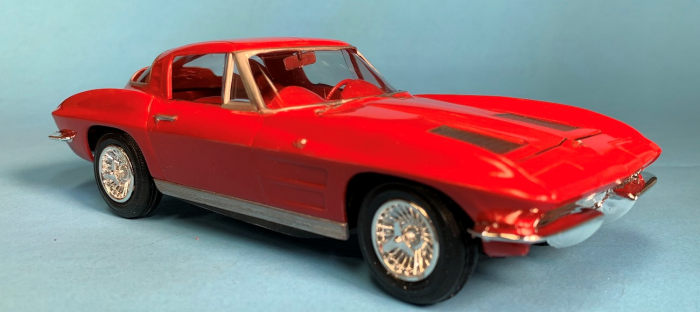
Unlike the C1 Vette that only offered a convertible with a hardtop option, the 1963 Corvette introduced a fastback coupe version, and the 1963 model had the unique “split window” design on the rear deck. Today, split window 1963 coupes are highly sought after and bring premium prices if they are in good original or meticulously restored condition.
This year marks the 60th anniversary of the Stingray line of Corvettes (my personal opinion is the 1967 Stingray Corvette is the best of the Vettes, and this is supported by the fact that 67s - especially those with the 427 big block motor - go for hefty prices at most car auctions. Of course, the jury is still out for the new mid-engine C8!). Having personally owned five Corvettes in my life – including a 1966 C2 Coupe – I was eager to build a kit of this historic Corvette.
| THE KIT |
Aluminum Model Toys (AMT) released a number of 1/25 scale dealer promotional model cars in its early days. AMT's 1949 and 1950 Ford and Plymouth sedans were its first plastic models, along with the 1950 Studebaker coupe. These promos often had wind-up motors which could not be seen through the shiny silver-tinted windows. They had metal chassis and diecast metal chrome-plated bumpers, which were later replaced with chrome-plated plastic. Often, official factory paint colors were applied to the models. The company's first commercial products were pre-assembled plastic promotional models, which were only available through automobile dealerships.
Though simply cast, promotional models were exquisitely detailed and proportioned, and by 1960, AMT became the main supplier of the pre-assembled model to American car companies.
 This
kit, which debuted in 1963/64, was therefore one of the early model kits
released by AMT for hobbyists to assemble that were still being made for dealers
as promotional models. As a result, it has a completely molded chassis/underside
and the usual steel rods as axles for mounting the wheels to the chassis. In
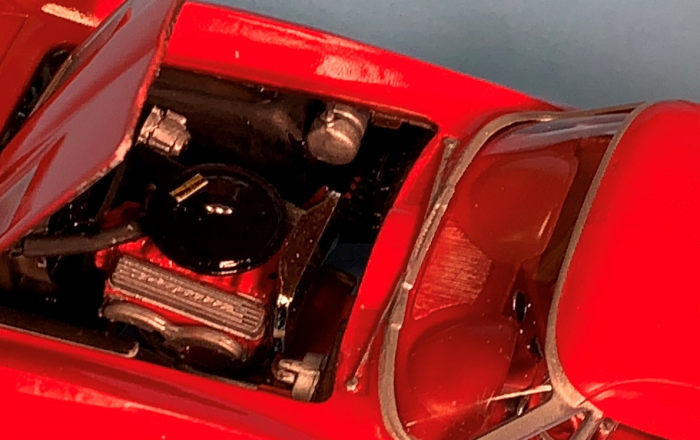
addition, while the engine is somewhat detailed, the engine bay is rather devoid
of details (I think the promotional models didn’t even have opening
hoods/engines, but I could be wrong about this). The kit is essentially a “3 n
1” kit, with stock, custom and drag versions available for construction.
This
kit, which debuted in 1963/64, was therefore one of the early model kits
released by AMT for hobbyists to assemble that were still being made for dealers
as promotional models. As a result, it has a completely molded chassis/underside
and the usual steel rods as axles for mounting the wheels to the chassis. In
addition, while the engine is somewhat detailed, the engine bay is rather devoid
of details (I think the promotional models didn’t even have opening
hoods/engines, but I could be wrong about this). The kit is essentially a “3 n
1” kit, with stock, custom and drag versions available for construction.
The version I built was a 2002 AMT/ERTL release. Accordingly, given the age of the mold, there was some flash to deal with when assembling the kit. The kit is molded in gray styrene plastic and has rubber tires. There is one sprue of chrome-plated parts. The chrome coating is rather thick and ragged in some places, which makes scraping and gluing these parts onto the car a little difficult. The simple decal sheet contains license plates for several states and some custom graphics for the drag and custom versions.
| CONSTRUCTION |
Like most model car kits, assembly begins with the engine. There are four versions: stock 327 small block; fuel injected 327; a blower-fed 327; and a 427 big block with optional Weber carbs or three Holley carbs. I opted for the 16-part stock small block engine. After completing the assembly, I painted the entire assembly with Model Masters Chevrolet Engine Orange and set it aside to dry. Once dried, I hand-painted the valve covers and exhaust manifolds with Testors Aluminum, the carburetor with Testors Brass, the air cleaner, and the oil filter holder, fan, and starter motor with Testors Gloss Black. Finally, I painted the fan/alternator belt with hobby acrylic flat black. I added detail in the form of a solder fuel line to the carburetor and thin drilled holes in the block and used small wire to simulate sparkplug wires. The 63-67 Corvettes had electromagnetic (EM) shielding to protect the radio from static noises transmitted from the firing sparkplugs, so the kit includes the coil and distributor shield (but not those over the plugs). This the added wiring easier because I didn’t have to drill holes in a small distributor cap that otherwise would be visible atop the rear of the engine. I also added battery cables using small wire, and an upper radiator hose using a piece of stretched and bent plastic sprue.
 Next, I
moved to the rather simple interior (4 parts). 1963 Corvettes generally came
with an interior color matching the exterior color (I think a black interior was
an option). I chose to paint my model red, which in the case of the Vette, was
called “Riverside Red” by the factory. For this and the exterior, I opted for my
trustworthy Model Master Guards Red.
Next, I
moved to the rather simple interior (4 parts). 1963 Corvettes generally came
with an interior color matching the exterior color (I think a black interior was
an option). I chose to paint my model red, which in the case of the Vette, was
called “Riverside Red” by the factory. For this and the exterior, I opted for my
trustworthy Model Master Guards Red.
I then hand-painted the dashboard and instruments black and highlighted the chrome interior trim pieces with Testors Metallic Silver. I left the seats and dash glossy and brushed-coated the rest of the interior with Testors Dullcote to get rid of the shine.
After painting the chassis flat black, I assembled the stock wheels, inserted the steel axles and attached the wheels to the chassis. I then hand-painted the exhaust pipes and mufflers Testors Aluminum.
I installed the firewall on the body and glued the taillight assemblies and windshield/windows (all one piece) to the interior of the body. I followed that by securing the interior to the inside of the body. (Note: after I had finished the model, I realized that the one-piece window assembly extended a little bit beyond the wing windows. Oh well: too tired to go back and fix this, so I just admitted a screwup and left this as is!).
Final assembly consisted of gluing the chrome bumpers and license plate housing to the body’s exterior. I then mounted the body to the completed chassis.
| COLORS & MARKINGS |
Having chosen to do a red Corvette, I sprayed the exterior body and hood with MM Guards Red thinned with lacquer thinner (I have found that this speeds the drying process and minimizes the “orange peel” effect inherent in most enamel-based gloss paints).
I then sprayed a very
“wet” coat of Krylon Cover Maxx crystal clear acrylic/gloss from a rattle can
onto the painted body. This is dicey, as you have to get just e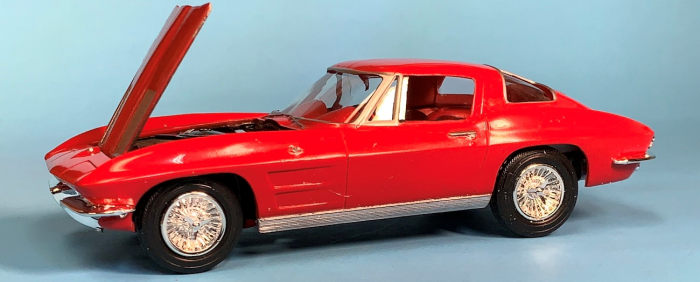 nough
of the paint on the model to make it very glossy without getting too much that
would cause the paint to run (I don’t recommend this for the faint of heart!).
nough
of the paint on the model to make it very glossy without getting too much that
would cause the paint to run (I don’t recommend this for the faint of heart!).
Once this gloss coat dried, I color (wet) sanded the body using 4000-8000 grit sanding pads. I then waxed the body using “The Treatment” model wax. I then hand-painted the chrome window trim and various badges on the body (in hindsight, I should have masked all the window trim and then used my airbrush to paint it, but I opted for the lazy way out – with less than spectacular results. The good news is I was able to clean up the hand-painted trim by using a Q tip dipped in some paint thinner.
There are no PE or chromed separate pieces for the distinctive Corvette badges, so I had to don the old jeweler’s magnifying hood to very carefully paint these as best I could. They look okay from a distance but degrade in appearance the closer one gets to the model. For a final touch, I printed out a scale Colorado license plate and glued it to the housing.
| CONCLUSIONS |
 Other
than Revell’s Snap-Tite kit, I believe this is the only game in town when it
comes to plastic kits of the 1963 Corvette Coupe (I am not sure if MPC produced
a 63 Coupe model). It is a tad “light” in details compared to modern day car
kits, but it builds into a great replica of this iconic car. If you are into
classic car models, this is a good one to have in your collection and a
relatively easy build.
Other
than Revell’s Snap-Tite kit, I believe this is the only game in town when it
comes to plastic kits of the 1963 Corvette Coupe (I am not sure if MPC produced
a 63 Coupe model). It is a tad “light” in details compared to modern day car
kits, but it builds into a great replica of this iconic car. If you are into
classic car models, this is a good one to have in your collection and a
relatively easy build.
| REFERENCES |
“C2 Corvette – ‘the Sting Ray’,” Corvsport Website, worldwide web, February 2023.
“1963-1967 C2 Corvette Factory Paint Colors,” Corvette Central Tech Blog, worldwide web, February 2023.
“Split-Window Corvette History,” Motortrend, worldwide web, February 2023.
22 May 2023
Copyright ModelingMadness.com. All rights reserved. No reproduction in part or in whole without express permission.
If you would like your product reviewed fairly and fairly quickly, please contact the editor or see other details in the Note to Contributors.