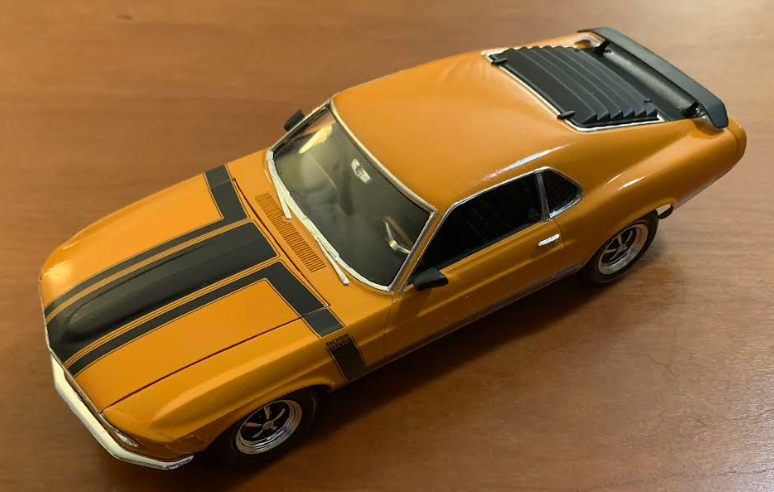
Revell 1/24 '70 Boss 302
| KIT #: | 4943 |
| PRICE: | $21.95 in 2015 |
| DECALS: | Two options |
| REVIEWER: | Shervin Shambayati |
| NOTES: | 2011 release |
| HISTORY |
 Although
Mustang originally started as a “pony car”—something akin to an American MG: a
two-door sporty looking car that was fun to drive but not too powerful—it soon
got that most American of automobile disease: the Muscle Car Syndrome. This
disease culminated in development of Mustang Boss 302, Boss 429 and Mustang
Mach1 series of cars. Boss 302 was designed specifically to have a special 302
cu. in engine to compete with Chevy Camaro 28/Z in TRANSAM series of races. The
body was had spent WWII in Manzanar internment camp for Japanese-Americans, he
was SoCal boy, immersed in the postwar SoCal car culture. He was artistically
inclined and attend Art Center College of Design. Although he did not graduate
(he did not like life drawing as he had no use for it in automotive design), his
talents as a designer were obvious. He got hired by a number of car companies,
finally landing at GM. At GM he designed the iconic Corvette Stingray among
others. When Henry Ford II poached Bunkie Knudson from GM, Knudson brought
Shinoda with him where his first project was designing Boss 302. The name “Boss”
is attributed to Shinoda. Apparently, when people asked him about what he was
working on, he would respond, “on boss’s car” referring to Knudson.
Although
Mustang originally started as a “pony car”—something akin to an American MG: a
two-door sporty looking car that was fun to drive but not too powerful—it soon
got that most American of automobile disease: the Muscle Car Syndrome. This
disease culminated in development of Mustang Boss 302, Boss 429 and Mustang
Mach1 series of cars. Boss 302 was designed specifically to have a special 302
cu. in engine to compete with Chevy Camaro 28/Z in TRANSAM series of races. The
body was had spent WWII in Manzanar internment camp for Japanese-Americans, he
was SoCal boy, immersed in the postwar SoCal car culture. He was artistically
inclined and attend Art Center College of Design. Although he did not graduate
(he did not like life drawing as he had no use for it in automotive design), his
talents as a designer were obvious. He got hired by a number of car companies,
finally landing at GM. At GM he designed the iconic Corvette Stingray among
others. When Henry Ford II poached Bunkie Knudson from GM, Knudson brought
Shinoda with him where his first project was designing Boss 302. The name “Boss”
is attributed to Shinoda. Apparently, when people asked him about what he was
working on, he would respond, “on boss’s car” referring to Knudson.
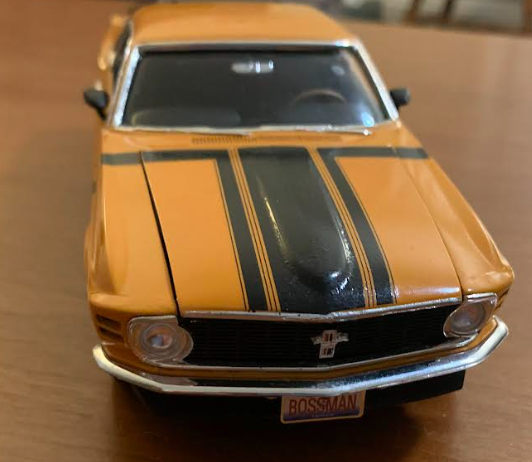
The subject of this kit, the 1970 Boss 302, differed from the 1969 in that its front was modified by removal of a pair of headlights. Externally, the iconic “hockey stick” stripe was added to the paint job.
| THE KIT |
See Scott’s preview here although it is an earlier boxing.
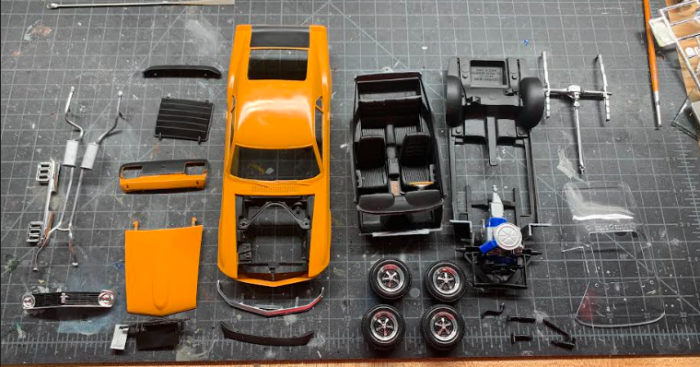
| CONSTRUCTION |
Building this car started with separating the parts that were supposed to be painted semi-gloss black. They were then painted with Tamiya semi-gloss lacquer spray, decanted for airbrushing. These include the chassis, the engine compartment, the cabin, the side view mirrors, the seats, the dashboard, the radiator, and the shocks.
 While
these were drying, I started on the engine. After connecting the engine halves
and the lower half of the valve covers and sanding the seams, I airbrushed the
transmission, the oil cooler and the carburetor lid with Alclad aluminum as well
as the steering wheel. I then masked the transmission and the carburetor top and
painted the body of the engine and lower carburetor with Model Master GM-Ford
engine. Once the engine was dried, I attached the top of the engine and the
valve covers. The valve covers were chromed parts but the pictures of the engine
show them as dull metallic, so I removed the chrome and painted it with Tamiya
X-53 which is a dull metallic color. The exhaust manifolds where paint the
Alclad steel and the part that includes the fan and the fan belt were painted
semi-black for the belts and gloss black for the fan and the belt wheels. After
the engine assembly was completed it was attached to the chassis.
While
these were drying, I started on the engine. After connecting the engine halves
and the lower half of the valve covers and sanding the seams, I airbrushed the
transmission, the oil cooler and the carburetor lid with Alclad aluminum as well
as the steering wheel. I then masked the transmission and the carburetor top and
painted the body of the engine and lower carburetor with Model Master GM-Ford
engine. Once the engine was dried, I attached the top of the engine and the
valve covers. The valve covers were chromed parts but the pictures of the engine
show them as dull metallic, so I removed the chrome and painted it with Tamiya
X-53 which is a dull metallic color. The exhaust manifolds where paint the
Alclad steel and the part that includes the fan and the fan belt were painted
semi-black for the belts and gloss black for the fan and the belt wheels. After
the engine assembly was completed it was attached to the chassis.
The main clear part—the combination windshield and rear glass—was dipped in Future and was left to dry while working on the other part.
Next was the interior. I glued the seats to the cabin. I then painted the steering wheel hand ring with Model Master wood colored enamel. I then added decals to the dashboard, glove compartment and the front seat console. I then added the gear shift to the cabin and attached the steering wheel to the dashboard. Final I attached the dashboard to the cabin.
| COLORS & MARKINGS |
 Next came
the body. I had painted the rear panel, the engine compartment and the trunk lid
semi-gloss black. I masked those. After masking them, I coated the body of the
car, the hood and part of the rear panel that needed to painted the body color
with decanted Tamiya white primer. Once that was dry, I airbrushed them with
decanted (yes I decant all my spray can colors) Grabber Orange from the now
discontinued Testor Custom Lacquer Color System. Once that was dried, I covered
them with Testors Custom Lacquer Color gloss clear coat. The clear coat was
built up in several layers. After the clear coat had reach what I thought was
sufficient thickness, I polished it with multiple grades of sanding pads from
coarsest to finest to get an even finish. Once that was done, I used fine
scratch remover polishing compound to give it a nice shine. Once that was done,
I covered the window and windshield frame, the front edge of the hood, the door
handles and the windshield wipers with Bare Metal Foil chrome and trimmed them
to shape.
Next came
the body. I had painted the rear panel, the engine compartment and the trunk lid
semi-gloss black. I masked those. After masking them, I coated the body of the
car, the hood and part of the rear panel that needed to painted the body color
with decanted Tamiya white primer. Once that was dry, I airbrushed them with
decanted (yes I decant all my spray can colors) Grabber Orange from the now
discontinued Testor Custom Lacquer Color System. Once that was dried, I covered
them with Testors Custom Lacquer Color gloss clear coat. The clear coat was
built up in several layers. After the clear coat had reach what I thought was
sufficient thickness, I polished it with multiple grades of sanding pads from
coarsest to finest to get an even finish. Once that was done, I used fine
scratch remover polishing compound to give it a nice shine. Once that was done,
I covered the window and windshield frame, the front edge of the hood, the door
handles and the windshield wipers with Bare Metal Foil chrome and trimmed them
to shape.
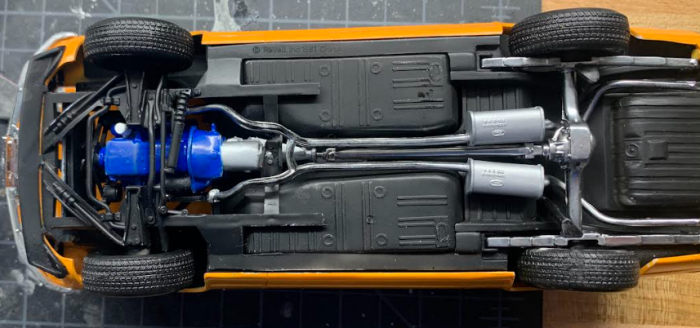
Next came the exhaust section. The muffler were painted dull aluminum while the rest of the exhaust was painted Alcald stainless steel. I also painted the combination drive shaft/differential/leaf springs/drive axels Alclad stainless steel.
The wheels and the front grill were also painted. I decided not to remove the chrome. Rather, I carefully hand-painted the parts of the grill and the wheels that were black with Tamiya semi-glass black acrylic paint (X-18). I also painted the indents around the taillights with Tamiya X-18. Finally, I painted the taillight Tamiya clear red. I painted the stripes behind Mustang emblem on the front with red and blue color.
| FINAL CONSTRUCTION |
 Once
everything was painted and the subassemblies were ready, I put everything
together without too much fuss following the instructions. This included
attaching the shocks, attaching the cabin to the chassis, attaching the clear
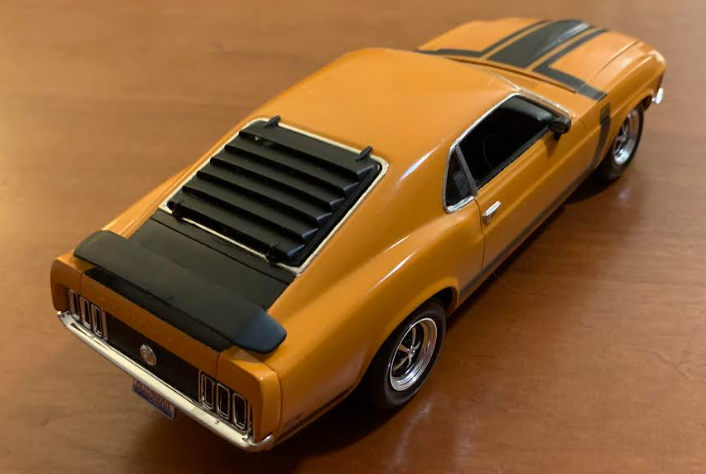
parts to the body and then adding the rearview mirrors. Adding the taillight,
the headlights, the front spoilers, the rear spoiler, the louvers on the rear
window and the bumpers.
Once
everything was painted and the subassemblies were ready, I put everything
together without too much fuss following the instructions. This included
attaching the shocks, attaching the cabin to the chassis, attaching the clear
parts to the body and then adding the rearview mirrors. Adding the taillight,
the headlights, the front spoilers, the rear spoiler, the louvers on the rear
window and the bumpers.
I used the kit decals. The external decals went on with minimal amount of fuss following the instructions. I also added various decals to the different parts of the engine.
I painted the bolts and nuts in the engine compartment with square bottle Testors silver enamel. I also painted the caps for the battery cells were painted with Tamiya gloss red.
| CONCLUSIONS |
Given that this kit is over 43 years old (copyright on the chassis says 1981 as does Scalemates.com) I was pleasantly surprised by the level of detail and the good fit of the parts. This is probably one of my favorite models. As an aside, when I lived in Northern California, I saw one of these cars, painted exactly as my model, in my local grocery store’s parking lot. This thing is huge. I strongly recommend this to people who want to start building cars. It is a beauty.
17 October 2025
Copyright ModelingMadness.com. All rights reserved. No reproduction in part or in whole without express permission from the editor.
If you would like your product reviewed fairly and fairly quickly, please contact the editor or see other details in the Note to Contributors.