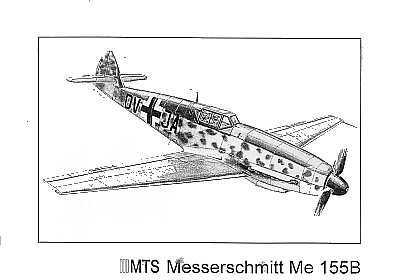
MTS 1/48 Me-155B
|
KIT # |
48002 |
|
PRICE: |
$35.00 |
|
DECALS: |
One aircraft |
|
REVIEW : |
|
|
NOTES: |
Kit resin with vac canopy |
|
HISTORY |
The Me-155 was an attempt at producing a high altitude fighter using as few new components as possible, this in order to keep the production line running smoothly. It so happens Kurt Tank was also designing a similar project designated Ta-152, an off shoot of the Fw-190D. With Messerschmitt's plate already full of projects and production problems, the RLM decided to transfer the 155 project to Blohm und Voss. The design was altered to the BV-155, as we know it; few of the original Me-155 ideas survived this process. History reads that the Ta-152 was more highly regarded as a superior high altitude design and put into production, the BV-155 was froth with technical issues and was at best an interesting and unique private venture.
|
THE KIT |
When MTS, a new Czech resin manufacturer released this kit, I just had to get one to see what it was like. Presented in a typical two part cardboard box, all tan resin parts are heat sealed into separate compartments to eliminate breakage. Decals looked suspicious and a nice set of photo-etch is included, the vacuformed canopy however is useless as it is too thin, and has two air egress buttons right on the top of the part.
|
CONSTRUCTION |
 First
off, the four parts that make up both wings need to be attended to before
gluing. This involves a great deal of sanding to bring it down to the correct
thickness and profile. This by far was the most tedious part of the entire kit;
the casting of these parts was a bit 'off'. The best way to have handled this,
from a modeler's point of view, was to cast each wing as one piece. Engraved
lines look good, but are a bit weak when it comes to the ailerons and flaps,
best to make them a bit deeper. The wheel wells are, well, not at all well. My
copy had flashed over wheel wells that required a steady hand to open up as well
as shape so both matched the proper profile. Let's go to the fuselage and get
that ready.
First
off, the four parts that make up both wings need to be attended to before
gluing. This involves a great deal of sanding to bring it down to the correct
thickness and profile. This by far was the most tedious part of the entire kit;
the casting of these parts was a bit 'off'. The best way to have handled this,
from a modeler's point of view, was to cast each wing as one piece. Engraved
lines look good, but are a bit weak when it comes to the ailerons and flaps,
best to make them a bit deeper. The wheel wells are, well, not at all well. My
copy had flashed over wheel wells that required a steady hand to open up as well
as shape so both matched the proper profile. Let's go to the fuselage and get
that ready.
The two piece fuselage is a re-worked Arii/Otaki Me-109G, reworked in such a way as to add the extra scale inches to the nose and the prominent bulge for the turbo-supercharger. The only original parts in the kit are wings, the underside air intake, and the main landing gear; the rest are resin copies of the venerable Arii kit. By the way, that air intake is a bit suspect in shape, looks a lot like a Spitfire tropical air filter. Back to the assembly. The fit of the two fuselage parts was good once each part was lightly sanded on a flat surface with 180-grit sandpaper. And for the most part, the wings were attached easily and painlessly, care being taken to apply dihedral.
 The
other problem, if you want to call it a problem, is the kit instructions refer
the modeler to the great Monografie Lotnicze book on Me-109 and
its' variants. But the drawings of the Me-155B don't match the kit fuselage in
shape at all. Call it " Artistic License", I guess.
The
other problem, if you want to call it a problem, is the kit instructions refer
the modeler to the great Monografie Lotnicze book on Me-109 and
its' variants. But the drawings of the Me-155B don't match the kit fuselage in
shape at all. Call it " Artistic License", I guess.
So as with the Arii Me-109 kit, assembly goes pretty smooth. One area I wished to enhance was the use of Moskit's exhaust pipes instead of the bumps provided. Some internal supports are super glued so all that's needed is to pop the metal parts in after painting is completed. The interior gets the usual RLM 66, adding the new photo-etched control panel, which is really one of the highlights of the kit. Later an etched rear armored panel will be added to a donor canopy.
All the parts are relatively free of bubbles and pinholes, with the exception of the wing leading edges. One concern was a funny surface texture on the fuselage, almost as though the resin was setting up when it was cast in the mold. It takes a lot of sanding and surface primer to eliminate it.
|
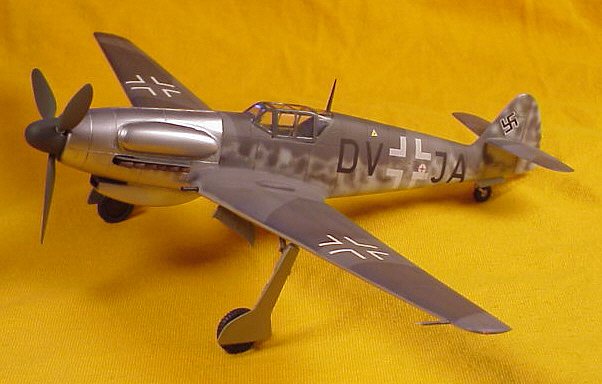
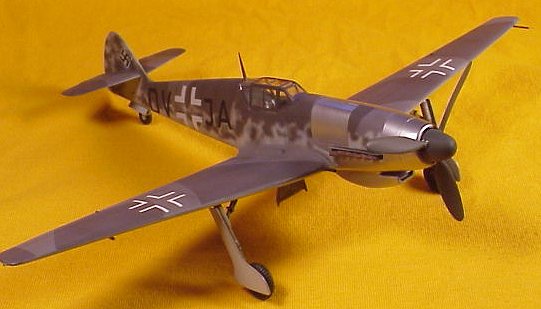
PAINT & DECALS |
Check out the decals and tell me what you think, look a bit, odd? Between you and me, the decals are helpless. MTS must have the same access to resources as I do to know that the decals are just not right. Radio call letters are way too small; crosses are just, off. Out came the Alps printer and about an hour later so did some more presentable decals.
The kit was actually looking pretty good after the
camouflage of RLM 76,74,75, the new decals helped a lot too. Something I tried
so as not to look like everyone else's Me-155B was to make a few engine panels
in natural aluminum color. The new Alcad II is remarkable paint. It doesn't
require any special coating or handling once applied.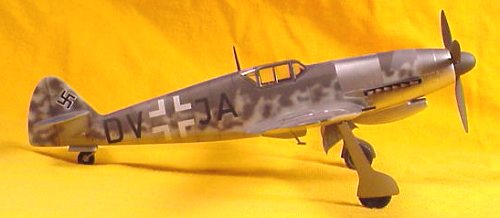
Next on tap is the landing gear. MTS has seen fit to cast the new gear legs with a wire insert, a nice touch to keep the model from belly landing after sitting on the shelf for a year or so. The gear covers are well done but need to be sanded to a thinner thickness. The next item is a canopy; the Arii version did not fit well, so it was immersed in hot water to bend it to shape. Alas, all my good intentions ended up as a blob of semi-clear plastic on the kitchen table. A sad end to my one hope, guess I'll try to use the kit canopy. But that is even less hopeful, the shape and lines look more like a Me-109B or C canopy. I managed to get an Otaki kit on E-bay fairly quickly so as to spirit the canopy out of it. Also a Cutting Edge Revi gunsight was used to jazz up the cockpit, the original part hardly looked the part.
Resin kits in general tend to be a bit more complicated
than the injected plastic counterpart, not in the difficulty of the actual
construction, although this kit could fall into that category, but in the actual
planning of construction. What part do we alter/finish in order to make
this part fit and do what its' supposed to do is the toughest part of a resin
kit assembly. No instructions can completely make one feel comfortable when
assembling the resin kit, but previous experiences making other kits will
certainly get you over that obstacle.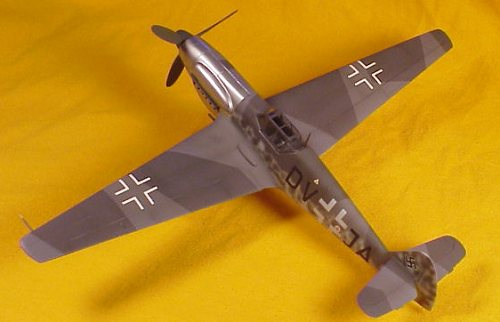
|
CONCLUSIONS |
A book could be written about this build, but let's just call it a month and call it at that. The Fun-O-Meter makes it up to a 5, hmmm. Must be the humidity, the Ease of assembly rates a 4, but the final result looks like an 8? It's a departure from the normal Me-109, having those extra long wings and chin air intake, and it looks good on my airfield, it might also look good on yours! Thanks MTS for taking a chance with this kit.
Copyright ModelingMadness.com. All rights reserved. No reproduction in part or in whole without express permission from the editor.
If you would like your product reviewed fairly and fairly quickly, pleasecontact the editor or see other details in the Note to Contributors.
Back to Reviews Page 2023