| KIT #: | 04166 |
| PRICE: | $16.00 |
| DECALS: | Two options |
| REVIEWER: | Francisco Santoro |
| NOTES: | Piece 8 curves up, canopy fits where it touches, cockpit bulkheads don´t reach to both sides of the fuselage halves, the model can be built "in flight". |
| HISTORY |
From the kit´s instructions: "The Messerschmitt Me 262 was the first operational jet fighter in the world. A legend has grown up around its existence which continues to inspire everyone with an interest in aviation.
Project work had begun at Messerschmitt as early as April 1939 on a new high-speed fighter plane, the propulsion of which was to consist of the "turbine jet" system. Targeted maximum speed was 900km/h, which was unimaginable at that time.
 On
18th July 1942, the Me 262 took off on its first flight with jet engines. On
July 26 1944, a series production Me 262 from the Test Command at Lechfeld
Station near Augsburg scored the first aerial victory by a jet fighter in the
history of aviation. In its role the Me 262 was used for combating bomber
fomations operating over Germany.
On
18th July 1942, the Me 262 took off on its first flight with jet engines. On
July 26 1944, a series production Me 262 from the Test Command at Lechfeld
Station near Augsburg scored the first aerial victory by a jet fighter in the
history of aviation. In its role the Me 262 was used for combating bomber
fomations operating over Germany.
The Me 262 was fitted with two Jumo 004B type engines, this was the first large batch production jet engine. The output of 930kp static jet thrust sufficed to give the Me 262 a maximum speed of 870km/h at an altitude of 6000m. Its service ceiling was 11400m, and its range was 1050km.
Basic armament consisted of 4x30mm MK 108 cannons installed on the nose. In addition, 2x12 type R4M rockets could be carried under the wings.
| THE KIT |
This Me 262 comes in Revell´s side opening blue box, with four sprues (three light grey and one clear) bagged inside a single heat-sealed bag.
The model was first released in 1996, meaning the kit has 22 years old, an age that shows on the amount of flash on some parts and inside the sprues and on the state of the canopy.
 The
two biggest sprues contain the fuselage halves, engine halves, tailplanes, and
the wing halves, whereas the third one has the landing gear, cockpit and engine
parts. The fourth sprue, the clear one, has three pieces: the canopy (a thick,
cloudy, badly moulded part) and the two recconnaissance clear parts that go on
the U3 boxing.
The
two biggest sprues contain the fuselage halves, engine halves, tailplanes, and
the wing halves, whereas the third one has the landing gear, cockpit and engine
parts. The fourth sprue, the clear one, has three pieces: the canopy (a thick,
cloudy, badly moulded part) and the two recconnaissance clear parts that go on
the U3 boxing.
The instructions are a 10 page booklet, the first five pages dedicated to warning advices in multiple languages and the colour listing (in Revell colours, but with RLM indications for the main camouflage). Pages six to eight display the construction steps in black and white, and are 20 (not counting the other two for the painting stage).
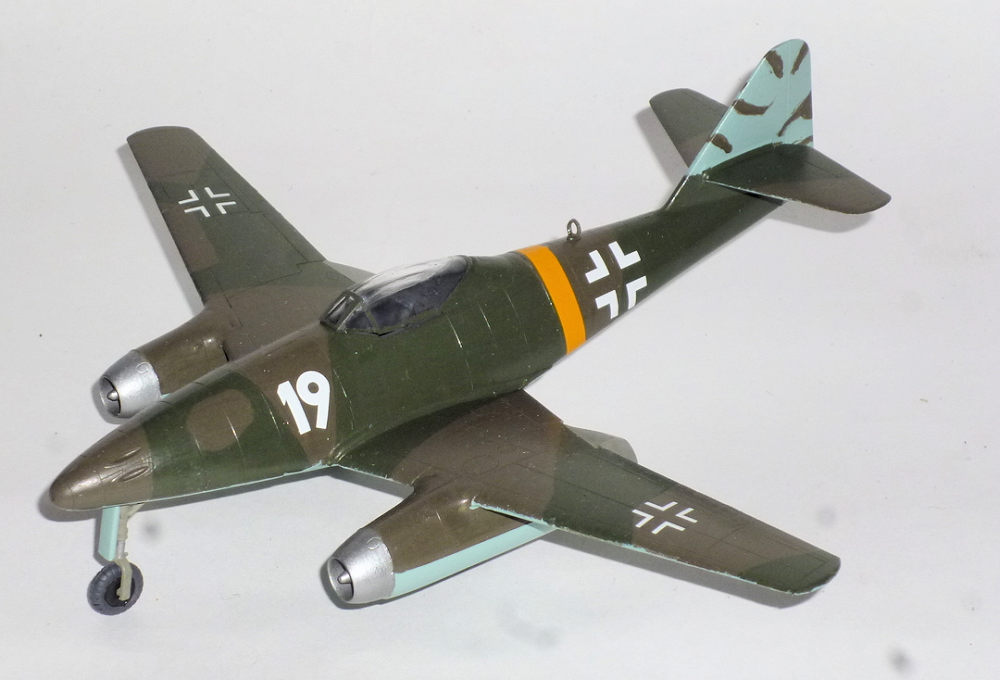
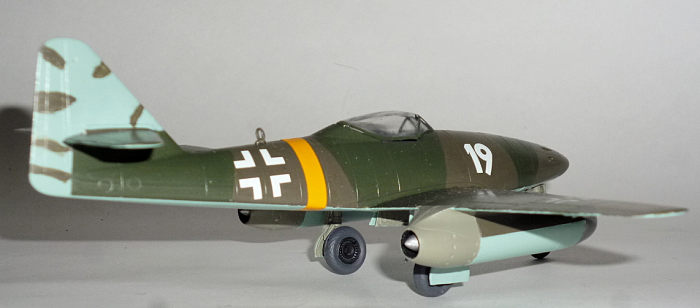
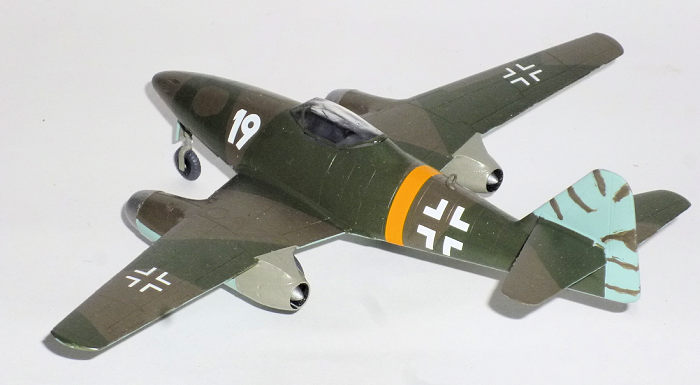
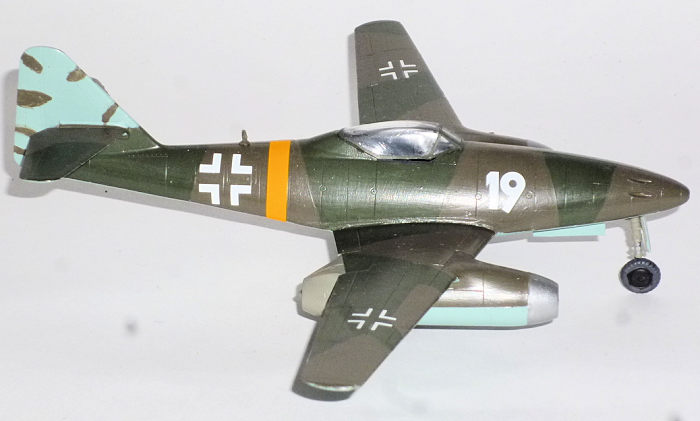
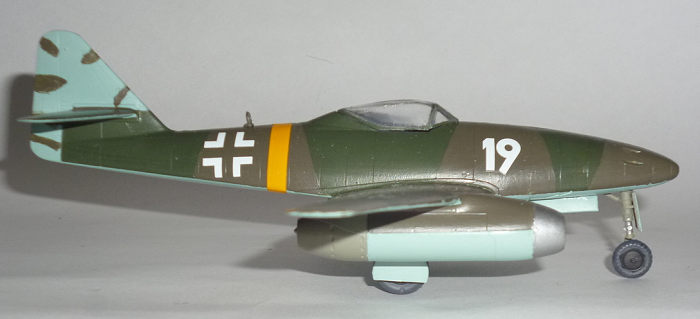
The kit comes with two colour schemes, Erick Mikat´s Me 262A-1a with Wgr 21s under the nose, and White 19 from Kommando Nowotny. Both aircraft are painted in RLM 81/82/76. I´m not sure about Mikat´s aircraft, but White 19 has an incorrect camouflage, Revell instructs one to paint the fuselage in a solid RLM 81 and with an S, but real life photos and profile pictures show it with a splintern pattern of RLM 81/82 without the S.
| CONSTRUCTION |
I began by painting the cockpit parts (control stick, cockpit tub, seat and instrument panel with Revell Tank Grey 78 and Revell 08. Once that was done, I separated them from the sprue and put them together using Contacta. Next were the fuselage halves, I also painted them with Revell 78. After the paint was dry, I glued the whole cockpit assembly to the right hand fuselage and let it dry (while I also began looking for a suitable way to add a lead weight big enough to make the model a nose sitter).
 When
the cockpit/fuselage assembly was cured, I sawed a weight and glued it to the
front bulkhead (while the front of the cockpit separated from the fuselage, and
I had to reglue it, risking myself to end up with a melted fuselage, but I
didn´t). After finishing with all that, I went on to glue the second fuselage
half, realising the cockpit bulkhead´s didn´t reach said half. I didn´t open the
holes under the nose for the fuel tanks or the Wgrs because they weren´t used.
When
the cockpit/fuselage assembly was cured, I sawed a weight and glued it to the
front bulkhead (while the front of the cockpit separated from the fuselage, and
I had to reglue it, risking myself to end up with a melted fuselage, but I
didn´t). After finishing with all that, I went on to glue the second fuselage
half, realising the cockpit bulkhead´s didn´t reach said half. I didn´t open the
holes under the nose for the fuel tanks or the Wgrs because they weren´t used.
While the now complete fuselage was left aside to dry, I began to work on the wings and engines. The wings were removed from the sprues, cleaned up, and glued without too much trouble, the engines followed, making sure to paint the engine fans in silver and the exhaust cones in black.
I glued the fuselage, wings, engines and horizontal stabilisers together and left them to dry. I also painted the landing gear parts on the sprues, to speed up the assembly process after painting the whole plane.
| COLORS & MARKINGS |
I decided to paint the model as White 19. Using a pencil, I hand drew the camouflage following the instructions. After that, I grabbed a square glass and began cutting the masking tape to make it fit the pencil outlines.
 I
first painted RLM 81, then I masked the RLM 82 areas, and I later painted the
RLM 76 under the fuselage.
I
first painted RLM 81, then I masked the RLM 82 areas, and I later painted the
RLM 76 under the fuselage.
Since I brush paint, the masking left paint ridges, so I wet sanded them with a 2500 grip sand paper, repainting the areas where I oversanded. Not only I ended up with a smooth paintjob, but it also looked as if it was faded.
The model was clearcoated with Revell´s gloss varnish, which was left to dry. I decalled the model soon after. I applied the decals almost without accidents, almost because I put my thumb over one of the Iron Crosses, making it stick on my thumb. I solved it by wetting the decal with a brush, and putting it gently over the wing. The decals performed flawlessly, and after they were dry, I matt coated the kit with Revell´s matt varnish.
After applying the decals, the model was prepared for the last parts, the landing gear and its doors, which have to be cut because they come "closed," for an in-flight model. The struts were glued, left to dry, and then the wheels were added.
The canopy was the last piece to be added, and its the worst fitting part in the entire kit.
When I finally put the aircraft on its wheels, I found out that the weight was just enough to make it stand on the nose, because a tap on the tail will make it tail sit.
| CONCLUSIONS |
 Third
time´s the charm, and that´s the same for this kit, I built it twice when I was
younger, this being the definitive version, having reched a successful
completion.
Third
time´s the charm, and that´s the same for this kit, I built it twice when I was
younger, this being the definitive version, having reched a successful
completion.
Aside from the flash and the ill-fitting canopy, I have to say it was a nice, relaxing build, perfect to get a model done in under a week (depending on how much detail you want to put into it).
| REFERENCES |
https://i.pinimg.com/originals/db/7e/9c/db7e9cdbab51d2c9daaa1a593e080118.jpg
http://www.cartula.ro/forum/topic/14307-messerschmitt-me-262-a-1a-white-19/
http://bbs.hitechcreations.com/smf/index.php?topic=267774.0
http://manuals.hobbico.com/rvl/80-4166.pdf
15 May 2018
Copyright ModelingMadness.com If you would like your product reviewed fairly and
fairly quickly, please
contact
the editor
or see other details in the
Note to
Contributors.
Back to the Main Page
Back to the Review
Index Page
Back to the Previews Index Page