
| KIT #: | 61087 |
| PRICE: | 81$ |
| DECALS: | Four options |
| REVIEWER: | Francisco Santoro |
| NOTES: | What If scheme |
| HISTORY |
In 1945, when WW2 ended, Willy Messerschmitt travelled to Argentina in order to escape from the Allied authorities. There, he interviewed with General Juan Domingo Perón and offered him the plans to manufacture the then revolutionary Me 262 if he allowed him to stay in the country. Perón agreed, and Messerschmitt moved to Córdoba to be employed in the Fábrica Militar de Aviones.
With abundant funding by the government, Messerschmitt was able to start serial production of the Me 262 really quickly. A hundred Me 262A-1a/A (A for Argentina) were produced up to 1947, making the Fuerza Aérea Argentina the first nation outside of North America and Europe (England) to have a jet fighter.
 The Me 262s
served until 1967, when they were slowly retired in favour of the A-4B Skyhawk.
No Me 262s have survived to this day, with only some profiles showing how the
plane looked in Argentinian colours.
The Me 262s
served until 1967, when they were slowly retired in favour of the A-4B Skyhawk.
No Me 262s have survived to this day, with only some profiles showing how the
plane looked in Argentinian colours.
Real history: "Development of the Me 262, the first practical jet powered fighter in the world, started in 1939. In July 18th 1942, Me 262V3 made its flight with two Junkers Jumo 004 jet engines. After prototypes featuring nose housed landing gear and improvem Jumo 004B engines, the first production model of the Me 262 was completed. Capable of 870km/h top speed, the Me 262 featured 18,5 degree receding wings. With Allied bombing raids on the German homeland were rapidly intensifying, the Luftwaffe proposed the hastened deployment of the of the revolutionary Me 262 as a jet fighter/interceptor. However, Hitler issued strict contrary orders prioritizing the deployment of the A-2a fighter bomber version of the Me 262. Despite these orders, the A-1a assigned to Me 262 test/training units (Ekdo 262) were deployed to intercept and succesfully shot down Allied Mosquitoes and Spitfires. On September 1944, the first practical unit was organized and on November 4th, full scale production of the Me 262A-1a was permitted at last. Me 262A-1a fighters were assigned to units such as JG7 (organized based on Ekdo 262) and KG (J) 54 (re-orginised from bomber unit to fighter unit). On April 1945, just before the end of WW2, Lieutenant Galland organized an elite unit of ace piloted Me 262A-1a fighters as JV44. Although the Luftwaffe was on its last wing, ace flown Me 262A-1a fighters packed with deadly armaments of four MK108 30mm cannons, as well as W.Gr 21 and R4M air-to-air rockets continued to threaten Allied aircraft until the end of the war."
| THE KIT |
Tamiya's Me 262A-1a has 6 sprues, 5 in grey plastic, one a clear one. There's also a metal weight included in order to give the aircraft enough nose weight to avoid it being a tail-sitter. The parts are cleanly moulded in light grey, with engraved panel lines. Clear parts have cleanly defined frames and will be easy to mask.
 There are a
total of four decal options to choose from:
There are a
total of four decal options to choose from:
1) Rudolf Sinner's W.Gr21 equipped Me 262A-1a Green 1, III/JG7 based at Brandenburg-Briest in 1945, with an RLM 82/83 striped camouflage pattern and RLM 76 undersides.
2) Heinz Bär's Me 262A-1a Red 13, of III/EJG2, based at Lechfeld, painted in RLM 74/75/76, though I think the camouflage should be painted in RLM 81/82 for the upper surfaces.
3) Johann Karl Müller's Me 262A-1a Red S of JV44, based at Brandenburg-Briest, March 1945. It is painted in RLM 81/82/76.
4) Hans Guido Mutke´s Me 262A-1a White 3, 9 Staffel of III/JG 7, based at Fürstenfeldbruck, April 1945. It is painted in RLM 81/82/76 and equipped with the R4M Orkan air-to-air rockets.
| CONSTRUCTION |
I began by painting all the cockpit parts in RLM 66 (Revell 78), and also painted the cockpit's firewalls in a steel colour (Revell 91). When those parts were dry, they were glued together.
I next turned my attention to the gun bay. Since I was building a sealed aircraft, I just built the guns and glued it to the metal weight with epoxi glue. It is at this time that you have to glue to the metal weight the nose wheel bay. Tamiya also tells you to install the landing gear strut at this time, but it can be added later in the build.
 With a
completed cockpit and nose gear bay, I glued them to the right fuselage half and
left it to dry. The cockpit sidewalls are also painted in steel by the way.
With a
completed cockpit and nose gear bay, I glued them to the right fuselage half and
left it to dry. The cockpit sidewalls are also painted in steel by the way.
Next came the wings. These are a top and bottom assembly. I first painted the rear landing gear bulkheads in steel, and then glued them to the bottom wing. With that dry, I glued the two upper halves of the wings to the bottom half.
After assembling the wings, I turned back my attention to the fuselage halves, which were glued together. When the fuselage halves were dry, I glued the wings to it.
The engines came next, these are easy to build and once finished, were glued to the wings.
I then proceeded to the painting phase.
| COLORS & MARKINGS |
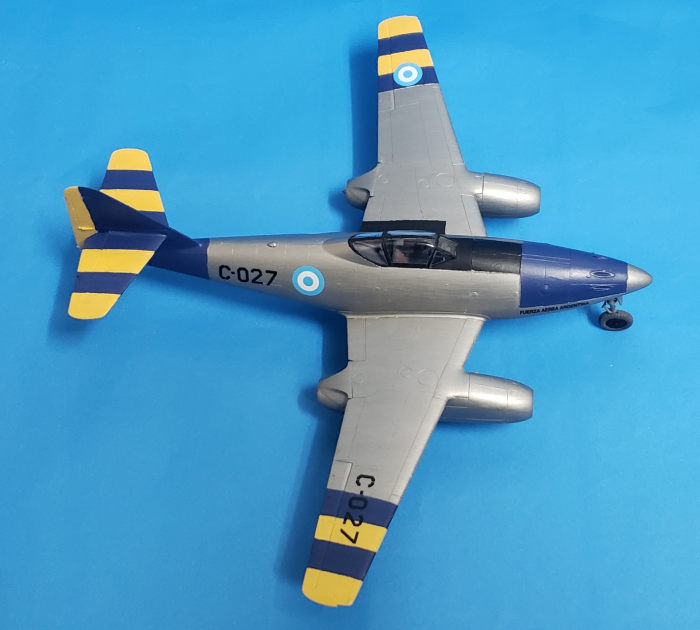
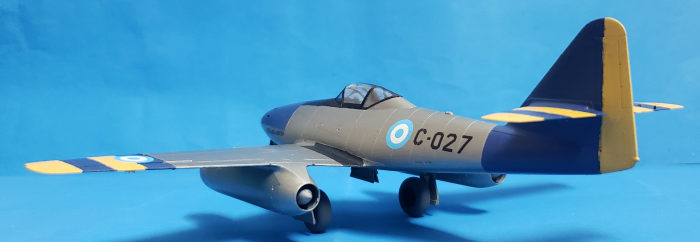
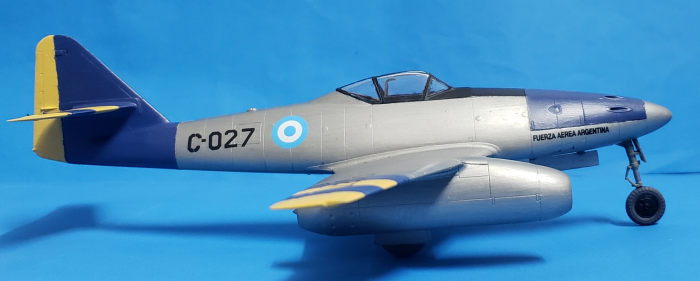
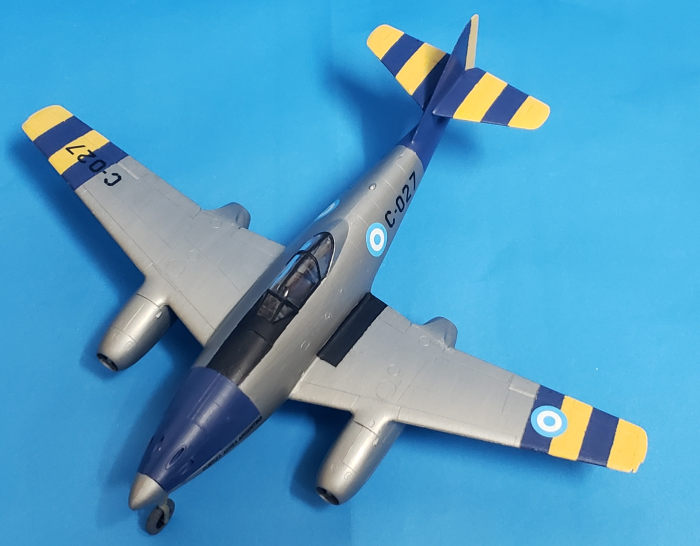 I
decided to paint this Me 262 in the colours of Gloster Meteor C-027 with the
yellow and blue bands on the wings. I first painted the yellow bands with Revell
Aqua 15 Yellow, and then masked and painted the blue bands with Revell 56 Blue.
After that, I primed the entire plane with light grey, and then brushed the
model with Revell's 91 Steel.
I
decided to paint this Me 262 in the colours of Gloster Meteor C-027 with the
yellow and blue bands on the wings. I first painted the yellow bands with Revell
Aqua 15 Yellow, and then masked and painted the blue bands with Revell 56 Blue.
After that, I primed the entire plane with light grey, and then brushed the
model with Revell's 91 Steel.
After letting the paint dry, I glossed the model and applied the decals. These were spares from a Condor Decals sheet. Once the decals were dry, I applied a matt coat.
I added the landing gear, canopy and wheels. All these pieces were left to dry for some hours, and then the aircraft was turned over and placed over its gear.
| CONCLUSIONS |
It's fun to sometimes go out of the ordinary when building models, such as this one. I really enjoyed the what if scheme and thinking about a fictional story for it.
Regarding the kit, it's another kit from Tamiya, which means it's easy to build and will result in a nice looking plane in your shelf.
Francisco Santoro
30 August 2022 Copyright ModelingMadness.com. All rights reserved. No
reproduction in part or in whole without express permission. If you would like your product reviewed fairly and fairly quickly, please
contact
the editor or see other details in the
Note to
Contributors.