| KIT #: | 8201 |
| PRICE: | $40.00 or so |
| DECALS: | Several options |
| REVIEWER: | Scott Lyle |
| NOTES: |

| HISTORY |
During
World War I the concept of a “strategic” fighter that could fly deep into enemy
territory and clear a path for friendly bombers, attack enemy bombers, and also
carry out some bombing and strike missions on its own, began to evolve.
The technology at the time did not permit the concept to
move past the drawing board, but when several nations began to re-arm during the
1930s, the idea was brought to the forefront once again.
By the mid-1930s Hermann Goring was so taken with the
idea that he made its development one of his top priorities.
Specifications were soon issued to Germany’s leading
aviation companies calling for an all-metal, two-engine monoplane with a heavy
load of cannon as well an internal bomb bay.
Henschel, Focke-Wulf,
 and
Messerschmitt all submitted proposals, though Messerschmitt chose to ignore
several of Goring’s specifications and instead focused more on performance.
As luck would have it the RLM dropped the bomber role
from the specifications and focused instead on the fighter-destroyer role – the
exact role that Messerschmitt had been designing for all along!
Consequently the Bf 110 was won the competition, and the
first prototype was constructed during the fall of 1935.
The Bf 110 saw initial success over the skies of
 With the Allied invasion of Europe in June 1944, many of
the German ground radar stations were soon overrun, and the constant bombing of
the German oil industry began to ground all but a few of Germany’s aircraft.
By the fall of 1944 British Mosquitos were escorting the
RAF bombers during their night attacks, and the Bf 110s were hopelessly
outclassed and hunted down wherever they appeared.
Losses of the Bf 110 began to mount alarmingly as their
fate became a foregone conclusion.
Still, for an aircraft that was nearly out of a job in
the fall of 1940, the Bf 110 served valiantly until the end of the war.
Still in the grip of a
| THE KIT |
Fresh
off my build of Eduard’s new 1/48 Bf 109E-4, I decided to try one their Bf 110s.
Eduard launched its line of 1/48 Bf 110 Zerstorers in
the fall of 2007 with the E vari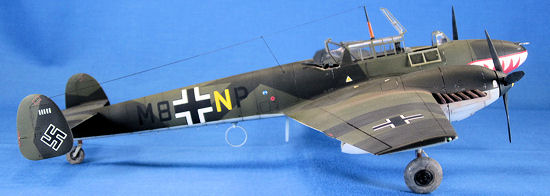 ant.
Since that time they have followed with virtually every
other Bf 110 variant including the C, D, G-2, and G-4 in various boxings.
Per usual for Eduard, the contents of the box will
delight any modeler.
There are six sprues of finely molded parts in Eduard’s
typical olive-beige plastic, two sprues of transparent parts, a fret of color
photo etch parts, a set of yellow “kabuki” tape cockpit masks (a must given how
much glass there was on the Bf 110), and two sheets of decals - one for stencils
and one for the markings for five different Bf 110Cs.
The surface detail on the fuselage and wing surfaces is
superb, featuring crisply recessed lines and rows of tiny recessed rivet heads.
The instruction booklet is very thorough and includes
full four-view, color painting instructions for each of the featured aircraft
that can be built out of the box.
To further enhance the kit and deplete my wallet I added a set of resin wheels from Eduard’s Brassin line, and a set of resin exhausts from Quickboost.
| CONSTRUCTION |
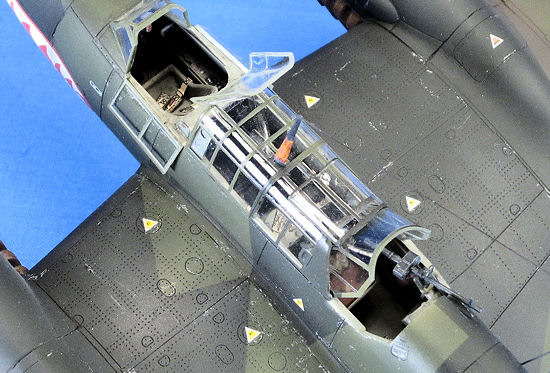
Construction began with the cockpit as
usual, and with the Bf 110, there’s a lot of it.
Eduard doesn’t skimp on the details either, mixing its
color photo etch parts with finely molded plastic parts to build a very busy
office.
My plan of attack was to first build up all of the interior
subassemblies that were to be painted RLM 02, spray them and weather them, and
then proceed to add the other details one by one.
 Following
the instructions I began with the pilot’s compartment.
The seat, throttle controls, and sidewall details were
glued to the floor plate.
I then moved onto the aft compartment, and once the
basic interior parts were glued together I airbrushed those two subassemblies
and the cockpit sidewalls Testors Acrylic RLM 02 Grey.
That was followed up by a wash of
When the cockpit subassemblies were
finished I sandwiched them between the fuselage halves and closed them up.
The fit was very good on the upper spine, but the lower
seam needed some putty and sanding.
Once I had the fuselage in good shape I moved on to the
nose cone parts, where Eduard gives you the parts to fully detail the machine
gun bay in the upper part of the nose.
Like the cockpit area the parts and assemblies are
remarkably delicate and detailed – built up, painted, and weathered they would
look fantastic.
I chose however (wrongly, as we’ll see) to close the nose up and
just leave the gun barrels protruding from the nose.
Problems arose when I tried to glue the completed nose
to the fuselage – the fit was horrendous.
The sides of the nose bulge out much further than the
fuselage, so much so that I had to use my Dremel to grind them down.
After the requisite puttying, sanding and rescribing I
was ready to move onto the wings.
The wing halves glued together nicely,
and Eduard took a novel approach to ensure that the trailing edges would be very
sharp.
Instead of the edges of the upper and lower halves mating at the
trailing edge, the trailing edge of the lower half is inset into the upper wing
half.
This leaves a seam that needs to be filled and sanded smooth, but that
was no big deal.
Once that was done the engine nacelles
were next.
I glued the halves together, and then fitted them to the wings.
The fit was fairly good except for where the na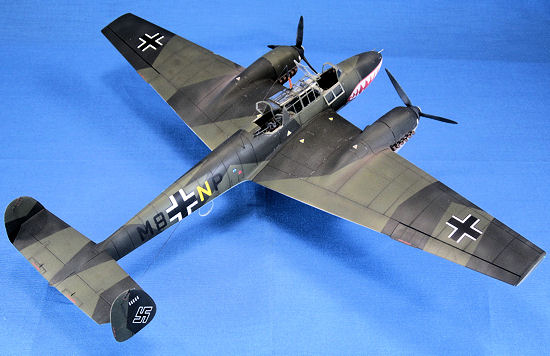 celle
mates with the wing’s upper surface.
Here the “hump” in the wing was quite a bit higher than
the nacelle.
I used my Dremel to sand it down and then rescribed the panel
lines that were lost in the process.
With the wings now complete Eduard next
has you detail the main landing gear bays.
Separate side wall pieces fit perfectly, providing a
high level of detail to the wells.
It was now time to mate the wings with
the fuselage, and here the fit was a bit troublesome.
I had to file the attachment points down a bit and do a
lot of test fitting, but the work was worth it as the joint turned out to be
tight and clean.
The elevator and twin tails also fit very well, a dose of liquid
cement being all that was needed to assemble them.
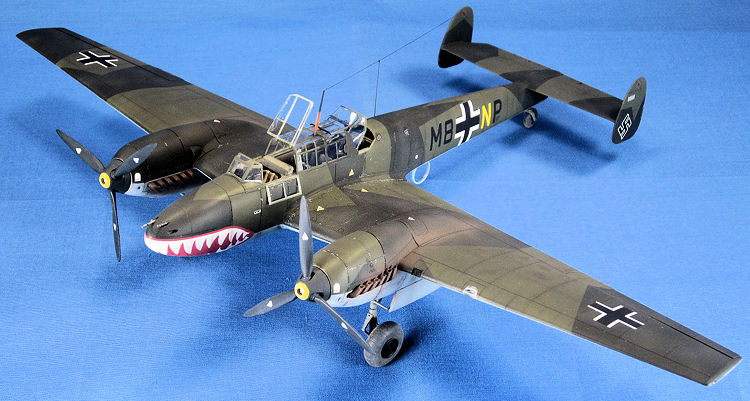
The assembly stage was now largely complete. Using the excellent masks provided by the kit, I masked off the large greenhouse sections and attached the front windscreen and large middle section to the model. The other open areas of the cockpit were masked off with Tamiya masking tape. With the landing gear and other various fiddly bits left off, I headed for the spray booth.
| COLORS & MARKINGS |
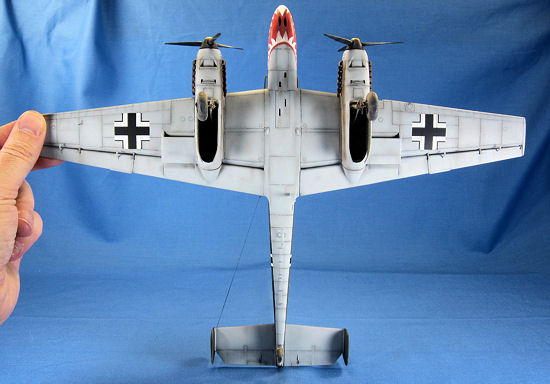 After a
wipe-down using Polly S’ Plastic Primer, I sprayed the model with a primer coat
of Tamiya Surface Primer.
This revealed a few seams that needed to be touched up,
which took a couple of nights.
Once that was done I preshaded the panel lines with some
Tamiya XF-69 NATO Black, and then lightly airbrushed the bottom surfaces a 50/50
mix of Tamiya XF-23 Light Blue and XF-2 Flat White.
I then masked that off using Tamiya masking tape and
airbrushed a mix of Tamiya XF62:6 + XF58:2 + XF2:3 to simulate RLM 71 Dark Green
on the upper surfaces.
That was then masked off in a splinter pattern (using
the kit’s instructions as a guide) and a mix of Tamiya XF62:6 + XF58:2 + XF1:1
was used to simulate the RLM 70 Black-Green.
Once the colors had dried I removed all of the masking
tape and sprayed Future over the whole model in preparation for the decals.
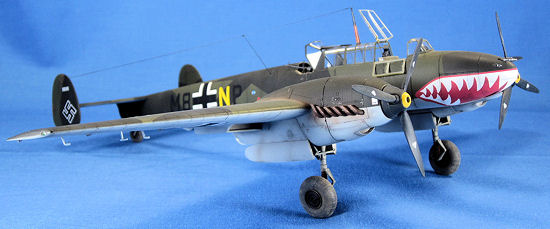
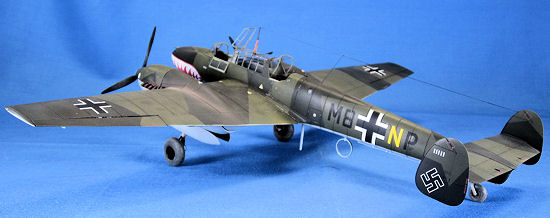
I used the kit’s decals, which are very comprehensive, and they behaved well with some Walthers Solvaset. The kit provided all of the markings I needed except for the yellow “N” in the “M8+NP” fuselage codes, but I was able to cobble that together from the yellow “A” that comes with the kit’s decals. The shark jaw decals on the nose needed some attention to make them cooperate, and even then there were some areas to touch up with paint. When the decals were dry I sealed them with another coat of Future.
| FINAL CONSTRUCTION |
A pin wash of Mig Productions “Dark
Wash” was applied to all of the panel lines and rivets, and then I airbrushed a
coat of Testors Lacquer Flat Finish onto the whole model, lightly diluting it
with a few drops of Testors Lacquer Thinner.
I assembled the
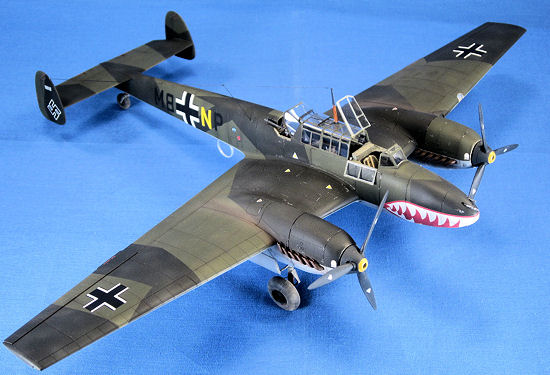 landing
gear and painted and weathered them at this point as well.
I post-shaded the panel lines and added engine exhaust
stains with a very dilute mix of 50/50 Tamiya XF1 Black and Tamiya XF64 Red
Brown.
Up next I removed the canopy masks, and then I added some paint chips
around the nose and the wing roots using a Silver Berol pencil.
With the weathering finished all that was left was to glue the final fragile parts in place, of which there were quite a few. I posed the canopy sections in their open positions and attached them using Testors Clear Parts Cement. The radio mast and landing gear went on without a hitch, as did the props. I added the tiny aileron mass balances and then painted the wingtip lights Tamiya Clear Red and Green respectively. I painted the Brassin wheels and weathered them with pigments, and then glued them to the model. I painted the Quickboost exhausts Vallejo Chocolate Brown and then dry brushed them with Testors Rust before gluing them to the nacelles. The final step was to use EZ Line to simulate the antenna wire, and with that the model was done.
| CONCLUSIONS |
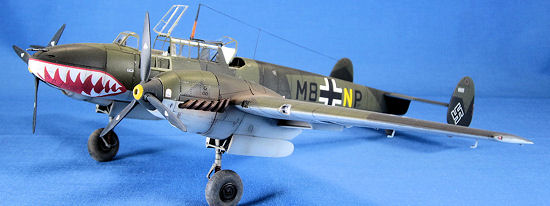 Eduard’s
1/48 Bf 110C requires you to work a little harder than you may be accustomed to,
but the end result is an excellent looking kit.
The level of intricate detail that Eduard has engineered
into the cockpit, machine gun bays, and wheel wells is museum quality.
Their ability to combine finely molded plastic parts
with their color photo etch has raised the look of those areas to a new level,
and as long as you don’t mind using your modeling skills, you will enjoy
building this model.
I highly recommend this model, and look forward to what
else Eduard has in store for us!
| REFERENCES |
-
Osprey Publications, Duel #29,
“Hurricane I vs. Bf 110, 1940”
-
Squadron/Signal Publications, Aircraft in Action #30,
“Messerschmitt Bf 110 Zerstorer in Action”
-
Wikipedia, the Online
Encyclopedia
January 2013
If you would like your product reviewed fairly and fairly quickly, please
contact
the editor
or see other details in the
Note to
Contributors.