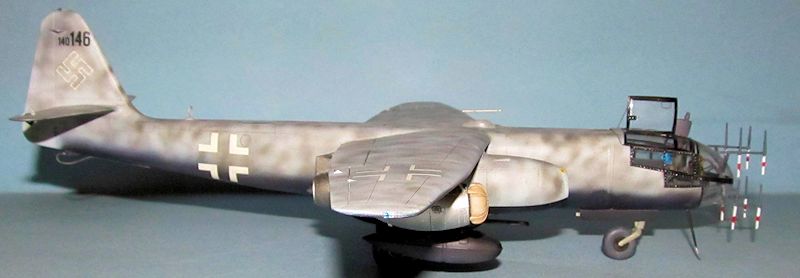
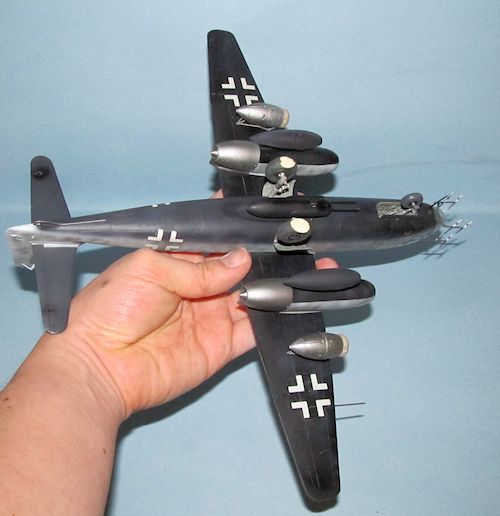
Hasegawa 1/48 Ar-234B-2N 'Nachtigall'
| KIT #: | 9820 |
| PRICE: | $55.95 SRP |
| DECALS: | Three options |
| REVIEWER: | Dan Lee |
| NOTES: |
SAC Landing Gear, True
Details Wheels, True Details Vaccuformed Canopy and Aires Cockpit. |
| HISTORY |
 The Arado
AR234 was the first ever jet bomber.
It gained some notoriety when it was used for strikes
against the Ludendorff bridge located in Remagen which was first intact bridge
captured by the Allies for crossing the Rhine.
Despite its fast speed, it didn’t do anything to blunt
Allied Air Supremacy or their inevitable victory against the Nazis.
The Arado
AR234 was the first ever jet bomber.
It gained some notoriety when it was used for strikes
against the Ludendorff bridge located in Remagen which was first intact bridge
captured by the Allies for crossing the Rhine.
Despite its fast speed, it didn’t do anything to blunt
Allied Air Supremacy or their inevitable victory against the Nazis.
In late 1944, the Luftwaffe decided to convert some 30 airframes into a night fighter by adding a twin 30mm gun pod and Naxos radar. The two prototypes were sent to Kommando Bonow, but in their evaluations they found the Nachtigall to be useless and the whole project was soon abandoned.
| THE KIT |
Here is Scott’s preview of the kit.
| CONSTRUCTION |
It all began
with the two engine pods internal parts painted and then glued together, but I
left them off the model until after I was done painting.
At the same time I glued the RATO rockets together.
I left the model to sit in the box for four months as I
was dealing with some personal issues and had no desire to build models.
When I started again the RATO units seams were carefully
filled and gently
 sanded so as not to remove much of the raised detail.
They were painted Tamiya XF-56 Metallic grey and Talon
Aluminum as per instructions.
The parachute packs needed to have prominent mold marks
removed and then painted various shades of tan and black.
Any raised details that were lost were redone with
incorrect recessed detail.
sanded so as not to remove much of the raised detail.
They were painted Tamiya XF-56 Metallic grey and Talon
Aluminum as per instructions.
The parachute packs needed to have prominent mold marks
removed and then painted various shades of tan and black.
Any raised details that were lost were redone with
incorrect recessed detail.
Next I worked
on the resin cockpit as I preferred the more detailed Aires one over the kit
cockpit.
I cleaned the parts with dish soap, dried them and then removed the from
the casting blocks with a razor saw.
The only problem I had was when I removed part of the
floor at the front of the cockpit as it cracked when I was trying to gently
remove the casting block.
I was fortunate that it was in a location no one would
really notice.
Once all the
parts were removed, I painted the various pieces RLM66 and then hand painted the
details with various colors based on color photos found on the internet.
It took a fair amount of time.
I sprayed the back of the cellophane cockpit details
sheet flat white, cut out the dials and then glued them to various PE instrument
panels.
After all the pieces were painted then I carefully assembled the cockpit
tub as each piece needed to be carefully glued and put in place which would be
very noticeable in the glasshouse canopy.
To add more detailed I used black fishing line some of
which was sprayed flat yellow to represent cables and wiring harnesses.
These were glued on using fine drops of CA glue.
Meanwhile I
started assembling the fuselage and wings.
The wheel wells were painted RLM02 as per instructions.
I wasn’t going to add the landing gear until after
sanding/filling and painting so I had to spend some trying insuring that the
parts would fit in without too much trouble (they fit, but they were a lot of
trouble.)
The radar operator’s station was painted and I attached pre
painted PE seat belts from an Eduard Luftwaffe PE set to the seat.
Once that was done, the wheel wells were added and the
main fuselage was glued together.
The wings are a touch problematic as I used the
alignment pins, but I should have read the reviews because they mention that one
wing (port?) is off by a little bit.
Later I ended up having to tear apart the wing, cut off
the alignment pins and align it to the shape which made for a better fit.
 All the parts
were thrown in the box to let the glue cure for a week and a half.
I started sanding and filling the seams with CA glue.
Certain seams gave me a headache and required a lot of
work to do.
Once done, I added the wings and then worked on the seams from
the wing to fuselage join.
Details were rescribed using a pin chucked into a pin
vise.
All the parts
were thrown in the box to let the glue cure for a week and a half.
I started sanding and filling the seams with CA glue.
Certain seams gave me a headache and required a lot of
work to do.
Once done, I added the wings and then worked on the seams from
the wing to fuselage join.
Details were rescribed using a pin chucked into a pin
vise.
I returned to
the cockpit and spent some time working on the clear nose assembly.
I masked off the interior portions and painted them
RLM66.
Next I carefully glued the two clear halves of the nose together.
It didn’t fit as well as I hoped and had to use CA glue
for the very thin topside attachment.
The nose sat in the box for a week till the glue cured
sufficiently.
Meanwhile I was done with with all the priming and polishing with
various grades of polishing cloths on the fuselage.
I glued the
cockpit/nose assembly to the fuselage with CA glue after I primed the rest of
the plane.
Later after priming I noticed that the gaps were still there and
used Vallejo Plastic Putty to fill in the gaps.
I did not attach the engines at this point as I couldn’t
paint the inside sections well.
| COLORS & MARKINGS |
The AR234 was
primed a couple of times using Tamiya Fine White Primer from the spray can.
Very useful stuff especially with those fine seams that
you just can’t fill any other way.
I did prime twice because I found flaws in my sanding or
something I missed. The primer coats were polished with various grades of
polishing cloths.
It was at this point I glued the cockpit assembly to
the fuselage.
 After that the
windows were masked off and the plane was painted flat black for the underneath.
Once the paint was dry, certain areas were masked off
and sprayed Poly Scale RLM76.
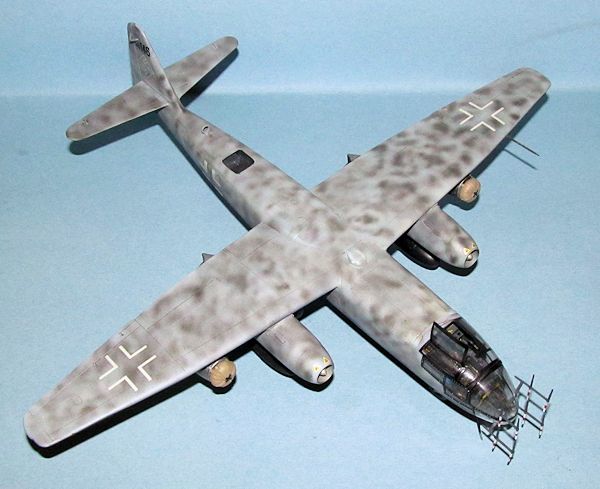
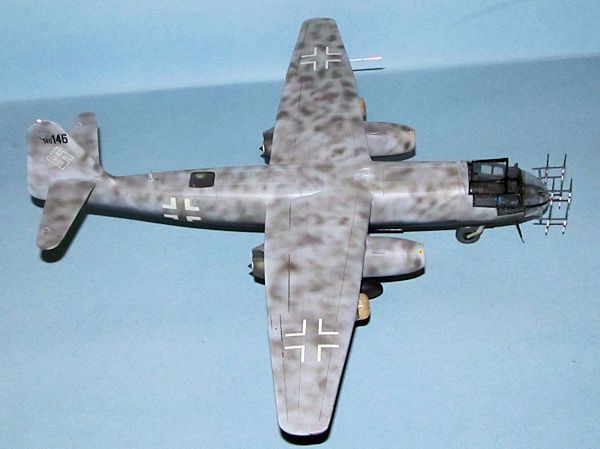
The mottling was added a day later to avoid Gunze from
reacting with the Poly Scale, I loaded Gunze Sanyo RLM75 into my airbrush and
set it for 10 PSI for mottling.
I started off making mottles very large and then got
them smaller as time went on.
It looks like four or five different people sprayed each
section slightly differently.
After that the
windows were masked off and the plane was painted flat black for the underneath.
Once the paint was dry, certain areas were masked off
and sprayed Poly Scale RLM76.
The mottling was added a day later to avoid Gunze from
reacting with the Poly Scale, I loaded Gunze Sanyo RLM75 into my airbrush and
set it for 10 PSI for mottling.
I started off making mottles very large and then got
them smaller as time went on.
It looks like four or five different people sprayed each
section slightly differently.
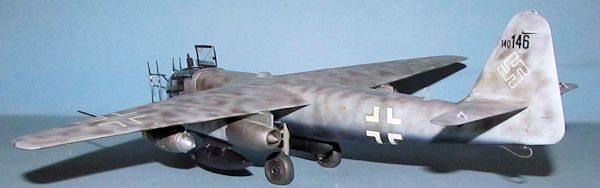
The engine
pods were polished a little more throughly as they were supposed to be burnt
bare metal.
They were first painted XF-56 Metallic Grey then when dry, the
areas were masked and the engine pods were painted along the same lines as the
rest of the plane.
The canopy frames were painted gloss black.
I used the
Hasegawa decals for Kommando Bonow.
They were easy to do with minimal fuss.
It seemed to me that the Hasegawa decals were missing
the intake warnings and fuel stencils that are quite noticeable on all German
WW2 jets so I added them from an old Aeromaster sheet.
I used a light
watercolor wash to highlight some of the details and the excess was removed with
many damp Q-Tips.
The Arado was sprayed with a couple of coats of Vallejo
Flat Varnish.
| FINAL CONSTRUCTION |
I added the radar to the nose piece which was pre
painted with RLM66 and hand painted red/white for the warning markings.
The RATO units
were glued to the wing, but this proved to be very fiddly.
It took some extreme patience and a very steady hand to
get t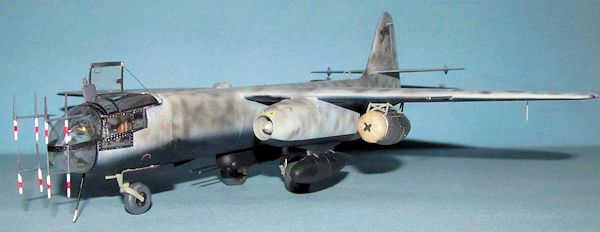 he parts on without smashing them in rage.
Next I added
the painted SAC landing gear which inserting the main landing gear turned out to
be more of a headache than I thought.
They were glued in place with CA glue.
I only attached the painted rear True Details resin
wheels as the nose wheel didn’t fit and I had to use the kit nose wheel.
The various
bits like fuel tanks, gun pod and stabilizers were glued on as per instructions.
I replaced a lot of the straight rod pieces with brass
wire which was attached with CA glue.
It turned out
the vacuformed canopy was the most difficult part of the build.
I made a mistake and cut off too much of the forward
part of the top section of the canopy.
I ended up having to replace that with 5 thou plastic
card which was trimmed several times and painted gloss black.
The hatch with PE parts from the Aires cockpit set was
added with no issues.
| CONCLUSIONS |
 Hasegawa’s
AR234-2B/N isn’t the easiest kit in the world to assemble thanks to the
aftermarket cockpit (although it wasn’t as bad as it could have been.)
Based on my own experience I found that the nose is the
most problematic part and requires some careful work.
Any modeler who has a few kits under their belt can
maker a nice looking kit if they are careful.
Hasegawa’s
AR234-2B/N isn’t the easiest kit in the world to assemble thanks to the
aftermarket cockpit (although it wasn’t as bad as it could have been.)
Based on my own experience I found that the nose is the
most problematic part and requires some careful work.
Any modeler who has a few kits under their belt can
maker a nice looking kit if they are careful.
The aftermarket stuff can improve the look of the kit, but adds to the
complexity and as mentioned above adds its own headaches.
June 2013
If you would like your product reviewed fairly and fairly quickly, please contact the editor or see other details in the Note to Contributors.