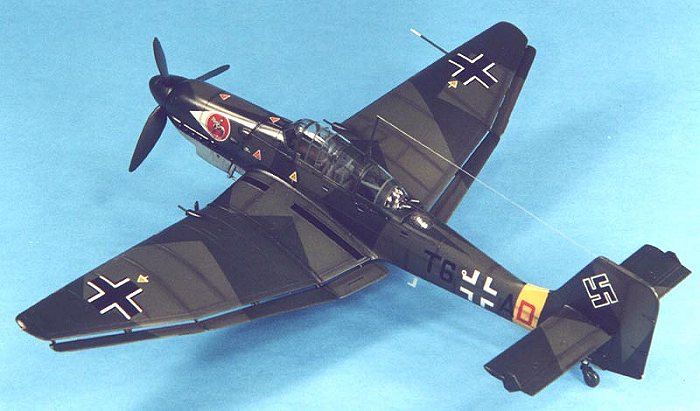
Hasegawa 1/48 Ju-87D-1/3 Stuka
|
KIT # |
Jt 185 |
|
PRICE: |
$32.98 |
|
DECALS: |
Two aircraft |
|
REVIEW : |
|
|
NOTES: |
|
|
HISTORY |
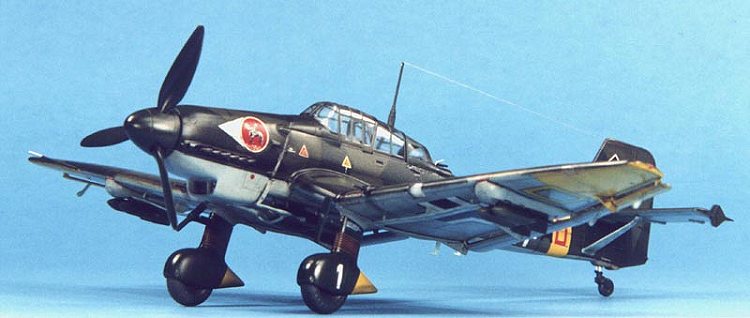
One of the most enduring images of WWII during the Blitzkrieg were legions of Stuka dive bombers swooping down from the sky, their sirens striking terror into the enemy, and dropping devastating bomb loads upon their targets. While that image is indeed valid, the truth of the matter is that the Stuka suffered high losses at the hands of a skilled enemy and was not that impressive of a weapon. Design work on the JU87 D series began in 1940 when it became apparent that the B series was no match for superior British aircraft during the Battle of Britain. After suffering devastating losses in the early part of the war to Hurricanes and Spitfires, the Stuka was withdrawn from daylight raids over much of the Western Front.
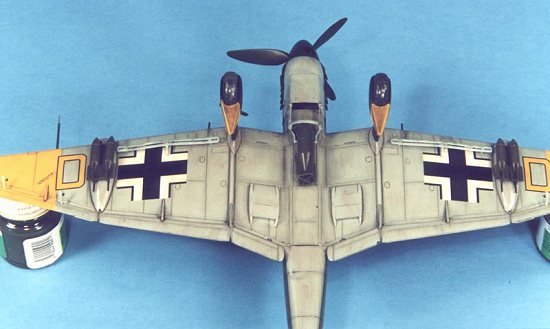
 The D series featured a much sleeker and aerodynamic
appearance from its B series sister, when the characteristic radiator was moved
from its position on the nose of the aircraft to under each wing and replaced
with a much smaller oil cooler. Further streamlining was accomplished with the
cockpit and fixed landing gear, but all these changes only increased its top
speed to about 400 KPH, which still made it an attractive target to most Allied
fighters. However, the Stuka was used with considerably more success on the
Eastern Front where the quality of its aerial opponents was not quite as
advanced as the Western Front.
The D series featured a much sleeker and aerodynamic
appearance from its B series sister, when the characteristic radiator was moved
from its position on the nose of the aircraft to under each wing and replaced
with a much smaller oil cooler. Further streamlining was accomplished with the
cockpit and fixed landing gear, but all these changes only increased its top
speed to about 400 KPH, which still made it an attractive target to most Allied
fighters. However, the Stuka was used with considerably more success on the
Eastern Front where the quality of its aerial opponents was not quite as
advanced as the Western Front.
|
THE KIT |
The kit is typical Hasegawa; a high quality injected molded plastic with detailed engraving. The kit consists of approximately 100 injected molded plastic parts that are the envy of the business in quality. The instruction sheet is typical Hasegawa, an eight-page foldout with color references for Gunze-Sangyo paints.
|
CONSTRUCTION |
After washing the parts in mild dishwater soap and letting them dry, I then pre-painted all the parts as indicated in the instructions. Starting with the interior, I built up the kit as per the instructions. The interior builds up very nicely with no significant problems but detail is a little on the sparse side (as is typical with most Hasegawa kits). After-market detail sets would add some nice touches to the look of the model, especially if you choose to leave the canopy in the open position. However, the detail in the cockpit is more than acceptable, especially if you choose to close up the canopy like I did.
 The only major construction hurdle of the entire kit was the
fitting of the forward fuselage insert that permits Hasegawa to offer the many
variants of the Stuka with the same basic mold. As is usually the case, the
insert does not fit all that well and some puttying was needed. This was the
only bad mark that I gave the kit. Unfortunately, it changes the build from an
incredibly easy one capable by anyone to a slightly more complex build best left
to modelers with some experience at lining up parts and gap filling.
The only major construction hurdle of the entire kit was the
fitting of the forward fuselage insert that permits Hasegawa to offer the many
variants of the Stuka with the same basic mold. As is usually the case, the
insert does not fit all that well and some puttying was needed. This was the
only bad mark that I gave the kit. Unfortunately, it changes the build from an
incredibly easy one capable by anyone to a slightly more complex build best left
to modelers with some experience at lining up parts and gap filling.
Main wing assembly and installation was flawless, without the all too typical Hasegawa wing root gap. Filing off the mold lines and dry fitting the horizontal stabilizers will also permit a flawless, putty free installation. After a quick sanding down of all the joins (no putty needed) the model visited the paint shop where it was painted, decaled, and weathered before final assembly took place.
|
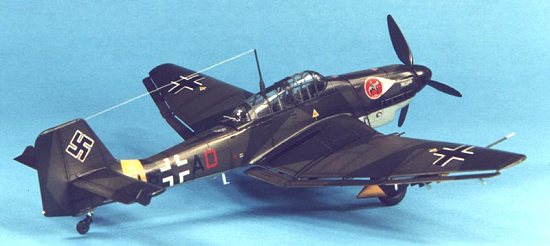
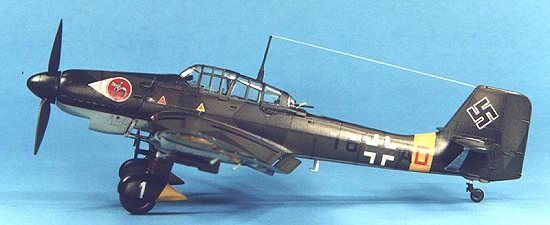
PAINT & DECALS |
The first order of business was to spray the yellow Eastern Front markings on the wing tips and fuselage band with Polly Scale (PS) Yellow RLM04. After masking these off, the undersides was airbrushed with PS RLM65 Light Blue and the topsides with PS RLM71 Dark Green. I used paper masks to do the topside splinter camo pattern with PS RLM70 Black Green. I enlarged on my scanner the painting pattern provided on the instruction sheet to the correct size and then used Tombo Mono Multi Liquid Glue to coat the backside of the cutout masks. This is really a great product for paper masks. The adhesive (when dry) will not pull up paint but is fairly tacky so you can use paper masks around curves. A light topcoat of Future was shot to prepare the flat surface for decaling.
 The kit decals are adequate, but slightly out of register and
a bit on the thick side and prone to silvering. I would recommend after-market
decals for this kit. I applied MicroSol setting solution and the decals
responded to the setting solution with only minor wrinkling. After drying
overnight, I wiped the decals off with Polly S Plastic Prep to remove any
residue and after drying I shot a light coat of Future over the decals to seal
them. For weathering, I chose to accentuate the engraved panel lines and surface
detail with a light burnt umber oil wash.
The kit decals are adequate, but slightly out of register and
a bit on the thick side and prone to silvering. I would recommend after-market
decals for this kit. I applied MicroSol setting solution and the decals
responded to the setting solution with only minor wrinkling. After drying
overnight, I wiped the decals off with Polly S Plastic Prep to remove any
residue and after drying I shot a light coat of Future over the decals to seal
them. For weathering, I chose to accentuate the engraved panel lines and surface
detail with a light burnt umber oil wash.
I then sealed everything with a light coat of PS Flat Finish to provide a surface for pastel application. I then used a pastel pencil to highlight the panel detail on the wings/tail surfaces and randomly applied some ground up pastels with a soft brush to simulate dirt staining on the lower surfaces. I then used pastels, and pastel pencils to lightly highlight the panel lines and detail on the wings/tail surfaces and fuselage. I use Derwent pastels and pencils and they are quite easy to use, just lightly draw on the surface to be highlighted and blend with artists blending stump. A very nice, subtle effect can be achieved with these pencils that is much easier for me than dry brushing or pre-shading. Next I applied a heavy burnt umber oil wash to the wheels and sealed everything with a light coat of Future.
|
CONSTRUCTION CONTINUES |
After painting and weathering, I assembled the landing gear, the bombs, the dive brakes, pitot, and antenna masts. Finally, several coats of Polly S Satin Finish was shot to achieve a semi-flat finish.
|
CONCLUSIONS |
This is an excellent model of an important WW II aircraft. It would be an extremely easy build suitable for first time modelers if not for the forward fuselage fit problems. A little careful work with that portion of the kit and you will be rewarded with an excellent model.
|
REFERENCES |
Squadron/Signal Publications, JU87 Stuka in Action, SS1073, $8.95
Copyright ModelingMadness.com. All rights reserved. No reproduction in part or in whole without express permission from the editor.
If you would like your product reviewed fairly and fairly quickly, pleasecontact the editor or see other details in the Note to Contributors.