|
KIT: |
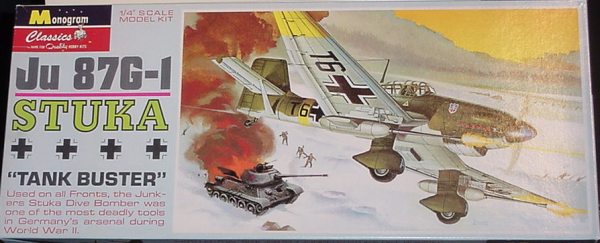
Monogram Classics 1/48 Ju-87G-1 |
|
KIT # |
0207 |
|
PRICE: |
$12.95 CDN |
|
DECALS: |
one aircraft |
|
REVIEWER: |
Olivier Lacombe |
|
NOTES: |
patch included with kit |
|
HISTORY |

“Stukas, here we go. Attacking now!” Having said that, the Squadron Leader banked his Spitfire to the right and swooped down on the enemy dive-bombers. A slaughter followed…
Following success in Poland then France, the Germans believed that the Stuka could devastate enemy targets with deadly efficiency. However, the Battle of Britain proved that it could only do so with local air superiority. The fixed-gears bombers were quickly withdrawn to other theatres of operation, and were given another chance during operation Barbarossa, the invasion of the Soviet Union in June 1941. The Luftwaffe quickly wiped the Soviet Air Force from the skies, enabling the lumbering Junkers to operate with relative impunity.
The early B model evolved into the D, then the G model, the latter being the favoured mount of the tank-busting ace Ulrich Rudel. Rudel came up with the idea of fixing two 37mm Flak canons under the wings, thus enabling the Stukas to attack the Russian tank’s weak spot (well, any tank’s weak spot), the rear. Rudel racked up almost 500 tanks before the war’s end.
|
THE KIT |
 The kit is typical of old models: raised
panel lines, scarce interior details and some working features. All the parts
are moulded in dark green styrene, with the clear parts, well, moulded in
clear. There is some flash, but a good cleanup will remove it without any
hassles.
The kit is typical of old models: raised
panel lines, scarce interior details and some working features. All the parts
are moulded in dark green styrene, with the clear parts, well, moulded in
clear. There is some flash, but a good cleanup will remove it without any
hassles.
There are no real options on the kit, but you can pose the pilot’s canopy opened or closed and choose to leave the guns off. You also get some big winter exhaust shrouds.
The decal sheet is very nice, with
markings for Rudel’s T6+AD. They are thin and in register, and all the stencils
are provided. The plan is curious, with an up-to-date first page done the
Monogram way with historical background and warnings, but the rest is just a
reprint of the old plan, with drawings and text. The painting notice is made
out of 3 pictures of the finished planes with the decal locations pointed out
and text for the paints.
A neat addition to the Monogram Classics line is a very nicely done cloth patch. Yeah, not exactly something to get excited about, but a nice addition anyway.
|
CONSTRUCTION |
 Since there are few parts, things go
along quickly. I started by painting the interior components Model Master RLM
66 then made the necessary detailing with Flat Black and Olive Drab. A little
Model Master Chrome Silver was brushed here and there to simulate wear.
Everything was glued together and the cockpit was installed in the right
fuselage. The fit is not so evident, so take your time. Before closing the
fuselage, I painted the radiator Flat Black and glued it in place, and the
propeller shaft was put through it.
Since there are few parts, things go
along quickly. I started by painting the interior components Model Master RLM
66 then made the necessary detailing with Flat Black and Olive Drab. A little
Model Master Chrome Silver was brushed here and there to simulate wear.
Everything was glued together and the cockpit was installed in the right
fuselage. The fit is not so evident, so take your time. Before closing the
fuselage, I painted the radiator Flat Black and glued it in place, and the
propeller shaft was put through it.
I then turned my attention to the tail, which comprises a rudder and the stabiliser. Glue the stabiliser in first, and make sure it’s level. It probably won’t, so rig it up with tape to ensure a good fit. Once it’s dry, glue the rudder in place, again making sure it’s straight. I applied Tamiya Putty to all the seams and smoothed them out. The wing came next and it was quickly glued to the fuselage, and the seams were dealt with in the same way as above. Before closing the wings, you might want to drill holes for the gun mounts, but it isn’t really necessary. I painted the wheels RLM 66 and the tires Flat Black and installed them in their respective wheel pants. Either one can go either side, so just watch for the spokes in the wheel, they should be facing outwards. I glued the wing radiators on, painted Flat Black before hand. Next, while carefully studying 3-view drawings, I glued the mounts in place and made sure I had smooth wing/wheel strut joint. Lastly, I glued the stabiliser struts in place and masked the aircraft up for painting.
|
PAINT & DECALS |
 Painting
After the usual cockpit/canopy masking, I sprayed the belly Model Master RLM 65, then followed by more masking and the top was coated with RLM 70. After yet another masking session, the theatre band and the undersides of the wingtips were sprayed Model Master RLM 04. I also sprayed the propeller Flat Black (I know it’s not the right colour, but I prefer black propellers!). Before proceeding to decaling, I glued the gondolas on the mounts and brushed the gun barrels Model Master Gun Metal. (Editor's note: I'm suspicious of the overall RLM 70 color callout as the standard camo for bombers such as the Ju-87 was RLM/70/71 for the upper colors. I'd be delighted to hear from those of you who have proof otherwise.)
Decals
My airbrush played a trick on me and totally refused to spray any Future, so I decided to apply the decals directly onto the paint. Everything went smooth, the new Revell-Monogram decals are very good, and they reacted well to Micro Set/Sol. I encountered some silvering on the leading edge stencils and on the fuselage letters, but given the fact that the surface of the aircraft wasn’t that smooth, it’s a remarkable achievement.
Once everything was dry and set, I coated the model with Dull Coat and glued the clear parts on with white glue. I decided not to install any control counterweight since they look more like plastic hairs than counterweights. Anyway, this is not very apparent on the finished aircraft.
|
CONCLUSIONS |
I really enjoyed this kit: it’s simple, yet it builds in a very convincing representation of Rudel’s bird. Superdetailers might want to add lots of stuff into the two offices, since they are pretty barren, but the amount of detail will satisfy a beginner or someone looking for a fun and short build. I recommend this kit to anyone looking for an inexpensive Gustav Stuka!
July 2002

Review kit courtesy of me and my wallet.
If you would like your product reviewed fairly and quickly where it will be seen by well over 150,000 visitors a month, please contact me or see other details in the Note to Contributors.