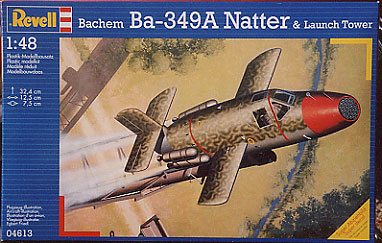
Revell 1/48 Ba-349 Natter
|
KIT # |
4613 |
|
PRICE: |
£ 12.99 |
|
DECALS: |
3 Aircraft |
|
REVIEWER: |
|
|
NOTES: |
Reboxed Dragon kit / Some Me-163 bits used |
|
HISTORY |

In cartoons, the Mad Scientist often has a German accent. It must be because of things like this plane… This particular inventor, Erich Bachem designed this particular plane as a cheap, partly expendable weapon to overcome the massive allied air superiority in the latter days of World War II. The Germans referred to it as a manned FLAC-grenade. It was not a kamikaze-plane, although a certain amount of suicidal courage might come in handy in flying this thing. In short: it was a vertical launched, rocket powered ‘plane’, build mostly from plywood, partly remote controlled, and only the part behind the cockpit would be re-used. The Bachem was never used in anger. I am only sure of one manned testflight, in which the testpilot, Lothar Sieber, was killed. There are unconfirmed stories of 3 to 5 other manned flights. At least one ‘battery’ of 10 Natters was found operational near Kirchheim, when overrun by advancing allied forces.
A normal flight should have been like this:
Vertical launch, powered with a HWK 109-509 liquid fuel rocked engine, and
4 solid fuel booster rockets. The boosters would quit after about 10 seconds,
at an altitude of 3500 Ft. During launch the controls would be fixed, shortly
after launch the plane radio control from a ground base would take over(!).
With only the HWK rocked engine left running the aircraft would climb to an
altitude of about 30.000-40,000 Ft in less then a minute. Still by radio
control, the plane would be directed to the enemy bomber stream. Only then the
pilot would take over control, aim the entire aircraft at a bomber, and launch
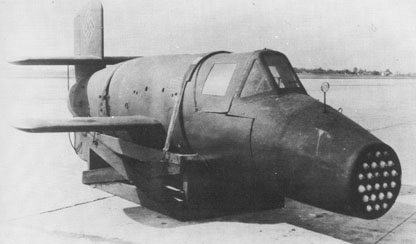
one salvo of 24 or 32 small rockets from the nose of the aircraft. After this
one shot, he was to unfasten his seatbelt, disconnect the
 stick and unlock the
front section. Next, a parachute at the back of the plane was deployed. This
would slow down the tail of the plane, thus casting off the entire front;
nose, windows, instrument panel rudder controls, all gone. The pilot would
naturally fall out of his chair as well, after which he was free to use a
parachute for a safe landing. The tail of the plane, with the rocked engine,
would land by the first parachute, to be used again. Somewhere on the web I
found the instruction: aim, shoot, unlock front, pull lever, fill pants, use
parachute. Sounds about right to me.
stick and unlock the
front section. Next, a parachute at the back of the plane was deployed. This
would slow down the tail of the plane, thus casting off the entire front;
nose, windows, instrument panel rudder controls, all gone. The pilot would
naturally fall out of his chair as well, after which he was free to use a
parachute for a safe landing. The tail of the plane, with the rocked engine,
would land by the first parachute, to be used again. Somewhere on the web I
found the instruction: aim, shoot, unlock front, pull lever, fill pants, use
parachute. Sounds about right to me.
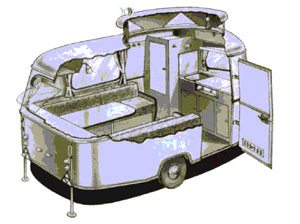
In a way, the Natter can be looked upon as the first manned rocket. The combination of liquid and solid fuel rocket engines is seen in the space shuttle today. As for the ‘mad scientist’, after the war and some denazification, he made a name as designer of tiny caravans made from plywood. To boldly go where…
|
THE KIT |
The box contains 5 grey plastic sprues, one clear sprue and 2 pieces to make the launch tower base. The main parts of the cockpit are in clear plastic, with the windows marked by a relief frame. This means the front window is part of an upper fuselage part, made in clear plastic. Likewise the large cockpit hood, it needs to be painted with the rest of the plane, with masked off windows. This means there will be no strange connection between windows and fuselage.
The clear plastic is very thick and distorting. For example, the clear nose cone, when installed, will render the fine cast rockets in the nose almost invisible. Luckily I did not find any picture of a Natter with a clear nosecone on the web, so one could probably do without.
 The launch tower consists of 3 sprues, leaving the Natter only 1 large and
1 very small sprue. It IS a simple plane after all…
The launch tower consists of 3 sprues, leaving the Natter only 1 large and
1 very small sprue. It IS a simple plane after all…
Decals enable 2 test planes (with some bright colours and large numbers or markings) and 1 operational plane (in mottled camouflage).
The Revell kit seems to be a reissue of the DML kit. The tail part separates in the right place to show off an engine (not included, here’s a chance for scratch builders if ever I saw one). A ladder is included, but no figures. The building instructions were rather straight forward and clear to me.
|
CONSTRUCTION |
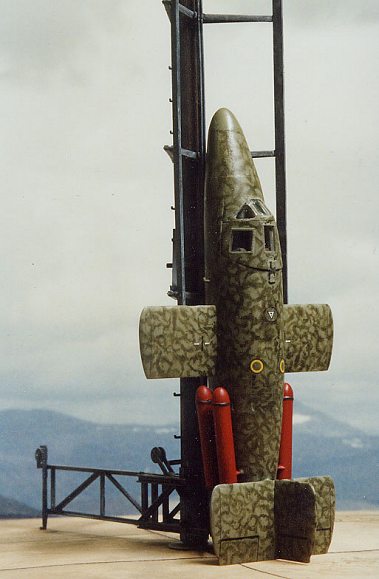
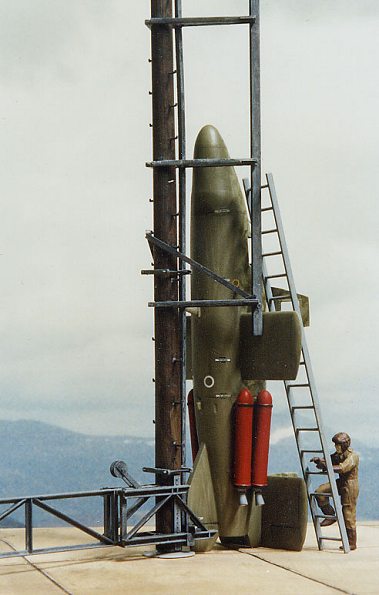
The biggest job was building the launch tower. I started with this, because I wanted to save the biggest fun (running with the almost finished plane through the apartment) part for last. All pieces making up the launch tower were hand painted during building, sometimes before assembly, sometimes after right after assembly (before continuation of the assembly). In general, all wood was painted brown, all steel grey (see the painting section for more details).
The pole is made out of 4 pieces, glued together. Much to my surprise, it was no problem to get it straight, the pen/hole construction fits well enough. The spikes for climbing the pole are cast with the pole, and turned out to be the biggest problem; one had to handle the pole with great care to prevent them from breaking of. Dropping it onto t nice carpet is NOT a good idea. I hade to glue several spikes back time and time again. Once the pole is ready, the top wheel can be installed.
IMPORTAND NOTE: The kit comes with clamps that were used to hoist the aircraft onto the pole. These clamps would be connected to a spreader bar, and this spreader bar would be connected to a cable. On top of the pole was a pulley, the cable would through this pulley, and down the back of the pole to a fence-like contraption leading the cable to a winch. If one wants to use this cable and clamps affair, the cable must be fed through the pulley house before gluing the these halves together, or one has to just glue the rope onto it afterwards. The rope provided by Revell is rather minimal, I decided to forget about this hoisting thing, since it would only be used during erecting the Natter, and I had no human figures to accompany this stage. If used, some fishing line would do better.
It took me a bit of staring at the drawings to figure out how the pulleys on the fence should be. Taking them off the sprue and just trying did the trick. The same went for the steel guide strips that make up the launch tower. The pole is not symmetrical, there is a clear back and front side, testfitting the fence at the bottom is the easiest way to figure out what is front and what is back. There are V-shapes that slot in behind the pole, V-shapes that slot in in front of the pole, the ends of all these V-shapes should meet, and then strips should connect the endings of these V-shapes. Sounds complicated? As easy as it looks in the drawings, I had quite a bit of work making ends meet here and lining everything up. Looking back, I should have used some more time for test fitting, the drawings made it look easier than it turned out to be. I was glad I did not use c.a. glue for this… Once the guide rails were in place the rest was easy. There is a central guide rail with some nice clamps to glue in place, and that is about it. The base halves fit together well, there is a collar for lining the hole in which the pole is placed, and the pool can remain free swivelling.
 Once the launch tower is done, the real fun begins. I started with the
cockpit. If the plane is build with a closed cockpit, there is little need for
detail. The little windows are to thick and distorting to make out anything
behind them. I wanted to present the plane with a moving cockpit hood, closed
to show the lines of the plane, but with a possibility to open up the cockpit.
Here’s one of my main problems in modelling; to show clear lines of the plane,
all hatches should be closed. But I also love the detail that can be seen in a
well build cockpit, an opened weapon bay or behind a removed engine panel. As
far as I can see there are only 2 solutions to this; build more of the same
planes, of try to make removing covers. With the Natter, I thought it would be
possible to leave the main cockpit hatch free.
Once the launch tower is done, the real fun begins. I started with the
cockpit. If the plane is build with a closed cockpit, there is little need for
detail. The little windows are to thick and distorting to make out anything
behind them. I wanted to present the plane with a moving cockpit hood, closed
to show the lines of the plane, but with a possibility to open up the cockpit.
Here’s one of my main problems in modelling; to show clear lines of the plane,
all hatches should be closed. But I also love the detail that can be seen in a
well build cockpit, an opened weapon bay or behind a removed engine panel. As
far as I can see there are only 2 solutions to this; build more of the same
planes, of try to make removing covers. With the Natter, I thought it would be
possible to leave the main cockpit hatch free.
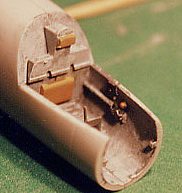
 So I needed to build a nice
cockpit. The kit comes with a rather nice cockpit, there are even a set of
rudder pedals that disappear out of view into the front of the plane (for
those of use who just want to know they are there). I had a few bits in a
spare box from a Revell Me 163 I build before, so I decided to add a throttle,
a fuse box and some piping. As both planes used the same WPK rocket engine,
one would expect more or less the same controls. The kit came without
seatbelts, but in a wave of brightness I once scanned a couple of decals from
seatbelts for future use. This seems to be a good idea; just print them on a
good quality paper, cut out and Bob’s your uncle.
So I needed to build a nice
cockpit. The kit comes with a rather nice cockpit, there are even a set of
rudder pedals that disappear out of view into the front of the plane (for
those of use who just want to know they are there). I had a few bits in a
spare box from a Revell Me 163 I build before, so I decided to add a throttle,
a fuse box and some piping. As both planes used the same WPK rocket engine,
one would expect more or less the same controls. The kit came without
seatbelts, but in a wave of brightness I once scanned a couple of decals from
seatbelts for future use. This seems to be a good idea; just print them on a
good quality paper, cut out and Bob’s your uncle.
After that, things went fast. 2 Fuselage halves are joined, 2 tail halves are joined, the front and tail of the fuselage are joined, tail and elevator are installed, wings are added, and that was about it really. As I said, I wanted to keep the cockpit hood free. It turned out it would fall off with the plane on it’s tail, so I plucked some hairs from my head, dotted some c.a. on the hood and on the fuselage, and used the hairs to hinge the hood. I had one particular picture in mind while building the Natter, and that picture shows quite a clear seam, where the detachable front meets the rest of the plane. This seam was not where the kit front meets the rest of the plane, although there is a panel line in the right place. I puttied the real connection into seamlessness and tried to emphasize the panel line. First I deepened the panel line by cutting into it with a knife, and then I scraped one side of the line to make a clear step.
The booster rockets are made from 2 halves each that went together well. Be careful with the nozzles on these boosters, they are very thin. A bit of attention in gluing gives good results here. I did not install the boosters onto the plane until after painting, just like some other tiny bits.
|
PAINT & DECALS |
I hand painted the lot with Revell and Humbrol enamel paint.
For the pole of the tower I used Revell matt 84 (dark brown), and I washed the pole with thinned matt black, to bring out the wood grain. The spikes for climbing the pole were painted iron (Revell 91) and then ‘rusticated’ with some red-brown of my own mix. All the metal was painted grey, first dark grey (Revell matt 78) and then dry brushed with lighter grey (Revell matt 57). I prefer my paint work not to smooth or perfect, somehow I think paint work was not the first priority in those days. Besides, a ‘sloppy’ paintjob adds a little life into the plastic, in my opinion. The base of the tower is very bare, just a plastic square with a hole in the middle. To add some reality, I scanned a piece of cardboard I made before, looking like concrete slabs. I printed this on thin paper and glued it over the base. It was meant as a short term solution, but it turned out so well I just left it like that.
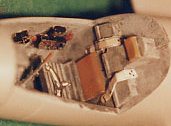
During building I already painted the inside of the cockpit grey, with some boxes and instruments in black and red. The instrument panel improved remarkable by a little dry brushing, showing nice detail. As usual, I did the dark grey/light grey trick. I masked all windows with liquid mask (Windsor & Newton Colourless Art Masking Fluid). To make the fluid stick to the plastic, I rubbed the brush over a little piece of hand soap before dipping it into the fluid, worked like a charm. I did this while building, because I needed to paint the inside of the cockpit (front fuselage and hood) grey before I glued them in place.
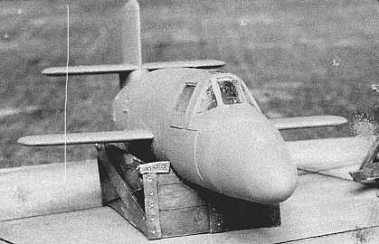
The outside was painted with the cockpit hood closed, since the camouflage pattern had to continue all over the plane. The entire plane was first coated in olive drab (Revell matt 45). For good hand painting, the paint should be thinned, about 2 parts of paint, 1 part turpentine. For overall work I use the softest brushes I can find, in my case Thomas 7110, number 6 (rather wide). Slap it on quick and thin, and just wait for the paint to spread itself. Practice (on a piece of sheet plastic) makes perfect, and after a day of drying, it is possible to redo areas where the paint still shows some plastic. I took some pictures of the plane in this ‘undercoat’ to compare it with some old pictures I found on the web.
The camouflage pattern was done with a good sable brush, just a little paint on the brush to start with and smudging out while the paint was drying. It took quite a few hours to do, but to me this is great fun.
The solid fuel boosters were done in red (Revell matt 36) with black bands round the top and bottom. The nozzles were done in metal (Revell 91).
I did not follow instructions to paint the tailpiece below the elevators in metal. On pictures I found, only few planes seem to have this metal cover to prevent the wood from burning. I did find several pictures with metal half round shields behind the boosters, and I am planning on scratch building those one day.
 After the paint job, the complete plane was varnished with Humbrol clear
varnish (No 35, gloss) to prepare the plane for decals. Decalling was no
problem, they went on like a dream. C-stoff circles, a T-stoff sticker behind
the cockpit, and several finely printed ‘hier Aufbocken’ added just that
little bit extra to the plane.
After the paint job, the complete plane was varnished with Humbrol clear
varnish (No 35, gloss) to prepare the plane for decals. Decalling was no
problem, they went on like a dream. C-stoff circles, a T-stoff sticker behind
the cockpit, and several finely printed ‘hier Aufbocken’ added just that
little bit extra to the plane.
Important note: There are no swastikas in this kit. Probably due to political correctness, but in this case also historical correct; the German Natters did not carry swastikas, ‘balkenkreuze’ or any other national markings. It was regarded an expendable weapon, just like a mortar shell or a bullet, and was not supposed to be marked like a plane. On the web, many pictures can be found of Natters with swastikas, but these have been painted on AFTER the war, usually for exhibition purpose.
A day later, I finished the paint work with a coat of matt varnish (Windsor & Newton Acrylic Matt Varnish).
|
FINAL CONSTRUCTION |
Final construction consisted of gluing the booster and some small parts in place with c.a. glue. For installing the boosters there are marks on the plane to line them up, but it rook me several goes to get them lined up well. The small parts are 2 hooks left and right of the cockpit (pitot tubes? I am not sure) and the aiming aids on the front of the nose. These last two were the only parts that did not convince me. The plastic looked to heavy, I tried scratch building them from metal wire, but in the end I decided to do without for now.
|
CONCLUSIONS |
This was a great kit to build, fit was good, no special problems whatsoever. With a camouflage pattern like this, hand painting is just great. I am rather new to this (this was my 3rd model to complete) and for me it was perfect. I can imagine adding quite a lot by scratch building, and with the tower it would be a good base for an unusual diorama. Now if only I could find that Opel Blitz T-stoff tanker in 1:48 anywhere…
As for accuracy of the model, the cockpit hood might be a bit wrong; on several (but not all) pictures of the real thing I saw larger side windows.
July 2002
For a look at the Natter with engine, follow this link.
|
REFERENCES |
Most reference I found on the web, just searching with Google for Natter, Ba 349, Erich Bachem and Lothar Sieber.
I visited the ‘Deutsches Museum’ in München, Germany, where they have a restored Ba 349. Unfortunately, it has been restored into perfection, which is not how I wanted to see the plane. Besides, due to its presentation, one could see nothing inside the cockpit.
The only book I used:
Diedrich, Hans-Peter, Die deutschen Raketeflugzeuge bis 1945, Aviatic Verlag GmbH, Oberhaching, 2001 (ISBN 3-925505-61-X)
If you would like your product reviewed fairly and fairly quickly, please contact the editor or see other details in the Note to Contributors.