| KIT #: | 18002 |
| PRICE: | $30.00 on sale ($100.00 SRP) |
| DECALS: | Two options |
| REVIEWER: | Mike Kleber |
| NOTES: | Includes rubber tires |
| HISTORY |
For kit details, please refer to my kit preview at this website.
| CONSTRUCTION |
As the build proceeded, I re-sequenced many of the steps to
make handling of the model easier.
The model gets tricky to pick up and hold as the multitude of easily breakable
parts are added.
 The
cockpit parts fit with no problems.
Note: The instrument panel is not readily visible in the cockpit once the build
is complete, but most everything else is.
The kit is designed such that the rudder can move.
The rudder required a bit of sanding to get a good fit.
I opted to glue it in place.
The
cockpit parts fit with no problems.
Note: The instrument panel is not readily visible in the cockpit once the build
is complete, but most everything else is.
The kit is designed such that the rudder can move.
The rudder required a bit of sanding to get a good fit.
I opted to glue it in place.
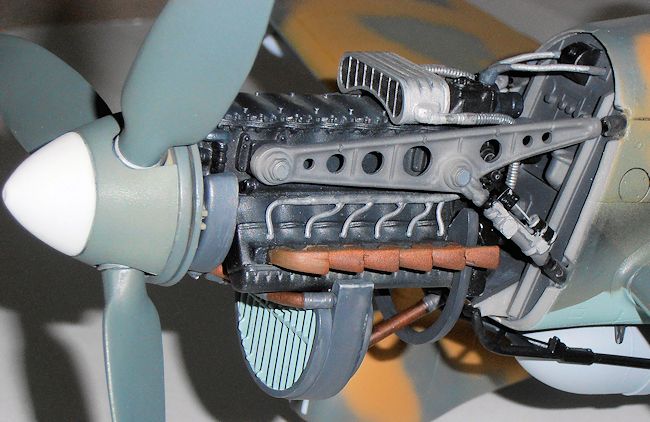
I installed the engine later in the build since the mounts
were flexible enough to allow it.
This made for easier handling during construction and painting.
The fire wall required some material to be ground away to make adequate
clearance for the radiator pipe when the engine was installed.
There are two sets of exhaust stacks for either the side cowling
installed or for the side cowling off.
The crew harnesses were installed at the end of the build.
This is a photo etched, pre-painted set from Eduard, #23003.
Two small notches were put in the seat back using a hot exacto knife
blade. The shoulder harnesses were
mounted into these notches using cyanoacrylate.
 t
this point I glued the flap mounts to the bottom of the wings, using the flaps
to align the mounts. The flaps
themselves were installed much later in the build after painting.
t
this point I glued the flap mounts to the bottom of the wings, using the flaps
to align the mounts. The flaps
themselves were installed much later in the build after painting.
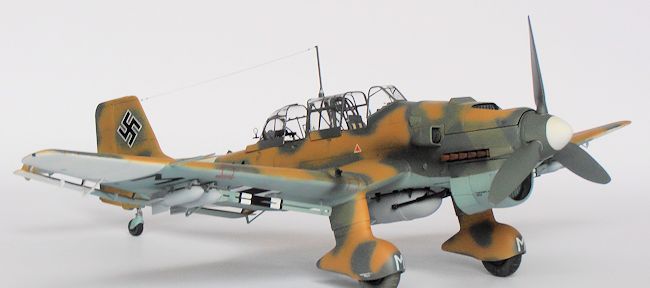
The holes on the fire wall that the bomb trapeze mounts to
had to be opened up to enable the proper alignment of the trapeze with the bomb.
The backs of the propeller blades had considerable sink holes and required
puttying. The top cowling needed material to be ground away in several areas for
it to fit properly.
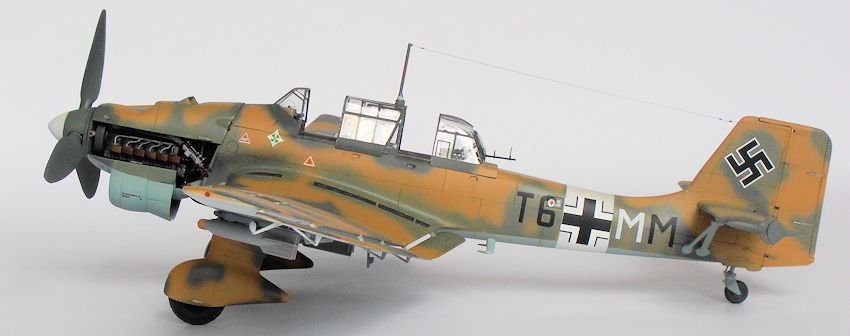
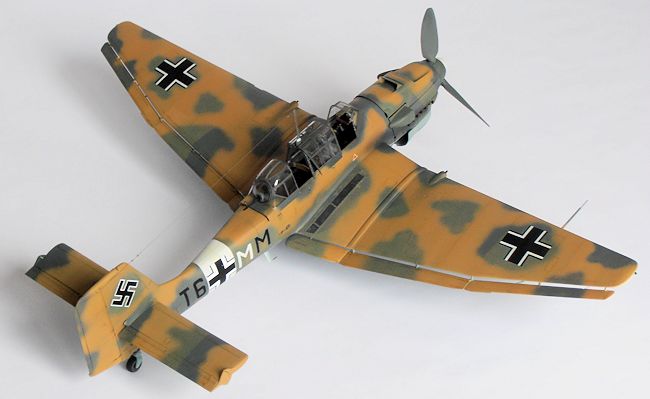
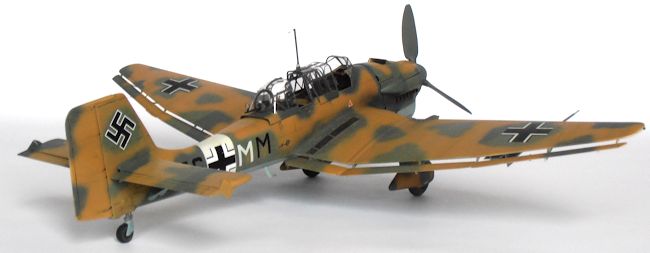
| COLORS & MARKINGS |
 The
camouflage pattern is that of a field applied sand color (RLM 79) painted over
the original 2 tone green splinter (RLM 70 & 71) pattern found on aircraft that
were removed from European operations and sent to North Africa.
The
camouflage pattern is that of a field applied sand color (RLM 79) painted over
the original 2 tone green splinter (RLM 70 & 71) pattern found on aircraft that
were removed from European operations and sent to North Africa.
I painted the white fuselage stripe and wingtips first,
then the blue undersides. Rather
than attempting to paint tan over green on the model, I painted the upper
surfaces tan first then applied RLM 70 / 71 green in a random pattern over the
tan. Model Master plastic enamels were used.
Black and brown water colors were applied in the panel lines.
Lacquer gloss and dull coats were sprayed prior to and after the
application of the decals respectively.
A ‘cross
section’ of the cross was painted on the dive brakes as no decal was provided
for this. I temporarily set the
dive brakes in their proper location over the already completed cross on the
wings. Placing a mark on the dive
brake where the pattern should start,
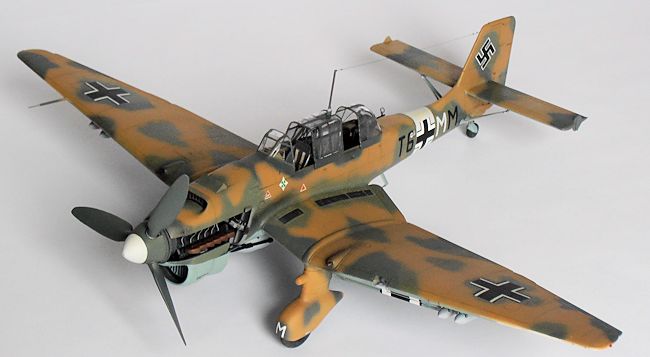 I then
used a photocopied decal as a guide for masking. When the dive brakes were
permanently installed, they lined up reasonably well.
I then
used a photocopied decal as a guide for masking. When the dive brakes were
permanently installed, they lined up reasonably well.
| CONCLUSIONS |
| REFERENCES |
 Stuka:
(Barker)
Stuka:
(Barker)
Luftwaffe 1935-45 Part 2, camouflage and markings: (Jaroslaw
Wrobel)
April 2015
If you would like your product reviewed fairly and fairly quickly, please contact the editor or see other details in the Note to Contributors.