ICM 1/48 Ju-88C-6b
| KIT #: | 48239 |
| PRICE: | $32.00 |
| DECALS: | Four options |
| REVIEWER: | Francisco Santoro |
| NOTES: | Decals stick to the surface as soon as you place them. |
| HISTORY |
 "During
the Second World War, the Junkers Ju 88 embodied what the Eurofighter, the
Rafale and the F-22 represent in our day. The MRCA, Multi Role Combat Aircraft.
It served as a conventional high altitude bomber, a dive bomber, and was just as
effective as a night fighter or even a torpedo bomber engaging surface vessels.
It could also be used as a tank killer and against railway targets, or even as a
mine layer or reconnaissance aircraft. During its final days it was used as a
bomb carrier in a composite unit under a Bf 109 or Fw 190. The Ju 88 was still
in full production at the end of the Second World War and up to this point in
time more Ju 88s had been built than all other Luftwaffe bombers put together,
over 15000 aircraft."
"During
the Second World War, the Junkers Ju 88 embodied what the Eurofighter, the
Rafale and the F-22 represent in our day. The MRCA, Multi Role Combat Aircraft.
It served as a conventional high altitude bomber, a dive bomber, and was just as
effective as a night fighter or even a torpedo bomber engaging surface vessels.
It could also be used as a tank killer and against railway targets, or even as a
mine layer or reconnaissance aircraft. During its final days it was used as a
bomb carrier in a composite unit under a Bf 109 or Fw 190. The Ju 88 was still
in full production at the end of the Second World War and up to this point in
time more Ju 88s had been built than all other Luftwaffe bombers put together,
over 15000 aircraft."
| THE KIT |
10 sprues of light grey and clear plastic come inside a single resealable bag. This is one of the many variants of the Ju 88 made by ICM released some years ago. The instructions come in the shape of a thick booklet in full colour.
 There're
four decal options included in this kit:
There're
four decal options included in this kit:
1) Ju 88C-6b of Wilhelm Beier, 10/NJG 1, Leeuwarden, October 1942. Painted in RLM 74 uppers and RLM 75 undersides.
2) Ju 88C-6b of Prinz Heinrich Zu Sayn Wittgenstein, Stab IV/NJG 5, Orel, Russia. Painted in RLM 76/75/22.
3) Ju 88C-6b of 3/NJG 4, Mainz, March 1944. Painted in RLM 76/75.
4) Ju 88C-6 of 6/NJG 2, Kassel, Spring 1944. Painted in RLM 76/75.
| CONSTRUCTION |
When I first opened this kit, I felt daunted by the amount of pieces that came inside the bag. I was really hoping for something simpler than the Revell 1:32 Ju 88A-1 I had built last year (which was an exercise in patience).
What I first did was to paint all the cockpit parts in RLM 66 (Revell
78). Once they were dry, the pieces were put together, and the cockpit was built
in a single day. So far, the kit was proving to be easier than the Revell 1:32
kit. Once I was finished with the cockpit, I glued it to the fuselage, together
with the tailwheel assembly (which comes as a single piece, including the tail
wheel), and closed the fuselage. I
 then moved
on to work on the seats and the cockpit floor. I glued the rudder pedals and
control stick to the cockpit floor, which were previously painted in RLM 66 (Revell
78), and then were left to dry. After everything was dry, I glued the cockpit
floor to the fuselage.
then moved
on to work on the seats and the cockpit floor. I glued the rudder pedals and
control stick to the cockpit floor, which were previously painted in RLM 66 (Revell
78), and then were left to dry. After everything was dry, I glued the cockpit
floor to the fuselage.
After the construction of the cockpit, you have to build the tail, horizontal stabilizers and wings. The first two fitted like a glove into their openings in the fuselage, but the wings turned out to be the most difficult stage in the entire kit, since they didn´t want to fit into place. After putting quite a fight, I was able to glue the wings in place, and left them to dry for the day. After the wings had dry, I glued the flaps, ailerons and rudder to the aircraft.
I then went to work on the landing gear. Unlike Revell, ICM provides a very clear assembly stage of their gear. The parts were painted in RLM 02 (Revell 45) and then glued into place.
The engines came next. ICM provides two complete engines for the kit, but I only needed them to hold the exhausts and the propellers, so I built the bare bones of the engines an glued them in place. After that, I trapped the engines into their respective cowlings, glued the radiator faces, and tried gluing the engines into the wings. This step also proved to be challenging, since they didn't want to fit properly. After more fighting with them, I was able to get them in place. The engine cowling s were then glued into the wings. The last step after working with the engines was to glue the flame dampers.
| COLORS & MARKINGS |
 I
had decided to paint the model as the Ju 88C-6b of Prinz Heinrich Zu Sayn
Wittgenstein. Thus, I painted the upper sides of the aircraft in RLM 76 (Revell
49), mottled them with RLM 75 (Revell 47), and then painted the lower fuselage
sides with RLM 22 (Revell 08). I then coated the entire aircraft with Revell's
gloss varnish.
I
had decided to paint the model as the Ju 88C-6b of Prinz Heinrich Zu Sayn
Wittgenstein. Thus, I painted the upper sides of the aircraft in RLM 76 (Revell
49), mottled them with RLM 75 (Revell 47), and then painted the lower fuselage
sides with RLM 22 (Revell 08). I then coated the entire aircraft with Revell's
gloss varnish.
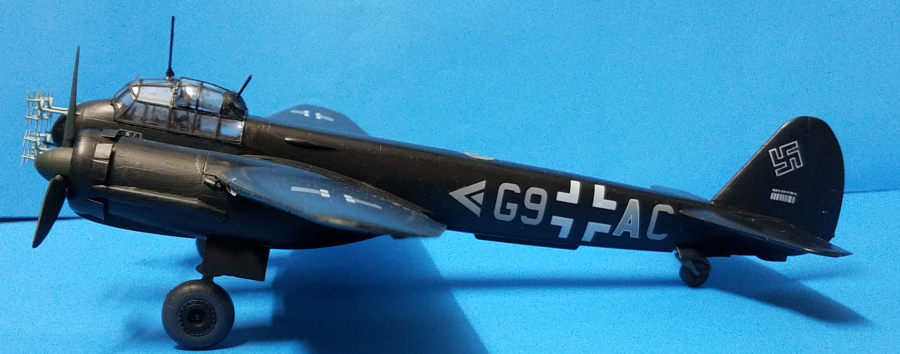
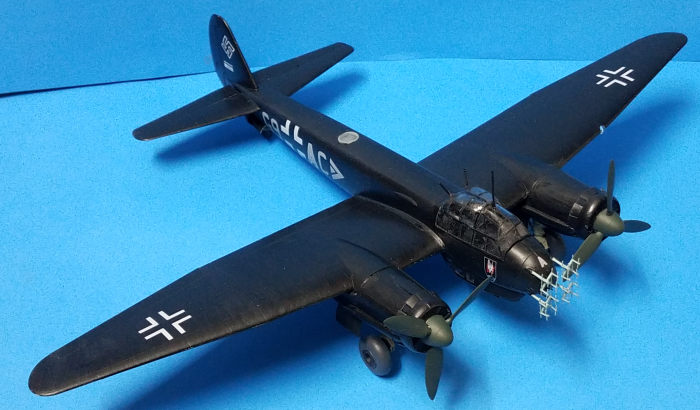
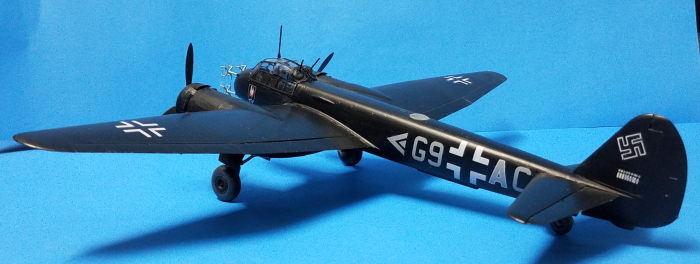
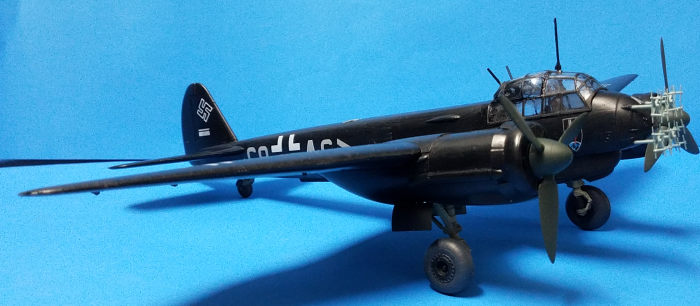
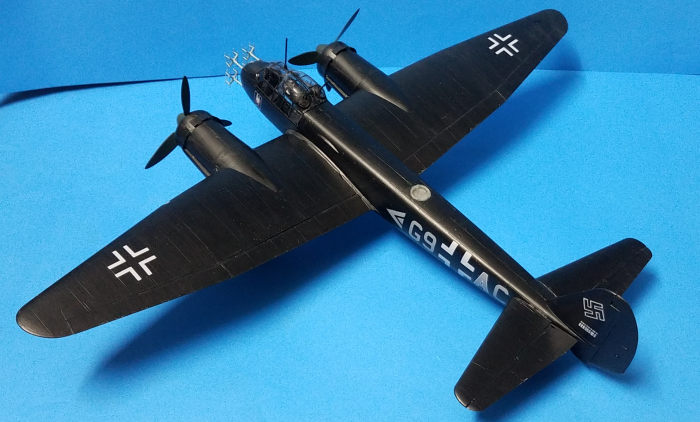
I found out when I tried to place the decals, that they were as Eduard's in house ones, they stuck to the surface solidly after placing them. I had placed one of the crosses in an incorrect position and wouldn't move. It was then that I decided to strip the paint and decal and paint the aircraft in an entirely black camouflage colour. Luckily I had on my decal stash a decal sheet for several Bf 110 night fighter aircraft, so I went with a "what if" route and decalled this Ju 88 as Walter Ehle's Ju 88 (it should be a Bf 110). I then gave the aircraft two coats of Revell's matt varnish.
I installed the lower gondola to the lower fuselage, and glued the antennas to the nose. The wheels were painted with black hubs and RLM 66 (Revell 78) tyres. The landing gear doors were painted in black. The clear parts were painted black and glued into their opening with Revell's clear Contacta glue.
| CONCLUSIONS |
ICM has launched a very good series of Ju 88s, and for 32$, one can have many of them. Mind the decals though, have some spares.
| REFERENCES |
Kit instructions
9 July 2021
Copyright ModelingMadness.com. All rights reserved. No reproduction in part or in whole without express permission.
If you would like your product reviewed fairly and fairly quickly, please contact the editor or see other details in the Note to Contributors.