Revell 1/72 Ju-88C-6Z/N Night Fighter
| KIT #: | 4856 |
| PRICE: | $27.00 |
| DECALS: | Two options |
| REVIEWER: | Francisco Santoro |
| NOTES: | Some steps on the instructions are confusing. |
| HISTORY |
 During
the Second World War, the Junkers Ju 88 embodied what the Eurofighter, the
Rafale and the F-22 represent in our day. The MRCA, Multi Role Combat Aircraft.
It served as a conventional high altitude bomber, a dive bomber, and was just as
effective as a night fighter or even a torpedo bomber engaging surface vessels.
It could also be used as a tank killer and against railway targets, or even as a
mine layer or reconnaissance aircraft. During its final days it was used as a
bomb carrier in a composite unit under a Bf 109 or Fw 190. The Ju 88 was still
in full production at the end of the Second World War and up to this point in
time more Ju 88s had been built than all other Luftwaffe bombers put together,
over 15000 aircraft.
During
the Second World War, the Junkers Ju 88 embodied what the Eurofighter, the
Rafale and the F-22 represent in our day. The MRCA, Multi Role Combat Aircraft.
It served as a conventional high altitude bomber, a dive bomber, and was just as
effective as a night fighter or even a torpedo bomber engaging surface vessels.
It could also be used as a tank killer and against railway targets, or even as a
mine layer or reconnaissance aircraft. During its final days it was used as a
bomb carrier in a composite unit under a Bf 109 or Fw 190. The Ju 88 was still
in full production at the end of the Second World War and up to this point in
time more Ju 88s had been built than all other Luftwaffe bombers put together,
over 15000 aircraft.
| THE KIT |
There's a total of 14 sprues contained in a single bag. Of the 14, 4 are made in clear plastic, while the remaining 10 are made of light grey plastic.
Instructions are of the old Revell style in black and white diagrams.
There're two decal options included:
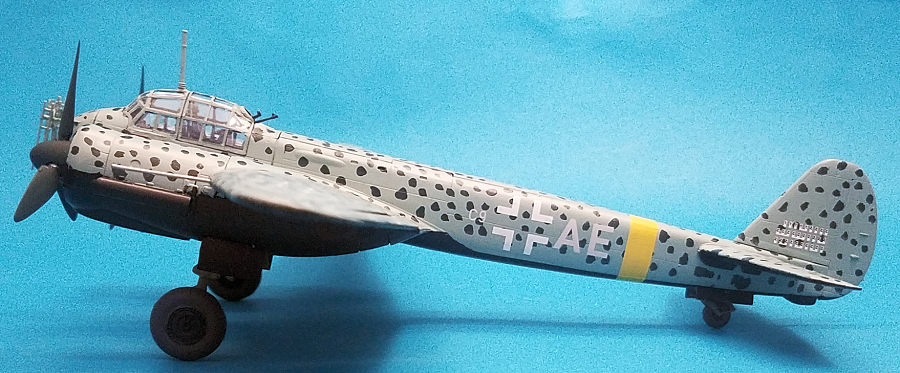
1) Junkers Ju 88C-6 C9+AE of Prinz Heinrich zu Sayn Wittgenstein. Painted in RLM 76/75/22.
2) Junkers Ju 88C-6 5K+DP of 6/KG (Z) 3, painted in RLM 71/65/04.
| CONSTRUCTION |
 The
kit has the option to be built as a Ju 88C-6N nightffighter (option B) or as a
Ju 88C-6Z dayfighter (option A). Early on you have to decide which aircraft to
build, because differences between the variants are shown since step 5. I wanted
to build the aircraft of nightfighter ace Prinz Heinrich zu Sayn Wittgenstein,
so I chose option B.
The
kit has the option to be built as a Ju 88C-6N nightffighter (option B) or as a
Ju 88C-6Z dayfighter (option A). Early on you have to decide which aircraft to
build, because differences between the variants are shown since step 5. I wanted
to build the aircraft of nightfighter ace Prinz Heinrich zu Sayn Wittgenstein,
so I chose option B.
I began by painting the cockpit pieces with Revell 78 Tank Grey (RLM 66). The radios were painted in black (Revell 08), while the rudder pedals were picked out with silver (Revell 91). Once all the cocktpit parts were fully painted and dry, I glued them all together. The finished product is a very busy cockpit, and needs no aftermarket products. Step 9 tells you to build up the tailwhell assembly and glue it to the fuselage, while at the same time closing the fuselage halves on step 10. Step 11 is the last cockpit construction step, where you have to glue the control panel and the rear fairing for the guns.
Steps 13, 14 and 15 are for building one of the nose guns and the cockpit's floor. After that, I glued the roof of the plane to the fuselage, and then glued the cockpit to the fuselage halves.
On step 19 is where the confusing instructions begin to rear their ugly head. On this step, Revell tells you to open the holes for the bombs, parts that aren´t included in the fighter version of the Ju 88. Don´t open them, build the wings as if.
Steps 20 to 25 further show you the construction of the wings, together with the ailerons and flaps. I glued all those pieces together and left them to dry.
 Steps
26 and 27 are for the assembly of the horizontal stabilizers and the rudder. I
built them and then glued them to the rear of the fuselage. Step 29 is for the
construction of the radiator faces and the assembly of the base of the
propellers (they can spin if you're careful when applying the glue).
Steps
26 and 27 are for the assembly of the horizontal stabilizers and the rudder. I
built them and then glued them to the rear of the fuselage. Step 29 is for the
construction of the radiator faces and the assembly of the base of the
propellers (they can spin if you're careful when applying the glue).
Step 30 is another place where the instructions are confusing. Revell tells you to glue the exhausts to the engine halves, but if you do this, you won't be able to glue the flame dampers on Step 35! On this step you also need to choose which flame dampers to glue. Checking the instructions, Wittegenstein's aircraft has the short dampers, so I glued those to the engines.
Backtracking a bit, Steps 31 to 33 are for the construction of the engine nacelles and its assembly into the wings. Step 34 is for the built up of the landing gear, but I left that for the end, since I didn´t want to damage the struts.
By this stage, the model, excepting the lower fuselage compartment and the nose with the guns and radar, was virtually complete, so I headed for the painting stage.
| COLORS & MARKINGS |
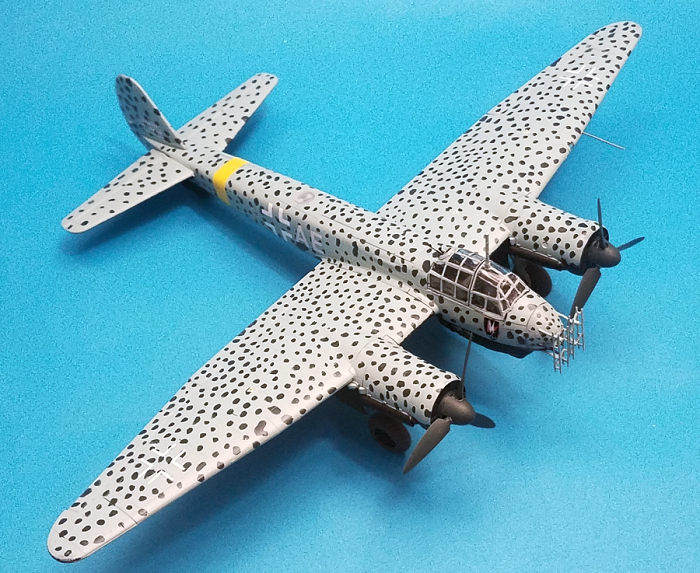
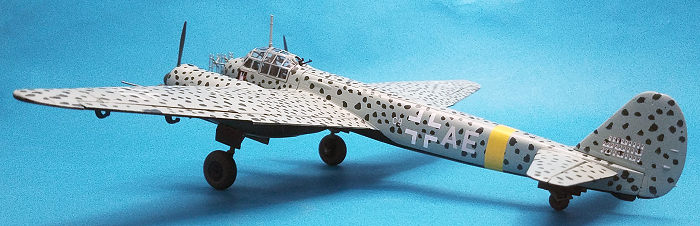 Wittgenstein's
aircraft is painted in a simple colour scheme of RLM 76/75/22. I painted the
entire upper surfaces with Revell 49 Light Blue (RLM 76/65), and then I mottled
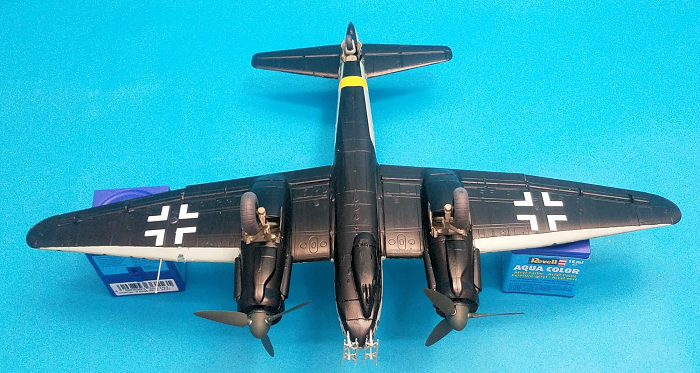
them with Revell 47 (RLM 75). I then masked the fuselage and painted the lower
surfaces in black. The model was then given two coats of Revell's gloss varnish
to prepare the surface for the decals. The decals behaved very well, and after a
drying time of 24 hours, the whole aircraft was coated with Revell's matt
varnish.
Wittgenstein's
aircraft is painted in a simple colour scheme of RLM 76/75/22. I painted the
entire upper surfaces with Revell 49 Light Blue (RLM 76/65), and then I mottled
them with Revell 47 (RLM 75). I then masked the fuselage and painted the lower
surfaces in black. The model was then given two coats of Revell's gloss varnish
to prepare the surface for the decals. The decals behaved very well, and after a
drying time of 24 hours, the whole aircraft was coated with Revell's matt
varnish.
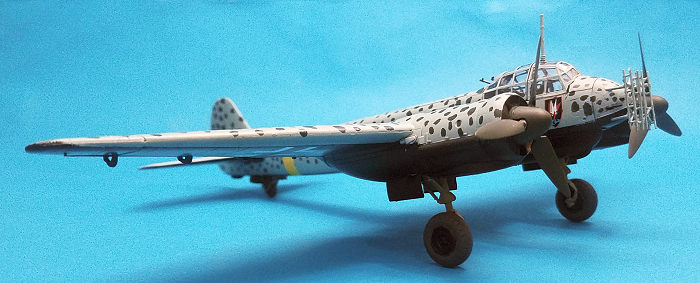
I began the final assembly by building the nose with the guns and the radar array. The latter was very fiddly to build, since it was made up of multiple small pieces which easily broke if too much pressure was applied. After glueing the nose in place, I painted the clear parts and glued them to the aircraft with Revell's Contacta Clear.
The last step was glueing the landing gear. It was painted in Revell 45 (RLM 02) and then glued into their respective openings. The wheels were painted with black hubs and RLM 66 tyres.
The propellers were painted in RLM 70 and then glued into place.
| CONCLUSIONS |
Revell's rendition of this important aircraft of WW2 is really good. You will end up with a very nice replica of the figher version of the Ju 88 as long as you check the instructions carefully.
19 February 2021
Copyright ModelingMadness.com. All rights reserved.
March 2015
If you would like your product reviewed fairly and fairly quickly, please contact the editor or see other details in the Note to Contributors.
Back to the Main Page Back to the Review Index Page Back to the Previews Index Page