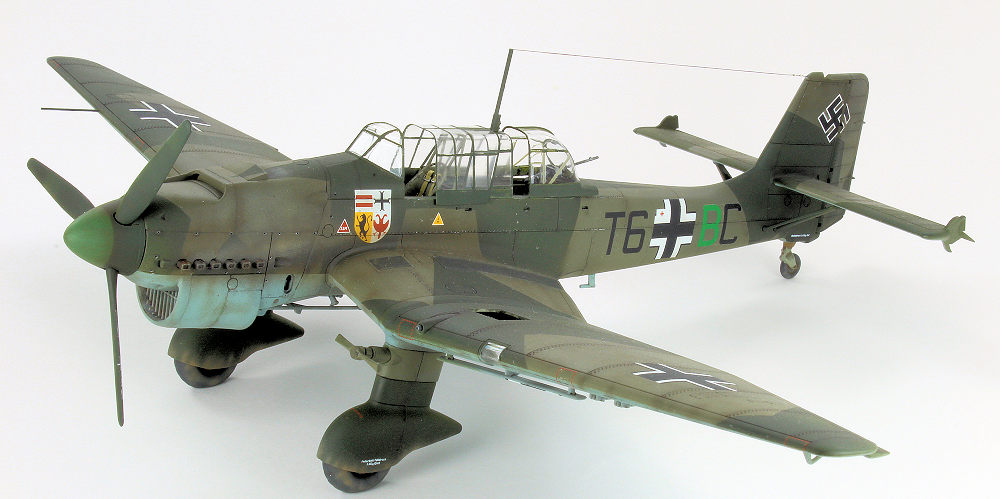
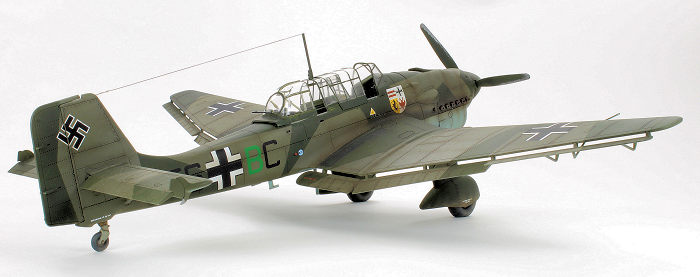
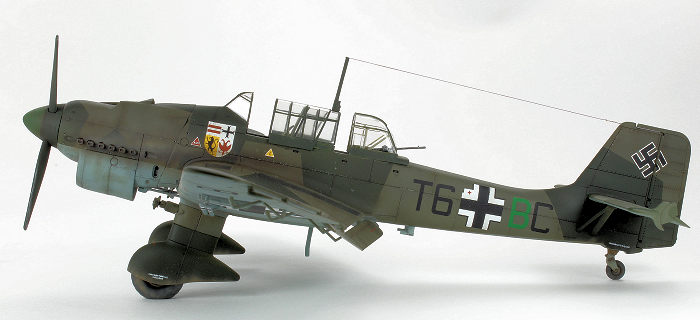
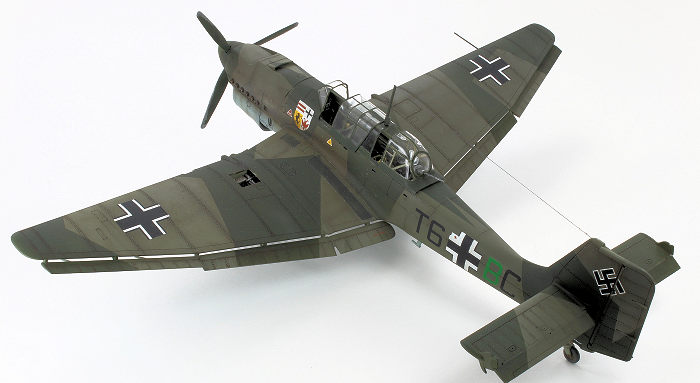
Airfix 1/48 Ju-87B-1 Stuka
| KIT #: | A07114 |
| PRICE: | $29.99 on sale ($58.99 SRP) |
| DECALS: | Two options |
| REVIEWER: | Scott Lyle |
| NOTES: | Limited Reissue (2012) |
| HISTORY |
A candidate for “most hated aircraft of all time”, the Ju 87 Stuka dive bomber was one of the key contributors to the early successes of the German war machine during World War 2. Designed to fill the roles of dive bomber and close air support, the Stuka was used to great effectiveness during the Polish and French Campaigns where it proved to be accurate, reliable and tough.
 With its
loud, screeching sirens, the Stuka’s attacks were often as devastating
psychologically as they were physically. By the summer of 1940 however it
began suffering heavy losses during the Battle of Britain, so much so that
it had to be withdrawn to secondary theaters. For a time it regained its
former glory in the Eastern Theater and later variants proved effective in
the tank-hunting role, but by the end of the war it was very vulnerable to
enemy fighters.
With its
loud, screeching sirens, the Stuka’s attacks were often as devastating
psychologically as they were physically. By the summer of 1940 however it
began suffering heavy losses during the Battle of Britain, so much so that
it had to be withdrawn to secondary theaters. For a time it regained its
former glory in the Eastern Theater and later variants proved effective in
the tank-hunting role, but by the end of the war it was very vulnerable to
enemy fighters.
Such was its success early on however that its fearsome reputation was created after less than a year of operations. The Stuka will always be remembered as the “flying artillery” of the Wehrmacht, spawning the popular phrase “Where the infantry went, so went the Stuka.”
| THE KIT |
I have been hearing a lot about “the new Airfix” lately and it got me wondering, have I ever built an Airfix kit? After some deep thought (and scotch), the answer is yes - in the late 70s I built a few of their dinosaur models. Not sure if that counts.
 They
grabbed my interest when they issued this new Stuka however. Featuring a
complete engine and open gun bays on the wings, it also contains poseable
elevators and rudder, a complete bombload, decals for two aircraft and two
options for the canopy, though as others have pointed out, Airfix botched
that a tad.
They
grabbed my interest when they issued this new Stuka however. Featuring a
complete engine and open gun bays on the wings, it also contains poseable
elevators and rudder, a complete bombload, decals for two aircraft and two
options for the canopy, though as others have pointed out, Airfix botched
that a tad.
Nonetheless, it features very crisp recessed panel lines and an “appropriate” amount of recessed rivets. The instructions are easy to follow and give you full color painting and decaling views. Having spent the last 10 months of my modeling life building 1970s vintage bomber kits, I was looking forward to a modern and trouble-free build.
| CONSTRUCTION |
Airfix
starts you with a neat one-piece wing-spar section that forms the base for
the cockpit and also supports the wings and fuselage. Following the
instructions, I added the gunner’s station parts, radio and nicely detailed
sidewalls to the interior floor of the spar, which soon built up into a sort
of “interior module”. The kit’s seats do not provide seat belts so I
replaced them with Quickboost seats that came with the belts sculpted in
place. Airfix’s parts have a few knockout pin marks here and there, some of
which are
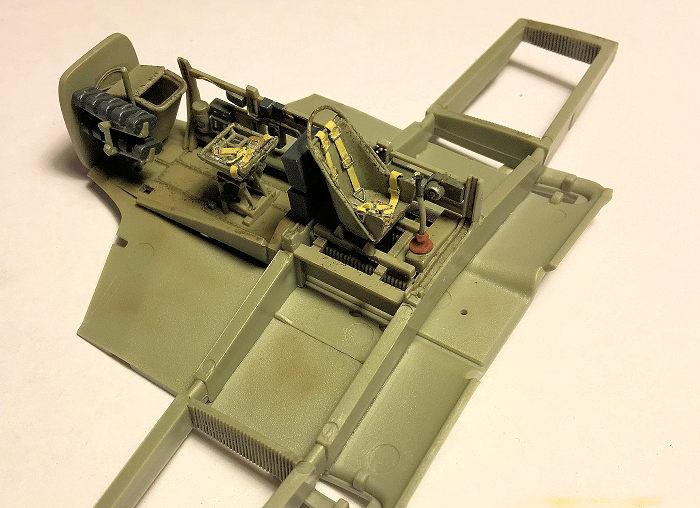 hidden by other parts, some of which you will want to deal with.
I painted the module Testors Acrylic RLM 02 “Grau” and then added a wash of MIG Productions Dark Wash before picking out the details by hand. Airfix’s instructions do an excellent job of clearly calling out what color goes where.
Once the paint was dry, I glued my interior module to the bottom, center section of the wing. The instructions next have you glue the fuselage halves together before sliding the module into place. I recommend doing some test fitting before doing that however. I found that to get the fuselage halves to close up properly I had to shave a couple of millimeters off the aft ends of the horizontal ribs on the inside of the fuselage halves, otherwise they slightly interfere with the rearmost bulkhead (the part added in step 2).
With the interior glued into the fuselage, I moved onto the instrument panel. It too was painted RLM 02 Grau and then coated with some Testors Gloss in preparation for the instrument panel decal. A couple of coats of Walthers Solvaset made the decal snuggle down nicely before it was dulled down with some Testors Flat. Lastly, I picked out the glass dials with Testors Gloss. The panel was then mounted to a bulkhead that also holds a small window frame in the floor, which was in turn attached to the fuselage. To this point I found the kit fun to build with a novel and innovative approach to the layout and assembly of the model. The crispness and “finesse” of the individual parts are not quite up to Tamiya standards, but so far so good.
The engine firewall “capped” off the front of the fuselage and then it was time for perhaps the worst part of any aircraft build – the fuselage seams. My concerns turned out to be minor however, with only a small amount of putty needed here and there to take care of them.
With that
done, it was onto the wings. The lower wings go on to the spar section
first, but before you attach the upper wings, you have to decide if you are
going to open up the gun bays. I opted to open up one side, so I cut the
cover panel out of the upper wing and then painted and attached the detail
bits inside. The upper wings were then glued on; a little putty was needed
to fill in some minor gaps. The tail planes are next,
 and Airfix nicely
gives you the option to mount them in three positions; horizontal, angled up
or angled down. Similarly, the rudder is free to be attached in any positon.
and Airfix nicely
gives you the option to mount them in three positions; horizontal, angled up
or angled down. Similarly, the rudder is free to be attached in any positon.
Up next you have to decide if you are going to go with the exposed engine option or the “buttoned up” nose option. When I bought the kit I intended to show the engine exposed, but the more I looked at pictures of the Stuka the more its notched, ungainly nose grew on me. I thus skipped over the engine portion and assembled the nose cowling panels, which went together without a hitch. Airfix provides parts to let you choose if the chin radiator’s flaps are open or closed. The kit also provides the exhaust stubs of the early B-1 versions, but there are parts in the box for later versions as well (as it turns out there are a whole slew of parts in the box not called out in the instructions – not only are more versions obviously coming from Airfix, but those extra parts can be put to good use).
With my airframe looking good it was on to the Stuka’s trademark-spatted landing gear. Once again Airfix gives you plenty of thoughtful options. First, you can add the “siren props” (they’re not called out in the instructions, but they’re in the box), just the siren hubs, or no sirens at all. There are also two sets of tires, weighted and not weighted. Lastly you have the option of showing the landing gear compressed as if the aircraft is on the ground, or extended like it is flying - very nice. I added the sirens (you can’t have a Stuka without sirens…) and went with the “sitting on the ground” options.
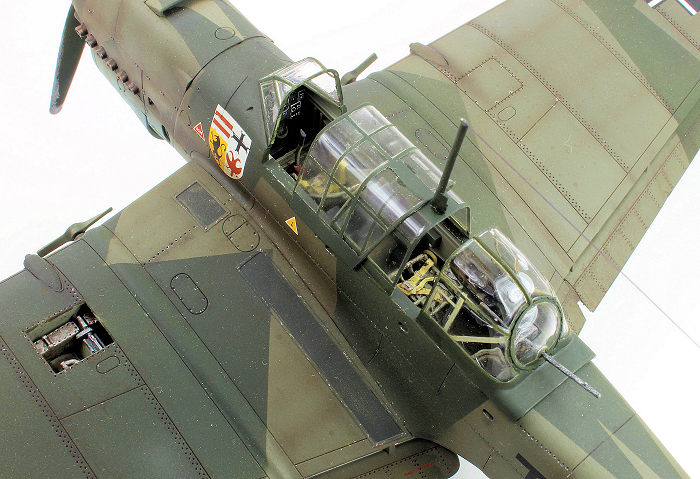
Moving on to the wing flaps, Airfix once again provides two different options, horizontal and deployed. The last step before painting was to decide what to do with the canopy. Airfix gives you two more choices here, a one-piece canopy depicting everything closed up, or multiple canopies letting you show things opened up – more on this later. Opting for the latter approach, I masked and glued the front windscreen into place and then stuffed the cockpit full of tissue paper. And with that, it was off to the spray booth for some spirited Stuka painting.
| COLORS & MARKINGS |
 Tamiya Surface Primer remains my primer of choice and
once applied, revealed some areas that needed further work. There were sink
marks here and there that I didn’t notice before, so those were filled and
sanded. Tamiya XF-69 NATO Black was next used to pre-shade all of the panel
lines. The lower surfaces were then sprayed Tamiya XF-23 Light Blue to
represent RLM 65.
Tamiya Surface Primer remains my primer of choice and
once applied, revealed some areas that needed further work. There were sink
marks here and there that I didn’t notice before, so those were filled and
sanded. Tamiya XF-69 NATO Black was next used to pre-shade all of the panel
lines. The lower surfaces were then sprayed Tamiya XF-23 Light Blue to
represent RLM 65.
I have long struggled with finding a shade of RLM 71 Dunkelgrun that I thought “looked right” (without knowing what the actual color really looked like of course…). In the past I have used Testors’ version but always thought it looked too light and gray. I have tried mixing up my own Tamiya shade, but that seemed to be too brown. Getting the feeling that I was making this harder than it needed to be, for this project I finally just added a couple of drops of Black and RAF Dark Earth to the Testors RLM 71 and called it a day.
Once the RLM 71 was dry I masked it off, using the kit’s instructions as a guide. Tamiya XF-27 Black Green was then used for the RLM 70 color, and then the walkways, tires, and exhausts were picked out by hand.
 The next
step was a coat of Future sprayed onto the areas to receive decals, which
worked just fine with Walthers Solvaset. Once they had all set I sealed them
with another coat of Future.
The next
step was a coat of Future sprayed onto the areas to receive decals, which
worked just fine with Walthers Solvaset. Once they had all set I sealed them
with another coat of Future.
The first weathering step was a panel line wash using Mig Productions Dark Wash. This was followed by airbrushing a very thin mix of 50/50 Tamiya XF-69 NATO Black/Tamiya XF-64 Red Brown onto the panel lines and around the engine exhausts and machine guns. A coat of Testors Lacquer Flat Finish (actually two coats – whenever I look at the model the next day after the first coat I always see areas I missed) was used to tone things down.
Some Tamiya XF-52 Flat Earth was airbrushed onto the tires and spats to dirty them up, and then the prop was sprayed Tamiya XF-27 with Tamiya XF-5 Flat Green for the tip. Some light paint chipping was done with a Silver Berol pencil. And with that it was time for the final bits – and that canopy…
| FINAL CONSTRUCTION |
As said
before, other reviewers have stated that the only real problem with the kit
is Airfix’s approach to the canopy. I can confirm that those other reviewers
are in fact, correct. The one-piece canopy is fine, but if you want to see
your interior detail and opt for the multiple canopy section approach,
beware that the middle two sections are molded as one piece. The result is
that they don’t look very
 accurate, and painting the framing of the
“underneath” section has to be done from inside the canopy, and thus doesn’t
look very good.
accurate, and painting the framing of the
“underneath” section has to be done from inside the canopy, and thus doesn’t
look very good.
Airfix should really have done the right thing and molded all four canopy sections as separate pieces - after all, they molded three of them separately, what’s one more? After some vigorous internal debate (and scotch) I purchased a Squadron set (meant for a Hasegawa Stuka) and proceeded with that. Going that route was not without its headaches however – I had to do a little scratch building to get the Squadron sections to look right. The whole process was a bit frustrating to be sure.
With the canopy unpleasantry behind me, I attached the remaining pitot tubes and antennas, and the model was done.
| CONCLUSIONS |
Canopy issues aside, I definitely recommend this kit. The model looks great once complete, and the fit and detail of the parts was overall very good. The number of options in the box makes us modelers happy, and I like some of the small touches in the kit like the high quality instructions and the innovative approach to the kit layout. I look forward to what else Airfix has in store for us in the future.
| REFERENCES |
- Osprey Publications, Combat Aircraft #1, “Junkers Ju 87 Stukageschwader 1937-41”
- Squadron/Signal Publications, Aircraft in Action #73, “Ju 87 Stuka in Action”
- Wikipedia, the Online Encyclopedia
21 May 2018
Copyright ModelingMadness.com
If you would like your product reviewed fairly and fairly quickly, please contact the editor or see other details in the Note to Contributors.
Back to the Main Page Back to the Previews Index Page Back to the Review Index Page