Hobby Boss 1/72 Ju-88C-6
| KIT #: | 80297 |
| PRICE: | $20.00 |
| DECALS: | Two options |
| REVIEWER: | Brian Baker |
| NOTES: | Good easy assembly kit for beginners. |
| HISTORY |
The JU-88C-6 was a fighter variant of the famed JU-88 bomber used on all fronts by the Luftwaffe during World War II. Powered by a pair of 1400 hp. Junkers Jumo J211J-1 or -2 liquid cooled engines, the C-6 variant carried a crew of three or four men, and had both defensive and offensive armament. Performance included a maximum speed of slightly over 300 mph, and a range of over 1,800 miles.
 The “C”
version was intended as a heavy fighter, with the bombardier’s position in the
nose replaced by forward firing armament of 7.92 mm machine guns and 20 mm.
MG-FF cannons. The roles intended for this aircraft included day and night
fighting, ground attack, long-range overwater patrols against enemy shipping and
naval forces, and ground attack. Earlier “C” models had Jumo engines of slightly
less power, and some had thin chord metal propellers instead of the wooden broad
bladed types used on the C-6 variant. The first C-6 models were allocated to
night fighter units in Europe, although some were assigned to bomber squadrons.
Some of these were used for anti-shipping duties and long range patrol over the
Atlantic.
The “C”
version was intended as a heavy fighter, with the bombardier’s position in the
nose replaced by forward firing armament of 7.92 mm machine guns and 20 mm.
MG-FF cannons. The roles intended for this aircraft included day and night
fighting, ground attack, long-range overwater patrols against enemy shipping and
naval forces, and ground attack. Earlier “C” models had Jumo engines of slightly
less power, and some had thin chord metal propellers instead of the wooden broad
bladed types used on the C-6 variant. The first C-6 models were allocated to
night fighter units in Europe, although some were assigned to bomber squadrons.
Some of these were used for anti-shipping duties and long range patrol over the
Atlantic.
The type really came into its own on the Russian Front, where they were used effective against Soviet ground forces. Later, radar equipped night fighters against British night bombers, and the type soldiered on until the end of hostilities in 1945. As far as is known, no “C” model survives today.
One thing I have often thought about is the fact that the Americans were the only ones to build medium bombers with tricycle landing gears. The British, German, Italians, Russians, and Japanese all used tailwheel types. Our pilots probably had an easier time of it with the B-25, B-26, A-20, and A-26’s, and if anyone ever did a study, they’ll probably find that our accident rate was much lower. The JU-88 was a high class performer, but I would certainly have hated to encounter an engine failure on takeoff in one, as it would have taken a lot of fancy footwork to keep it on the runway. But I digress.
| THE KIT |
 This is
Hobby Boss’s first issuance of a JU-88 kit, and in keeping with their
“simplicity uber alles” philosophy, the kit has fewer parts than any other JU-88
kit I have seen. Consisting of about 38 parts cast in light gray plastic, the
kit has two clear plastic parts, the main canopy and the gondola located under
the nose. There is an interior (discussed later) and in keeping with their
quality standards, there are fine recessed panel lines, and almost no flash. The
only trimming you’ll have to do it to clean off the injection molding joint
points, which is standard for most kits. The kit is molded in a unique style,
with the two major parts, the upper and lower wing/fuselage combinations joining
together in an idiot-proof assembly, and the horizontal tail unit snapping into
place with almost no effort. It is impossible to get this model misaligned, as
the dihedral angle and tailplane position will line up every time.
This is
Hobby Boss’s first issuance of a JU-88 kit, and in keeping with their
“simplicity uber alles” philosophy, the kit has fewer parts than any other JU-88
kit I have seen. Consisting of about 38 parts cast in light gray plastic, the
kit has two clear plastic parts, the main canopy and the gondola located under
the nose. There is an interior (discussed later) and in keeping with their
quality standards, there are fine recessed panel lines, and almost no flash. The
only trimming you’ll have to do it to clean off the injection molding joint
points, which is standard for most kits. The kit is molded in a unique style,
with the two major parts, the upper and lower wing/fuselage combinations joining
together in an idiot-proof assembly, and the horizontal tail unit snapping into
place with almost no effort. It is impossible to get this model misaligned, as
the dihedral angle and tailplane position will line up every time.
| CONSTRUCTION |
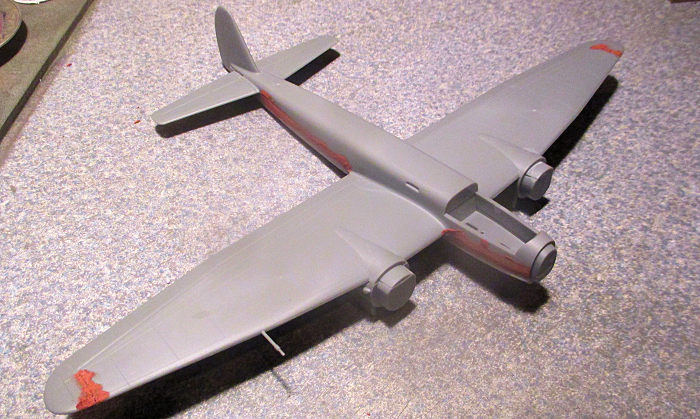
This kit is designed to go together with a minimum of effort, and the designers certainly succeeded. The shape appears to be completely accurate, and the surface detail is very nice. Everything lines up without undue effort, and although it is not a highly detailed model, this is not the point. My grandkids could build this into an acceptable model without undue frustration, and this is the point. I think this kind of model is certainly fair competition with video games and other electronic devices.
 The only
weakness in this kit is the interior detail, which in the wheel wells is
non-existent, and the cockpit, is wrong. Somehow, they got the idea that the
pilot and rear gunner sat in tandem positions, and their seats were centered
with control sticks in front of each seat. There is no instrument panel, but
this is easily fabricated from the scrapbox. I added a control wheel, as this is
what the airplane had, and I also added the firing portion of the machine guns,
as the only parts of the guns provided were the barrels, which go on the outside
of the canopies. I put the pilot’s seat on the left side, along with the wheel,
although I didn’t do a lot of interior detail in the cockpit, although the
detail can be seen through the canopy glass.
The only
weakness in this kit is the interior detail, which in the wheel wells is
non-existent, and the cockpit, is wrong. Somehow, they got the idea that the
pilot and rear gunner sat in tandem positions, and their seats were centered
with control sticks in front of each seat. There is no instrument panel, but
this is easily fabricated from the scrapbox. I added a control wheel, as this is
what the airplane had, and I also added the firing portion of the machine guns,
as the only parts of the guns provided were the barrels, which go on the outside
of the canopies. I put the pilot’s seat on the left side, along with the wheel,
although I didn’t do a lot of interior detail in the cockpit, although the
detail can be seen through the canopy glass.
Other problems include the tailwheel doors, which are not included but are easy to make from card. The main gear doors are molded into the bottom of the engine nacelles, and they are way too thick, although I don’t know how you would correct this unless to cut them off and make your own. When the kit was assembled, they didn’t look too bad, so I decided to live with it.
After major assembly, there was very little filling required, as this kit fitted together very nicely. The engine nacelles snapped into place easily, and I just painted the insides of the landing gear wells with RLM 02, as I did with the tailwheel position. I then masked them off, and this worked very well.
The engines are cast in single units, with nicely detailed radiators in front, and the props, cast in four pieces, snap together easily. I painted the prop blades RML 70 “schwarzgrun” and did the spinners in the airplane’s exterior colors.
| COLORS & MARKINGS |
 The kit
comes with decals for two aircraft, a European finished C-6, 3U+LV operating in
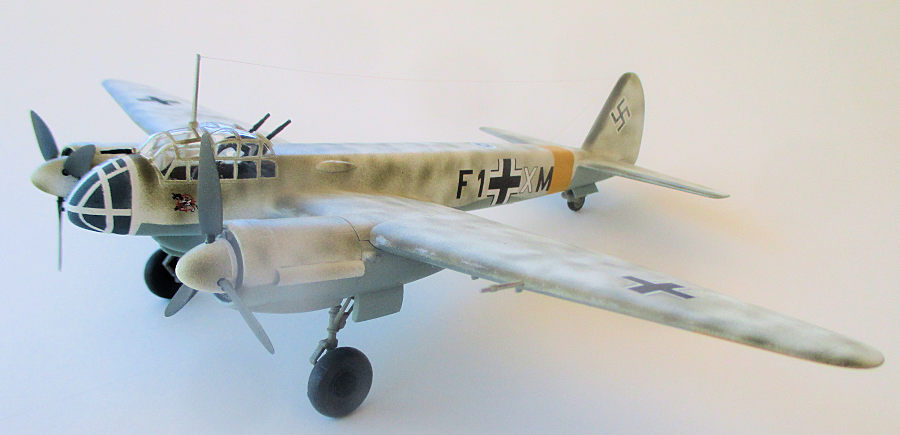
North Africa, and a winterized C-6, F1+XM, operated by 4(Z) ZG76, in Russia
during 1942. Complete four view drawings are provided for each aircraft on the
back of the instruction sheet. Since I had already built the Italeri JU-88C-6
kit in ZG76 markings, I decided to do the winterized plane, as I am partial to
those paint schemes. However, the decal sheet has a couple of errors which need
to be corrected.
The kit
comes with decals for two aircraft, a European finished C-6, 3U+LV operating in
North Africa, and a winterized C-6, F1+XM, operated by 4(Z) ZG76, in Russia
during 1942. Complete four view drawings are provided for each aircraft on the
back of the instruction sheet. Since I had already built the Italeri JU-88C-6
kit in ZG76 markings, I decided to do the winterized plane, as I am partial to
those paint schemes. However, the decal sheet has a couple of errors which need
to be corrected.
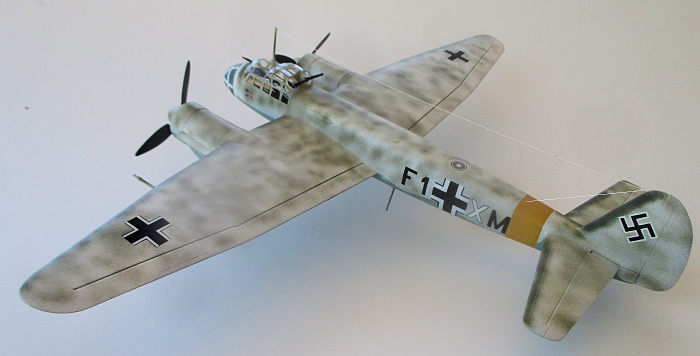
For the European ZG 26 aircraft, the decals are adequate. For the snow-camouflaged version, however, there are a couple of problems that need to be corrected. I replaced the upper wing crosses with some from my spares file, as they say to use the same style cross used on the fuselage sides. They provide tail swastikas, although these are barely alluded to in the kit instructions. The swastika markings come in two parts, and neither one looks like the ones in the photos in the book. I used some from the spare decal department. We all know that with the political correctness we have these days, no Luftwaffe aircraft ever flew with swastika markings on the tail.
The nose of this plane was painted to look like the nose of the bomber version. I can imagine a Russian Yak pilot lining up on a JU-88C for a head on frontal attack, only to discover that he has six 20 mm and 7.9 mm guns firing back at him. Maybe that’s why they had laundry facilities on major airbases. A decal is provided for the white stripes used for this marking, but as this goes over some rounded surfaces, I opted to use masking tape instead.
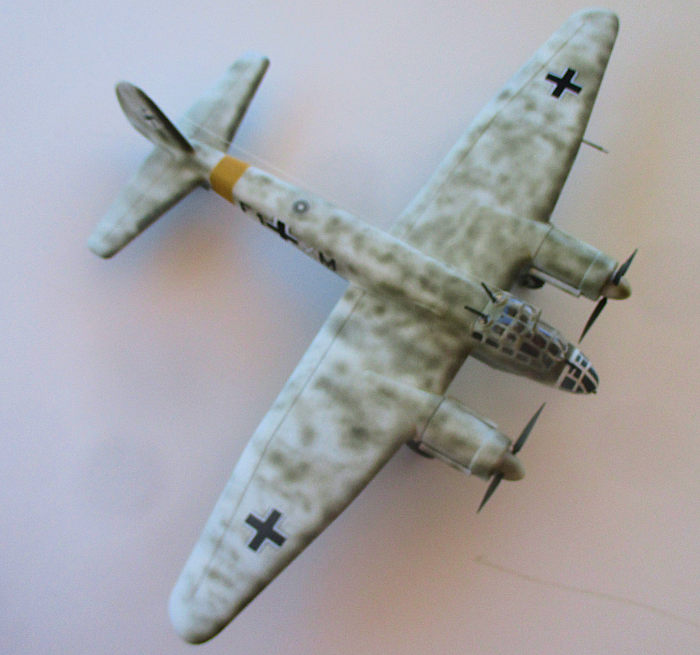
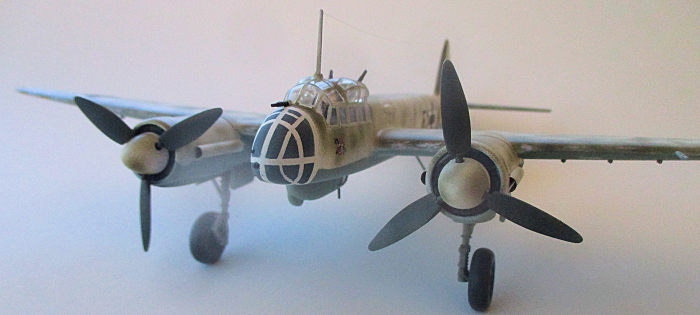
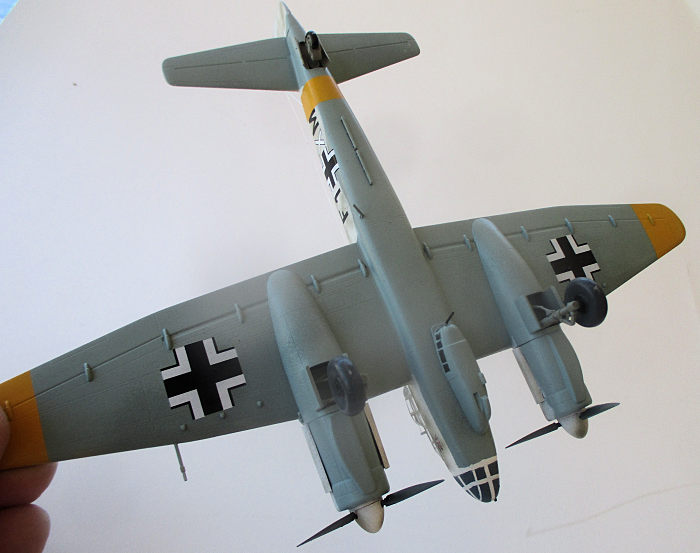 Painting
the model in this camouflage scheme was easy. First, I painted the fuselage band
and wing underside markings in RLM 04 yellow and masked them off. I then masked
off the canopy glass, a tedious job for which a set of masks would have been
helpful, and then painted the undersides RML 65 light blue. After masking off
the bottom, I painted the upper surfaces flat white, after which I added some
splotchy RML 71 green, as this aircraft apparently had originally been painted
with a 70/71/65 European color scheme, and later had a white overspray over the
entire upper surfaces. After a few months of hard usage, some of the white had
worn off, so it makes a very interesting pattern of white and green, with some
of the green showing heavier on the wing and tail unit leading edges.
Painting
the model in this camouflage scheme was easy. First, I painted the fuselage band
and wing underside markings in RLM 04 yellow and masked them off. I then masked
off the canopy glass, a tedious job for which a set of masks would have been
helpful, and then painted the undersides RML 65 light blue. After masking off
the bottom, I painted the upper surfaces flat white, after which I added some
splotchy RML 71 green, as this aircraft apparently had originally been painted
with a 70/71/65 European color scheme, and later had a white overspray over the
entire upper surfaces. After a few months of hard usage, some of the white had
worn off, so it makes a very interesting pattern of white and green, with some
of the green showing heavier on the wing and tail unit leading edges.
One problem I did not deal with, but may later on, is that the decals give the fuselage code of “F1+XM”. The photos in the Squadron book show all of the codes in black, while the kit decals give a white “X” with a thin black outline. It looks OK, but it is not entirely accurate, and I don’t know how they could have made this kind of error. Maybe squadron should publish some of their books in Chinese. Hmm.
| CONCLUSIONS |
I actually have to thank the Phoenix IPMS Chapter for providing this kit. At one of the last meetings, I somehow won the model contest, and the prize was a $20 gift certificate at my local hobby shop. I picked out this model, which cost just about exactly $20, and that is how I acquired it. Overall, I was impressed with the model, and would certainly recommend it to anyone interested in this particular aircraft. It is certainly cheaper than the competition, and makes into a perfectly acceptable model. Don’t think that because you are a master modeler you are above this kind of kit. It was fun, and I’d get another. I’ve built a lot of Hobby Boss kits, and this is one of their better ones. Try one. They can be addicting.
| REFERENCES |
Probably the best source of information for the JU-88 is the Squadron In
Action Series No. 113, which covers the fighter variants of the JU-88 in
remarkable detail. There are many photos and drawings that are extremely useful
to modelers, and I have used these books for years as basic references.
Obviously, there are other sources, many on-line, but the Squadron series is
enough for a person doing this model.
Copyright ModelingMadness.com If you would like your product reviewed fairly and
fairly quickly, please
contact
the editor or see other details in the
Note to
Contributors.