Dragon 1/48 Ta-154 'Moskito'
| KIT #: | 5522 |
| PRICE: | 83$ |
| DECALS: | Eight options |
| REVIEWER: | Francisco Santoro |
| NOTES: | Fun 'what if' project |
| HISTORY |
The Ta 154 replaced the old Bf 110G-2s and
G-4s in the day and nightfighter role by 1945. The successful interdiction
of the RAF bombing run against Wuppertal in June 1944, the city that housed
the factory producing the key Tego film glue of the wooden Ta 154, allowed
this aircraft to reach its full potential by 1945. During the day, the Ta
154A-2 single seat dayfighter, together with the Me 262s, engaged the
Americans. At night, the Ta 154A-4 two seater nightfighter was fast enough
to catch the formerly untouchable De Havilland Mosquitos nightfighters,
oftentimes both entering in a turn dance to see who killed who. The A-2
dayfighter was assigned to JG300, alongside the Fw 190D-9s in order to
intercept American B-29s flying over Germany. The atomic bombing of the
Japanese cities of Hiroshima and Nagasaki in August of 1945 by
 American
B-29s made the German authorities fear the same fate falling upon their
cities, so an armistice was signed with the Allies.
American
B-29s made the German authorities fear the same fate falling upon their
cities, so an armistice was signed with the Allies.
Real life: The Ta 154 was a German twin engined plane designed to be built, as the British Mosquito, with wood. The plane started to be developed in 1942 as a high speed bomber by using the He 111's Jumo 211 engines. The intensification of the British night bombing raids against German industry and cities meant a new nightfighter was urgently needed, and this was the task where the Ta 154 was finally assigned. Several problems with the hydraulic systems, the bombing of the Tego Film factory (the glue used to hold the wooden airframe of the Ta 154 together) in Wuppertal, and the desintegration of following Ta 154s due to a too acidic replacement glue, meant the aircraft would end up binned by 1944. However, a small number of Ta 154 nightfighters were pressed into service with Nachtjagdgruppe 10 (NJGr 10) and I/Nachtjagdgeschwader 3 (I/NJG3), changing nothing to the final outcome of the Thousand Year Reich.
Proposed variants were the Ta 154A-1 two seat dayfighter, A-2 single seat dayfighter, A-3 trainer, A-4 two seat nightfighter, B-1 powered with Junkers Jumo 211N engines, B-2 single sitter dayfighter with a new cockpit, C-1 powered fighter with Jumo 213 engines and a metal nose, C-2 single seat day fighter and fighter bomber, C-3 two sitter reconnaissance aircraft, C-4 two sitter bomber, and the D-1 and D-2s high altitude fighters (designated Ta 254 but abandoned).
| THE KIT |
The kit is divided in ten light grey sprues with a small PE fret. Sprue A has the fuselage halves and cockpit parts, B is for the wings, C has the armament and rudders, sprues E have the landing gear parts, sprues F have the engine and props, sprue J has parts of the Dragon Ju 88C-6 nightfighter with flame dampers and antennas. Sprue G is solely dedicated for the clear parts. The small PE fret contains radar antennas and the instrument panel face.
| CONSTRUCTION |
 This is my
second Ta 154, the first one being the Revell/Pro Modeler original tooling from
1999. On the first one I had issues locating en enough weight as far forward of
the fuselage as possible. On this one I had no issues. Watch this space.
This is my
second Ta 154, the first one being the Revell/Pro Modeler original tooling from
1999. On the first one I had issues locating en enough weight as far forward of
the fuselage as possible. On this one I had no issues. Watch this space.
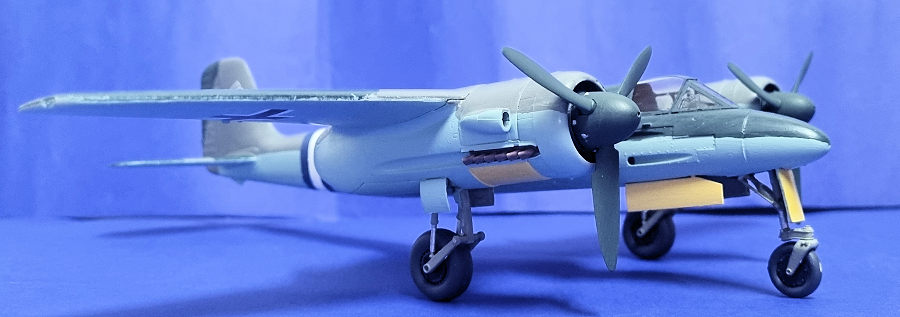
I first started by painting the small parts, such as the landing gear struts in RLM 02 (Revell 45 Light Olive), the propellers in RLM 70 (Revell 40 Black Green), the cockpit in RLM 66 (Revell 78 Tank Grey), and the wheels in matt black and tyres in RLM 66.
Proper job on the kit was started by building and filling the engine cowlings with as much weight as I could. i managed to cram 60 grams of lead between both nacelles. I then grabbed the fuselage halves and glued a 50 gram weight cut in half behing the cockpit firewall. Because I was building the A-2 single seat dayfighter, I removed the locator pin where the radarist seat would be, and added another 50 grams in there, constantly checking if the weight would clash against the rear clear part and since it didn´t, I kept working on the kit. The cockpit, with rudder pedals painted in steel (Revell 91 Steel), instrument panel and control stick painted RLM 66 (Revell 78 Tank Grey) with black detailing, was glued to the fuselage. The nose gear was then glued to the front of the nose, and left to cure before placing the aircraft over its wheels (unlike what I did on my first model, where I turned the plane upside down and the nose collapsed).
 The wings
were put together easily. These, unlike the Pro Modeler version, weren´t warped,
so anyone wishing to get a 1:48 Ta 154 should grab the Dragon 3 in 1 boxing.
Then the nacelles were glued to the wings. I then added the main landing gear on
the wings and left them to set. After some hours of hardening, the wings were
dry fitted to the fuselage, together with the rudder and horizontal stabilizers
to see if I had added enough nose weight. The model was nose heavy enough so I
could tap the rudder, the aircraft falling back into its nose by itself. Happy
with that, I glued the wings and stabilizers in place, the latter needing tape
to avoid them falling. Much to my dismay, the right hand stabilizer was taped
too high, and it ended up curing at an angle instead of the correct 90° setting.
Some pressure ended up tearing the right stabilizer, but I was able to reglue it
at a straight angle.
The wings
were put together easily. These, unlike the Pro Modeler version, weren´t warped,
so anyone wishing to get a 1:48 Ta 154 should grab the Dragon 3 in 1 boxing.
Then the nacelles were glued to the wings. I then added the main landing gear on
the wings and left them to set. After some hours of hardening, the wings were
dry fitted to the fuselage, together with the rudder and horizontal stabilizers
to see if I had added enough nose weight. The model was nose heavy enough so I
could tap the rudder, the aircraft falling back into its nose by itself. Happy
with that, I glued the wings and stabilizers in place, the latter needing tape
to avoid them falling. Much to my dismay, the right hand stabilizer was taped
too high, and it ended up curing at an angle instead of the correct 90° setting.
Some pressure ended up tearing the right stabilizer, but I was able to reglue it
at a straight angle.
Once all the glue on the aircraft had dried, I used CA to fill all the seams on the upper part of the aircraft. The lower side of the fuselage looked good enough after a light sanding, so CA was not applied here.
| COLORS & MARKINGS |
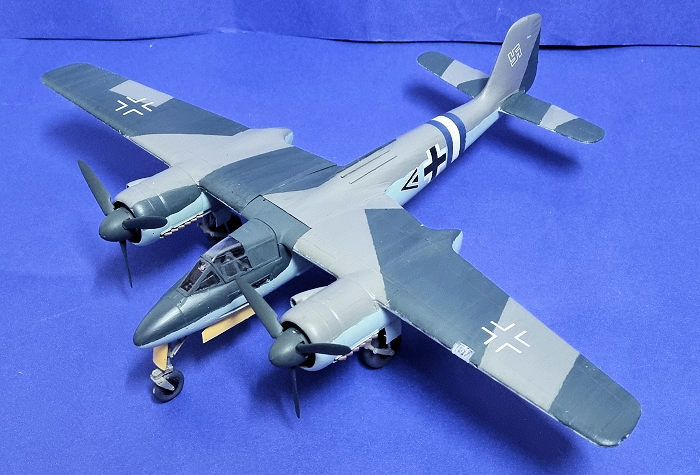
Initial idea was to assign this aircraft to JG
300 in a what if scenario, so I painted the blue/white/blue RVD band in RLM 24 (Revell
54 Matt Blue) and RLM 21 (Revell Matt White 05). I then started work on the main
camouflage. Colours chosen were RLM 74 and RLM 75 (Revell 69 Granite Grey and 47
Mouse Grey respectively) in a straight edged splinttern pattern, typical of the
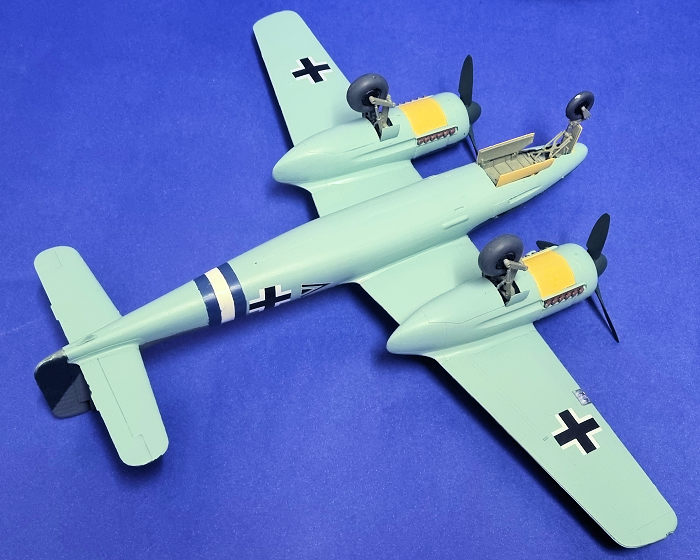
Bf 110 heavy fighters. The fuselage and lower wings were painted in RL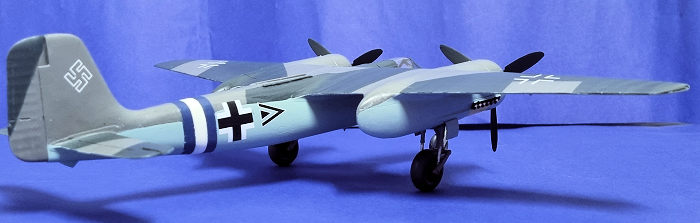 M
76 (Revell 49 Light Blue). The gear doors of the nose and lower engine cowls
were painted yellow to give the plane a splash of colour. The aircraft was then
glossed for the decals.
M
76 (Revell 49 Light Blue). The gear doors of the nose and lower engine cowls
were painted yellow to give the plane a splash of colour. The aircraft was then
glossed for the decals.
Main insignia came from the decal sheet included in the kit (printed by Cartograf), chevrons were from the Academy Bf 109G-6/G-2 with JG 27 kit, and swastikas came from a Dukel Hobbies sheet. Some Microsol was used to set the decals into the surface (because there weren't any panel lines). The plane was then matt coated.
The final parts were the clear parts. The rear part of the hinged canopy was painted RLM 74 to make an improvised single seat canopy. These were glued with white glue. The landing gear doors were also glued at this time.
| CONCLUSIONS |
The Ta 154 is an elegant aircraft, elegant and seemingly important enough to have been molded by Revell and reboxed by Dragon. The warped wing issues that plagged the Revell/Pro Modeler kit weren't present on this kit. The main issue would be to find enough weight as forward as possible, but if you eliminate the radar operator's position (whether you build a what if or a regular nightfighter), enough lead can be placed to get a nose sitter.
| REFERENCES |
http://www.historyofwar.org/articles/weapons_focke-wulf_Ta_154_Moskito.html
Colours used (in no particular order of use): Revell 69 Granite Grey (RLM 74), 47 Mouse Grey (RLM 75), 49 Light Blue (RLM 76), 56 Matt Blue (RLM 24), 05 Matt White (RLM 21), 08 Matt Black, 78 Tank Grey (RLM 66), 15 Matt Yellow, 01 Gloss Varnish and 02 Matt Varnish.
9 May 2023 Copyright ModelingMadness.com.
All rights reserved. No reproduction in part or in whole without express
permission. If you would like your product reviewed fairly and
fairly quickly, please
contact
the editor or see other details in the
Note to
Contributors.