| KIT #: | Jt90 |
| PRICE: | 60$ |
| DECALS: | Two options |
| REVIEWER: | Francisco Santoro |
| NOTES: | Fiddly cowling construction |
| HISTORY |
 From
the instructions: "The Fw 190 was developed to perform a supporting role to the
Luftwaffe's mainstay fighter, the Messerschmitt Bf 109. The Fw 190 was powered
by a radial engine, a rare feature in a European fighter of the era. With a
tough construction and superb maneuverability, the efficiency and practicality
of the design afforded the Fw 190 considerable versatility, and modifications
and variants meant the aircraft was able to perform a wide variety of combat
roles through to the end of the war. The A-3 model was fitted with the more
reliable BMW 801D engine in place of the less dependable BMW 801C that had
powered the earlier A-2 model. The new engine also offered an additional 140hp
of power, boosting the Fw 190's top speed to 660km/h. Outward appearance and
fixed armament did not differ much between the A-2 and A-3, with the latter
model fitted with two MG 17s 7,92mm machineguns and 4x MG 151 20mm cannons.
Other Fw 190 variants also began to appear around this time. A total of 509 A-3
models were produced."
From
the instructions: "The Fw 190 was developed to perform a supporting role to the
Luftwaffe's mainstay fighter, the Messerschmitt Bf 109. The Fw 190 was powered
by a radial engine, a rare feature in a European fighter of the era. With a
tough construction and superb maneuverability, the efficiency and practicality
of the design afforded the Fw 190 considerable versatility, and modifications
and variants meant the aircraft was able to perform a wide variety of combat
roles through to the end of the war. The A-3 model was fitted with the more
reliable BMW 801D engine in place of the less dependable BMW 801C that had
powered the earlier A-2 model. The new engine also offered an additional 140hp
of power, boosting the Fw 190's top speed to 660km/h. Outward appearance and
fixed armament did not differ much between the A-2 and A-3, with the latter
model fitted with two MG 17s 7,92mm machineguns and 4x MG 151 20mm cannons.
Other Fw 190 variants also began to appear around this time. A total of 509 A-3
models were produced."
| THE KIT |
Coming inside Hasegawa's usual attractive top side boxart, top opening box, there're a total of 9 sprues, 7 in light hard grey plastic, a clear sprue, and 4 poly caps to hold the propeller once the aircraft is finished. There's also the instruction sheet of the foldable style with 9 construction steps and two painting indications. There're two decal options: Hans "Assi" Hans's plane and the one I did, Fw 190A-3 "Black 13" with the stylised Eagle Head on the front of the fuselage.
| CONSTRUCTION |
 I
started construction by painting most of the subassemblies on the sprues.
Cockpit parts and fuselage side walls were painted RLM 66, and the landing gear
parts were covered in RLM 02. I then painted the propeller and nose cone in RLM
70 with a natural metal cooling fan. The prop was then put together and set
aside until the end. With that subassebly done, I glossed the cockpit IP and
side consoles and placed the instrument panel decals overt the raised details.
The decals then received some brushes with Mr. Mark Softer, which worked
perfectly and made the decals conform into the raised details. I then put
together the wheels wells and glued them to the lower wing of the 190, trapping
it with the upper wings minutes later. With the wings done, I glued the cockpit
to the fuselage and trapped it with the second half. I then added the cooling
slots that go on each fuselage side, and glued the wings to the fuselage. Unlike
later variants of the Hasegawa 190A, this time I didn´t have fit issues with the
fit between the wings and fuselage. It was at this time that I glued the
ailerons (they come as separate parts). It was time to glue the engine and
cowling together. In my attempt to get to the painting stage as soon as
possible, I assembled the cowling and ended up with a rather messy result. This
was then remedied with some CA filling, but that shows that scale modelling
isn't a race to get the finished model as soon as possible.
I
started construction by painting most of the subassemblies on the sprues.
Cockpit parts and fuselage side walls were painted RLM 66, and the landing gear
parts were covered in RLM 02. I then painted the propeller and nose cone in RLM
70 with a natural metal cooling fan. The prop was then put together and set
aside until the end. With that subassebly done, I glossed the cockpit IP and
side consoles and placed the instrument panel decals overt the raised details.
The decals then received some brushes with Mr. Mark Softer, which worked
perfectly and made the decals conform into the raised details. I then put
together the wheels wells and glued them to the lower wing of the 190, trapping
it with the upper wings minutes later. With the wings done, I glued the cockpit
to the fuselage and trapped it with the second half. I then added the cooling
slots that go on each fuselage side, and glued the wings to the fuselage. Unlike
later variants of the Hasegawa 190A, this time I didn´t have fit issues with the
fit between the wings and fuselage. It was at this time that I glued the
ailerons (they come as separate parts). It was time to glue the engine and
cowling together. In my attempt to get to the painting stage as soon as
possible, I assembled the cowling and ended up with a rather messy result. This
was then remedied with some CA filling, but that shows that scale modelling
isn't a race to get the finished model as soon as possible.
| COLORS & MARKINGS |
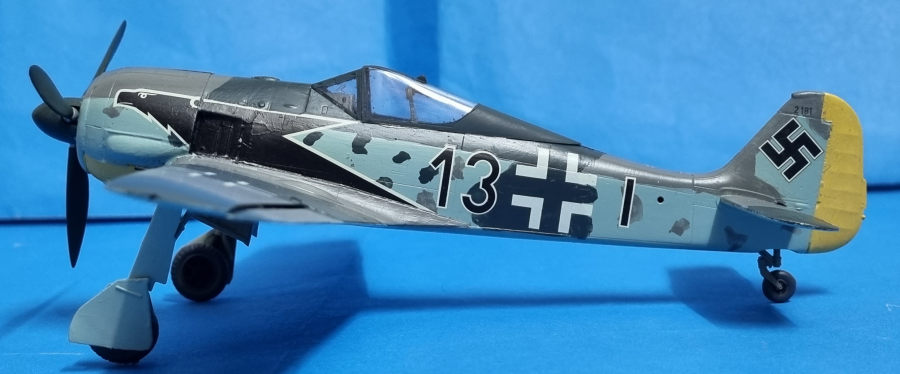
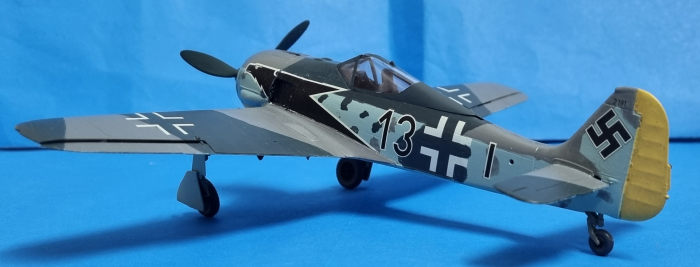
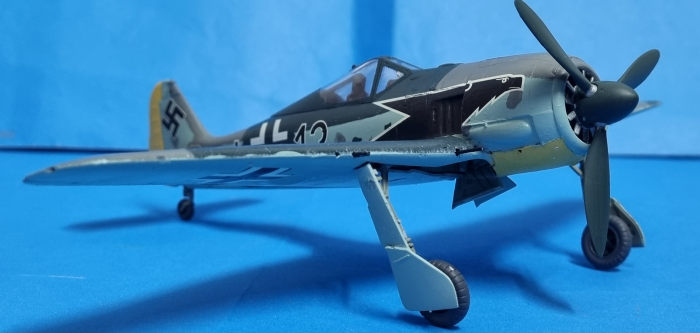 I had
decided early on to paint this aircraft as Black 13 with the stylised Eagle Head
on the nose. This aircraft was part of 8/JG 2 in France, 1942. As such, the
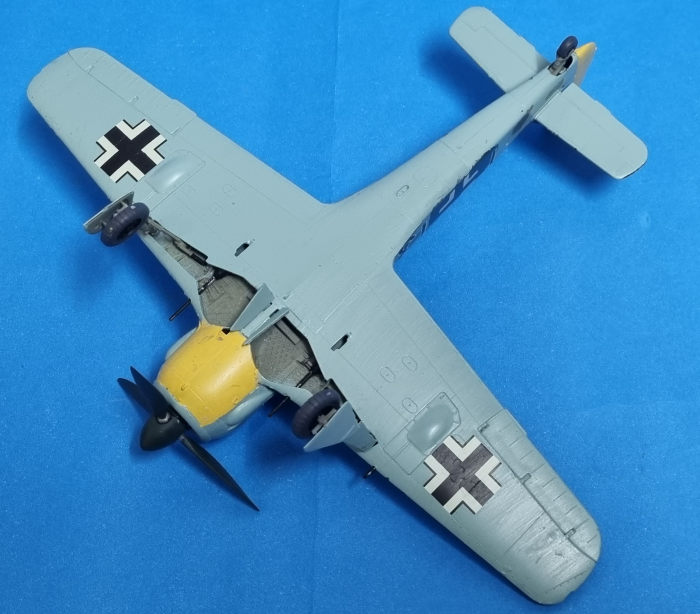
place sports RLM 74/75/76 camouflage with yellow lower nose and rudder. I first
painted the yellow bits and masked them. Next came the RLM 74, 75 and 76 for the
fuselage and horizontal stabilizers. The wings were painted next. Once the
colours had dried, I applied the gloss varnished and placed the decals. These
were ver brittle, with the 13 of the right hand side breaking when being placed.
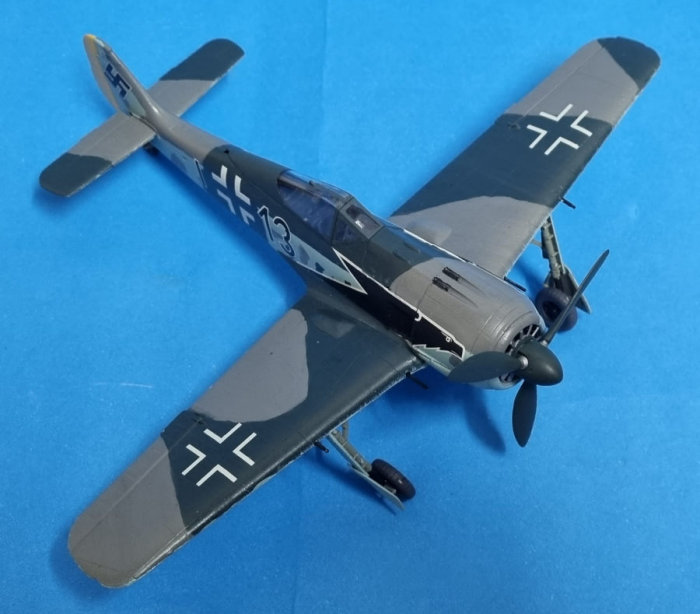
I was able to put it together OK though. Upper crosses are of the late Luftwaffe
style with the thin white outline. All the decals received some coats of Mr.
Mark Softer, especially the Eagle Head. They conformed perfectly to the
imperfections of the nose after the softening solution had gone off. I then
applied the matt coat.
I had
decided early on to paint this aircraft as Black 13 with the stylised Eagle Head
on the nose. This aircraft was part of 8/JG 2 in France, 1942. As such, the
place sports RLM 74/75/76 camouflage with yellow lower nose and rudder. I first
painted the yellow bits and masked them. Next came the RLM 74, 75 and 76 for the
fuselage and horizontal stabilizers. The wings were painted next. Once the
colours had dried, I applied the gloss varnished and placed the decals. These
were ver brittle, with the 13 of the right hand side breaking when being placed.
I was able to put it together OK though. Upper crosses are of the late Luftwaffe
style with the thin white outline. All the decals received some coats of Mr.
Mark Softer, especially the Eagle Head. They conformed perfectly to the
imperfections of the nose after the softening solution had gone off. I then
applied the matt coat.
With the aircraft fully decalled, I added the main landing gear, wheels and gear doors. The propeller was also added. The guns and canopy were also glued in place, and I was able to call this aircraft complete.
| CONCLUSIONS |
 This
was a fun kit to build, meaning that the Eduard kit is still available, one can
get joy from just constructing the simpler Hasegawa model. Fit issues described
in the build were of my own doing.
This
was a fun kit to build, meaning that the Eduard kit is still available, one can
get joy from just constructing the simpler Hasegawa model. Fit issues described
in the build were of my own doing.
| REFERENCES |
Instructions.
Colours used were all Revell Aqua paints: RLM 66 (Revell 78 Tank Grey), RLM 02 (Revell 45 Light Olive), RLM 74 (Revell 69 Granite Grey), RLM 75 (Revell 75 Mouse Grey), RLM 76 (Revell 49 Light Blue), RLM 04 (Revell 15 Yellow).
30 January 2023
Copyright ModelingMadness.com. All rights reserved. No
reproduction in part or in whole without express permission. If you would like your product reviewed fairly and fairly quickly, please
contact
the editor or see other details in the
Note to
Contributors.