Revell (Monogram) 1/48 Do-335A-1/12
| KIT #: | 04686 |
| PRICE: | 25.00 Euros |
| DECALS: | Two options |
| REVIEWER: | Francisco Santoro |
| NOTES: | The kit is still a viable option to the Tamiya release. |
| HISTORY |
 From the kit instructions:
"Development of the Do 335 was a brilliant concept for a multi-purpose aircraft
in which for the very first time all requirements were incorporated during the
construction phase. The tandem engine arrangement was the logical progression of
a well thought out aerodynamics, then with this concept the obligatory drag of
the second engine was no longer present. This enabled the Do 335 to become the
fastest series built propeller-driven aircraft of the Second World War. Despite
all these superlatives, by the time it entered series production, the middle of
1944, the Dornier 335 was already militarily obsolete. The new jet engines gave
a substantial increase in engine performance at a low material cost. An
additional fact was also that since 1943, costly raw materials in a no longer
justifiable amount were dearly needed for aircraft already in service..."
From the kit instructions:
"Development of the Do 335 was a brilliant concept for a multi-purpose aircraft
in which for the very first time all requirements were incorporated during the
construction phase. The tandem engine arrangement was the logical progression of
a well thought out aerodynamics, then with this concept the obligatory drag of
the second engine was no longer present. This enabled the Do 335 to become the
fastest series built propeller-driven aircraft of the Second World War. Despite
all these superlatives, by the time it entered series production, the middle of
1944, the Dornier 335 was already militarily obsolete. The new jet engines gave
a substantial increase in engine performance at a low material cost. An
additional fact was also that since 1943, costly raw materials in a no longer
justifiable amount were dearly needed for aircraft already in service..."
| THE KIT |
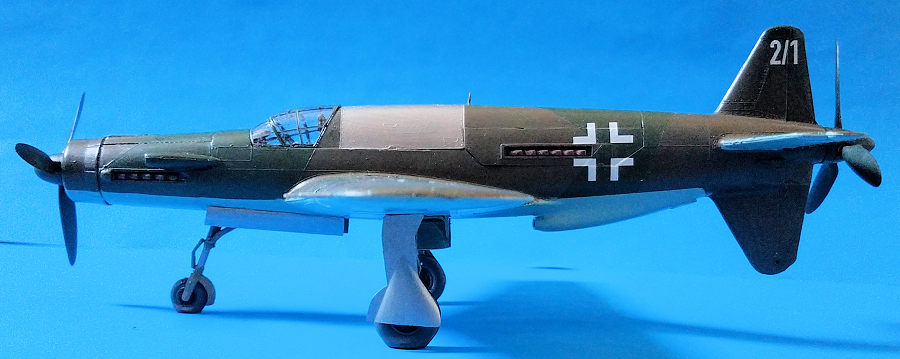
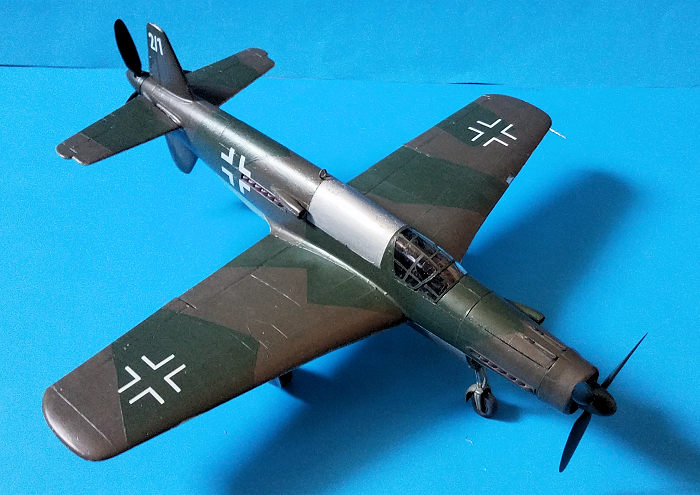
Six sprues come inside a single bag. Five are moulded in light grey plastic with one being moulded in clear plastic. There's a total of two decal options for two aircraft, Do 335A-1 2/1 and Do 335A-12 114. These two aircraft are painted in the late war camouflage pattern of RLM 81/82/65.
| CONSTRUCTION |
 I began by painting the cockpit pieces with RLM 66 (Revell 78). While
those pieces were drying, I tackled the wings. These are a a bottom and two top
pieces, which also is where the flaps are attached. The flaps can be positioned
at will. Back to the cockpit, I glued all the pieces of it together and let the
glue set for a moment. When the glue had set, I glued the cockpit to one
fuselage side, and left it to dry while I searched for a suitable nose weight.
Once I found the weight, I glued it to the fuselage half which housed the engine
detail, and left it aside to dry. Once the weight's glue had cured, I glued both
fuselage halves, and then I glued the wings to it. It was at this time that I
also decided to build the A-1 version, which looks better than the twin seater.
I also glued at this time the horizontal stabilizers. I also tried to glue the
radiator coolant intake that goes just in front of the rear engine, but it fell
inside the model, and in order to retrieve it, I had to tear away the wings from
the fuselage, which were glued again soon after.
I began by painting the cockpit pieces with RLM 66 (Revell 78). While
those pieces were drying, I tackled the wings. These are a a bottom and two top
pieces, which also is where the flaps are attached. The flaps can be positioned
at will. Back to the cockpit, I glued all the pieces of it together and let the
glue set for a moment. When the glue had set, I glued the cockpit to one
fuselage side, and left it to dry while I searched for a suitable nose weight.
Once I found the weight, I glued it to the fuselage half which housed the engine
detail, and left it aside to dry. Once the weight's glue had cured, I glued both
fuselage halves, and then I glued the wings to it. It was at this time that I
also decided to build the A-1 version, which looks better than the twin seater.
I also glued at this time the horizontal stabilizers. I also tried to glue the
radiator coolant intake that goes just in front of the rear engine, but it fell
inside the model, and in order to retrieve it, I had to tear away the wings from
the fuselage, which were glued again soon after.
| COLORS & MARKINGS |
 The official RLM colour pattern for the Dornier Do 335 was of RLM 81,
RLM 82 and RLM 65. These colours from Revell are NATO 46 Brown, 65 Bronze Green,
and 49 Light Blue. I first traced the camouflage colour with a pencil, and then
used masking tape to limit the areas where the paint would go. I applied first
the RLM 81 and then the 82. I then masked the limit between the upper and lower
colours, and painted the undersides with RLM 65. The decal option I chose has
panels painted in natural metal, these were masked and painted accordingly. The
model was then varnished with Revell's gloss varnish to prepare the aircraft for
the decals.
The official RLM colour pattern for the Dornier Do 335 was of RLM 81,
RLM 82 and RLM 65. These colours from Revell are NATO 46 Brown, 65 Bronze Green,
and 49 Light Blue. I first traced the camouflage colour with a pencil, and then
used masking tape to limit the areas where the paint would go. I applied first
the RLM 81 and then the 82. I then masked the limit between the upper and lower
colours, and painted the undersides with RLM 65. The decal option I chose has
panels painted in natural metal, these were masked and painted accordingly. The
model was then varnished with Revell's gloss varnish to prepare the aircraft for
the decals.
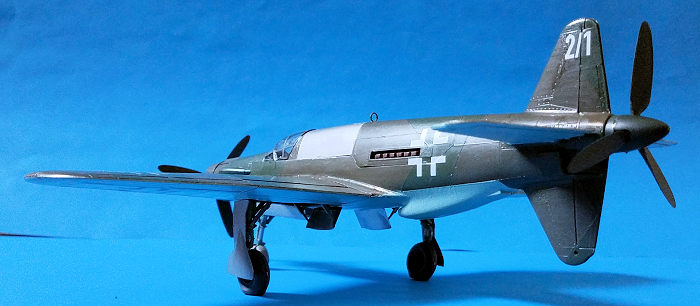
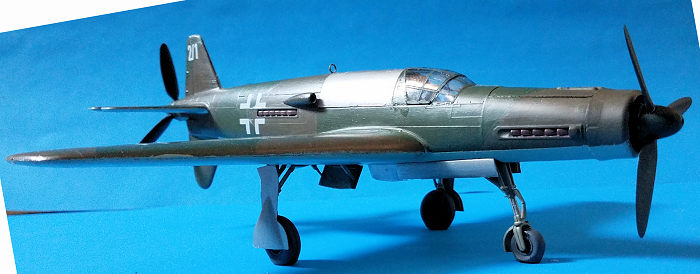
The decals behaved perfectly and conformed to the raised detail very well. I estimate I spent 1 hour decalling the model. Once all the decals were dry, I left them to dry for a day. The next day, the model was coated with two coats of Revell's matt varnish.
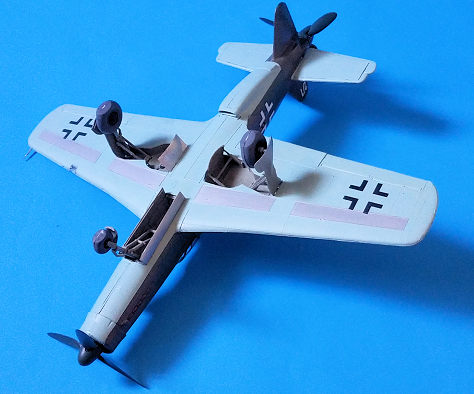
I glued the propellers (painted in RLM 70/Revell 40), the landing gear (painted in RLM 02) and the wheels. The last pieces to be added were the clear parts, which fitted very well.
| CONCLUSIONS |
 Revell's Dornier Do 335 is still a viable
alternative to the much harder to find and more expensive Tamiya Dornier. Even
though the molds are 46 years old, there wasn´t too much flash to clean up.
Revell's Dornier Do 335 is still a viable
alternative to the much harder to find and more expensive Tamiya Dornier. Even
though the molds are 46 years old, there wasn´t too much flash to clean up.
28 July 2020
Copyright ModelingMadness.com.
If you would like your product reviewed fairly and fairly quickly, please contact the editor or see other details in the Note to Contributors.
Back to the Main Page Back to the Review Index Page Back to the Previews Index Page