|
KIT: |
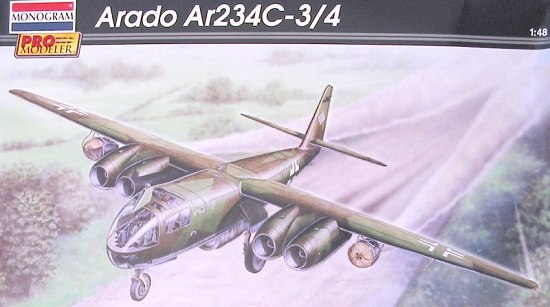
ProModeler 1/48 Ar-234C-3 |
|
KIT # |
5979 |
|
PRICE: |
$31.98 MSRP |
|
DECALS: |
Two Aircraft |
|
REVIEWER: |
|
|
NOTES: |
Development of Ar-234B-2 kit |
|
HISTORY |

Shortly after the twin-engine prototypes for the Ar-234 took flight, it was apparent that the airplane was "underpowered," and could accept more power before running into the airframe's performance limits.
 The Ar-234 V8 -
first of the four-engined prototypes - first flew on February 1, 1944
with four BMW003A-1 engines in place of the two Jumo 004s of the
twin-engine aircraft. The V8 was not capable of reaching the maximum
sustainable speed due to the problem of airflow separation, because of
the cowling shape; as high speeds, the airflow between the fuselage and
the inner side of the engine cowling approached Mach 1, resulting in the
formation of severe shock waves. The Ar-234V6, the second four-engine
prototype, flew on April 8. The four engines were in separate nacelles,
which solved the airflow difficulty, but also lowered the top speed due
to increased wetted area. Both the V6 and the V8 were used
experimentally for reconnaissance missions in the summer of 1944.
The Ar-234 V8 -
first of the four-engined prototypes - first flew on February 1, 1944
with four BMW003A-1 engines in place of the two Jumo 004s of the
twin-engine aircraft. The V8 was not capable of reaching the maximum
sustainable speed due to the problem of airflow separation, because of
the cowling shape; as high speeds, the airflow between the fuselage and
the inner side of the engine cowling approached Mach 1, resulting in the
formation of severe shock waves. The Ar-234V6, the second four-engine
prototype, flew on April 8. The four engines were in separate nacelles,
which solved the airflow difficulty, but also lowered the top speed due
to increased wetted area. Both the V6 and the V8 were used
experimentally for reconnaissance missions in the summer of 1944.
The Ar-234V13 reverted to the two paired engines of the V8 and first flew on August 39, 1944. Changes in the shape of the nacelles solved the problem of airflow separation and allowed the airplane to reach nearly 560 mph. The Ar-234V19 was the first prototype of the C-series, which would use the four-engine arrangement.
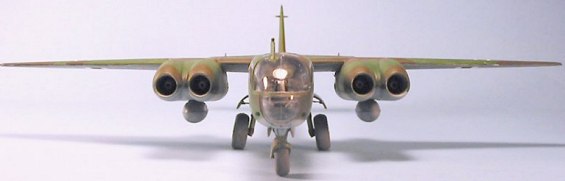
Development of the Ar-234C was seriously delayed by the relocation of the experimental assembly plant to different regions, and fuel shortages which delayed the flight test program. The C-series was similar to the B-series other than the substitution of four BMW003 units for the two Jumo engines. The nosewheel of the C was enlarged.
 The AR-234C-1
was to be a reconnaissance version capable of 542 mph at 19,700 feet with
a range of 920 miles. the Ar-234C-2 was a bomber version with a maximum
speed of 555 mph. These were abandoned in favor of the multi-purpose
Ar-234C-3. The C-3 was to use the BMW003C engine, but lack of
availability meant it retained the BMW003A-1 engine of previous C
models. The cockpit roof was raised to improve visibility, and the
airplane was armed with 2 forward-firing and 2 aft-firing MG151 cannon.
The C-3 would also have been adapted for the night fighter role with the
cannon pack already developed for the B-series. Maximum speed was 532mph
at 19,700 feet.
The AR-234C-1
was to be a reconnaissance version capable of 542 mph at 19,700 feet with
a range of 920 miles. the Ar-234C-2 was a bomber version with a maximum
speed of 555 mph. These were abandoned in favor of the multi-purpose
Ar-234C-3. The C-3 was to use the BMW003C engine, but lack of
availability meant it retained the BMW003A-1 engine of previous C
models. The cockpit roof was raised to improve visibility, and the
airplane was armed with 2 forward-firing and 2 aft-firing MG151 cannon.
The C-3 would also have been adapted for the night fighter role with the
cannon pack already developed for the B-series. Maximum speed was 532mph
at 19,700 feet.
Only 19 Ar-234C-3s were completed prior to the end of the war and none saw active service.
|
THE KIT |
On opening the box, one is immediately aware that this kit was developed from the original Hasegawa Ar-B-2. This kit series was announced as a co-project of Revell-Germany and Hasegawa.
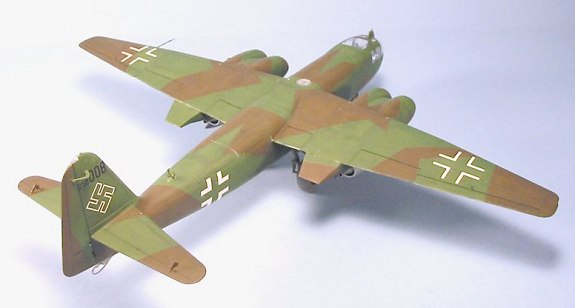
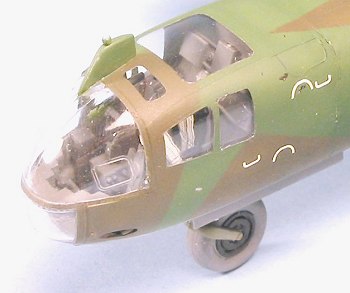
The differences between this kit and the earlier on is the forward fuselage, with the differently-shaped nose and a differently-equipped cockpit, and the larger nosewheel. The wings have been modified to take the twin-engine cowling, and the twin-engine cowlings and engines replace the earlier parts.
Decals provide the 8th production Ar-234C-3, and the only production Ar-234C-4 reconnaissance variant.
|
CONSTRUCTION |
 If you have
built the earlier kit, there are no surprises here. Most importantly,
the modeler still needs to cut off the alignment pins on the wings, and
to manually align the wing parts during assembly, to avoid the
misalignment problem that leads to a gap between right wing and fuselage,
and consequent fit problems of the engines. Since these engines also fit
into a cutout area of the leading edge of the wings, it is even more
important to do this change in the wing construction process. If you do,
all will fit perfectly and you won't use any putty or Mr. Surfacer in
attaching the wing to the fuselage or the engine nacelles to the wings.
If you have
built the earlier kit, there are no surprises here. Most importantly,
the modeler still needs to cut off the alignment pins on the wings, and
to manually align the wing parts during assembly, to avoid the
misalignment problem that leads to a gap between right wing and fuselage,
and consequent fit problems of the engines. Since these engines also fit
into a cutout area of the leading edge of the wings, it is even more
important to do this change in the wing construction process. If you do,
all will fit perfectly and you won't use any putty or Mr. Surfacer in
attaching the wing to the fuselage or the engine nacelles to the wings.
 I first assembled
the wings, the main fuselage and the tail units, attached the two main
subassemblies of wing and fuselage, and set them aside. I then assembled
the engine nacelles and set them aside; do not attach the rear of the
nacelle until you have assembled the engines in position.
I first assembled
the wings, the main fuselage and the tail units, attached the two main
subassemblies of wing and fuselage, and set them aside. I then assembled
the engine nacelles and set them aside; do not attach the rear of the
nacelle until you have assembled the engines in position.
The cockpit went together with less difficulty than that of the earlier kit, primarily because it does not use the oversize bulkhead that will spread the main fuselage too wide if it is not sanded down. In fact, once assembled, the nose fit to the fuselage with no difficulty. Given there is less glass in this canopy than in the B-model, the kit-supplied cockpit is more than sufficient to produce a good look - only those hopelessly addicted to resin cockpits will really need one for this kit, though I am sure that will not deter any of the usual suspects from producing such cockpits and enticing the unwary into doubling the cost of their kit.
I decided not to attach the engine nacelles until after the model was painted.
|
COLORS & MARKINGS |
 Painting:
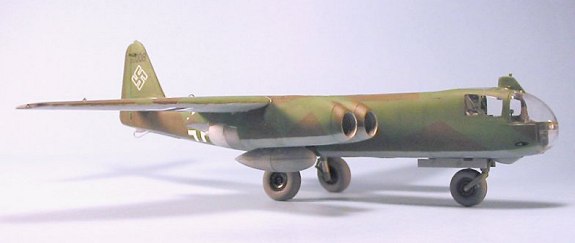
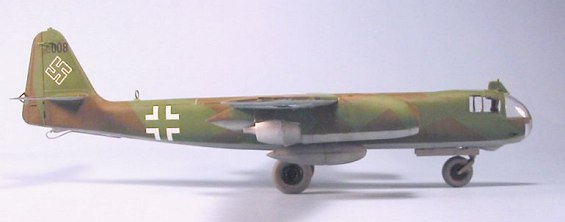
There are knowledgeable experts who claim the Ar-234 series might well have been in 70/71/65, rather than the 81/82/76 that others claim, due to Arado having large stocks of the earlier paints. There are no surviving Ar-234Cs, or color photographs of any of the 19 that were built, so the modeler is on their own to choose what to do. I went with the 81/82/76 scheme.
After
pre-shading the model, I applied Gunze-Sangyo RLM76 to the lower
surfaces. When that 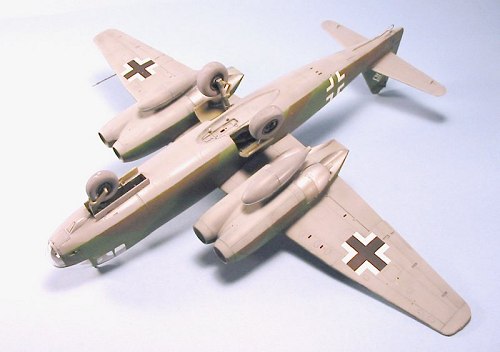 was
dry, I planned to use a set of Cutting Edge "Black Magic" masks for
camouflaging the upper surfaces. I painted the areas that were to be
RLM82 Bright Green with Gunze-Sangyo RLM82.
was
dry, I planned to use a set of Cutting Edge "Black Magic" masks for
camouflaging the upper surfaces. I painted the areas that were to be
RLM82 Bright Green with Gunze-Sangyo RLM82.
Unfortunately, I found that the Black Magic masks were actually too small for the kit, and that when one pressed down the mask enough to hold it in position, it would pull up paint beneath it. Personally, I was a believer that these mask sets are a useless waste of money for these with hand-eye coordination problems, and trying one proved it for me. Off came the masks, then I repainted the areas that had pulled up, and went on to use my tried-and-true method of using low-tack drafting tape and running thread 1/16" in from the edge to raise it, to do a "hard edge" scheme with "scale overspray." This was easily accomplished.
I then painted the visible engine parts in varying metallic shades, and attached them to the nacelles.
I then gave the model a coat of Future.
|
FINAL ASSEMBLY |
 The engine
nacelles fit precisely, with no need for any gap-filler. I first
attached the main nacelle to the wing, then glued the rear fairing in
position. I also attached the landing gear and the rudder and elevator
hinge guides at this point.
The engine
nacelles fit precisely, with no need for any gap-filler. I first
attached the main nacelle to the wing, then glued the rear fairing in
position. I also attached the landing gear and the rudder and elevator
hinge guides at this point.
I used the kit decals to make the number 8 production machine of the C-3 series. The decals were much better than the Hasegawa kit decals had been, and presented no difficulty. When these were dry, I washed the model. After applying an overall coat of Future and allowing it to dry, I shot two coats of thinned Testor's Dullcote. When this was dry, I unmasked the cockpit and the model was finished.
|
CONCLUSIONS |
This is a well-designed and the result is a nice model of a technologically-important airplane. One can see the results of the aerodynamic development of the Ar-234C in several post-war American jet bombers like the North American B-45, and others like the Curtiss XF-87, a contender to the F-89 Scorpion as a jet night fighter. Luft '46 fans could have fun modeling this airplane, which really existed and would have been a "contender" in their fantasy war.
May 2003
Review Kit compliments of my wallet.
If you would like your product reviewed fairly and quickly by a site that has over 200,000 visitors a month, please contact me or see other details in the Note to Contributors.