Pavla 1/72 Fi-167
| KIT #: | ? |
| PRICE: | £12.00 |
| DECALS: | Two Luftwaffe options |
| REVIEWER: | Carmel J. Attard |
| NOTES: | Short run with photo etch and vacuform parts |
| HISTORY |
Way back in 1936, a few weeks after the keel was laid for the German aircraft carrier Graf Zeppelin a specification was tendered to both Arado and Fiesler Companies for a two seat multi purpose aircraft capable of operating from the new vessel. Requirements were for all metal biplane with folding wings, a dive speed of over 300 mph and able to carry a single torpedo or a maximum bomb load of 1,100 lbs.
 The Fiesler aircraft designated Fi-167
won the award upon meeting the specified conditions. Twelve examples were
immediately ordered with modifications including larger low pressure tyres, new
flame dampers, modified air intakes, provision of a two man dinghy, an improved
emergency release for main undercarriage and ‘Flattner’ type of tail surfaces.
The ship’s construction was first halted in 1940. The 12 Fiesler aircraft were
based in Holland with Enprobungstalle 167 for a while but was disbanded and the
aircraft relegated to land-based torpedo-bombers and reconnaissance sorties when
construction. Construction began again in 1942 but by this time the Ju-87E had
been selected for the original duties of the Fi-167.
The Fiesler aircraft designated Fi-167
won the award upon meeting the specified conditions. Twelve examples were
immediately ordered with modifications including larger low pressure tyres, new
flame dampers, modified air intakes, provision of a two man dinghy, an improved
emergency release for main undercarriage and ‘Flattner’ type of tail surfaces.
The ship’s construction was first halted in 1940. The 12 Fiesler aircraft were
based in Holland with Enprobungstalle 167 for a while but was disbanded and the
aircraft relegated to land-based torpedo-bombers and reconnaissance sorties when
construction. Construction began again in 1942 but by this time the Ju-87E had
been selected for the original duties of the Fi-167.
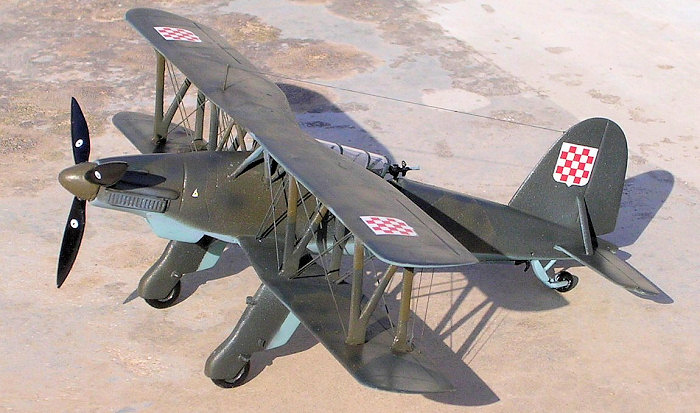
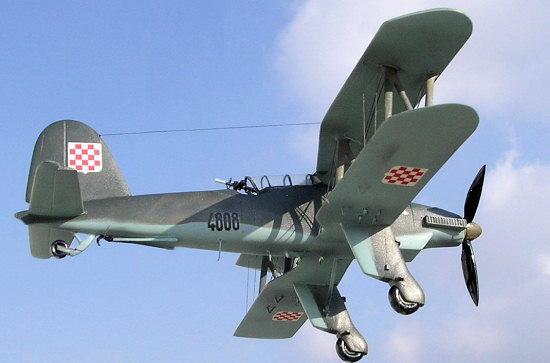
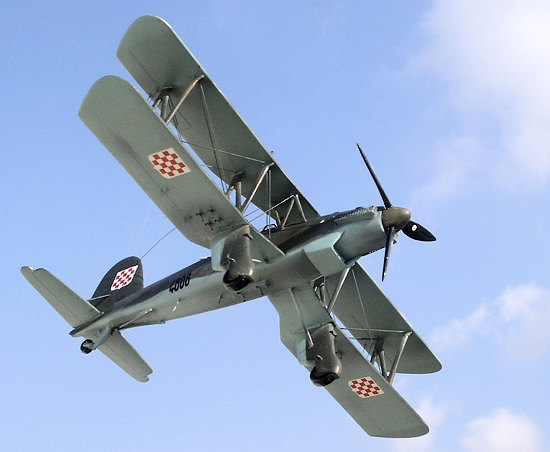
While the Fi-167 was based in Holland until 1943 various experiments were conducted on it including research for effective camouflage. The type eventually found its way into Croat Air Force service when in fact these were carrying one of the experimental camouflage schemes at the time of transfer. The Yugoslav AF also acquired the Fi-167 one of which was camouflaged light grey upper surfaces and light blue under surfaces. After delivery eventually there were some modifications including the possible removal of the arrestor hook and other offensive attachment equipment when relegated to land based reconnaissance duties.
| THE KIT |
 This is
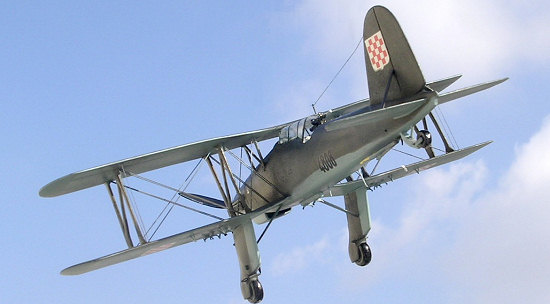 the second time that the Fi-167
has been released by Pavla Models after the first batch has been sold out. It is
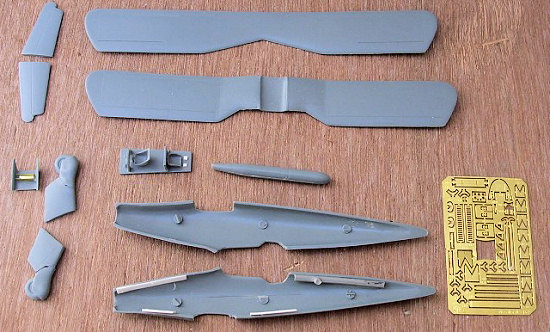
a limited run kit of very good standard. The kit comes in a relatively soft, grey
plastic with a small brass etch fret and a vac form canopy in duplicate. The
cockpit interior caters for a pilot and gunner with detail instrument panel in
brass etches a control column which is injection moulded, firewall, and armour
plate to gunner at rear. There is a rear injection gun with detail metal
mounting and aiming sight mounted at the rear of cockpit. The assembly
instructions are well illustrated and easy to follow and there is also a layout
drawing of all the parts. The last two pages are devoted to painting guide and
decal emplacement for two Luftwaffe machines. But to those who like to build
German aircraft BUT in foreign markings, there is a decal sheet also produced by Pavla which has two interesting liveries of a Croat and a Yugoslav machine.
the second time that the Fi-167
has been released by Pavla Models after the first batch has been sold out. It is
a limited run kit of very good standard. The kit comes in a relatively soft, grey
plastic with a small brass etch fret and a vac form canopy in duplicate. The
cockpit interior caters for a pilot and gunner with detail instrument panel in
brass etches a control column which is injection moulded, firewall, and armour
plate to gunner at rear. There is a rear injection gun with detail metal
mounting and aiming sight mounted at the rear of cockpit. The assembly
instructions are well illustrated and easy to follow and there is also a layout
drawing of all the parts. The last two pages are devoted to painting guide and
decal emplacement for two Luftwaffe machines. But to those who like to build
German aircraft BUT in foreign markings, there is a decal sheet also produced by Pavla which has two interesting liveries of a Croat and a Yugoslav machine.
| CONSTRUCTION |
 Like most limited run kits the fuselage
halves have no locating pins but are generally good. I noticed that in my
example one half of the fuselage was slightly deeper than the other half. This
was dealt with when the top put together and scraped down the proud lip on the
inside. The cockpit floor required sanding from sides particularly towards the
rear. The brass etch instrument panel needed trimming ½ mm from the width in
order to fit. There is a delicately produced intake tubular fairing on the
starboard nose area. This had the intake opened with a hand drill and then
shaped with a pin file. I also added an interior blanking plate from a tiny
piece of plastic card to avoid the see through effect. This operation can be
carried out after the fuselage halves are put together since the blanking piece
can be added from the open spinner end area.
Like most limited run kits the fuselage
halves have no locating pins but are generally good. I noticed that in my
example one half of the fuselage was slightly deeper than the other half. This
was dealt with when the top put together and scraped down the proud lip on the
inside. The cockpit floor required sanding from sides particularly towards the
rear. The brass etch instrument panel needed trimming ½ mm from the width in
order to fit. There is a delicately produced intake tubular fairing on the
starboard nose area. This had the intake opened with a hand drill and then
shaped with a pin file. I also added an interior blanking plate from a tiny
piece of plastic card to avoid the see through effect. This operation can be
carried out after the fuselage halves are put together since the blanking piece
can be added from the open spinner end area.
 The next step was fixing the lower wings
to the fuselage. As with every biplane that I build I add the outer plane cabine
struts first. These are carefully fixed in the lightly engraved marked area on
the lower wings and are allowed to set firmly ensuring that they are fixed
vertically and not allowed to lean to any side. The upper wing was then lowered,
dry fitted to check that there was the correct desired gap between the mid area
of upper wing and cockpit canopy. The interplane struts are then simply glued at
the desired
The next step was fixing the lower wings
to the fuselage. As with every biplane that I build I add the outer plane cabine
struts first. These are carefully fixed in the lightly engraved marked area on
the lower wings and are allowed to set firmly ensuring that they are fixed
vertically and not allowed to lean to any side. The upper wing was then lowered,
dry fitted to check that there was the correct desired gap between the mid area
of upper wing and cockpit canopy. The interplane struts are then simply glued at
the desired
 angle to the fuselage which I can say is a straight forward step. As
for the undercarriage I would have preferred if the trouser undercarriage was
moulded separate from the wheels but it was easy task to clean them from flash.
angle to the fuselage which I can say is a straight forward step. As
for the undercarriage I would have preferred if the trouser undercarriage was
moulded separate from the wheels but it was easy task to clean them from flash.
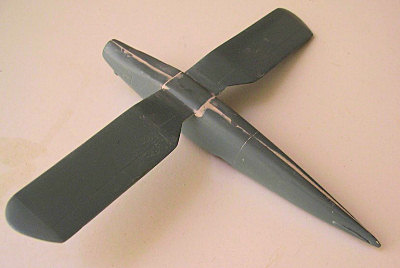
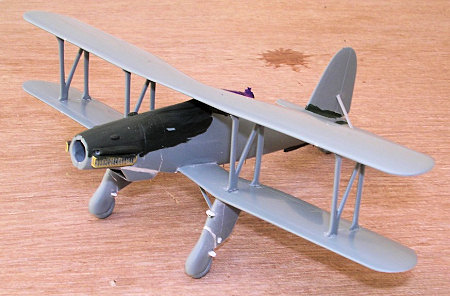
Small brass pieces fairings acting as steps were added to front of each leg and I also added semi circular steps to sides as these were not provided. These circular hinged steps are shown on the box art. The arrestor hook comes in a brass etch backed by plastic piece but it would be too cumbersome if the two pieces were added so I fixed the brass etch one in place and it looked correct. The engine exhausts are also shrouded with a brass detail piece and the torpedo and bomb brackets and flap hinges are also in bras etch giving the true scale effect to the model. The tail fins for both the medium size and small bombs are also in brass etch. I have replaced the aerials with steel pins of equivalent diameter and length. The rigging was made by first hand drilling with a pin drill all the holes and literally sewing the wing parts using invisible thread which had the end each rig secured with a tiny drop of super glue. When these dried firmly the outer of wings was sanded to remove the surplus thread. The wireless for the antenna was made from an even thinner thread.
| COLORS & MARKINGS |
 The interior was painted dark grey with
crew seats in leather colour and seat straps in linen colour. The Croat machine
was finished in standard German war camouflage of RLM 72,73 and 65 and added
mottle in RLM 72 over the 73 areas. The decals made by Model Hobby Press gives
national markings for 6 Croat positions. Other references indicate that the
outer upper starboard wing markings can be left out. My Fiesler saga did not
stop here and in fact took advantage of the situation and completed in time a
vacform Formaplane Fi-167 which I got from e-bay and which had no decals and
canopy. So I took the opportunity and used the spare cockpit canopy as well as
the Yugoslav decal sheet to complete the second kit which I finished in RLM2
upper surfaces and Hellblue under surfaces.
The interior was painted dark grey with
crew seats in leather colour and seat straps in linen colour. The Croat machine
was finished in standard German war camouflage of RLM 72,73 and 65 and added
mottle in RLM 72 over the 73 areas. The decals made by Model Hobby Press gives
national markings for 6 Croat positions. Other references indicate that the
outer upper starboard wing markings can be left out. My Fiesler saga did not
stop here and in fact took advantage of the situation and completed in time a
vacform Formaplane Fi-167 which I got from e-bay and which had no decals and
canopy. So I took the opportunity and used the spare cockpit canopy as well as
the Yugoslav decal sheet to complete the second kit which I finished in RLM2
upper surfaces and Hellblue under surfaces.
| CONCLUSIONS |
It required some effort to build the two kits at the same time and I can certainly recommend the Pavla kit for anyone seeking to build the Fi-167 not only because the Pavla kit is an injected moulded type but the accuracy of the kit is superior to the Formaplane offering.
October 2007
Copyright ModelingMadness.com. All rights reserved. No reproduction in part or in whole without express permission. If you would like your product reviewed fairly and quickly, please contact
the editor or see other details in the
Note to
Contributors.