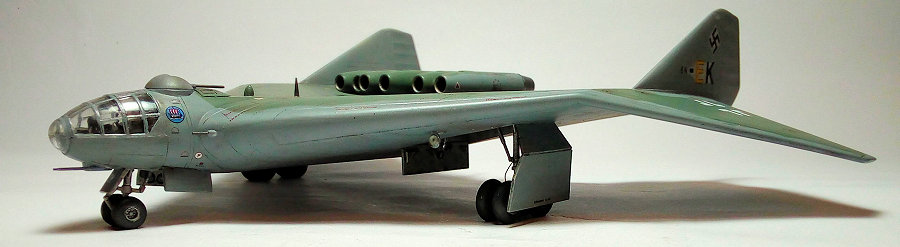
Revell 1/72 Arado E.555
| KIT #: | 04367 |
| PRICE: | €20 in 2005 |
| DECALS: | Two options |
| REVIEWER: | Spiros Pendedekas |
| NOTES: | Some improvements made. |
| HISTORY |
 In response to the RLM's Amerikabomber project, Arado’s E.555 proposal
included a series of long range jet bomber designs of various sizes,
powerplants, crew and weapon load configurations. Those designs would be
capable of striking the continental United States from Germany.
In response to the RLM's Amerikabomber project, Arado’s E.555 proposal
included a series of long range jet bomber designs of various sizes,
powerplants, crew and weapon load configurations. Those designs would be
capable of striking the continental United States from Germany.| THE KIT |
 The characteristic glazed crew compartment is very well represented,
consisting of no less than 12 pieces, with a lot of details (including seat
belts) already molded on the complex shaped cockpit floor. Only thing
“missing” is the prominent (in WWI Luftwaffe greenhouse cockpits) instrument
wiring that emerged behind the instrument panel, but I might ask too much
for this scale…
The characteristic glazed crew compartment is very well represented,
consisting of no less than 12 pieces, with a lot of details (including seat
belts) already molded on the complex shaped cockpit floor. Only thing
“missing” is the prominent (in WWI Luftwaffe greenhouse cockpits) instrument
wiring that emerged behind the instrument panel, but I might ask too much
for this scale…| CONSTRUCTION |
Having decided to deal with the cockpit at later
stages, I first attached only the cockpit tub on the lower wing half and affixed
two sizable lead weights (secured with styrene blocks and nicely wrapped with my
sons’ clay) bilaterally at the front wing roots area. Then I attached the top
part and the pair of 2-piece fins. Fit was exceptional and, at no time, I had a
complete airframe! Although 5 nice bombs are provided, I decided to close the
bomb bays, so I glued their doors shut.
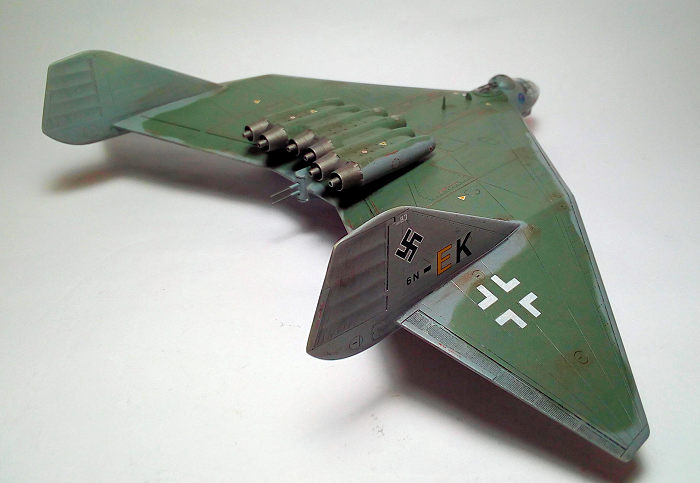
I then glued the very impressive multi-engine halves and attached the 6 air
intake fronts, but left the exhausts off. Again, nice fit. I did not attach the
engine block on the airframe, leaving this task to be done at final stages, as
to facilitate painting. I also assembled the landing gear, adding brake lines
from black painted stretched sprue at the MLG struts. The innards of the intakes
(which end to nice compressor faces)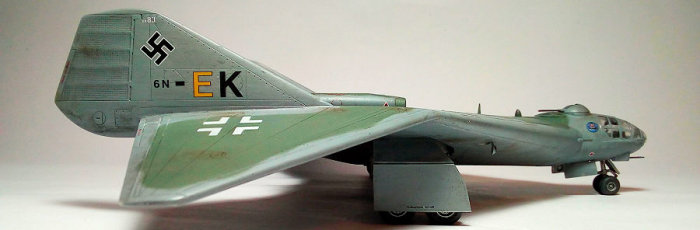 , landing gear struts, wheel wells, doors
inner faces and wheel rims were painted Testors Steel. The oleos were finalized
with my Pilot extrafine silver pen. The nice tires were a tad flattened with a
file and painted extra dark sea gray.
, landing gear struts, wheel wells, doors
inner faces and wheel rims were painted Testors Steel. The oleos were finalized
with my Pilot extrafine silver pen. The nice tires were a tad flattened with a
file and painted extra dark sea gray.
I then assembled the top turret, adding a small rectangular styrene, as a means
of covering the area at the point where the guns enter the turret: the kit
provided rendition seemed to me empty and toy-ish. The rear turret rendition was
not to my liking, as well, so I fabricated one from a bomb half of suitable
diameter, shortened the rear airframe protrusions and attached it, looking more
“aerodynamic” now!
With the above steps, basic construction was more or less completed. I gave the
whole model, plus the engine block, a coarse sanding, then Squadron Green filler
was applied at a few places, then the final sanding took place and I was off to
the paint shop!
| COLORS & MARKINGS |
 Imagination may be left to gallop upon Luft46 color
schemes, and I have seen many very striking and interesting color schemes. On
“my” Luft46 subjects, after some “operational conditions guessing”, I usually
end up with some less flamboyant schemes and this one was no exception. With My
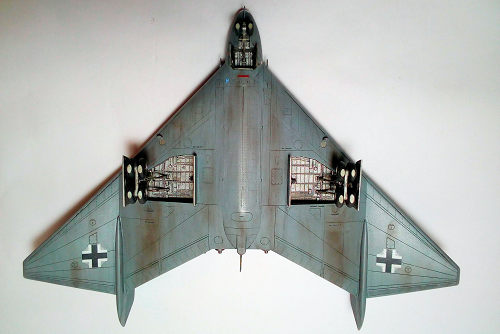
Revell Vario airbrush, I started by applying Hu128 Compass Gray on all bottom
surfaces, including the engine block and LG doors, extending a good portion at
the above surfaces. After a protective coat of Future, I applied Patafix tack
strip on a loose pattern, roughly following the top of the leading edges and
sprayed Hu31 Slate Gray (which actually has a nice greenish shade, kind of
RLM02) on all topsides, leaving off the fins and the front glazed area.
Imagination may be left to gallop upon Luft46 color
schemes, and I have seen many very striking and interesting color schemes. On
“my” Luft46 subjects, after some “operational conditions guessing”, I usually
end up with some less flamboyant schemes and this one was no exception. With My
Revell Vario airbrush, I started by applying Hu128 Compass Gray on all bottom
surfaces, including the engine block and LG doors, extending a good portion at
the above surfaces. After a protective coat of Future, I applied Patafix tack
strip on a loose pattern, roughly following the top of the leading edges and
sprayed Hu31 Slate Gray (which actually has a nice greenish shade, kind of
RLM02) on all topsides, leaving off the fins and the front glazed area.
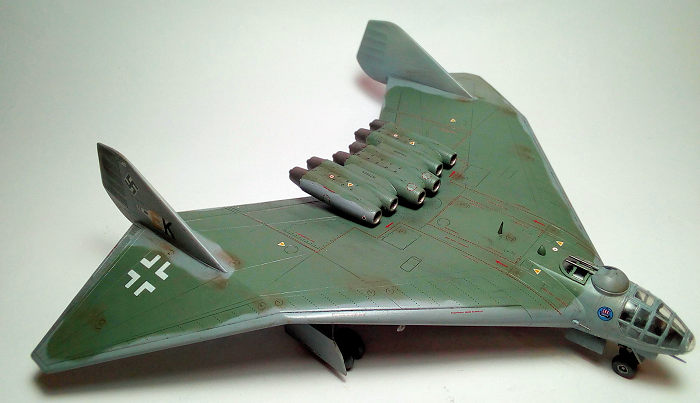
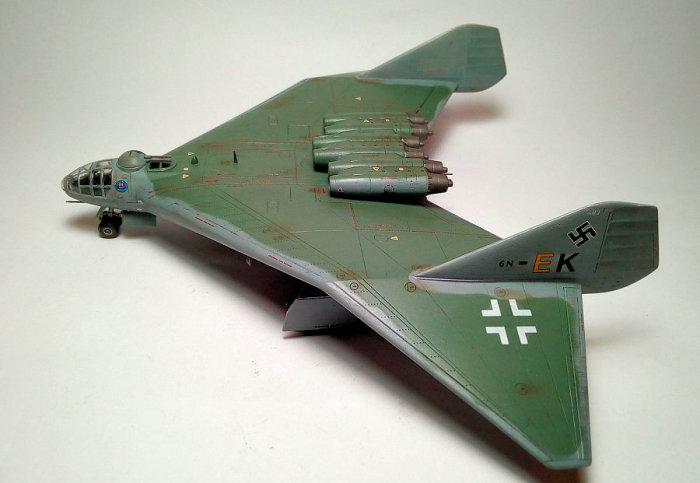
Upon removing the Patafix, nice, uneven, well defined but not dead hard camo
lines had emerged. A coat of Future sealed the top camo.
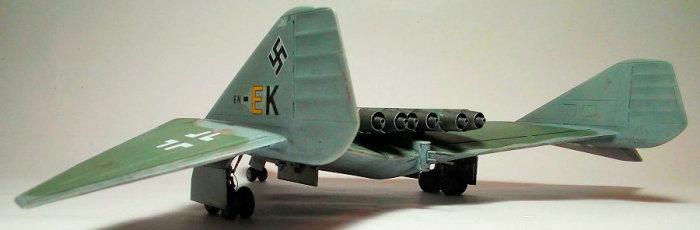
I used the kit decals to depict a 6N-EK/KG100 fictitious aircraft. The Cartograf
decals behaved, as usual, very well. I had to trim the top white crosses extra
film, as it showed, but that was, almost for sure, my fault on poor surface
preparation for decaling. There was a ton of maintenance stenciling that I
happily applied, the result looking very busy and realistic! I used Swastikas
from an Icarus Decals generic sheet. A coat of Future sealed the decals.
| FINAL CONSTRUCTION |
The 6 engine exhausts were painted (and then buffed)
with Testors Burned Metal. Their back extending central tubes lacked depth, so I
drilled them out and painted their innards black. Then, all six exhausts were
attached at the main engine block, which in turn was attached onto the airframe.
I was then cockpit time! I first attached the two back consoles and the back
seat and then the two front top seat parts (the seat bottoms are already molded
in the cockpit floor). The so prominent wiring behind instrument panels at
greenhouse glazed Luftwaffe bomber cockpits was represented by drilling 7 holes
at the front instrument panel and inserting small copper cables, twisting them
to look like a strand that
 “disappeared” underneath. They were painted a cream
contrasting color, visible through the greenhouse canopy. I attached the control
yoke, the bombardier’s gunsight and bottom transparent mini window, the rear
gunner’s periscope base and transparent periscope top and somehow managed to
cram the pilot’s foot pedals in the tight area provided in front. Basic cockpit
color was Hu32 (for RLM66), with leather seat cushions, cream seat belts, black
instrument panels, yoke handles and consoles (silver dry brushed, with red,
white and yellow “knobs” added). Another top mounted mini instrument panel was
attached at the inside of the canopy. The finished cockpit looked nice and busy.
“disappeared” underneath. They were painted a cream
contrasting color, visible through the greenhouse canopy. I attached the control
yoke, the bombardier’s gunsight and bottom transparent mini window, the rear
gunner’s periscope base and transparent periscope top and somehow managed to
cram the pilot’s foot pedals in the tight area provided in front. Basic cockpit
color was Hu32 (for RLM66), with leather seat cushions, cream seat belts, black
instrument panels, yoke handles and consoles (silver dry brushed, with red,
white and yellow “knobs” added). Another top mounted mini instrument panel was
attached at the inside of the canopy. The finished cockpit looked nice and busy.
Landing gear time: I first attached the landing gear struts, followed by the
wheels after curing. After some quality aligning time, all 10 of them touched
nicely the ground. The gear doors with their retracting arms followed, again all
nice and aligned. The front NLG door had its landing light transparency attached
beforehand.
 I attached the two wing root cannons and front pitot tube (fuselage color body,
gun metal tips). The two underwing mounted clear landing lights had their backs
and fuselage wells painted silver, their framing fuselage color and were
attached at extended position. The mini top fuselage antenna mast was attached,
too.
I attached the two wing root cannons and front pitot tube (fuselage color body,
gun metal tips). The two underwing mounted clear landing lights had their backs
and fuselage wells painted silver, their framing fuselage color and were
attached at extended position. The mini top fuselage antenna mast was attached,
too.
The glazed transparencies had well defined frames, so it was not that hard to be
hand painted. They were attached with tiny amounts of styrene glue. Fit was ok,
the resulting gaps faired with white glue.
I then gave the model a black wash that accentuated the panel lines and provided
a well-used look inside the wheel wells. Weathering consisted of wheels area
dirtying, hinges grease leaks, top wing fuel leaks and wing root guns sooting,
all performed with dry pastels of dark brown and black shades, towards the
direction of the airflow.The model then received its final almost matt (70/30
matt/gloss) coating and was called done!
| CONCLUSIONS |
This was another pleasant surprise from Revell: a
well-executed mainstream kit of a Luft46 whatiffer. Kit design, molding, decal
quality, instructions and price, all are really appealing. No problems
whatsoever were encountered during building. Even a beginner can put this kit
together easily and come up with a very nice result. Of course, an experienced
modeler can super detail it to his liking and skills. No aftermarket that I am
aware of is available, but, frankly, none is needed, except some canopy masks,
of course!
This kit, with its easiness of construction, camo freedom allowance, and
impressive, exotic looks, might be a good candidate to encourage young modelers,
as they will produce a super result that can be proud of and will be looking
forward to their next project. As usual, I had a great time putting this what-if
beauty together, and can wholeheartedly recommend it!
Happy modeling!
| REFERENCES |
Wikipedia
Scalemates
Luft46 website
The net
20 September 2021
Copyright ModelingMadness.com. All rights reserved. No reproduction in part or in whole without express permission.
If you would like your product reviewed fairly and fairly quickly, please contact the editor or see other details in the Note to Contributors.