Eduard 1/48 FW-190A-9
| KIT #: | 84122 |
| PRICE: | 81$ |
| DECALS: | Two options |
| REVIEWER: | Francisco Santoro |
| NOTES: | Weekend Edition. Aeromaster 'Defense of the Reich 3'. |
| HISTORY |
 From the
(old) Eduard Fw 190A-9 instructions: "The final production version of the BMW801
powered fighter was the Fw190A-9, equipped with the BMW801TS of 2000hp (1470kW).
There was a parallel development of these fighter optimized aircraft with a
dedicated fighter-bomber version, the Fw190F. These aircraft had reduced wing
armament to two MG151 cannon in the wingroot position. The engine was optimized
for low level operation, and the armament options varied to satisfy the ground
attack role, including bombs of various weight classes and a variety of
anti-tank rockets. This branched into the extended range Fw190G version.
Development of the thoroughbred fighter continued in the guise of the Fw190D,
which began to reach Luftwaffe units in the second half of 1944, and was the
result of mounting an in-line Jumo213A-1 engine into a modified Fw190A-8
airframe. Although the Fw190 never achieved the widespread usage of the
competing Bf109, its contribution to the German Air Force was certainly
significant through the second half of WWII. Fw190s saw service on the Western
Front as well as in the East. As heavy fighters with imposing firepower, they
found themselves integral components, from 1943 onwards, within the units tasked
with the protection of the Reich from the ominous clouds of allied four-engined
bombers. This is where the A-8 version was instrumental, along with it´s A-8/R2
armoured development. This version, with its firepower, was a very ominous and
daunting foe for the bomber crews. From the second half of 1944, their danger
was kept in check to a degree by escorting P-47s, and necessitated the
development of the P-51 Mustang."
From the
(old) Eduard Fw 190A-9 instructions: "The final production version of the BMW801
powered fighter was the Fw190A-9, equipped with the BMW801TS of 2000hp (1470kW).
There was a parallel development of these fighter optimized aircraft with a
dedicated fighter-bomber version, the Fw190F. These aircraft had reduced wing
armament to two MG151 cannon in the wingroot position. The engine was optimized
for low level operation, and the armament options varied to satisfy the ground
attack role, including bombs of various weight classes and a variety of
anti-tank rockets. This branched into the extended range Fw190G version.
Development of the thoroughbred fighter continued in the guise of the Fw190D,
which began to reach Luftwaffe units in the second half of 1944, and was the
result of mounting an in-line Jumo213A-1 engine into a modified Fw190A-8
airframe. Although the Fw190 never achieved the widespread usage of the
competing Bf109, its contribution to the German Air Force was certainly
significant through the second half of WWII. Fw190s saw service on the Western
Front as well as in the East. As heavy fighters with imposing firepower, they
found themselves integral components, from 1943 onwards, within the units tasked
with the protection of the Reich from the ominous clouds of allied four-engined
bombers. This is where the A-8 version was instrumental, along with it´s A-8/R2
armoured development. This version, with its firepower, was a very ominous and
daunting foe for the bomber crews. From the second half of 1944, their danger
was kept in check to a degree by escorting P-47s, and necessitated the
development of the P-51 Mustang."
| THE KIT |
 This is my
first Eduard Fw 190A in any scale. Previously, I had built several Hasegawa
190s, so the amount of pieces of this kit seemd a little daunting at first, but
the instructions were clear enough and the assembly was pretty straight forward.
This is my
first Eduard Fw 190A in any scale. Previously, I had built several Hasegawa
190s, so the amount of pieces of this kit seemd a little daunting at first, but
the instructions were clear enough and the assembly was pretty straight forward.
All the parts are bagged individually, something that avoids the pieces from scuffing and breaking due to the rubbing while in-transit to their destination. The parts are moulded in a dark greyish-blue plastic. The parts are perfectly molded, with no flash to be seen. The plastic have a smooth texture to them.
Unlike Hasegawa, who issues a basic kit and adds the necessary parts to make a definite variant, Eduard provides (at least on their A-6 kits and onwards) all the parts to make several variants with the basic boxing. As such, you get parts for the A-6 to A-9 Fw 190. Also included are the radar antennas for the Fw 190A-8/R11.
This Weekend kit of the Fw 190A-8 comes with two decal options: Fw 190A-8 732183 "Blue 4" flown by Leutnant Rudolf Linz (CO of 12/JG 5 in Norway), and Fw 190A-8 380374 "Yellow 17" of 3/JG301.
Instructions are typical from Eduard, a thick, fully coloured booklet.
| CONSTRUCTION |
I didn't start with the cockpit this time, I began by building the propeller. I painted the propeller in RLM 70 (Revell 40).The nose cone was painted white, then masked, and painted black. Once it was dry, I unmasked the nose cone to reveil a nice white spiral over a black spinner. I then grabbed the 14 bladed cooling fan (characteristic of the A-9), and glued it to the propeller. Once that was done, I moved onto the cockpit.
 All the
cockpít parts were either painted in RLM 66 (Revell 78) or black. The instrument
panel was painted black and then drybrushed with a metalling colour. The cushion
of the pilot's seat was painted in dark brown. Before gluing the cockpit to the
fuselage, I painted in RLM 66 the sidewalls of the fuselage. Once that was dry,
I glued the cockpit. Before closing the fuselage halves you must add the engine
face (a very nice simplification over the older Eduard 190s), the left and right
exhausts, and an alignment bulkhead. These pieces were dully glued to their
places, and then the fuselage halves were closed. Fit of this assembly was
perfect.
All the
cockpít parts were either painted in RLM 66 (Revell 78) or black. The instrument
panel was painted black and then drybrushed with a metalling colour. The cushion
of the pilot's seat was painted in dark brown. Before gluing the cockpit to the
fuselage, I painted in RLM 66 the sidewalls of the fuselage. Once that was dry,
I glued the cockpit. Before closing the fuselage halves you must add the engine
face (a very nice simplification over the older Eduard 190s), the left and right
exhausts, and an alignment bulkhead. These pieces were dully glued to their
places, and then the fuselage halves were closed. Fit of this assembly was
perfect.
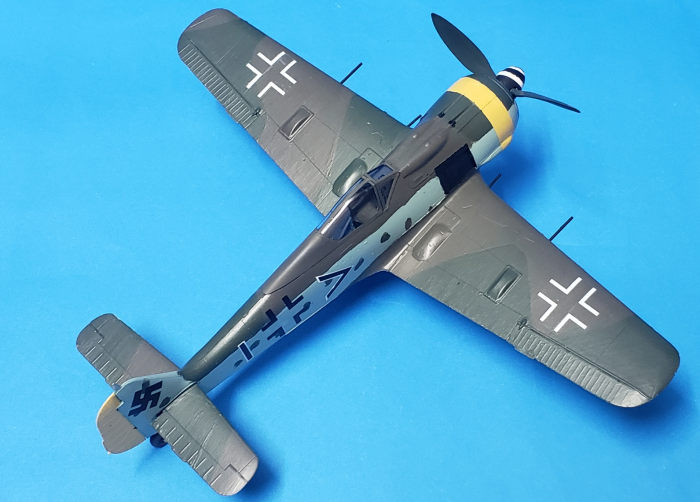
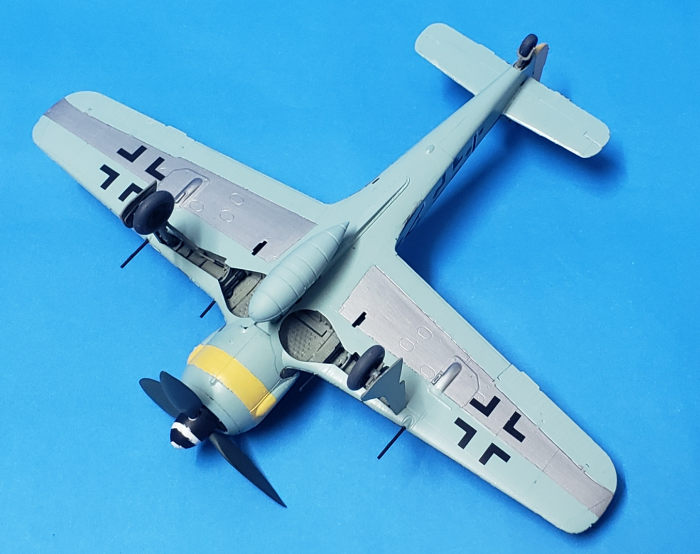
I then moved onto the wings. These are made of two upper and a single lower wing. There's a wingspar to which several small pieces are glued. I painted all these pieces first on their sprues with RLM 02 (Revell 45), and then scrapped the paint from the unions to avoid ruining the fit of the wingspar. Before gluing the wing halves, I opened the holes for the fairings that go above the wings. I also glued the cannon tubes at this stage.
Before commiting to glue the fuselage and the wings, I checked for any fit issues or gaps. There weren't any, so I glued both assemblies and left them to dry. Once that was dry, I glued the horizontal stabilizers and the rudder. After that, I glued the cowling with the guns.
| COLORS & MARKINGS |
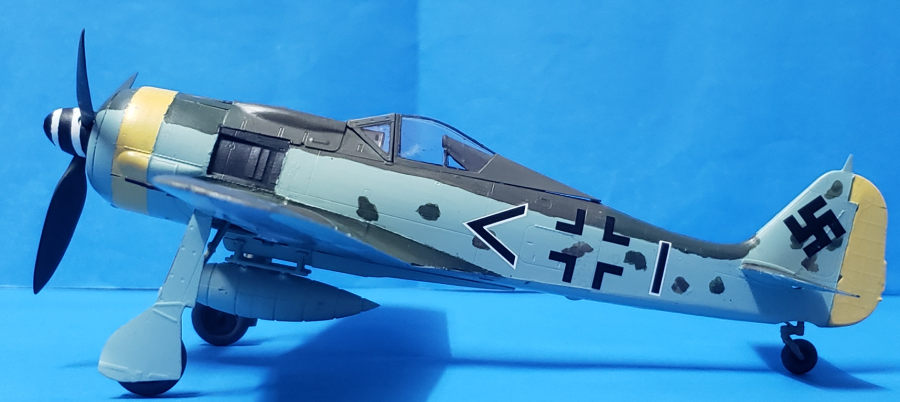
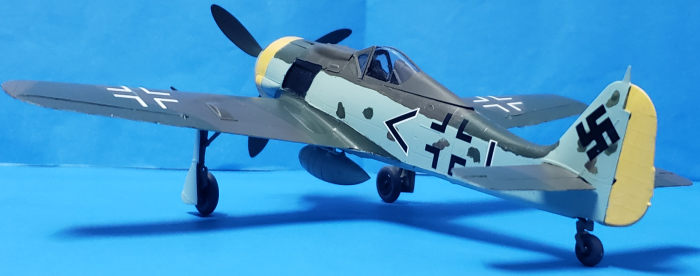
I had decided to use Aeromaster's "Defense of the Reich 3" decal sheet. The aircraft I had planned to paint wasn't on that decal sheet, but was presented as an option on Eduard's old tool Fw 190A-9 in 48th. It was the Fw 190A-9 205998 of the Stab III/SG10 in Austria in 1945. This aircraft was painted in RLM 81/82/76 with a yellow nose band and rudder. I used Revell Aqua colours 46 NATO Brown, 65 Bronze Green, 49 Light Blue, 15 Yellow, and 91 Steel for the lower wing panels. Once the aircraft was fully painted, I gloss coated the model with Revell's gloss varnish.
 Decals
performed very well, but some tried to stick to my fingers rather than to the
model's surface (should have used a toothpick). I used Microsol to make them
settle down into the panel lines. Once the decals were dry, I matt coated the
model with Revell's matt varnish.
Decals
performed very well, but some tried to stick to my fingers rather than to the
model's surface (should have used a toothpick). I used Microsol to make them
settle down into the panel lines. Once the decals were dry, I matt coated the
model with Revell's matt varnish.
One of the things I like from Eduard kits is how they present their wheels. They have separate tyres and wheel hubs. I painted the tyres in Revell 78 Panzer Grey and the hubs in matt black. The landing gear struts were painted in RLM 02 and installed (Eduard provides a foolproof way for aligning the struts on their 190s). The canopy was painted and installed with PVA glue. The last par to be installed was the propeller.
| CONCLUSIONS |
Eduard's new tool 190s are excellent kits to build. They aren't for the beginner builders due to the amount of parts and due to how many small pieces are provided. However, for the more advanced builder, these kits are perfect.
22 April 22
Copyright ModelingMadness.com. All rights reserved. No reproduction in
part or in whole without express permission. If you would like your product reviewed fairly and fairly quickly, please contact the editor
or see other details in the
Note to
Contributors. Back to the Main Page
Back to the Review
Index Page
Back to the Previews Index Page