| KIT #: | ?9094 (Jt94) |
| PRICE: | $33.00 |
| DECALS: | Two options |
| REVIEWER: | Francisco Santoro |
| NOTES: | My decals were a tad brittle. |
| HISTORY |
From the kit´s instructions: "The Fw 190 was designed as an auxiliary fighter for the Luftwaffe´s mainstay Bf 109 series. It was powered by a radial engine-rare in a European fighter design. The Fw 190 was a brilliant design, with a robust airframe and high performance characteristics thanks to its high horsepower to weight ratio.
 Based on the earlier A-3, the A-4 can be said to be the first
"definitive" A model. Improvements accumulated since the first A-0, incluing a
forward shift of the airframe´s centre of gravity by 15cm, were all factored
into the production model A-5. The A-5 inherited its basic fixed armament
package from the A-4, and while few "straight" Fw 190A-5s were produced, the
type was the base of many model variants.
Based on the earlier A-3, the A-4 can be said to be the first
"definitive" A model. Improvements accumulated since the first A-0, incluing a
forward shift of the airframe´s centre of gravity by 15cm, were all factored
into the production model A-5. The A-5 inherited its basic fixed armament
package from the A-4, and while few "straight" Fw 190A-5s were produced, the
type was the base of many model variants.
The most heavily produced of all Fw 190 models was the A-8. Beginning production in March 1944, 8300 aircraft of this model were manufactured by war´s end. The A-8 was basically the same as the A-7, but its heavy fixed armament of two MG131 13mm machineguns and four MG151/20 20mm cannons can be said to be the definitive Fw 190 loadout. Another change arriving with the A-8 was the inclusion of a 115 litre fuel tank located behind the cockpit, and the moving of the pitot tube from the centre of the starboard wing out to the wingtip. Identity Friend-or-Foe (IFF) FuG16ZY Morane antenna was also standard issue with the type. Many of these aircraft produced after September 1944 featured the bulged "Galland haube" canopy for improved pilot vision. A long range "R" variant of the A-8 saw extensive action as a direct "on call" ground support night-fighter bomber and nightfighter."
| THE KIT |
 Hasegawa´s Fw 190A is well known to most modellers. The kit comes in
a top opening box with 6 sprues moulded in dark hard grey plastic, a single
clear sprue, and a sprue with 4 rubber poly caps. The clear parts have an unused
Galland canopy, so with the correct decals, one can make a late Fw 190A-8. To
make way for the wing with heavier armament of the Fw 190A-6 onwards, one has to
open holes on both the lower and upper wings.
Hasegawa´s Fw 190A is well known to most modellers. The kit comes in
a top opening box with 6 sprues moulded in dark hard grey plastic, a single
clear sprue, and a sprue with 4 rubber poly caps. The clear parts have an unused
Galland canopy, so with the correct decals, one can make a late Fw 190A-8. To
make way for the wing with heavier armament of the Fw 190A-6 onwards, one has to
open holes on both the lower and upper wings.
Instructions are of the foldable type, listing in black and white the sprue layout and clearly showing the construction steps.
There´re two decal options provided:
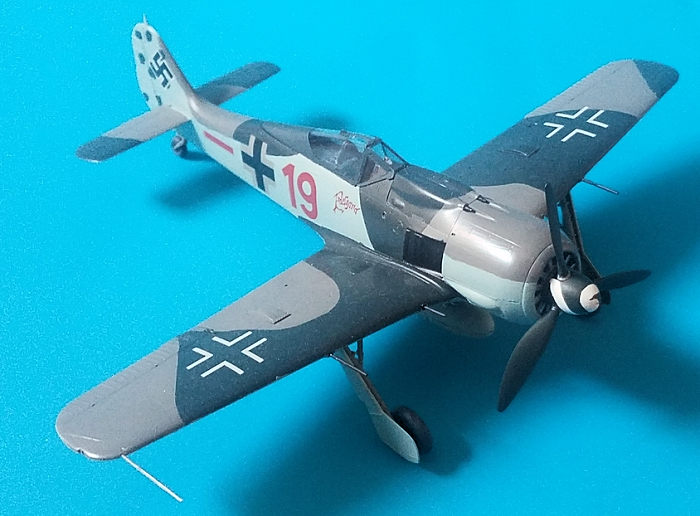
1) Ernst Schröder´s Fw 190A-8, 5(Sturm)/JG300, Germany, October 1944. Painted in RLM 74/75/76.
2) Kurt Bühligen´s Fw 190A-8, JG2, France, June 1944. Painted in RLM 71 or 74/02/76/04.
| CONSTRUCTION |
I began by painting all the cockpit parts with Revell 78 (RLM 66). When dry, they were detailed by painting on them flat black. The control panel was painted with flat black, whereas the rudder pedals were painted with Revell 91 (Steel). All the pieces were then glued together. I then glued the cockpit to one fuselage half, the other half following shortly after.
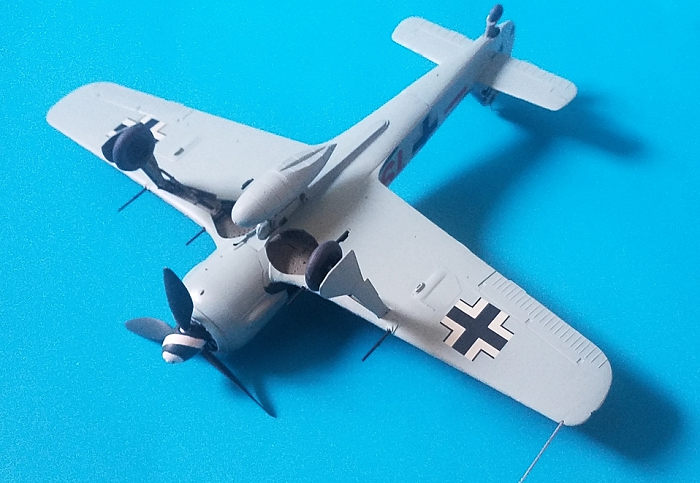
The wings need to have several holes opened to make way for the
A-8 wing. I first opened the holes for the fuel tank rack, and then I open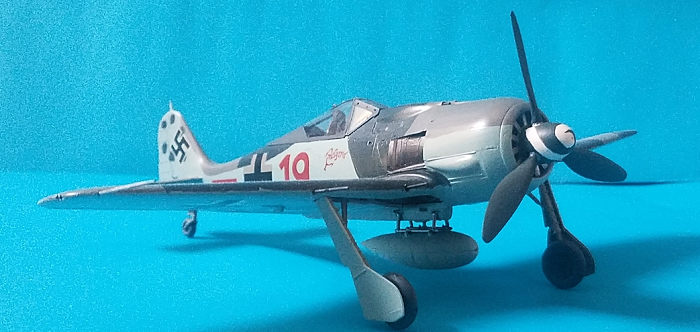 ed the
holes on the upper wing halves for both C14 parts (which I assume are for the
MG151s). Not knowing how to glue them, I checked the painting instructions,
which show them going above the panel line where the flaps are.
This link
shows what I mean more clearly. I also opened the holes on the leading edges of
the wings so I could install the MG151 inserts. Test fit showed I needed to
remove quite a bit of plastic, which left me with some ugly gaps on the upper
wings, and with none in the lower wing. I glued the wings together, followed by
the inserts. After all the parts were dry, I filled the gaps with CA and Revell
Plasto.
ed the
holes on the upper wing halves for both C14 parts (which I assume are for the
MG151s). Not knowing how to glue them, I checked the painting instructions,
which show them going above the panel line where the flaps are.
This link
shows what I mean more clearly. I also opened the holes on the leading edges of
the wings so I could install the MG151 inserts. Test fit showed I needed to
remove quite a bit of plastic, which left me with some ugly gaps on the upper
wings, and with none in the lower wing. I glued the wings together, followed by
the inserts. After all the parts were dry, I filled the gaps with CA and Revell
Plasto.
Test fitting the fuselage/wing assembly showed an unwanted step on the right hand of the assembly. This is caused because the right fuselage half where the wing meets has more plastic than what´s needed, and it has to be trimmed to get a good fit. With the wings glued to the fuselage, I glued the horizontal stabilisers to the fuselage and let them dry.
The engine came next. Everything behind the engine front was left unpainted, while the front was painted in black.The model was then left alone overnight to let the glue set.
| COLORS & MARKINGS |
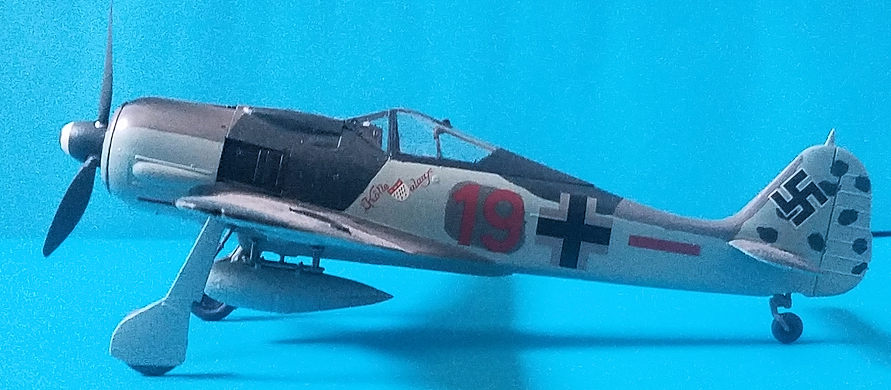
I chose option 1, Ernst Schröder´s aircraft without the red RVD band.The camouflage was first outlined with a pencil.
I began by painting fuselage with Revell 47 and 69 (RLM 75/74), and
then the sides were painted with Revell 49 (Light Blue) in several thinned
coats. With the fuselage colour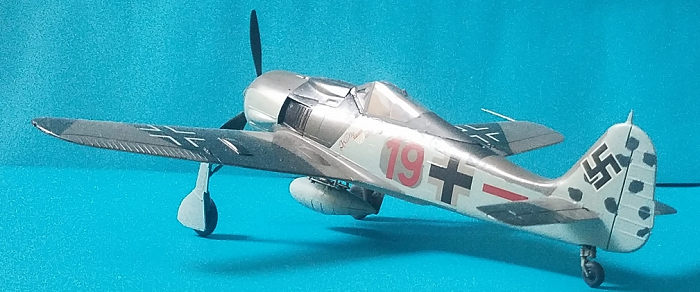 s complete, I added the mottling to the tail with
Revell 69 (RLM 74).
s complete, I added the mottling to the tail with
Revell 69 (RLM 74).
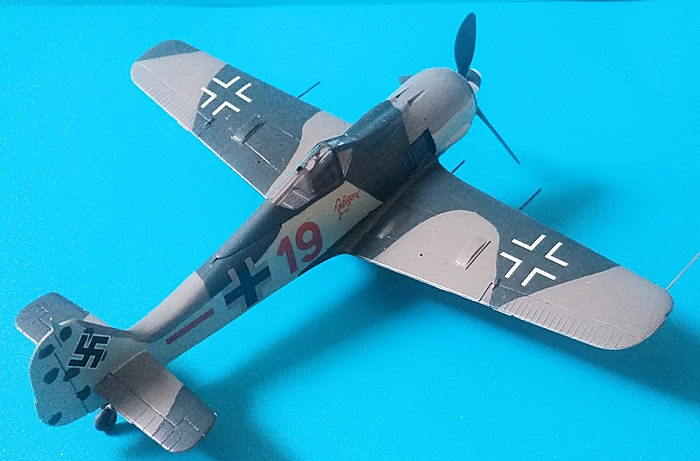
Wings and horizontal stabilisers were next. I painted first first RLM 74 (Revell 69), followed by RLM 75 (Revel 47) after getting a good coverage of the first colour. After the paint on both areas was fully dry, I masked the surfaces to paint the light blue. The left fuselage side received a large patch of RLM 75, as indicated by the instructions.
With all the surfaces painted, the aircraft was coated twice with Revell´s gloss varnish, to prepare the aircraft for the decals. I began the decalling with the Iron Crosses of the upper wings and fuselage. I applied the red bars next, and some bits broke off them while I was moving them into position. Regarding the red 19s, I first placed the one that went above the RLM 75 patch, and then the one on the other side. The upper side of the aircraft was completed when I added the pilot´s personal markings. The decalling was completed after I added the Iron Crosses to the underside of the aircraft, and after I touched up with red the broken areas of the bars.
All the decals were brushed with Vallejo´s decal softner, which isn´t as strong as Microsol. After dry, any remains of decal softener were brushed off with water.The model was then coated twice with Revell´s matt varnish (Revell 02).
| FINAL CONSTRUCTION |
 This part involved the painting and construction of the landing gear,
the wheels, and fuel tank.
I painted the landing gear
and the tailwheel with Revell 45 (RLM 02), with the oleos painted with Revell 91
(Steel). The wheels were painted first with flat black, and then the tyres were
painted with Revell 78 (Tank Grey). The main landing gear was then glued into
position. With the gear fully cured, the wheels were glued into place.
This part involved the painting and construction of the landing gear,
the wheels, and fuel tank.
I painted the landing gear
and the tailwheel with Revell 45 (RLM 02), with the oleos painted with Revell 91
(Steel). The wheels were painted first with flat black, and then the tyres were
painted with Revell 78 (Tank Grey). The main landing gear was then glued into
position. With the gear fully cured, the wheels were glued into place.
The landing gear doors were painted RLM 02 on the inside, and then light blue on the outside. Both gear doors were trimmed on their bases, since they wouldn´t fit into place if left as is.
With the aircraft standing on its wheels, I left it aside and began masking the clear parts. They were painted with the interior fuselage colour (Revell 78/RLM66), left to dry, and then overpainted with RLM 74 (Revell 69). The gunsight was glued into place, and then the two clear parts were added as the finishing touches.
| CONCLUSIONS |
The Hasegawa kit is a nice kit for those who want to have a good Fw 190 and aren´t too worried about details, and the fit issues on the wings are easily corrected with a sharp hobby knife. My only issue with this kit is the need to open the holes for the MG151s, which will leave the modeller with sizeable gaps on the wings to be filled. After I build my Sturmstaffe 1 Fw 190A-6, I´ll try the newly tooled Eduard model.
| REFERENCES |
Kit´s instructions.
16 April 2021
Copyright ModelingMadness.com. All rights reserved. Not reproduction without express permission.
If you would like your product reviewed fairly and fairly quickly, please contact the editor or see other details in the Note to Contributors.