Pegasus Hobbies 1/48 FW-190A-3
| KIT #: | 8414 |
| PRICE: | $7.00 'Used' |
| DECALS: | One option |
| REVIEWER: | Francisco Santoro |
| NOTES: | EagleCals EC129 decals |
| HISTORY |
With the introduction of the more powerful BMW 801D-2 engine, which began to be installed into the Fw 190 in the Spring of 1942, gave rise to a new Fw 190 variant, the A-3. Its higher power was because of the installation of a two stage compressor, which changed the type of fuel used, from the B4 of 87 octanes to the C3 of 97 octanes. The armament remain unchanged from the previous A-2 variant, which was enough when facing the enemies which prowled the skies of 1942.
 Many airframes of the A model were employed, as it was common, to
test armament and equipment to improve the new version. The model also received
the ETC 501 fuselage rack to carry bombs of 500kg, two of 250kg, or up to four
50kg bombs. For long range missions, the aircraft could be equipped with a 300
litre drop tank. Apart from this modifications, the aircraft was identical to
the Fw 190A-2. The new BMW 801D-2engine provided 1700hp at takeoff and was
similar to the previous ones, except it had new air intakes to cool it.
Many airframes of the A model were employed, as it was common, to
test armament and equipment to improve the new version. The model also received
the ETC 501 fuselage rack to carry bombs of 500kg, two of 250kg, or up to four
50kg bombs. For long range missions, the aircraft could be equipped with a 300
litre drop tank. Apart from this modifications, the aircraft was identical to
the Fw 190A-2. The new BMW 801D-2engine provided 1700hp at takeoff and was
similar to the previous ones, except it had new air intakes to cool it.
The Fw 190A-3/U2 was used for the installation of the RZ65 rockets while the Fw 190A-3/U4 had installed cameras Rb 50/30 for aerial recconnaissance. Its armament was reduced to two MG FF 20mm cannons. The Fw 190A-3/U3 had under the fuselage an ETC 250 ventral rack, and the wings had one SC 50 each. The Fw 190A-3/U7 was an attempted high altitude fighter, with reduced weight and armed only with two MG 151/20 20mm cannons, but only three aircraft received this domination.
In the Autumn of 1942, a group of 72 Fw 190A-3s were exported to Turkey under the designation Fw 190Aa-3. They were armed with four MG 17 7.92mm machineguns and equipped with the FuG 25 radio equipment. With the arrival of the Fw 190A-3 to the front, the remaining Fw 190A-1s were given to flight schools. 500 A-3s were completed until the arrival of the Fw 190A-4. The machines were supplied to JG 26 and JG 2 in the Channel front, however, since there weren´t enough machines available, the III/JG 26 had to be equipped with the Bf 109F.
| CONSTRUCTION |
 I bought this kit bagged and with two decal options from a hobby shop
rather far away from where Iive. It was complete, but I didn´t trust how the
decals looked, so I witheld from building this kit until I came back from
Amsterdam, were I was able to buy Eagle Cals 48-129 decal sheet for the Fw
190A-2/A-3 in 1:48 (Aviation Mega Store, a huge hobby shop near Schipol airport
where you can buy whatever you need).
I bought this kit bagged and with two decal options from a hobby shop
rather far away from where Iive. It was complete, but I didn´t trust how the
decals looked, so I witheld from building this kit until I came back from
Amsterdam, were I was able to buy Eagle Cals 48-129 decal sheet for the Fw
190A-2/A-3 in 1:48 (Aviation Mega Store, a huge hobby shop near Schipol airport
where you can buy whatever you need).
This is one of the five snap fit kits from Pegasus Hobbies. As such, it doesn´t come with many details or parts, but is a good introduction for younger modellers.
I began by painting the cockpit and fuselage halves with Revell 78 Tank Grey. They were left to dry while I assembled the wings, which have big locating holes. One of the holes was not allowing one of the wings to fit properly, so I trimmed it off. With the paint dry, I glued the cockpit to one fuselage half, and soon after I glued the other half. The wings were then glued to the fuselage bottom and that was left aside.
I then began working with the engine. This isn´t very much detailed, but it didn´t matter to me, since the engine's face would be covered by the engine's cooling fan. The engine was glued to the cowling and left to one side to dry properly. When it was dry, I glued the cowling to the fuselage, and I had a complete airframe.
| COLORS & MARKINGS |
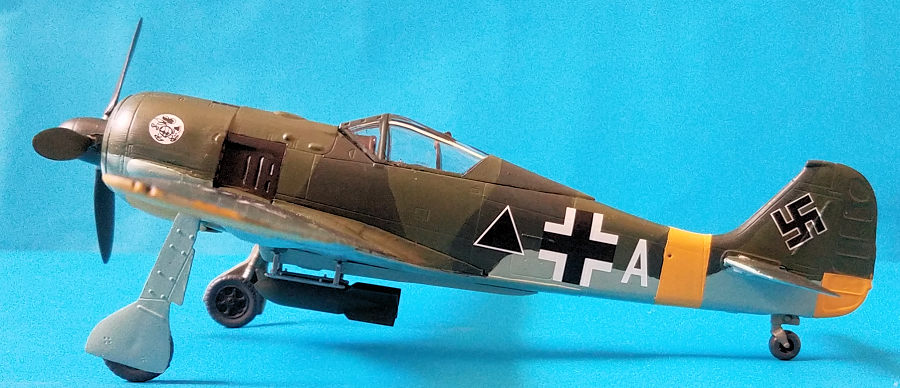
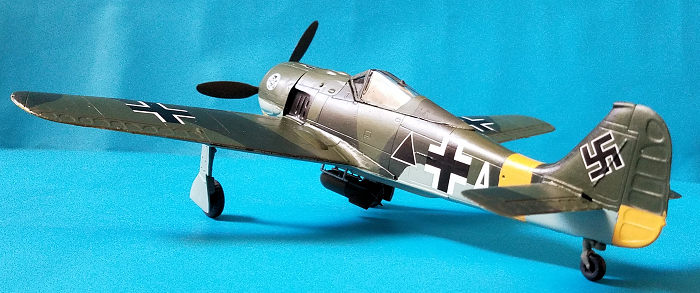
 I had decided early on that I wanted to paint my Fw 190A-3 as a
Schlachtgeschwader 1 machine on the Eastern Front, with the RLM 70/71/76/04
colour scheme. The colour page that comes with the Eagle Cals sheet is poor at
best, so I began searching the internet for a pircture of the plane I wanted to
make. When I typed "Fw 190A-3 jagdbomber A," I found the image that I was after.
Making this aircraft demanded I cut the outer guns, leaving only the inner
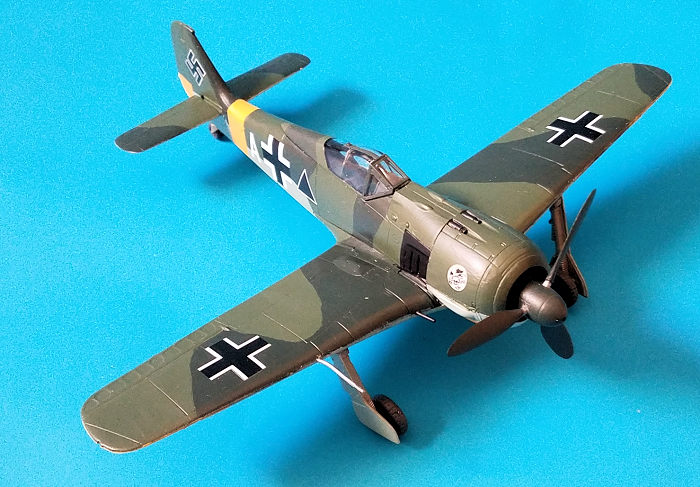
cannons and the cowling guns. I painted the upper surfaces with Revell 40 Black
Green (RLM 70) and Revell 39 Dark Green (RLM 71). The undersides were then
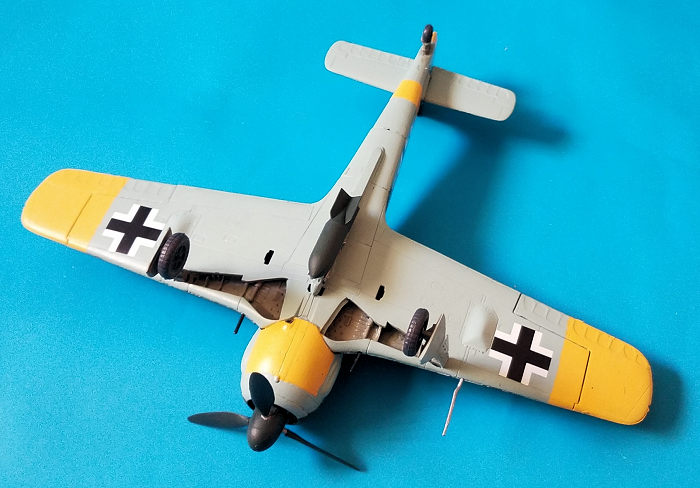
painted with Revell 49 (RLM 76) and when that was dry, I masked the areas that
had to go in yellow. These areas were the wing tips and the fuselage band. I
next applied two coats of gloss varnish (Revell 01) to the plane, and applied
the decals.
I had decided early on that I wanted to paint my Fw 190A-3 as a
Schlachtgeschwader 1 machine on the Eastern Front, with the RLM 70/71/76/04
colour scheme. The colour page that comes with the Eagle Cals sheet is poor at
best, so I began searching the internet for a pircture of the plane I wanted to
make. When I typed "Fw 190A-3 jagdbomber A," I found the image that I was after.
Making this aircraft demanded I cut the outer guns, leaving only the inner
cannons and the cowling guns. I painted the upper surfaces with Revell 40 Black
Green (RLM 70) and Revell 39 Dark Green (RLM 71). The undersides were then
painted with Revell 49 (RLM 76) and when that was dry, I masked the areas that
had to go in yellow. These areas were the wing tips and the fuselage band. I
next applied two coats of gloss varnish (Revell 01) to the plane, and applied
the decals.
The aircraft was decalled in two hours. The Eagle Cals decals look great, but are a bit thick, but they settled nicely after some decal softener was applied over them.
 I painted the landing gear struts and wheel wells with Revell 45 (RLM
02), painted the wheels with Revell 78. The landing gear doors were painted with
Revell 49, and the propeller was painted in RLM 70. With everything painted, I
glued the remaining pices.
I painted the landing gear struts and wheel wells with Revell 45 (RLM
02), painted the wheels with Revell 78. The landing gear doors were painted with
Revell 49, and the propeller was painted in RLM 70. With everything painted, I
glued the remaining pices.
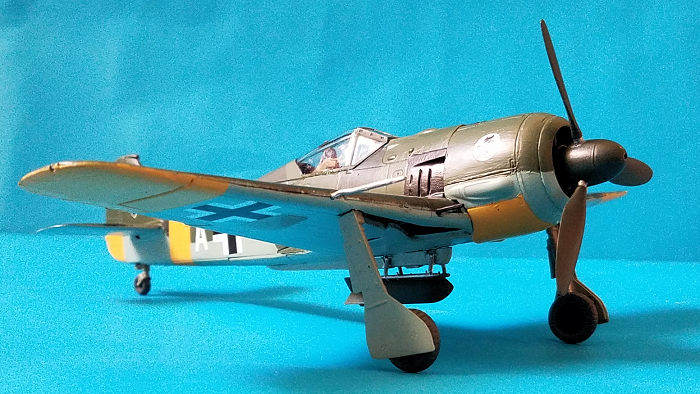
Since I was building a fighter bomber, I searched my spare parts bin for an ETC 501 bomb rack, and found the Hasegawa one. I built it and glued it under the fuselage. The bomb came from the Academy Bf 109E-3 kit.
| CONCLUSIONS |
This was a fun kit to build and, although basic, has given me the interest of buying more of this snap fit Pegasus Hobbies kit. Recommended for the inexperienced modeller and to the more experienced one who wishes to have an easy project.
| REFERENCES |
Focke Wulf Fw 190 "El Pájaro Carnicero," Javier Ormeño.
11 May 2020
Copyright ModelingMadness.com
If you would like your product reviewed fairly and fairly quickly, please contact the editor or see other details in the Note to Contributors.
Back to the Main Page Back to the Review Index Page Back to the Previews Index Page