| KIT #: | 9976 |
| PRICE: | $43.00 |
| DECALS: | One options |
| REVIEWER: | Francisco Santoro |
| NOTES: | Comes with resin pieces for the U7 version |
| HISTORY |
The Fw 190 competes with the Bf 109
for the title of Germany´s most important fighter during WWII. Making its
operational debut in 1941, it was the world´s best fighter, having the upper hand
over the Spitfire Mk.V, until Arnim Faber landed by accident (some say on
purpose) his Fw 190A-3 on an RAF
 airfield, giving the English the opportunity to
test his aircraft against RAF ones, and developing the Spitfire Mk.IX as a
result.
airfield, giving the English the opportunity to
test his aircraft against RAF ones, and developing the Spitfire Mk.IX as a
result.
Nevertheless, this fighter was able to be radically modified and, with liquid cooled, V inveted engines or with air cooled radial engines, it became a powerful fighterbomber and attack aircraft.
The Fw 190A-5 was introduced at the beginning of 1943. The BMW 801D-2 was moved forward by 15cm, increasing the aircraft´s length to 8,95m, restoring the aircraft´s center of gravity after the addition of extra equipment in the rear part of the fuselage. The aircraft had a maximum takeoff weight of 4300kg, and was capable of receiving factory and field conversion sets.
The total Fw 190A-5 production between Focke Wulf, Arado, AGO and Fieseler was of 723 aircraft.
| THE KIT |
Coming in a top opening box, Hasegawa´s kit has 7 sprues, 6 molded in dark grey, and one containing the transparent pieces. The plastic is smooth to the touch and shiny when put against the light.
 Sprue A, B and D have the biggest
parts (fuselage halves, cockpit tub, propeller and upper and lower wing halves).
Sprue E has all of the small parts (engine, cooling fan, wing spar, and a star
shaped piece I don´t know its name).The kit comes with four light grey
resin pieces, with no apparent imperfections (they weren´t taken out of their
bag). These pieces are the high altitude intakes, which are required to build
the A-5/U7 version.
Sprue A, B and D have the biggest
parts (fuselage halves, cockpit tub, propeller and upper and lower wing halves).
Sprue E has all of the small parts (engine, cooling fan, wing spar, and a star
shaped piece I don´t know its name).The kit comes with four light grey
resin pieces, with no apparent imperfections (they weren´t taken out of their
bag). These pieces are the high altitude intakes, which are required to build
the A-5/U7 version.
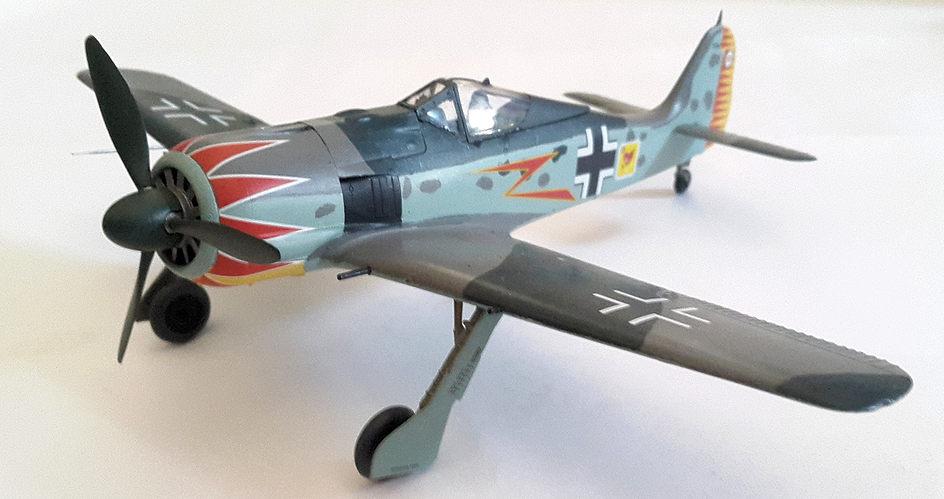
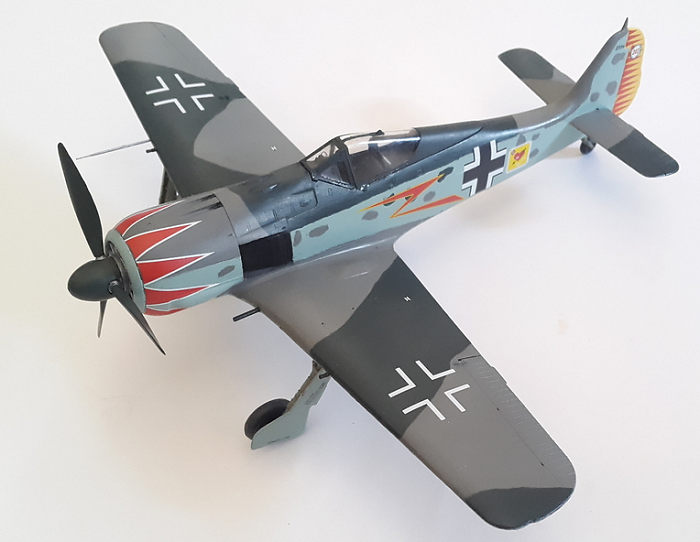
Instructions are the usual Hasegawa stuff, a single sheet of folded paper with constructions steps from 1 to 12. The decal sheet offers one marking option, that is of Hermann Graf´s Fw 190A-5/U7 2594 with a cowling painted in yellow. The tulips are 10 and are done individually, so the builder can place them one by one, making sure they all line up.
What put me off from building this model in the first place was the thought of having to use resin, but checking on the Internet, I found pictures and colour profiles of 2594 as a regular A-5, so with that in mind, and seeing the regular cowling bulges were included in the kit, I set off to work.
| CONSTRUCTION |
The model that didn´t want to get built.
Construction began by brush painting the cockpit tub, instrument panel, side consoles, control stick, seat, trim wheel and rudder pedals in the sprue. I painted all of them in RLM 66 (Revell 78), the trim wheel with flat black, and the rudder pedals in steel.
 After giving those pieces four coats
of paint, I set them aside and began working with the fuselage halves. The area
where the cockpit was going to be glued was painted in RLM 66, while also
forgetting to paint the rear wheel well in RLM 02. After the paint had dried, I
glued the trim wheel to one fuselage half, cockpit following soon after and,
after that was dry, I went and glued the other half of the fuselage.
After giving those pieces four coats
of paint, I set them aside and began working with the fuselage halves. The area
where the cockpit was going to be glued was painted in RLM 66, while also
forgetting to paint the rear wheel well in RLM 02. After the paint had dried, I
glued the trim wheel to one fuselage half, cockpit following soon after and,
after that was dry, I went and glued the other half of the fuselage.
Wings came next. I removed the lower wing half from the sprue and while I was cleaning it with my Xacto what was left of one spruegate, I managed to break part of the leading edge. The Xacto must have gotten stuck without noticing, and the area broke with the pressure I did. I grabbed my bottle of Revell Contacta, glued the piece (still attached by a sliver of plastic), and then added some superglue to fill the remaining seam. Letting all that to dry paid off, because there weren´t any seams after I sanded the superglue, and the leading edge looked as if nothing had broken. Next time I´ll use sanding paper.
After that episode, I painted the wingspar and the wheelwell in RLM 02 (Revell 45) , and glued the whole assembly to the lower half of the wing. Parts D4 and D5 were also glued to the lower half of the wing and left to dry. Before gluing the upper halves of the wings to the lower half, you have to open the holes for the two outer guns and the pitot tube. I glued the wings together and test fitted them to the fuselage, the left union between the wing and the fuselage snapped into place without seams, but I had to fight the right one because it sat above the wing. I removed some plastic with the Xacto, and that made things better. The wings and the fuselage were glued and I used some masking tape to keep them together while the glue dried.
 As the aircraft was taking the shape
of an Fw 190, I moved on to the engine cowling. Instead of building the U7
version with the resin intakes, I used pieces A3 and A4 to make the regular A-5.
I glued the exhaust to the lower cowling half, then I glued the bulges, and after
that the upper half of the cowling. The oil ring was installed soon after.
As the aircraft was taking the shape
of an Fw 190, I moved on to the engine cowling. Instead of building the U7
version with the resin intakes, I used pieces A3 and A4 to make the regular A-5.
I glued the exhaust to the lower cowling half, then I glued the bulges, and after
that the upper half of the cowling. The oil ring was installed soon after.
I moved onto step 6 already knowing I was going to break another piece, and that piece was E25 (and E20), which has 15 delicate arms, all of them attached to a ring designed by Hasegawa to protect them. Not knowing how to proceed, I used my Xacto with a sharper blade, and began slicing, one by one, the unions. I broke four arms, which were reglued and left to dry. Gluing them proved to be useless, because three of them broke after I test fitted the engine with the cowling (it was my fault, because I didn´t clean them up properly, so they didn´t fit very well.
After assembling the engine, I glued the fuselage exhaust pieces to the fuselage, and then glued the engine to the fuselage, waited for them to dry, and glued the cowling. The addition of part G2 and of the horizontal stabilisers finished the fuselage.
| COLORS & MARKINGS |
I cleaned the entire fuselage with
isopropyl alcohol to remove any fingerprings and leftovers of paint, and grabbed
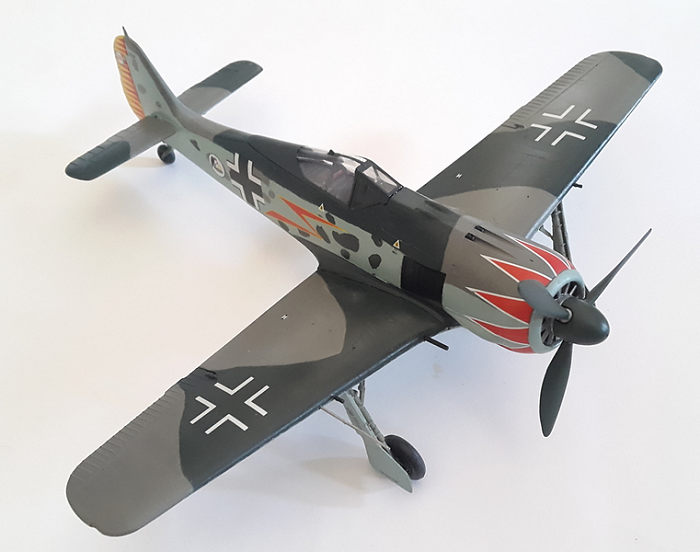
a pencil to mark where each colour of the camouflage should go. I brushpainted
the upper surfaces in RLM 74 (Revell 69) and RLM 75 (Revell 47) and the fuselage
in RLM 65 (Revell 49) . I replaced RLM 76 for RLM 65 because I didn´t have that
colour, and RLM 65 looks way better to my eye with the yellow rudder and
cowling. Once the main colours were dry, I masked the areas surrounding the
rudder 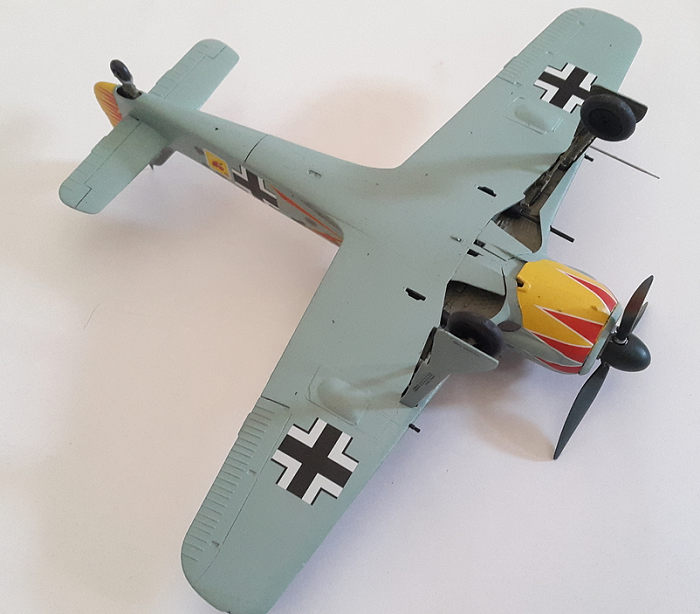 and lower cowling, and painted them in yellow (Revell 15). The oil ring
was painted in RLM 65 (it was white on the real thing apparently).
and lower cowling, and painted them in yellow (Revell 15). The oil ring
was painted in RLM 65 (it was white on the real thing apparently).
Before adding the decals, I coated the model with clear varnish (Revell 01) to avoid any silvering. I began with the tulips, don´t do as I did and follow the top view as a guide, use the side views and add the tulips, starting on the cowling bulges and go up (it will leave a small gap), and then add the the final two that go under the cowling. The rest of the decaling went without any problems, except that I broke the right fuselage´s lightning bolt, but I fixed it moments, without any evidence of it breaking.
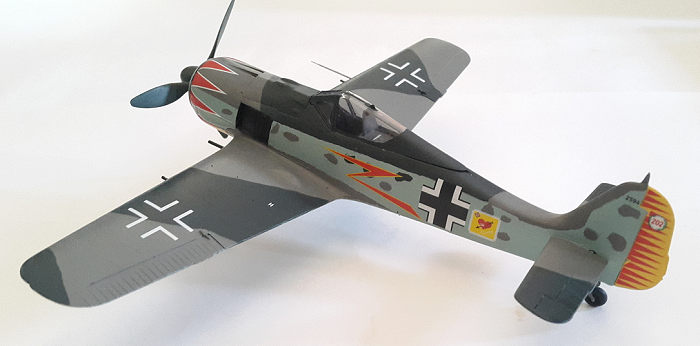
The only pieces left were the main wheels, the tail wheel, guns and pitot tube. The guns and tail wheel were easily glued in place, but the landing gear was a whole different story.
I glued the wheel struts to their holes, together with the retraction arms to give the whole landing gear assembly strength. I ended up with the left gear crooked because I didn´t glue the left retraction strut on the landing gear´s locating pin. The right one ended up in its correct position. The pitot tube was finally glued in place, and the model was finished.
| CONCLUSIONS |
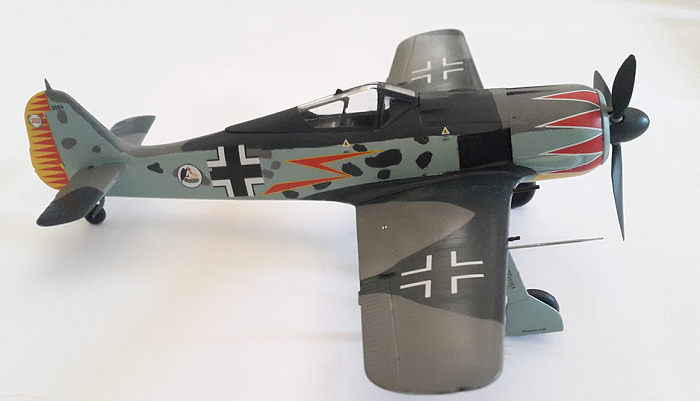
This is my third model (I have a
fourth one, another 190) since I came back to modelling, so you can see in the
photos many things that a serious modeller would have corrected, like filling
the seams. I´ll do that for my next model, but I´m not confident in my use of CA
for seam filling. Aside from that, I never thought I´d
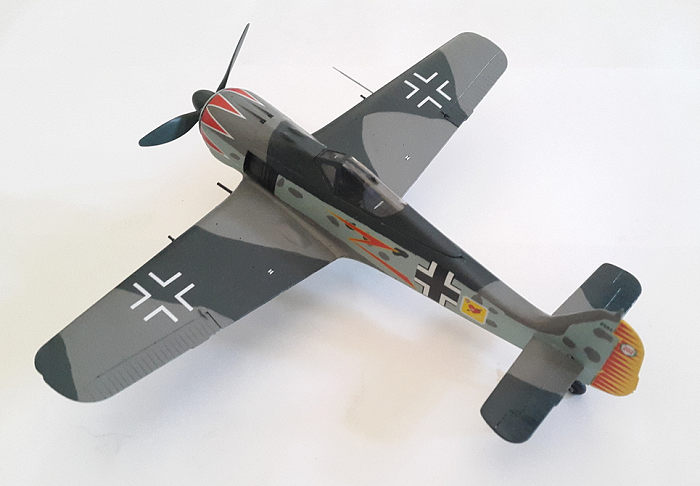 have so many self
inflicted issues with this model. The final result is still nice, and I´ll use
what I learnt on this model for my next Hasegawa Fw 190. I think Hasegawa could
have simplified the model by molding part E25 to the engine face (like they did
with their Fw 190A-3).
have so many self
inflicted issues with this model. The final result is still nice, and I´ll use
what I learnt on this model for my next Hasegawa Fw 190. I think Hasegawa could
have simplified the model by molding part E25 to the engine face (like they did
with their Fw 190A-3).
Edit: Checking Eduard´s new Fw 190A-5 Light Fighter instructions, Hasegawa´s Fw 190A-5 instructions in 1:32 (I even downloaded the colour guide to my phone) and other internet pictures, I´ve come to realise I made a "hybrid" aircraft, with the colour scheme for the lightly armed Fw 190A-5 2594, but with the pieces for the heavier Fw 190A-5/U7, with the outer cannons (and no high altitude intakes). I feel pretty annoyed, because I checked many times other builds of the same aircraft, not even seeing the different armament. I thought that, since 2594 received the new intakes, the armament had stayed the same.
5 April 2018
Copyright ModelingMadness.com
If you would like your product reviewed fairly and
fairly quickly, please
contact
the editor or see other details in the
Note to
Contributors. Back to the Main Page
Back to the Review
Index Page
Back to the Previews Index Page