| KIT #: | A7 |
| PRICE: | Dirt cheap at swap meets |
| DECALS: | Two options |
| REVIEWER: | Jon Hudak |
| NOTES: | Still a reasonable kit for its age. |
| HISTORY |
 the Naval
Air Station in Anacostia Washington D.C. The aircraft which had formerly been
with the Luftwaffe was said to have been in good condition overall but had
been stripped of its radio, armament and other assorted parts.
the Naval
Air Station in Anacostia Washington D.C. The aircraft which had formerly been
with the Luftwaffe was said to have been in good condition overall but had
been stripped of its radio, armament and other assorted parts.
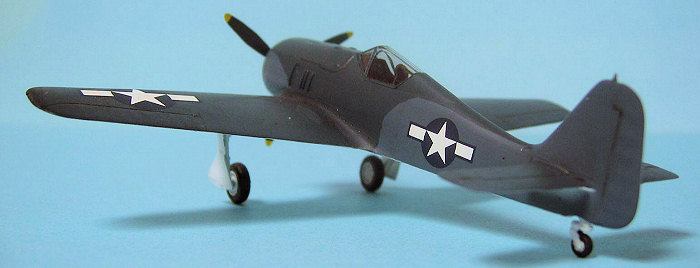
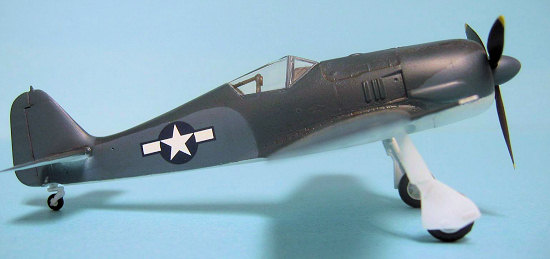
Over the course of the next month the CEAU made all kinds of necessary repairs to the to the engine, wings, fuselage, canopy and electrical systems. It was then repainted in a bright paint scheme with a striped rudder and star and bar US insignia. On February 25, 1944 it was then flown to the Naval Air Center at Patuxent River Naval Air Station. This aircraft is most likely thought to have originally served as an A5/U8 fighter-bomber equipped with bomb racks and minus it's cannon armament to save weight. A captured German handbook was then used as a guide to bring the former German aircraft to its proper gross weight and balance that would have been standard for a Luftwaffe 190 of this type. This was accomplished by adding ballast to bring it up to its "fighting weight".
It was then repainted in a standard three tone US Navy paint scheme at Patuxent.
Three pilots, Lieutenant Commander F.L. Palmer and Lieutenants C.C. Andrews and W.C. Holmes were some of the lucky ones who were fortunate enough to fly and put the 190 through it's paces in a rigorous set of tests against an F6F Hellcat and F4U Corsair! The Focke Wulf was reported to easily out-climb both fighters and on the deck compared with the Hellcat it had an identical top speed of 334 mph. The 190 was said to get progressively faster at higher altitude and at 25,000 feet it reached a speed of 410 mph compared with the Hellcats 391 mph. The Corsair did better at lower altitude being nearly 30 mph faster on the deck but was still a little slower at 25,000 feet reaching 403 mph compared to the Focke Wulfs 410 mph speed. The Corsair and 190 were said to be about even in rate of roll since the F4U had mechanically boosted ailerons, while the Hellcat was a little behind. In maneuverability both Navy fighters had superior turning characteristics and there was no move that the 190 could do that the other two couldn't easily follow. The 190 however was said to stall out at times while trying to stay on the tails of either of the Navy fighters. Further stories of its turning performance as recalled by German pilots were it's tendencies to sometimes skid in a turn and dangerously flip over on its back and go down if pressed too hard in a tight right hand turn. It's not hard to understand why some moves were not recommended below altitudes of 3,000 feet so that the pilot would have time to recover.
 during tight maneuvers. Forward vision
out of the cockpit when taxiing was so-so at best due to the position of the
windscreen over the aircrafts nose and overall forward vision was noted as
lacking when compared to the F6F and F4U. Rearward visibility in the 190 was
superior to the aforementioned and though it was lacking its armament when
brought back to the US, all pilots agreed it would make an excellent gun
platform. The overview by the US pilots was that the 190 was a delight to fly
and well engineered but was not the equal of the F6F and F4U in combat. They
said that if attacked by a 190 in combat they could use the superior
maneuverability of their planes to outturn it and get away from it if followed
by the use of tight loops where the 190 might stall if trying to keep up.
Caution would have to be taken with it due to the 190s superior rate of climb
and to not sacrifice any edge in altitude when trying to close with it.
during tight maneuvers. Forward vision
out of the cockpit when taxiing was so-so at best due to the position of the
windscreen over the aircrafts nose and overall forward vision was noted as
lacking when compared to the F6F and F4U. Rearward visibility in the 190 was
superior to the aforementioned and though it was lacking its armament when
brought back to the US, all pilots agreed it would make an excellent gun
platform. The overview by the US pilots was that the 190 was a delight to fly
and well engineered but was not the equal of the F6F and F4U in combat. They
said that if attacked by a 190 in combat they could use the superior
maneuverability of their planes to outturn it and get away from it if followed
by the use of tight loops where the 190 might stall if trying to keep up.
Caution would have to be taken with it due to the 190s superior rate of climb
and to not sacrifice any edge in altitude when trying to close with it.Though these events give us a pretty fair idea, one never knows for sure what might have happened had the 190 met either of these two fighter planes in actual combat. The American pilots tended to sound pretty confident of their machines and abilities which is only natural especially during these highly patriotic times. Lets not forget how many excellent pilots Germany also fielded during WW2. It would have been interesting to have seen and read reports from former 190 pilots had they ever gotten the chance to fly the Hellcat and Corsair immediately post war and heard what they would have had to say. Fortunately though at least we have this opportunity to have and recall.
| THE KIT |
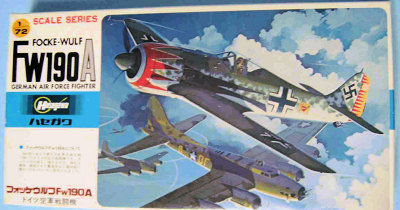 nice and
what one would expect from a Hasegawa kit of this era. Items like the cockpit
and frontal radiator area are a bit simplified, the cockpit being one of the
familiar "stone throne" types featuring a chair with the "backboard" and floor
molded around it. Hey, at the very least it works. As sparse as this sounds at
least it comes with an instrument panel and pilot to help fill the area in.
The frontal radiator area features no separate parts like the fan blade that
is unique to the FW 190 but one does have to take into account the age of the
kit.
nice and
what one would expect from a Hasegawa kit of this era. Items like the cockpit
and frontal radiator area are a bit simplified, the cockpit being one of the
familiar "stone throne" types featuring a chair with the "backboard" and floor
molded around it. Hey, at the very least it works. As sparse as this sounds at
least it comes with an instrument panel and pilot to help fill the area in.
The frontal radiator area features no separate parts like the fan blade that
is unique to the FW 190 but one does have to take into account the age of the
kit.
| CONSTRUCTION |
Since I wanted to do an A5 version from the start I knew I would
have to remove the pitot tube from the right wing tip, moving it further
inwards and use the cowling insert with the smaller gun blisters. Simple
enough. The cockpit tub and related areas/parts had been previously painted in
RLM 66 while doing another Luftwaffe build a while back so that was one less
thing that needed doing. Sometimes it pays to stretch the paint a bit rather
than dump it out in your trash pail right? A hole was then drilled in the floor
and a generic control column was added from stretched sprue and was painted to
busy things up a bit. I brushed the instrument panel with some Future to prep it
for the decal a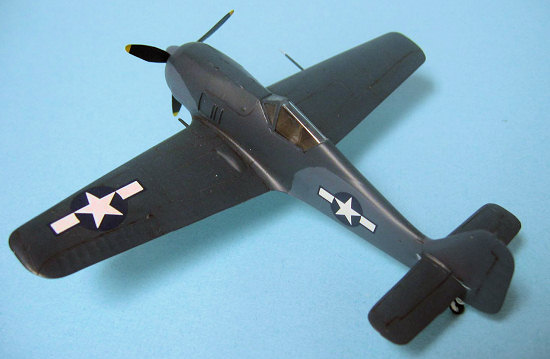 nd
surprisingly they were still useable for as old as they were. Now complete, the
cockpit tub and instrument panel were then trapped between the fuselage halves
and the whole assembly was set aside to dry. The wings came next and features
the familiar one piece lower section with separate upper halves for each side.
The wing assembly was later glued on followed by the rear stabilizers and it was
now starting to look like a FW 190.
nd
surprisingly they were still useable for as old as they were. Now complete, the
cockpit tub and instrument panel were then trapped between the fuselage halves
and the whole assembly was set aside to dry. The wings came next and features
the familiar one piece lower section with separate upper halves for each side.
The wing assembly was later glued on followed by the rear stabilizers and it was
now starting to look like a FW 190.
| COLORS & MARKINGS |
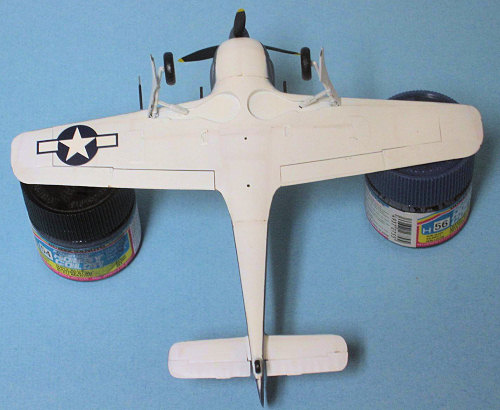 areas as well as the landing gear struts,
wheels and gear doors. I used H56 Intermediate Blue next after masking off the
bottom of the model and encountered no problems. The prop spinner was also
painted in the Intermediate Blue color as well. It was hard to discern from
the photographs exactly what color the spinner was but it seemed to match up
with the Intermediate Blue on the sides of the cowling so that's what I used.
areas as well as the landing gear struts,
wheels and gear doors. I used H56 Intermediate Blue next after masking off the
bottom of the model and encountered no problems. The prop spinner was also
painted in the Intermediate Blue color as well. It was hard to discern from
the photographs exactly what color the spinner was but it seemed to match up
with the Intermediate Blue on the sides of the cowling so that's what I used.
| FINAL CONSTRUCTION |
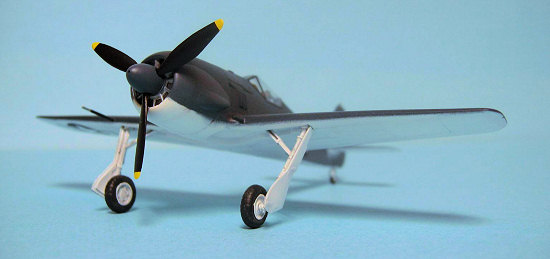
The tires and machine guns were painted with Gunze H77 Tire Black and the landing gear were glued in place, with the main gear doors added last. The fit of the doors to the legs was a bit violinish (fiddly) and once they were in place I secured them with a very minute amount of some more super glue. I had to nip off a good 1/8" or so off the tops of these parts guestimating from the instructions, there was no clear point at where to cut so it was just a little at a time, check, nip a little more etc, you get the idea.
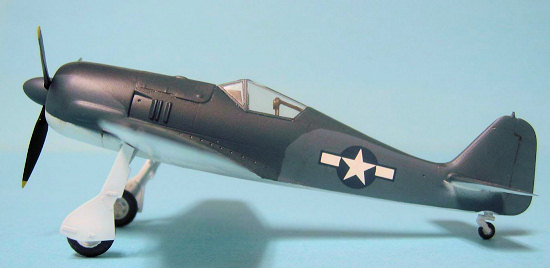 The propeller had some deformities to it in the form of some "blisters" on
the fronts of the blades which looked like a molding issue. Since I had
nothing that looked like a possible heir for the Focke Wulfs prop shaft I
would have to settle and use the kit part, gasp! However with a little sanding
and a pinch of salt thrown over my shoulder for good luck as well as some
black paint to hide them they weren't as noticeable as before. Again Gunze
paints were used for the prop and tips. To accent the detail of the cooling
fan area at the front of the cowl I used my home brewed flimflam mans method
of taking a bottle of unstirred flat black acylic paint. If you take some of
the paint from the top of an unshaken bottle ofacrylic paint you'll have a
watery mixture that works almost like a wash and without the mess! A couple
applications of this and I was all done and followed it up by giving myself a
pat on the back at having remembered to use this neat little trick. Ahh it
doesn't take much to make us modelers happy right? The prop was pressed into
place after enlarging the hole for the prop shaft with an Xacto knife and the
spinner glued on immediately afterwards. A hole was drilled in the starboard
wing for the pitot tube which came from a 190 "spares" kit that was given to
me by a friend just after I'd finished the kit (thanks DG) and this was
painted and glued in. A little weathering with some pastels and the model was
now truly complete and I now had a "horse of a different color" Focke Wulf to
add to my collection.
The propeller had some deformities to it in the form of some "blisters" on
the fronts of the blades which looked like a molding issue. Since I had
nothing that looked like a possible heir for the Focke Wulfs prop shaft I
would have to settle and use the kit part, gasp! However with a little sanding
and a pinch of salt thrown over my shoulder for good luck as well as some
black paint to hide them they weren't as noticeable as before. Again Gunze
paints were used for the prop and tips. To accent the detail of the cooling
fan area at the front of the cowl I used my home brewed flimflam mans method
of taking a bottle of unstirred flat black acylic paint. If you take some of
the paint from the top of an unshaken bottle ofacrylic paint you'll have a
watery mixture that works almost like a wash and without the mess! A couple
applications of this and I was all done and followed it up by giving myself a
pat on the back at having remembered to use this neat little trick. Ahh it
doesn't take much to make us modelers happy right? The prop was pressed into
place after enlarging the hole for the prop shaft with an Xacto knife and the
spinner glued on immediately afterwards. A hole was drilled in the starboard
wing for the pitot tube which came from a 190 "spares" kit that was given to
me by a friend just after I'd finished the kit (thanks DG) and this was
painted and glued in. A little weathering with some pastels and the model was
now truly complete and I now had a "horse of a different color" Focke Wulf to
add to my collection.| CONCLUSIONS |
| REFERENCES |
January 2007
If you would like your product reviewed fairly and fairly quickly, please contact the editor or see other details in the Note to Contributors.